Grace Girls | Building & Cooking Over Fire

homeschool, Motherhood, Uncategorized

This week we had our second Grace Girls meeting of the new school year. Our last meeting was learning how to properly set a table.

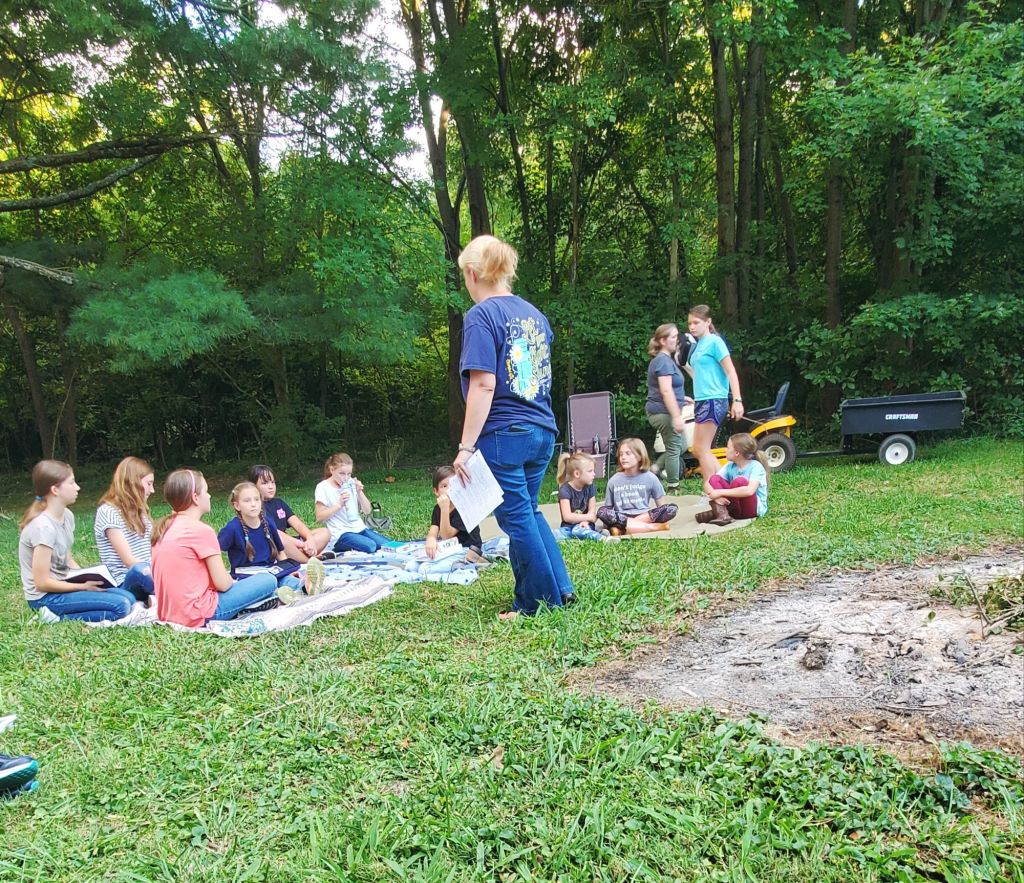
We started our night out with the devotion reading and a light discussion about what we read in our Bright Lights curriculum.

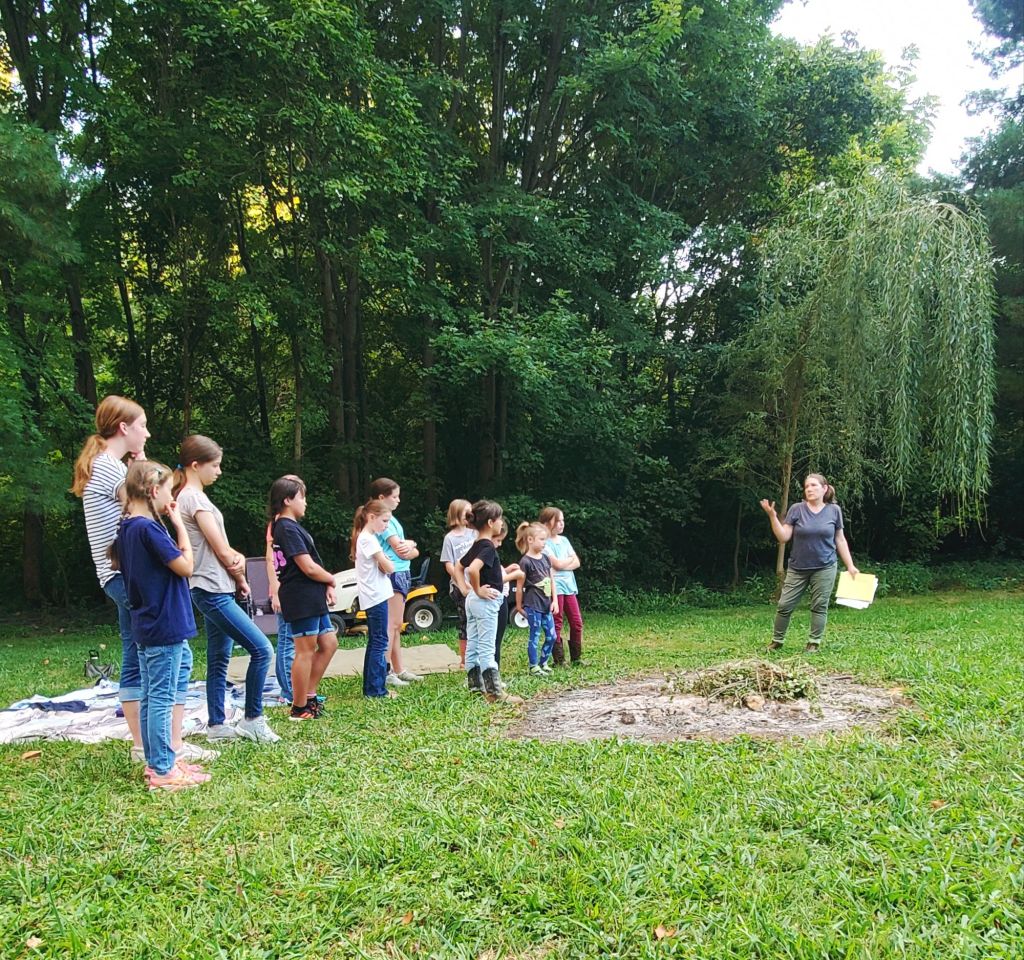
The meeting was hosted again by Ms. Darla and she taught the girls a lot about Fire Safety.

We learned what to wear and not wear around a fire. You want to wear jeans and short sleeves preferably. No flowy tops, dresses, or skirts. Hair must be secured back safely away from your face or cut short so it doesn’t catch on fire.

The most important question to always ask before building a fire is if it is legal to for a fire to be built there. Certain states have different regulations & seasons when fires are permitted, while other states ban fires all together due to high risk of forest fires.

When choosing a location to build your fire you want to look for:

  • No overhanging branches
  • Nothing flammable within 10 feet
  • The amount of wind the location gets
  • Is a pit provided? If not, dig one before building a fire to keep it safely secured in one location. It is best to line your pit with rocks.

Next Ms. Darla explained that we only burn wood for fuel. However for tinder & kindling you can use small branches or twigs, pinecone, evergreen branches and needles, pet fur, dryer lint, sawdust, or paper.

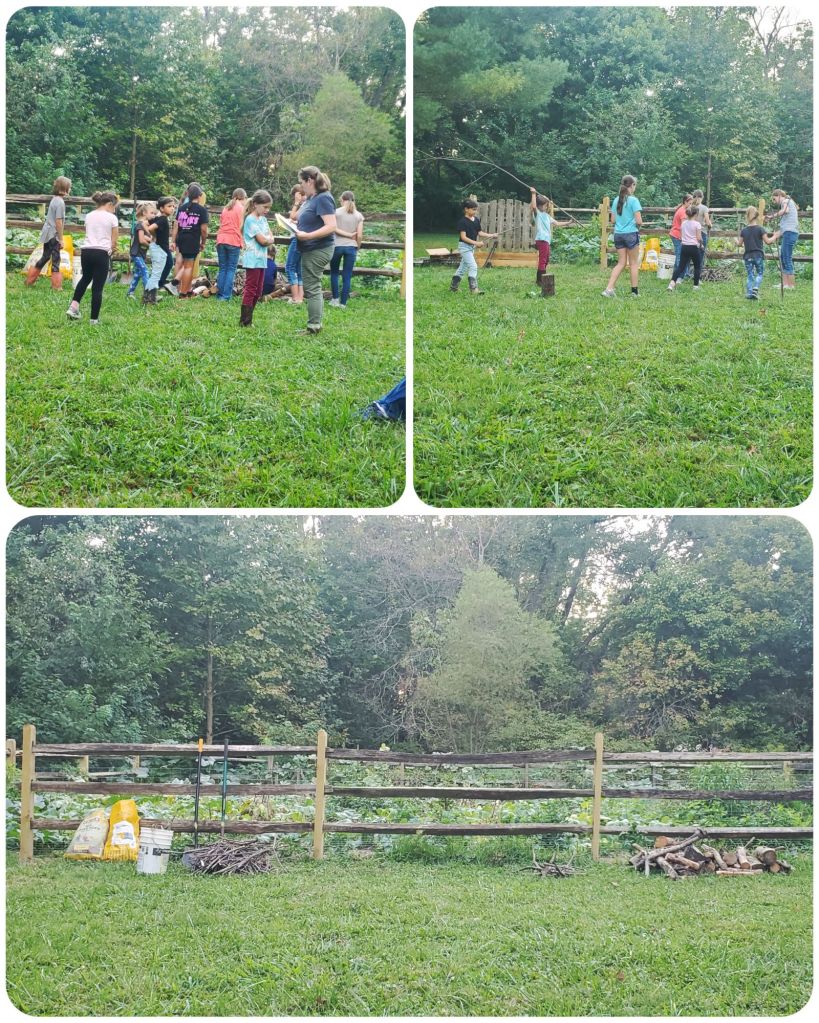
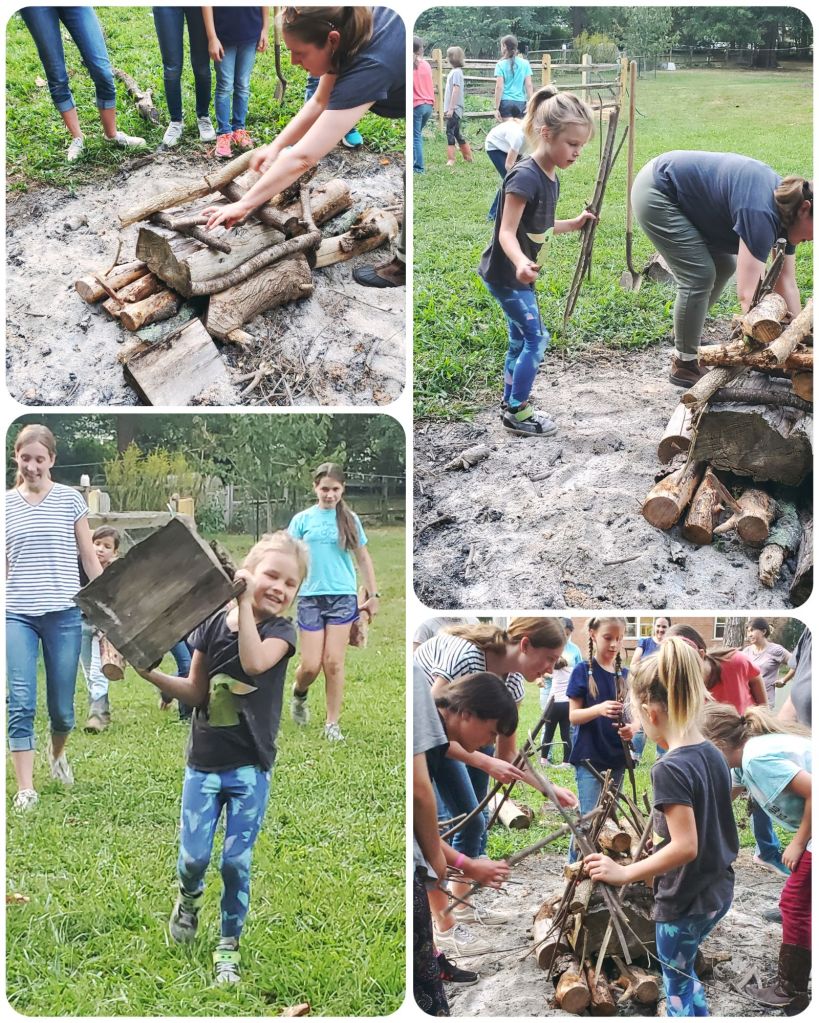
The girls worked together to group the wood in piles of large & small, and tinder/kindling in a bucket. She had bags of pinecone she had already collected over time.

Ms. Darla taught the girls different ways to build a fire, and what each kind is called. I had absolutely no idea there were so many different ways to make a fire. I thought it was just one way: build it 😂. The visual designs were really neat & helpful.

The girls then got into groups to pick a type of fire to build. Each group did a really good job!

We then went back around the fire to learn a bit more fire safety before we could get started.

We learned that you NEVER leave a fire unattended, and that you NEVER build a fire without adult permission & supervision.

If you do need to leave your fire for any reason: put it out first using water, covering with dirt or sand, or by spreading it out to reduce the heat.

Next, it was time to build the fire. Sasha really enjoyed this part. She was so adorable carrying the biggest log she could hold over for fuel.

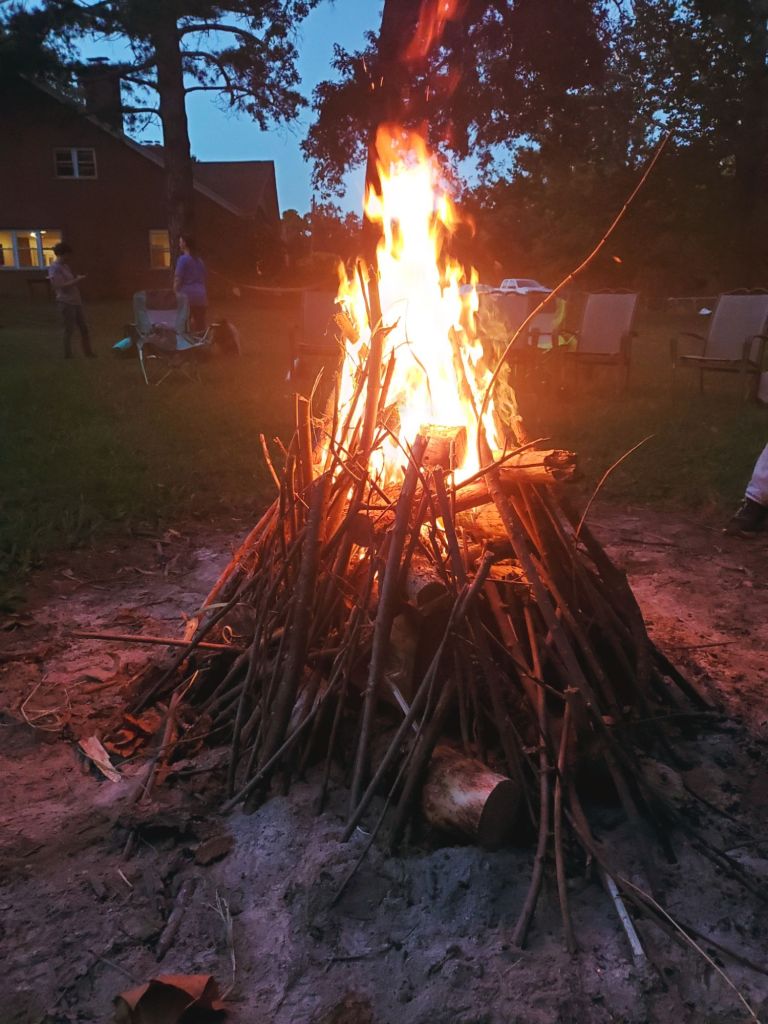
The girls did a really good job building the fire. They even decorated it with pinecone and evergreen, draping kindling along the top and sides to make it pretty. It definitely was the prettiest fire I’ve ever seen!

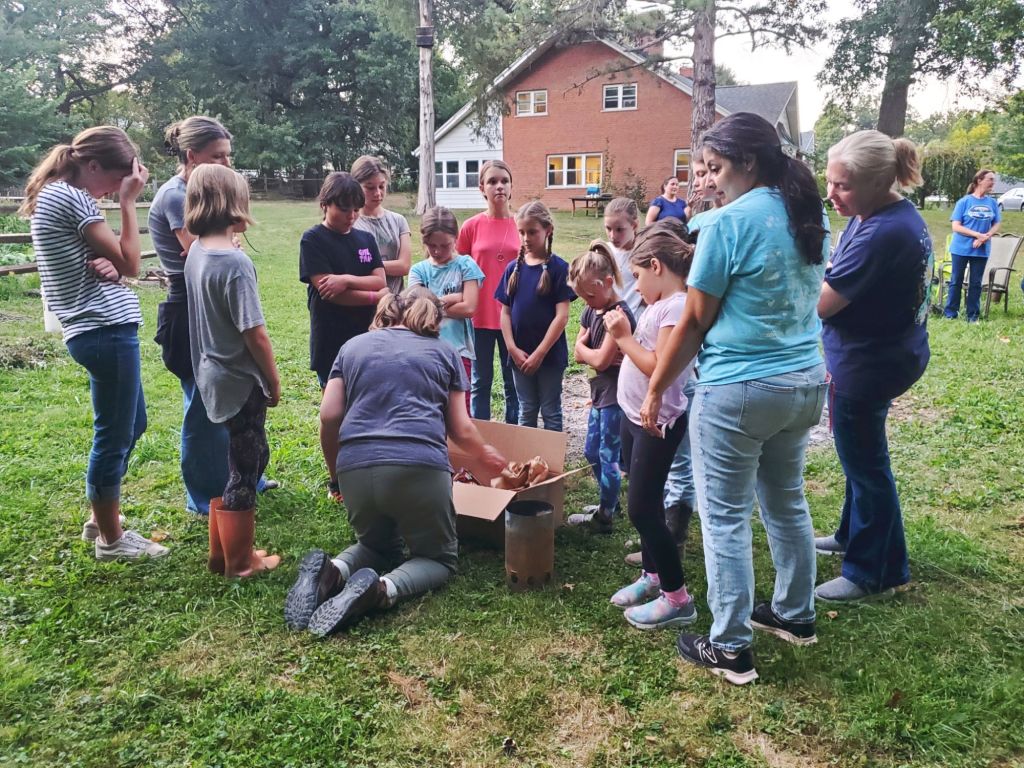
Ms. Darla taught the girls about different tools needed to start a fire. She taught them about using fire starters and how they are important tools to pack when camping. She also taught things we could use if we don’t have Firestarter handy. She taught about the different size lighters and what each is good for. She also taught that when handling fire, we always use leather gloves to protect our hands.

For liability reasons, Ms. Darla lit the fire for the girls. They did such a great job building it! It burned really, really well and evenly. It was so beautiful and cozy – a perfect way to welcome in the start of cold nights here in Ohio.

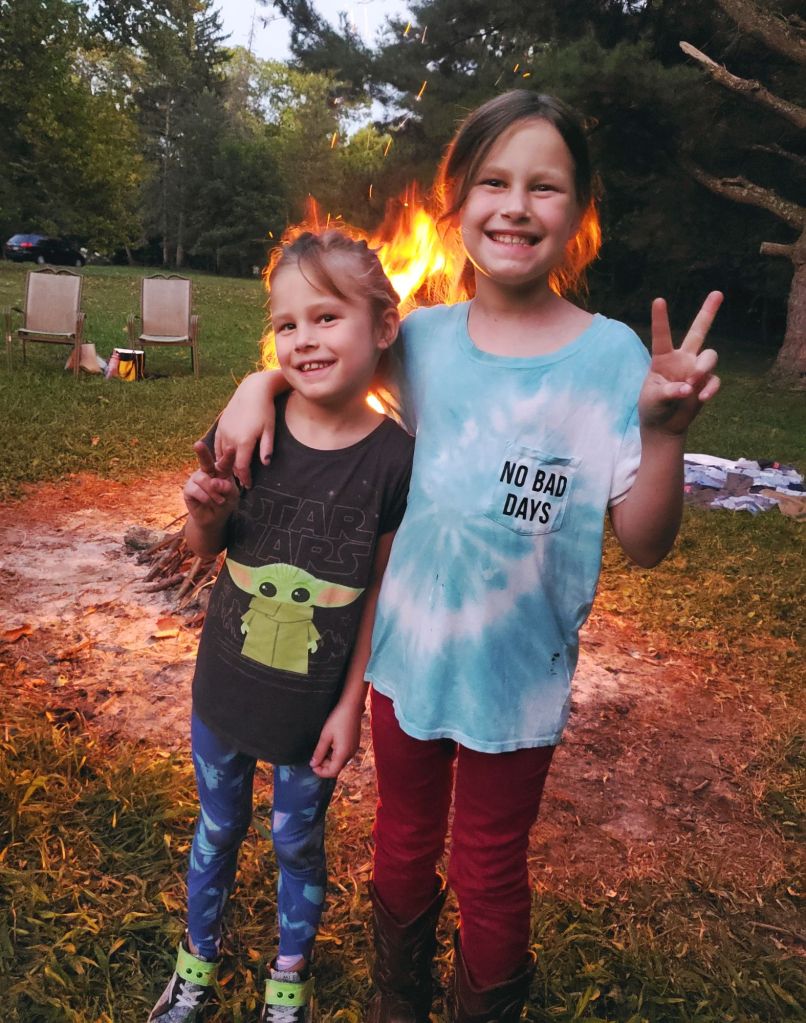
The girls hung out for awhile, running around playing Ghost in the Graveyard together – another fun & spooky way to welcome in the season changing to Fall. They swung in the tree-swing and caught up with friends, while Mom’s got a chance to catch up with each other too.

Once the embers were hot enough, Ms. Darla began getting the fire ready for cooking while the girls went to the table under the light to start making their campfire Pizzas.

Once they were finished assembling their campfire Pizzas, Ms. Darla put them carefully on her makeshift oven set up.

She used fire grates, with racks on top of those. She then placed a baking sheet on top of the racks, and used a disposable baking pan lid as a cover to trap heat. Once the lid was on, she placed a smaller secondary disposable lid on top and filled it with hot embers to add heat coming from under, around, and above.

Once the Pizzas were finished cooking, she carefully removed them from heat and transferred to each girls paper plate. Ella said it was the best pizza she’d ever had, and that’s a big compliment coming from someone who doesn’t typically enjoy pizza.

This was such an awesome experience for the girls! I really wish I had a group like this when I was little – it really would have set me up for homemaking success later in life and taught me really necessary skills for living as an adult. I’m grateful to have it now with my own girls though – it’s even better together than it would have been on my own as a child. I’m grateful for the strong mother & daughter relationship foundation we are building. I really appreciate these classes and feel like I learn so much with them! The girls are always very excited to go.

Until next time ♡ Mama Morozov

Baking with Kids | Berry Cream Cheese Biscuit Muffins

Motherhood, Recipes, Uncategorized

Are you looking for an insanely easy & fun recipe for your kids to bake almost entirely by themselves? This is it! My 4 year old – Athena – did literally everything by herself, except handle the oven, and left behind NO mess at all, except for the dirty dishes for me to wash. 

I love breakfast foods, but I do not love eating when I first wake up. It takes me a good 6+ hours of being awake to begin to feel hungry. My children, however, love to stuff their face the second their eyes open. Allowing them to make their own kid-friendly breakfasts has worked out really great for our family.

Ingredients

  • 2 3/4 cups All-Purpose Flour
  • 1 Tablespoon Baking Powder
  • 1 Teaspoon Sugar
  • 1/2 Teaspoon Sea Salt
  • 4 oz. Cold Cream Cheese
  • 1 stick Salted Butter, cut into small pieces
  • 1 1/4 cup Buttermilk
  • 2/3 cup Blueberries* {or whatever berries/fruit you have on hand… could also substitute Chocolate Chips, Sprinkles, raisins, or nuts even, or omit if plain is more your style.}

Directions

  • In a large mixing bowl, whisk together flour, baking powder, baking salt, sugar, and salt.
  • Add cream cheese & butter cubes to the mixture, set a timer for 5 minutes, then use your hands to mix together until all crumbly & combined.
  • Dig a hole in the center with your hands, then pour in buttermilk. Using a rubber spatula, stir until combined.
  • Fold in Blueberries {or other mix in choice.}
  • Scoop mixture into a greased muffin tin & bake for 15 minutes at 425°F {Adult Supervision Required}.

While the Biscuit Muffins are baking, prepare your Sea Salt Vanilla Butter for serving.

Ingredients

  • 6 Tablespoons Salted Butter, softened
  • 1 Teaspoon Vanilla Extract
  • 1/2 Teaspoon Sea Salt

Directions

  • Mix ingredients together with a kid-sized rubber spatula until blended & easily spreadable.

Let cool for a few minutes before serving with a heaping spoonful of Sea Salt Vanilla Butter.

This really is such a kid-friendly recipe. It takes very little time from start to finish, involves super fun “play-learning” using their hands {make sure to wash first!!}, leaves them feeling accomplished & successful, as well as provides them with useful baking skills that they can use for the rest of their lives. Happy baking!!!

Until next time ♡ Mama Morozov

Ukrainian Halva Fairy French Toast

Recipes

Our family loves French Toast. It’s such a delicious way to start your morning, but it can be really messy, especially when little hands get ahold of maple syrup.

This is a really fun & tasty way to switch up your French Toast to keep all the deliciousness, but lose the mess! Plus it’s cute as heck and sprinkles are a guaranteed way to start the morning out with a smile. Plus it’s so simple to make!

The halva is already sweet like candy, but with a nutty/toffee-like flavor to it so maple syrup is not needed for this recipe, but if you can’t imagine French Toast without it (like my Ella), go right ahead and add it!

Ingredients

  • Your Favorite Bread
  • 6 Eggs
  • 2 cups Milk
  • 2 tsp Vanilla Extract
  • Cinnamon (as much or little as you like)
  • Butter
  • Ukrainian Sunflower Seed Halva
  • Rainbow Sprinkles (optional)

Directions

  • Whisk together eggs, milk, cinnamon, & vanilla extract in a bowl and pour into a small square or rectangle dish (but still large enough to fit your bread slices).
  • Dip Bread, flipping after at least 10 seconds to make sure both sides get completely covered.
  • Fry in warmed cast iron skillet on medium low for 2 minutes on each side.
  • Spread butter, spread Ukrainian Halva, top with rainbow Sprinkles.

Enjoy! 🍽

Until next time ♡ Mama Morozov

Ukrainian Pancakes (Syrniki)

Motherhood, Recipes, Uncategorized

Sasha & I made Syrniki this morning for breakfast! Syrniki are Ukrainian pancakes made from Farmers Cheese. I didn’t have time to pick up real Farmers Cheese, so I used cottage cheese as a substitute. Next time I make these, I’m going to stop in at Marina’s European Food Market and pick up some real Slavic Farmers Cheese.

In case you don’t know us personally, I am Ukrainian & my husband is from Russia. I was lucky enough to grow up learning some of the Ukrainian/Eastern European culture from my dad & his family (his sister, Mary, & her polish husband, Vince, both who are sadly no longer with us.) I loved going to their family parties! Learning the traditions, hearing the language… I loved their accents. I’d ask them to speak to me in Ukrainian, and in Ukrainian they would say, “why should I speak it if you can’t understand it?” I just thought that was the coolest thing ever. I learned a few words growing up, but never the language.

Ever since I was little, I knew I wanted to marry an Eastern European man. I gave all of my children a Ukrainian (or Russian) middle name to honor our heritage: Kaden Yuri (after my dad) 💙, Ella Aleksandriya 💗, Mia Nataliya (after Niko’s birth mother) 💗, Sasha Katiya 💗, Athena Mariyah (after my dad’s sister & my mom, both Mary… *side note: it isn’t supposed to have an “h” at the end. I’m still mad at myself for agreeing to putting that) 💗, & Moses Kolya (after Niko) 💙.

Since the invasion, I have decided to go “full Ukrainian.” I’ve taught myself how to read & write their alphabet confidently. I can now speak Ukrainian at an elementary level. I am teaching my children as I learn so we can be fluent at home. My husband has tried teaching me Russian over the years (which is very similar to Ukrainian), and I’ve tried Rosetta Stone in the past so it wasn’t totally unfamiliar to me, but this time it just clicked- almost like it was unlocked from my DNA bank. I finally would be able to not only understand what they were saying to me, but respond too. I’m so proud of myself.

In addition to all of that, I am learning how to cook Ukrainian foods so that I will be able to pass recipes down to my children to continue embracing our culture for generations to come.

Today we made Syrniki & it turned out REALLY yummy so I decided to share it here.

Gather your ingredients.

  • 2 16oz containers cottage cheese (farmers cheese if possible)
  • 2 eggs
  • 1 cup flour
  • 4 tablespoons sugar
  • 2 teaspoons baking soda
  • 1/2 teaspoon salt

I have a large family & wanted to make sure that I had extra to send to my parents to try. If you have a small family; cut this in half, or make & use for breakfast prep/freezer breakfast meal for later.

Mix together.

Sasha hard at work mixing everything together in a big bowl.

Meanwhile, pour some oil of your choice on a skillet on the stove and let it heat up.

Wash your hands again. Leave them a little wet, but not dripping. Grab a smallish size amount of cheese mixture and form into a patty & place on stove. Wet hands again & repeat one by one. You’ll want to fry them until they are golden brown. DO NOT move them until you see the crust forming on the bottom & the top looks flat like pancake batter, no longer like cottage cheese (the cottage cheese will slop all over the pan if you flip too soon). Flipping is more difficult than with American pancakes.

Once both sides are golden brown, transfer to a place &…

Serve.

I served these with peaches. I had planned on making cream to go with them as well, but got too overwhelmed with the flipping that I decided peaches were enough. Next time I will definitely make the cream ahead of time because it would be a very nice treat to go with them.

Now that I made them and know what to expect, I will feel more confident making them from here on out. I am excited to try them with various toppings, especially other fruits & jams. They are more savory than sweet, so the fruits bring a natural sweetness to them. They are really, really good though- the kids even said they were delicious!

Until next time ♡ Mama Morozov

My Favorite Vegetable Pot Pie

Recipes

Happy Monday! I know I’m the odd man out here, but I LOVE Mondays! Especially if the weather is as beautiful as it was today.

Monday is the start of a brand new week. A fresh slate. Getting back to my 4:30-5 am routine that I honestly enjoy. I’ve recently given myself permission to sleep in on the weekends which really helps restore my soul more than I knew I needed.

Anyway, not everyone shares my enthusiasm for Mondays. So I wanted to share my very favorite Vegetable Pot Pie recipe with you in case you need a super mindless (& meatless) meal to make.

You will need:

  • 1 box of store-bought pie crust (2 included), thawed to room-temp
  • 2 (10.5 oz) cans of Cream of Potato Soup
  • 3 bags of Frozen Mixed Vegetables, heated
  • 1/2 cup milk
  • Salt, pepper, & thyme to your liking

First, preheat your oven to 375°

In a large bowl mix together 2 10.5 oz cans of Cream of Potato soup, 3 bags of Frozen Mixed Vegetables (I heat before adding to mixture), a half cup of milk, salt & pepper to your liking, throw some thyme in that bowl, and mix it all up.

Put 1 thawed-out, store-bought pie crust in your pie pan (you’re welcome to make your own if you want, but we’re going for mindless over here). Slowly scoop in your mixture until it’s all in there nice.

Place your second pie crust right on top and squish it around gently until it looks pretty. Add a fun design or letter (I like to do M for our last name) if you want, or just a slit works too. Beat an egg, brush it on top and pop that in the oven for 45 minutes.

When it comes out, let it cool for a few minutes. Cut into slices, dish it out, & enjoy.

There ya go! A super, duper easy and affordable weeknight meal that is both kid & meat-eating husband approved. You can add cheese or other spices if you want as well. It’s also a meal that is easy enough for older children to learn how to make on their own!

Helpful tip: use the cooking time for homework or chores. Try to get as much of your to-do list crossed off before the timer goes off. The more you can get accomplished before dinner, the less you’ll be left with at the end of the night.

What is your favorite mindless meal 🍽 to make on the weeknights?

Until next time ♡ Mama Morozov

Vegan Banana Oat Muffins

Recipes

My husband and girls LOVE bananas, so lately I have been making a lot of banana flavored treats for my family.

This breakfast is healthy, delicious, and super simple to make with and for kids! Ella and I made this batch together for Sunday breakfast for our family.

This recipe makes 24 muffins- which is perfect for our large family. This recipe can be easily cut in half if your family size isn’t as large! Or you can make and freeze for an easy grab & go breakfast for those accidental last-minute mornings!

Let’s Bake!

Ingredients:

  • 1 Stick vegan “butter”, softened (I use Earth’s Best!)
  • 4 Over-ripe bananas
  • 2 Cups flour
  • 1 Cup light brown sugar
  • 1 TSP salt
  • 2 TSP cinnamon
  • 2 TSP Pure Vanilla Extract
  • 2 TSP baking soda
  • 2 TSP baking powder
  • 2 Cups oats

Instructions:

  • Wash hands ✋
  • Preheat oven to 400° + prepare muffin tins (reusable liners or spray with Pam Baking Spray w. Flour)
  • In your stand mixer bowl, mix together bananas, flour, and brown sugar.
  • Add in salt, cinnamon, vanilla, baking soda, and baking powder. Stir to combine.
  • Add oats, stir to combine.
  • Spoon batter into muffin tin + top with oats for decoration
  • Bake 15 minutes + let cool before serving

That’s it! So easy that kids can make these almost entirely by themselves!

I hope you enjoy your Vegan Banana Oat muffins! If you do, please share!

Have a beautiful day 🥰

Vegan Stuffed Pepper Soup | ONE POT | Easy + Affordable

Recipes, Uncategorized

My sweet Mia recently decided that she is going vegetarian! My husband recently told me that he is going pescatarian! Hooray! We are taking another giant step closer to being a completely meat-free home!

My mom also recently told me about these “Blue Zone People” who eat very little meat and live to be over 100 years old. I’m not a fad-diet person, or a diet person at all if we’re being honest, but if it involves no meat, I’m a supporter!

However, all three share a lack of enthusiasm when it comes to “fake meat,” or meat alternatives. I, for one, LOVE ❤ “fake meat,” but that is probably for the first time in my life, I can eat something that resembles meat without being afraid of eating it. We aren’t supposed to put dead things inside living things 🤷🏼‍♀️.

[ ❇ FUN FACT: I did not eat meat growing up due to a very debilitating phobia of vomit (better known as emetophobia), but did not classify myself as vegetarian because my diet consisted of strictly noodles, butter, and cheese until I met my husband. So basically, I was a carb-ivore. 😂]

I became determined to find recipes that make “fake meat” more appetizing to keep them from losing their interest in going meat-free and provide a variety of healthy AND large-family affordable meatless meals, using mostly ingredients we keep regularly stocked in our pantry. Using what you already have is the MOST eco-friendly thing you can do.

Let’s Get Cooking 

◾ Fresh Ingredients:

  • 1 Yellow onion
  • 1 Green pepper
  • 1 Yellow pepper
  • 1 large tomato
  • 1 LB. “Meatless Grind”

◾ Pantry Ingredients:

  • 3 TBSP olive oil
  • 1 Carton vegetable broth
  • 3 TBSP tomato paste
  • 1 TSP dried oregano
  • 2 TSP dried basil
  • 1 TSP garlic powder
  • 1/2 TSP black pepper
  • Salt to taste
  • 1 Cup brown rice

◾ Instructions:

  1. Get Prepared – Begin heating 3 TBSP olive oil over medium heat in your Dutch Oven pan (I prefer Lodge brand) + chop all veggies.
  2. Dump in your peppers & onions, after a few minutes add the tomatoes, cooking for another minute or so.
  3. Scoot your veggies over against the sides and add your meatless grind into the center & cover. Stir grind, cover. Stir grind, cover. Eventually you will mix all of the meatless grind in with the veggies as it cooks.
  4. Add your 3 TBSP tomato paste, stir. Add 1 carton of vegetable broth, stir. Add 1 TSP oregano, 2 TSP basil, 1 TSP garlic powder, 1/2 TSP black pepper, + salt to taste, stir.
  5. Bring the temp down to low, cover + let simmer for 20 minutes.
  6. Add 1 Cup brown rice. Cover + cook until rice is finished.
  7. Serve, paired with a crusty bread. We chose French Baguette.

Enjoy 😘

Found this recipe delicious? Please consider sharing! Make sure to subscribe for more easy & affordable meat-free recipes!

Have a beautiful day 🥰

Vegan (and Delicious) Soft Pretzels

Recipes

I love soft pretzels! Especially fresh soft pretzels. Like, a lot. I tried getting frozen soft pretzels to make at home, but they are just not the same. I decided to begin searching for soft pretzel recipes online. After trying a few, I decided to use my favorite parts of each to end up with some really delicious soft, buttery, and salty pretzels. They are also really filling!

What You’ll Need:

Directions:

Step 1: In a small bowl, mix your Active Dry Yeast and water and set aside.

Step 2: In a large mixing bowl, mix your sugar, salt, and flour.

Step 3: Once yeast is dissolved, combine with flour mixture and add warmed up Silk. Mix until dough is no longer sticky.

Step 4: Cover the dough with a dish towel and let rise for one hour.

Step 5: Preheat your oven to 500° F, uncover your dough bowl and punch down the dough. Break apart into 9 (as even as possible) chunks of dough.

Step 6: Roll each chunk of dough into a long rope. To form a pretzel grab both ends and form a heart, twist together once in the center and close pretzel by tucking ends under. Leave to rise for 15 minutes.

Step 7: In a large pot, boil water and baking soda. Use a spatula to dip each pretzel in the bath for 30 seconds then put onto baking sheet.

Step 8: Melt “butter” and brush generously onto each pretzel. Sprinkle course sea salt onto pretzels to liking.

Step 9: Bake in oven for 10 minutes, or until golden brown. After removing, brush more melted “butter” and serve warm.

If you really want to go all out, try serving with my Incredibly Easy Vegan Chickpea Salad!

Incredibly Easy Vegan Chickpea Salad

Recipes

I first heard about this Vegan Chickpea Salad from a dad in our play group and it has since become a staple in our home. Seriously, I make it at least once a week!

It is a healthy, kid-approved lunch that is so easy to make! In fact, it is so hard to mess up that you can totally let your kids make this (almost*) completely by themselves and it will still come out delicious. It is a great meal to get kids involved in the kitchen from a young age.

What You Need:

  • 1-2 can(s) garbonzo beans
  • Red onion
  • Shallots
  • Celery
  • Lemon juice
  • Follow Your Heart Vegenaise
  • Dijon Mustard
  • Relish
  • Paprika
  • Dill
  • Salt & Pepper

Directions:

(I used 2 cans of garbonzo beans here)

Step 1. In a strainer, drain and rinse garbonzo beans then empty into a large mixing bowl.

Step 2: Add all ingredients into bowl.

This is one of those recipes where you can literally just eyeball everything to your own liking. Add as much or as little as you prefer – it will still come out delicious with very little effort.

It’s the perfect starter recipe for getting kids involved in the kitchen (*note: please leaving vegetable preparation / knife handling to an adult) from a young age. Being able to add ingredients freely is so exciting to my children. They get to play and experiment with their ingredients while gaining confidence since it still comes out delicious in the end!

Step 3: Stir and Mash

Mix everything together really well and then mash it up. A potato masher is easiest, but you can use whatever you have handy. I like to have it semi-mashed because I enjoy the texture, but mash it to your liking.

Enjoy!

Serve it up with some Ritz Crackers (our favorite way), as a sandwich, on homemade pretzels (recipe coming soon!), or on a bagel for a delicious and healthy lunch!