Grace Girls | Cupcake Decorating 🧁

homeschool, Motherhood, Uncategorized

This week’s Grace Girls class was on the basics of cupcake decorating. We learned about frosting, how to make & fill piping bags, and how to use the piping bags to frost cupcakes or other desserts.

Our class was led by Mrs. Mandee. She did such a great job teaching the girls (and some of us moms) how to properly frost cupcakes. She prepared a little cupcake tray ahead of time showing different designs you can make using your piping bags.

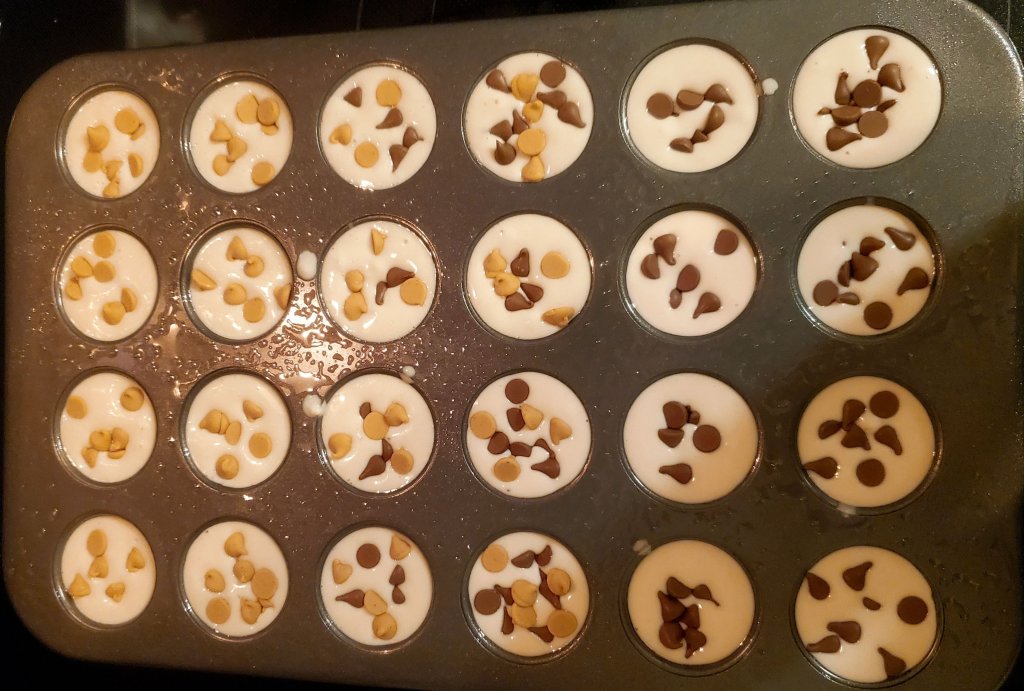
Everyone was told to bring: a small mixing bowl, a rubber spatula, and a large Mason jar. My wide-mouths are currently being used, so we brought standard size. In the future, I will be using wide-mouth for this.

Mrs. Mandee taught us how to make our piping bags. We take one bag and one tip and place it inside as far as it will go without disrupting the bag. Make a mark using your scissors halfway up your piping tip to indicate where you will be cutting. Push your tip back a little bit, cut at the mark you made, then push tip back down to the end so it is snug in the bag.

The piping bags should look like this when they are ready to be used:

Once they are made, place your piping bag inside the Mason Jar with the ends open around the jar to prepare for filling your piping bag.

This tip to me was a game-changer! I have typically avoided using piping bags in the past because of the mess I would make filling the bag. This prevents a mess! It makes it seriously SO easy!!!

Next, Mrs. Mandee scooped out her Buttercream icing into her mixing bowl and explained that you must whip the frosting really well before placing into your piping bags to make sure you do not get any air bubbles into it.

She shared that at home this is her favorite recipe to make homemade frosting, but because there was a large number of participants, she purchased bulk frosting from Sam’s Club. We went through 80% of the bucket in the class!

To fill our bags we:

  • 1. Stir, stir, stir until as smooth as possible. Add a color, if using.
  • 2. Using a rubber spatula, scoop smooth frosting into the prepared piping bag in your jar.
  • 3. Shake your frosting to the bottom.
  • 4. Twist your bag from the top of the frosting to the end to close it.

When making designs, we want to twist not squeeze the piping bag. We will continue to twist like this all the way down the bag until it is finished.

Finally, Mrs. Mandee demonstrated how to make various designs before it was time to work independently. Then continued to show us new ones throughout our practice time.

We stirred our frosting, filled our piping bags, and practiced getting used to working with our piping bags and making designs on parchment paper.

When we were finished practicing with both size piping tips, we scooped our frosting back into the bowl with our rubber spatula and started the process over. We stirred & refilled our piping bags to get ready to frost our own cupcakes.

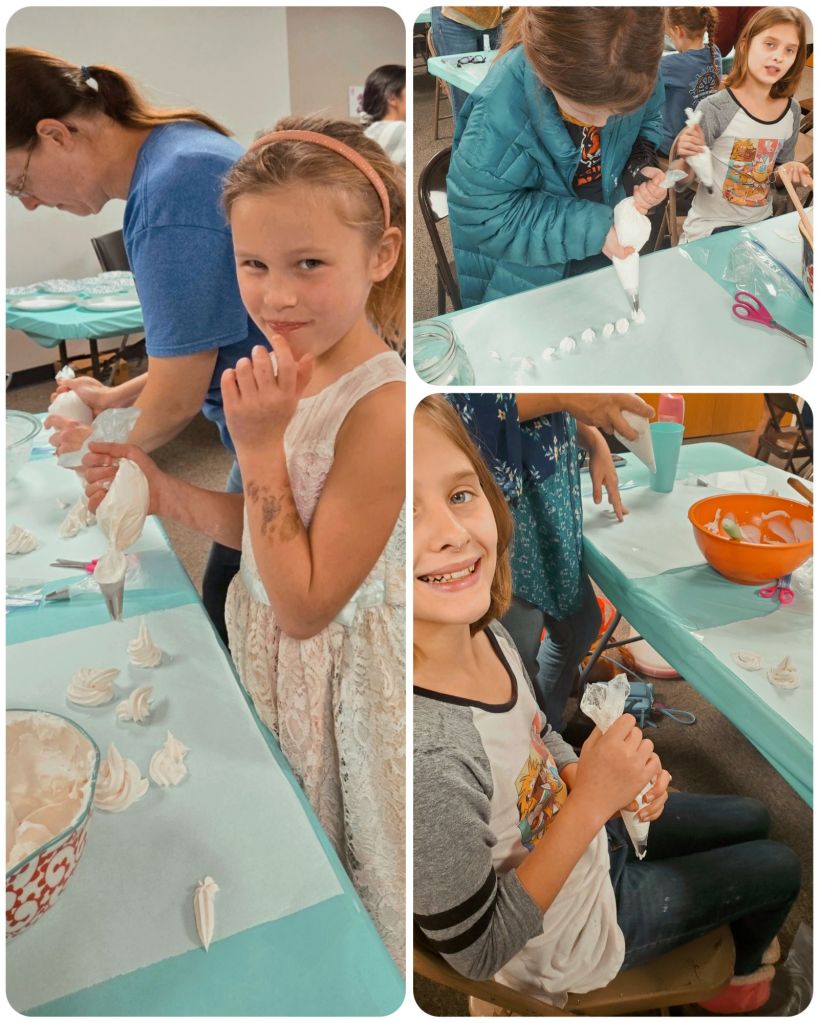
I loved seeing the different designs being practiced. Over at Sasha’s table, a mom made an adorable butterfly! She shared that she had previous employment experience at a bakery years ago.

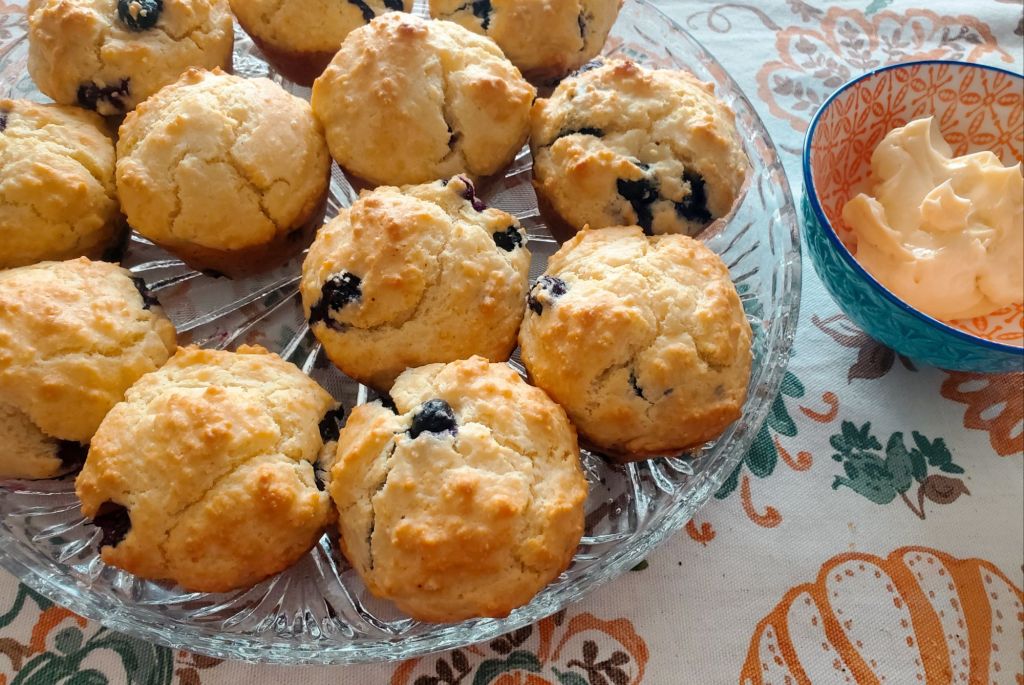
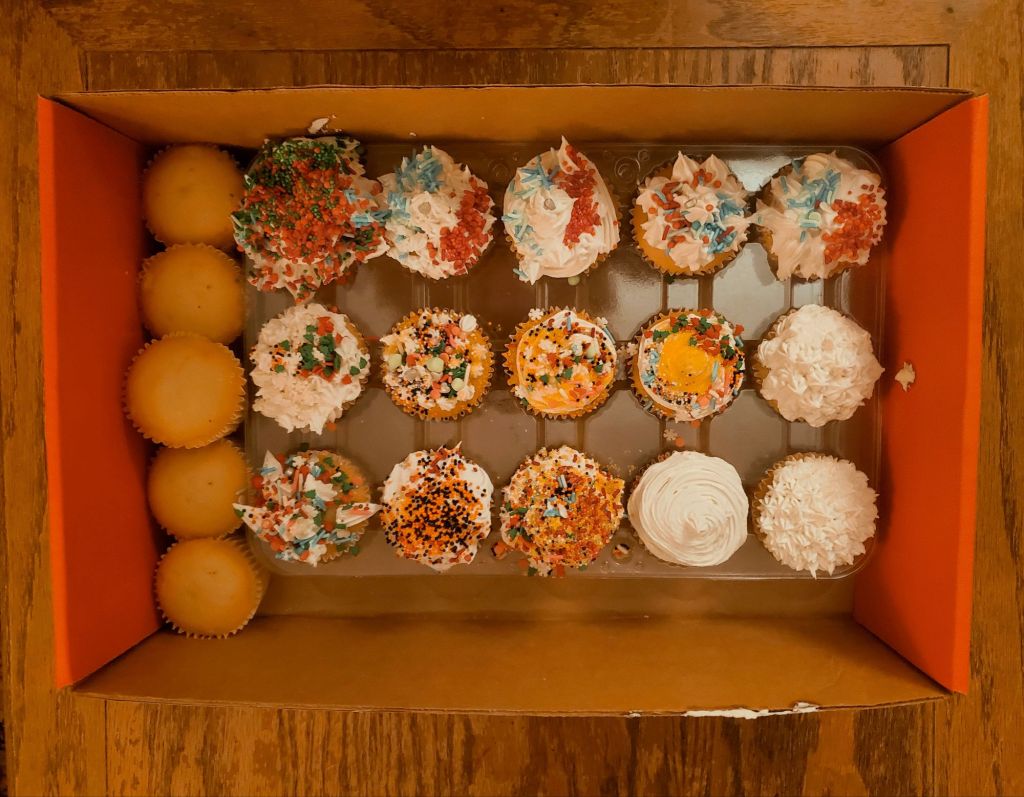
After a lot of practice, it was finally time to frost our own cupcakes! Everyone was given 4 to decorate.

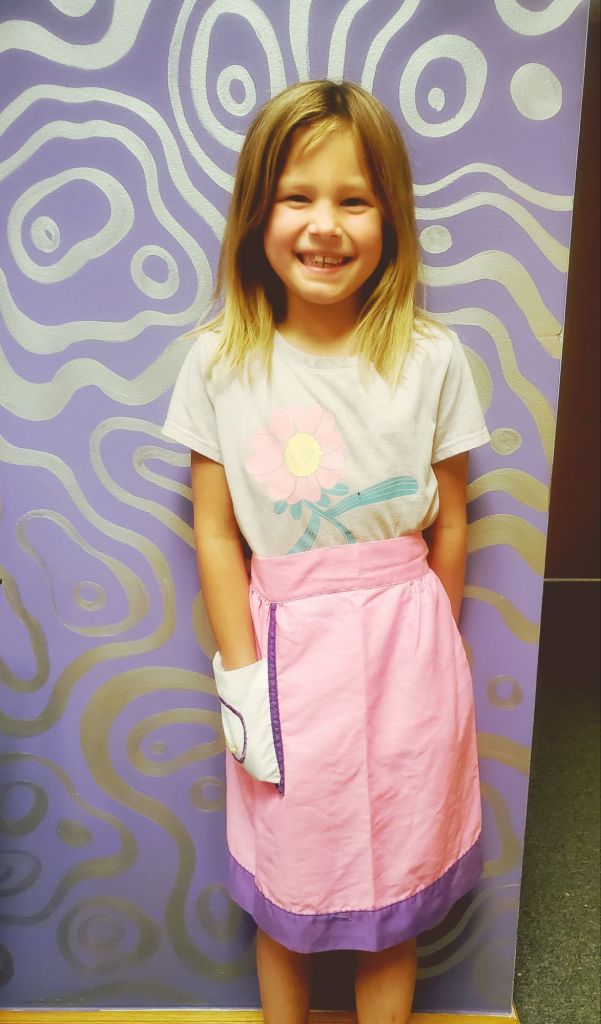
Ella made American flag cupcakes to celebrate America, Veterans, and her birthday (Veteran’s Day).

It was the perfect time for this lesson with her birthday next week. I will definitely be using my new frosting skills on her birthday cake this year! So thankful to learn this lifelong skill!!

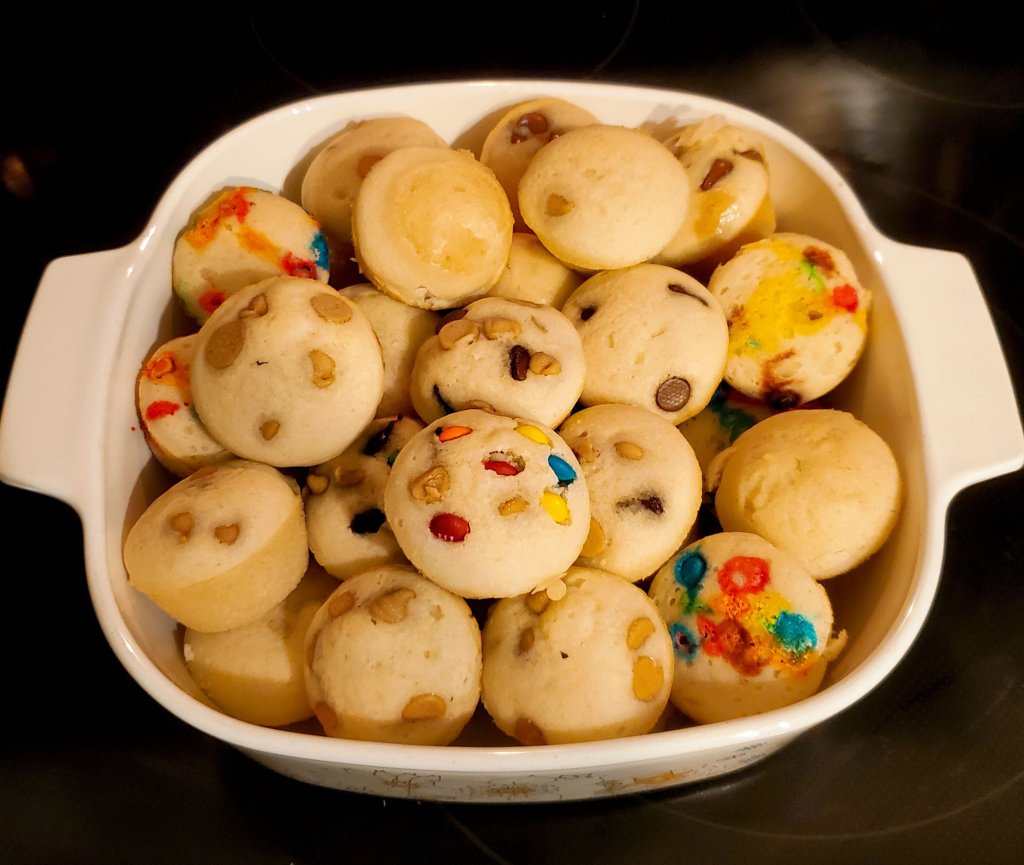
I chose to leave mine un-sprinkled, but one of my girls (Mia) decided to practice her sprinkling once we got home. I gotta say, she did a really great job! She used tweezers to line them perfectly around. I think she may have found her new life passion.

Athena had to miss out on this night unfortunately, but we brought her home a piping kit & un-frosted cupcakes so she didn’t have to completely miss out on the activity. I also gave Moses one of mine to decorate too.

We will be doing a second part to this class though, which will be “advanced” cupcake decorating beyond simple frosting. That is a class that we are all really looking forward to!

Our next meeting is our annual potluck Thanksgiving Feast! This is one of our favorite traditions now. We will be spending the next 2 weeks planning & then preparing our dishes. Ella, of course, signed up to bring the turkey again for the second year in a row! It was the biggest hit last year and she was SO proud of herself! That girl will be a pro at cooking up a turkey feast before she even has a family to fix it for!

Any suggestions for what we should bring to our potluck Thanksgiving Feast?! I’d love to hear them!

Until next time ♡ Mama Morozov

Ooey Gooey Halloween 👻 Sourdough Discard Brownies

Motherhood, Recipes, Uncategorized

HAPPY HALLOWEEN 🎃!!! I can’t believe that tomorrow is already November! This year has absolutely blown by abnormally fast. I’m not gonna lie though, this has been a rough (but also rewarding) year & I’m totally ready for a fresh new one.

Anywho – These Sourdough Discard Brownies have easily become my favorite brownie ever! Usually I prefer to leave out the Mini M&Ms in this recipe and they are absolutely delicious, but for Halloween we decided to add the Mini M&M candy surprise then topped them with Halloween Sprinkles we had.

Ingredients

  • 1 Stick Salted Butter
  • 1 10oz Bag Semi-Sweet Chocolate Chips
  • 1/2 Cup Cocoa Powder
  • 2 Teaspoons Pure Vanilla Extract
  • 2 Large Eggs, + 1 Egg Yolk
  • 1 Cup Sugar
  • 1/2 Cup Brown Sugar
  • 1 Cup All-Purpose Flour
  • 1 Teaspoon Salt
  • 1/2 Cup Mini M&Ms (or other candy of choice)

Directions

  • Preheat oven to 350° and grease a 10×10 square baking dish.
  • On low heat, melt the butter. Once melted stir in chocolate chips, cocoa powder, and vanilla extract. Once everything is smooth, remove from heat and set aside.
  • In the bowl of your electric mixer, beat together the eggs & sugars for 5 minutes. Add the sourdough discard and chocolate mixture and beat again for another 5 minutes. Add flour and salt, and mix together until fully combined on a low setting.
  • Remove bowl from stand mixer and fold in Mini M&Ms.
  • Pour into prepared baking dish and bake for 35 minutes at 350°
  • Cool for at least 30 minutes before adding frosting & Halloween Sprinkles or other decorations.
  • Serve & Enjoy!

The kids decided to decorate theirs with some of the Halloween candy they received too. They were definitely a hit for Halloween!

Naruto, Coraline, Pirate Princess, Cowgirl, Spiderman

The only photos I got from trick or treating tonight. I could not get over how cute & confident Moses was 😍.

Until next time ♡ Mama Morozov

Baking with Kids | Berry Cream Cheese Biscuit Muffins

Motherhood, Recipes, Uncategorized

Are you looking for an insanely easy & fun recipe for your kids to bake almost entirely by themselves? This is it! My 4 year old – Athena – did literally everything by herself, except handle the oven, and left behind NO mess at all, except for the dirty dishes for me to wash. 

I love breakfast foods, but I do not love eating when I first wake up. It takes me a good 6+ hours of being awake to begin to feel hungry. My children, however, love to stuff their face the second their eyes open. Allowing them to make their own kid-friendly breakfasts has worked out really great for our family.

Ingredients

  • 2 3/4 cups All-Purpose Flour
  • 1 Tablespoon Baking Powder
  • 1 Teaspoon Sugar
  • 1/2 Teaspoon Sea Salt
  • 4 oz. Cold Cream Cheese
  • 1 stick Salted Butter, cut into small pieces
  • 1 1/4 cup Buttermilk
  • 2/3 cup Blueberries* {or whatever berries/fruit you have on hand… could also substitute Chocolate Chips, Sprinkles, raisins, or nuts even, or omit if plain is more your style.}

Directions

  • In a large mixing bowl, whisk together flour, baking powder, baking salt, sugar, and salt.
  • Add cream cheese & butter cubes to the mixture, set a timer for 5 minutes, then use your hands to mix together until all crumbly & combined.
  • Dig a hole in the center with your hands, then pour in buttermilk. Using a rubber spatula, stir until combined.
  • Fold in Blueberries {or other mix in choice.}
  • Scoop mixture into a greased muffin tin & bake for 15 minutes at 425°F {Adult Supervision Required}.

While the Biscuit Muffins are baking, prepare your Sea Salt Vanilla Butter for serving.

Ingredients

  • 6 Tablespoons Salted Butter, softened
  • 1 Teaspoon Vanilla Extract
  • 1/2 Teaspoon Sea Salt

Directions

  • Mix ingredients together with a kid-sized rubber spatula until blended & easily spreadable.

Let cool for a few minutes before serving with a heaping spoonful of Sea Salt Vanilla Butter.

This really is such a kid-friendly recipe. It takes very little time from start to finish, involves super fun “play-learning” using their hands {make sure to wash first!!}, leaves them feeling accomplished & successful, as well as provides them with useful baking skills that they can use for the rest of their lives. Happy baking!!!

Until next time ♡ Mama Morozov

Our Favorite Places | Mason Cottage Day

Crafts & DIY, homeschool, Motherhood, Uncategorized

We are beginning our second year taking homeschool classes at Mason Cottage Day! It’s hard to believe it’s only been that long! I feel like Ms. Natalie is one of my dear lifelong friends who I’ve known forever.

So naturally, I wanted my first post of my new Series: Our Favorite Places, to be about her studio – Mason Cottage Day! In this series, I’ll be sharing about our very favorite places & what makes them our favorite.

Welcome to Mason Cottage Day

From the moment you arrive, her studio is so welcoming! She has a board outside her door with important information & business cards, as well as which classes she is currently offering.

We personally have taken Sewing, Embroidery, Baking, and Reading/Writing classes in our time at Mason Cottage Day. I think science would be a really fun class to take too!

One of Ms. Natalie’s former students made her this adorable giant wooden pencil & another student made her this name plaque. I love that she continues to display their artwork that they took the time to create for her even after they have moved on. It shows how much she truly cares about each and every one of her students.

Each month, Ms. Natalie changes the artwork on display. It’s so fun to see the different projects & types of art the students are learning, as well as what students have come up with on their own in the art room.

This is such a cozy reading corner for students learning to read, and I love the giant embroidery hoops on display. I had never seen them that large before!

She has a ton of books & learning games for all different ages. She has been working with Sasha on her reading, & it has been so impressive to see how fast Sasha has been making noticeable progress in her reading abilities.

One of my favorite things about Mason Cottage Day is that it is really geared toward homeschooling families. Siblings are welcome to come play for free during lessons! That’s incredibly helpful, especially for low-or-one-income large families who otherwise have to miss out due to pricing or scheduling conflicts.

There are plenty of interactive areas to play such as a kitchen/nursery/home play area, a doctor or veterinarian area, a building area, and a doll house area for children to use their imagination.

There is the cutest little hand-washing station for baking students, along with plenty of child-size aprons to choose from.

All of her baking is taught through these conventional ovens. They are the perfect child-size, beginner ovens to learn on.

Sasha has loved taking baking classes at Mason Cottage Day. She had learned how to make a good variety of different items. Her confidence in the kitchen is going up after each class & just like at our home, Ms. Natalie incorporates reading & math into her baking lessons, so those skills are also improving while she bakes. Sasha of course looks adorable in her little aprons & she’s always quick to let her siblings take turns helping her bake.

The art room gives students free-range to create to their hearts content. There is a painting table, all the coloring utensils you need, stencils, & tons of other various art supplies & tools. Anything out is able to be used, and if you see something in her art storage area that you want to use that isn’t out – just ask! She’s more than happy to accommodate little minds.

You can always count on seeing fun science projects or experiments going on from her science students – like this potato clock.

She even has a beautiful planter that is Ukrainian Petrykivka style, which makes my Ukrainian 💙💛 heart so happy to see.

Ella loves learning sewing & embroidery from Ms. Natalie. I have loved every single project that Ella has created for me. Ms. Natalie comes up with super cute, child-friendly projects. One of my favorite projects she has made for me was the peekaboo picture frame with the cutest photo of our kids at the park.

Another thing you can always expect to find at Mason Cottage Day is plants! Ms. Natalie loves plants & nature. She teaches about Monarch Butterflies in season & grows her own pollinator garden outside.

Because of our mutual love of plants & Pollination, we made her a bouquet from our own pollinator garden to bring to her as a gift. We love creating bouquets for people we love!

She has been such a great teacher and role model in our children’s lives. She is helping them learn lifelong skills that they can & will regularly use. She has the kindest & understanding soul. I look forward to our visits with Ms. Natalie as much as the kids do!

“I want children to feel comfortable in the studio. Everything is set up so that they automatically know what to do. It’s a great joy to see children of every age play, pretend, and learn while using all the different materials! Children always have very good ideas about what should be included, and I always take their suggestions seriously. A simple thing such as including little squeeze ketchup and mustard containers made one young person so happy…he had noticed that the play kitchen did not have them, and he suggested adding them. Playing and learning are very definite collaborative communication pathways. I hope the studio allows children to learn in their best ways!” – Ms. Natalie

Classes are an affordable $20 each, which includes all necessary materials! *Beginning October 1, 2024 classes will be raised to $30 each*

Mason Cottage Day is located at 105 E. Main Street, Mason, Ohio 45040. The free parking lot is located behind the Pop Revolution Gallery Building off of Mason-Montgomery Road.

It is right along the cutest little shopping Street – while you are there check out the Mason Whippy Dip for a yummy ice cream treat, or the attached Thai Terrace for a delicious dinner!

You can contact Ms. Natalie to visit her studio or schedule classes at nataliebaxter@yahoo.com

Until next time ♡ Mama Morozov

My Favorite Vegetable Pot Pie

Recipes

Happy Monday! I know I’m the odd man out here, but I LOVE Mondays! Especially if the weather is as beautiful as it was today.

Monday is the start of a brand new week. A fresh slate. Getting back to my 4:30-5 am routine that I honestly enjoy. I’ve recently given myself permission to sleep in on the weekends which really helps restore my soul more than I knew I needed.

Anyway, not everyone shares my enthusiasm for Mondays. So I wanted to share my very favorite Vegetable Pot Pie recipe with you in case you need a super mindless (& meatless) meal to make.

You will need:

  • 1 box of store-bought pie crust (2 included), thawed to room-temp
  • 2 (10.5 oz) cans of Cream of Potato Soup
  • 3 bags of Frozen Mixed Vegetables, heated
  • 1/2 cup milk
  • Salt, pepper, & thyme to your liking

First, preheat your oven to 375°

In a large bowl mix together 2 10.5 oz cans of Cream of Potato soup, 3 bags of Frozen Mixed Vegetables (I heat before adding to mixture), a half cup of milk, salt & pepper to your liking, throw some thyme in that bowl, and mix it all up.

Put 1 thawed-out, store-bought pie crust in your pie pan (you’re welcome to make your own if you want, but we’re going for mindless over here). Slowly scoop in your mixture until it’s all in there nice.

Place your second pie crust right on top and squish it around gently until it looks pretty. Add a fun design or letter (I like to do M for our last name) if you want, or just a slit works too. Beat an egg, brush it on top and pop that in the oven for 45 minutes.

When it comes out, let it cool for a few minutes. Cut into slices, dish it out, & enjoy.

There ya go! A super, duper easy and affordable weeknight meal that is both kid & meat-eating husband approved. You can add cheese or other spices if you want as well. It’s also a meal that is easy enough for older children to learn how to make on their own!

Helpful tip: use the cooking time for homework or chores. Try to get as much of your to-do list crossed off before the timer goes off. The more you can get accomplished before dinner, the less you’ll be left with at the end of the night.

What is your favorite mindless meal 🍽 to make on the weeknights?

Until next time ♡ Mama Morozov

Vegan Banana Oat Muffins

Recipes

My husband and girls LOVE bananas, so lately I have been making a lot of banana flavored treats for my family.

This breakfast is healthy, delicious, and super simple to make with and for kids! Ella and I made this batch together for Sunday breakfast for our family.

This recipe makes 24 muffins- which is perfect for our large family. This recipe can be easily cut in half if your family size isn’t as large! Or you can make and freeze for an easy grab & go breakfast for those accidental last-minute mornings!

Let’s Bake!

Ingredients:

  • 1 Stick vegan “butter”, softened (I use Earth’s Best!)
  • 4 Over-ripe bananas
  • 2 Cups flour
  • 1 Cup light brown sugar
  • 1 TSP salt
  • 2 TSP cinnamon
  • 2 TSP Pure Vanilla Extract
  • 2 TSP baking soda
  • 2 TSP baking powder
  • 2 Cups oats

Instructions:

  • Wash hands ✋
  • Preheat oven to 400° + prepare muffin tins (reusable liners or spray with Pam Baking Spray w. Flour)
  • In your stand mixer bowl, mix together bananas, flour, and brown sugar.
  • Add in salt, cinnamon, vanilla, baking soda, and baking powder. Stir to combine.
  • Add oats, stir to combine.
  • Spoon batter into muffin tin + top with oats for decoration
  • Bake 15 minutes + let cool before serving

That’s it! So easy that kids can make these almost entirely by themselves!

I hope you enjoy your Vegan Banana Oat muffins! If you do, please share!

Have a beautiful day 🥰

Vegan (and Delicious) Soft Pretzels

Recipes

I love soft pretzels! Especially fresh soft pretzels. Like, a lot. I tried getting frozen soft pretzels to make at home, but they are just not the same. I decided to begin searching for soft pretzel recipes online. After trying a few, I decided to use my favorite parts of each to end up with some really delicious soft, buttery, and salty pretzels. They are also really filling!

What You’ll Need:

Directions:

Step 1: In a small bowl, mix your Active Dry Yeast and water and set aside.

Step 2: In a large mixing bowl, mix your sugar, salt, and flour.

Step 3: Once yeast is dissolved, combine with flour mixture and add warmed up Silk. Mix until dough is no longer sticky.

Step 4: Cover the dough with a dish towel and let rise for one hour.

Step 5: Preheat your oven to 500° F, uncover your dough bowl and punch down the dough. Break apart into 9 (as even as possible) chunks of dough.

Step 6: Roll each chunk of dough into a long rope. To form a pretzel grab both ends and form a heart, twist together once in the center and close pretzel by tucking ends under. Leave to rise for 15 minutes.

Step 7: In a large pot, boil water and baking soda. Use a spatula to dip each pretzel in the bath for 30 seconds then put onto baking sheet.

Step 8: Melt “butter” and brush generously onto each pretzel. Sprinkle course sea salt onto pretzels to liking.

Step 9: Bake in oven for 10 minutes, or until golden brown. After removing, brush more melted “butter” and serve warm.

If you really want to go all out, try serving with my Incredibly Easy Vegan Chickpea Salad!

Incredibly Easy Bite-Size Pancake Muffins

Recipes

I love pancakes, but I do not love making them, nor do I have the time to make them. That makes these little incredibly easy, bite size pancake muffins the perfect solution! Mess free, easy grab & go, and delicious! No sticky syrup everywhere, no standing over a hot oven watching for air bubbles… just another incredibly easy, kid approved meal!

I like to make them after dinner while I am cleaning up. They take less than 5 minutes to whip up so I preheat the oven, get them ready, and start cleaning up from dinner. Once the oven is ready, put them in and set the timer for 10 minutes and finish cleaning. Try to race the clock and get your cleaning finished before the timer for the muffins go off!

Ingredients:

  • Box Pancake Mix
  • Water
  • Optional Mix Ins (chocolate chips, etc.)

Did I mention this was incredibly easy? 😜

Directions

Step 1 • Preheat oven to 350° F and spray mini muffin tin with cooking spray, or use liners (reusable, please!)

Step 2 • Follow directions on box mix. The brand I used called for 2 cups mix + 1 and 1/3 cup water. Pour mix into mini muffin tin or (reusable) liners.

Step 3 • Top mixture with optional mix ins. I listed the mix ins that I used this time under each photo. Fresh fruit is always a great and healthier mix in!

Peanut Butter Chips, Chocolate Peanut Butter Chips, Chocolate Chips
M&Ms, Butterfly Sprinkles, Maple Syrup

Step 4 • Bake at 350° for 10 minutes. Remove from oven, let cool before removing from mini muffin tin.

Peanut Butter Chips, Chocolate Peanut Butter Chips, Chocolate Chips

M&Ms, Butterfly Sprinkles, Maple Syrup

Enjoy!

I don’t think these could possibly be any easier to make. It is a fun breakfast to include children in making if you do have time in the mornings, but during the school year it’s just so much easier for me to make the night ahead.

As the muffins cool, finish up the last of your cleaning. Remove from the mini muffin tin, store for the morning, start your dishwasher and call it a day. You already have breakfast ready for your family in the morning. That’s how you get a head start on tomorrow before you even go to sleep!

Did you like these Incredibly Easy Bite Size Pancake Muffins? What mix ins did you use? Let me know in the comments! 🥞