Maple Orange Pecan Sourdough Discard Cinnamon Rolls with Fresh-Squeezed Orange Juice

Recipes, Uncategorized

Our Fall baking is still in full swing! The days are both shorter & busier, but we are squeezing in new treats every chance we get.

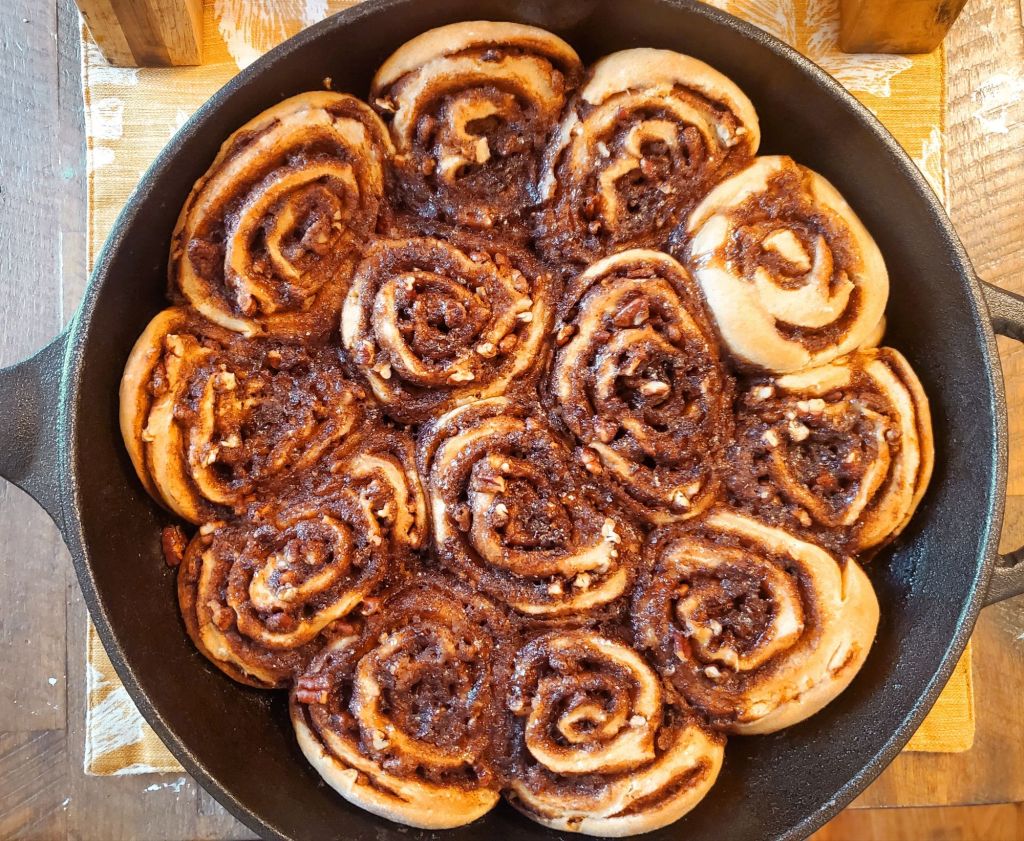
These Maple Orange Pecan Cinnamon Rolls made using sourdough discard are the perfect, flavorful start to a crisp fall morning.

Unlike most cinnamon rolls, these don’t require any rise time, so you can still throw these together pretty quickly even on busy morning days. If you want to save even more time in the morning, you can prepare your filling & icing the evening before.

Ingredients | Dough

  • 4 Cups All Purpose Flour
  • 1 Teaspoon Baking Soda
  • 2 Teaspoons Baking Powder
  • 1 Teaspoon Salt
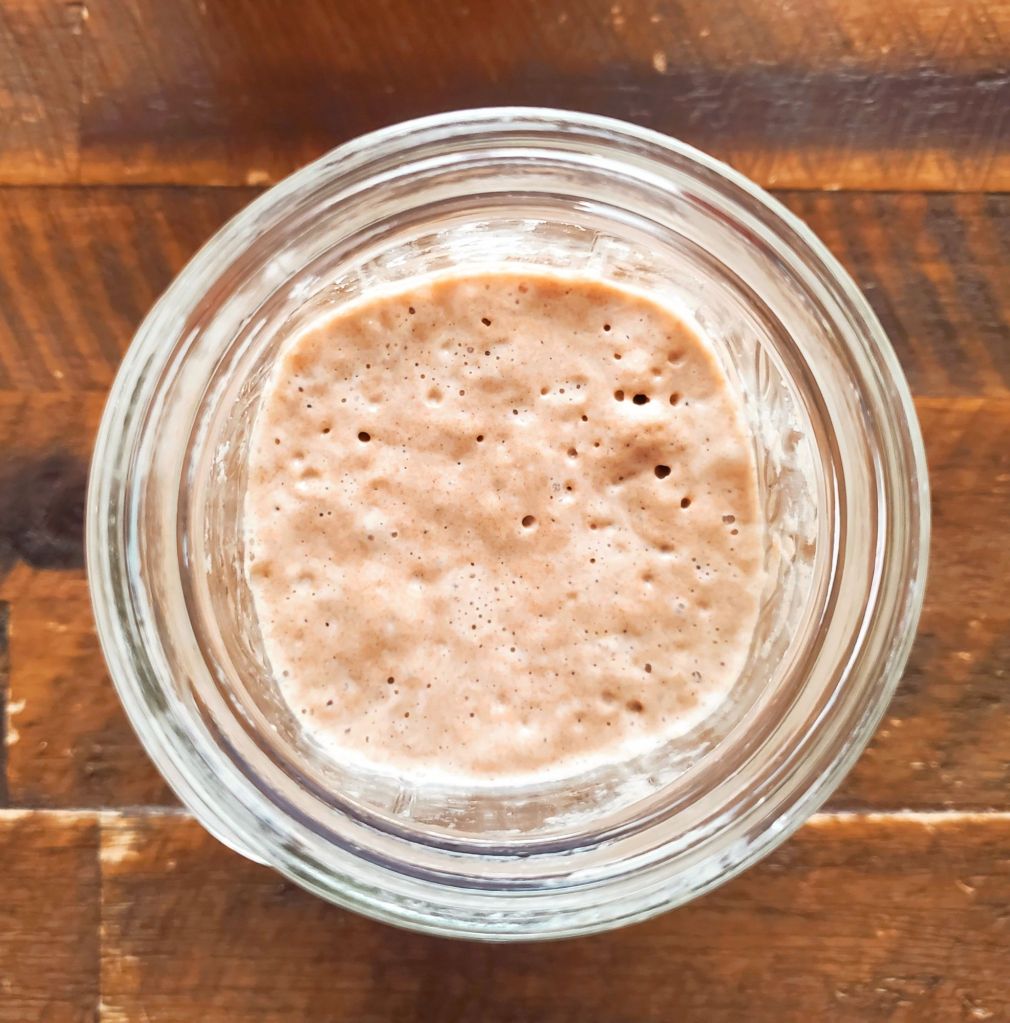
  • 1 Cup Sourdough Discard
  • 1 Cup Water
  • 1 Stick Melted Butter
  • 1 Tablespoon Fresh Squeezed Orange Juice
  • 1/4 Cup Maple Syrup

Directions | Dough

  • In the bowl of your stand mixer, add & whisk together all dry ingredients.
  • Once whisked, add all wet ingredients to the same bowl.
  • Use dough hook to mix until a ball forms and easily attches from the bowl, about 5-8 minutes.
  • On a well-floured surface, roll the ball out to as best of a rectangle as you can. It helps to shape the dough into the shape before you begin rolling.
  • Once rolled out, you can begin filling:

Ingredients | Filling

  • 1 Stick Salted Butter
  • 1 Cup Brown Sugar
  • Zest of 1 orange
  • 2 Teaspoons Cinnamon
  • *Plus 1 Cup Pecan Pieces, set aside.*

Directions | Filling

  • In a small mixing bowl, mix all ingredients together, except the pecans.
  • Place globs of the Filling mixture on top of the rolled out dough & spread evenly, leaving about 1/2 inch border.
  • Sprinkle the Pecan pieces on top of the Filling spread.
  • Fold top down 1 inch, fold borders on both sides, and gently roll down towards your body, forming an even log.
  • Once log is finished & seam side down, grab a ruler and cut 1 Inch rounds, placing each roll in your cast iron skillet.
  • Bake 30 minutes at 375°
  • Let cool at least 10 minutes while you make the icing:

Ingredients | Icing

  • 1 (8oz) Package Cream Cheese
  • 1/2 Cup Heavy Whipping Cream
  • 1/2 Cup Maple Syrup
  • 2 Teaspoons Vanilla Extract
  • Zest of 1 Orange (Optional)

Directions | Icing

  • Mix ingredients over medium-low heat until all combined, let cool slightly and pour on top of cooled rolls.
  • Serve & Enjoy!!

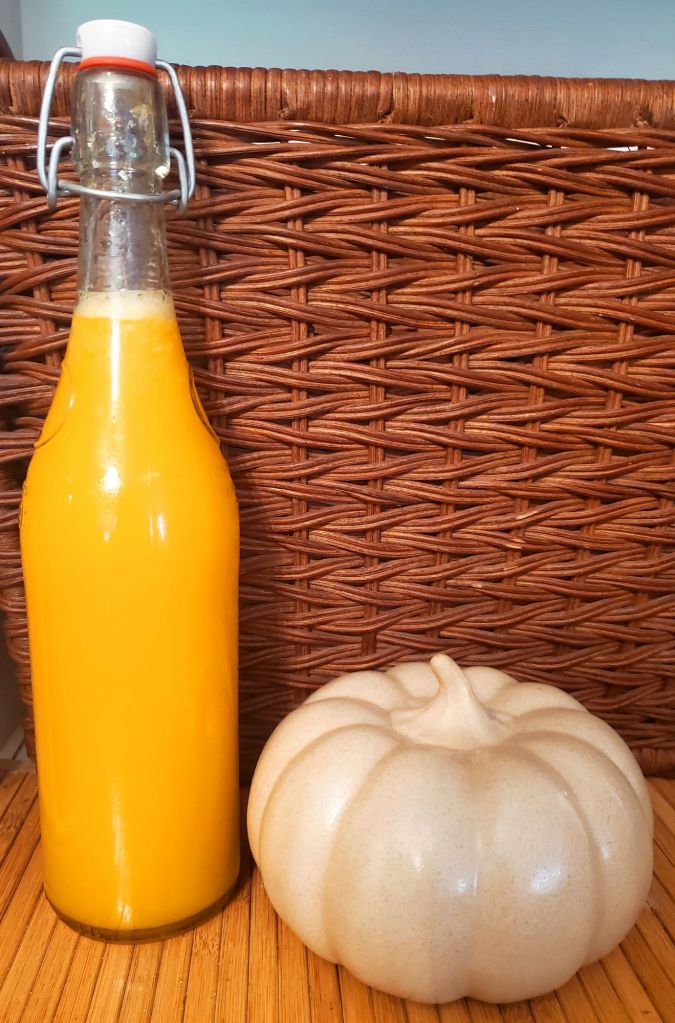
We served these Maple Orange Pecan Cinnamon Rolls with fresh-squeezed orange juice. It is so much better than store-bought & no extra ingredients so it isn’t all fake tasting.

This was such a simple, yet flavorful & delicious way to begin our Fall morning. They make your entire home smell like a Fall candle during & after baking. I hope that you enjoy them as much as our family does!

Until next time ♡ Mama Morozov

My Latest Food Obsession

Recipes, Uncategorized

A few months ago I made a Ukrainian Care Package for my cousin. We were discussing the Ukrainian foods she loves & grew up eating when she told me about a special food that she ate growing up that her mom used to make for her as a special treat from my тато & her childhood.

I made a mental note that I would have to find a recipe & make it for my тато. It seems food triggers his childhood memories that he has compartmentalized deep, deep down inside himself more than anything else so far.

I had honestly forgotten about this dish for a few months; but then one day as I was reading my new-to-me cookbook written by Auschwitz survivors that I had gotten to resonate with my бабуся, who was also a holocaust survivor, I found the recipe for Strawberry Soup.

What my тато remembers is a little bit different: less soupy, more mashed consistency. His was also made with heavy cream instead of sour cream, but that’s an easy swap. Overall same concept though: Strawberries with cream & sugar.

What Survivor, Eva Kerenyi, shared with me through her story in this cookbook is very simple, although I did have to double the recipe the second time I made this, this week because of how good it is.

  • 2 pounds Strawberries
  • 3/4 cup sweet red wine
  • 3/4 cup sour cream (or heavy cream)
  • 1/2 cup sugar

Blend all ingredients together & chill in refrigerator for a minimum of 2 hours. Serve chilled.

I, however, adapted it a little bit because I was a little bit concerned about the wine. I don’t drink alcohol. I was worried that if it was all just mixed together, it would act more as a mixed drink than a food dish. I’m sure I was just over-thinking it, but I wasn’t willing to risk it or let my kids eat it like that (even though Eva shared this recipe was from her own childhood so it must be child-friendly 🤷🏼‍♀️) so, I added an extra step.

Once blended, I cooked it on medium-high heat over the stove until it was boiling and then turned off the stove, but let continue to cook while the burner cooled until the soup was room temperature before transferring it into the refrigerator to cool.

I kept sneaking spoonfuls because it’s so delicious that it is addictive, but I can definitely confirm the longer it chilled, the better the flavor. Cooking it also really made the alcohol taste from the wine disappear which I really appreciate.

Unil next time ♡ Mama Morozov

Pumpkin Pie 🎃 Sourdough Discard Bagels 🥯

Recipes, Uncategorized

Getting my sourdough starter – which I have officially named моя закваска (“My sourdough” in Ukrainian, because I like the way it sounds and it immerses the language into my daily life) – has been one of my best homemaking decisions ever! I have been baking like crazy every free second I get, obsessively trying all of the different ways to use up my discard.

I had a request for Bagels, so we went with a Pumpkin Pie flavor for Fall. They were literally the BEST Bagels we’ve ever eaten! I also went ahead and made a batch of Everything Bagels (which were great as well) using Trader Joe’s Everything but the Bagel Seasoning because I knew my husband wouldn’t be on board with the Pumpkin Pie flavor.

From now on, we’re never buying bagels again. We are going to make our homemade Bagels even easier by preparing them the night before and letting them rise overnight while we sleep so that we can begin straight at the boiling stage in the morning and get right to our homeschool work.

We started in the morning with a nice room temperature sourdough discard that was fed the evening before.

We added together all the ingredients – first the dry, then wet – to form a nice smooth dough, then let the dough rise for a few hours.

After it doubled, it was time to form the Bagels. We cut the dough into 8 equal pieces and shaped the dough into Bagels. This was the best bagel dough I’ve worked with, and the first time they came out exactly the way I like my Bagels.

Mia did a great job shaping the Bagels! Once they were in their bagel form, we let them rest for another 30 minutes before boiling.

We filled our Cast Iron Dutch Oven with 8 cups water & 2 tablespoons of brown sugar and heat to a strong boil. Once the water was boiling, we added 2 Bagels at a time for 30 seconds on each side, then transfer to a wire rack with a piece of parchment paper placed on it until all Bagels

Then we did an egg wash to each bagel and added the Pumpkin Pie topping to the Bagels and baked for 20 minutes in the oven. This topping is a Fall-inspired copycat from Panera’s Cinnamon Sugar Bagels.

The kids loved picking all of the crispy melted topping off of the parchment paper and calling it “candy.” It reminded me a lot of a molasses candy (but with more toffee texture) that I had made at school as a child when I was learning about Little House on the Prarie & Pioneer life. It was one of my fondest memories from that school.

If you don’t have a bunch of kids to eat it all in seconds, consider crumbling up the pieces to use as a crispy topping for another Fall treat, or sprinkled on whipped cream on top of a warm pumpkin flavored beverage to make it extra special.

We waited about 5 minutes for the Bagels to cool because we were so hungry by the time they were finished, although I’d suggest a longer waiting period. It was very hot to cut, but soooo warm and delicious. The cream cheese was really easy to spread! Because they were fresh out of the oven we didn’t need to heat them in the Toaster. Later when we did reheat bagels in the Toaster, they were somehow even better.

I hope that you love them as much as we did!

Ingredients | Bagels

DRY:

  • 3 3/4 Bread Flour
  • 1 Tablespoon Light Brown Sugar
  • 1 Tablespoon Pumpkin Pie Spice
  • 2 Teaspoons Sea Salt
  • 1 Teaspoon Active Dry Yeast

WET:

  • 1 Can Pumpkin Puree
  • 3/4 Cup Sourdough Discard
  • 1/4 Cup Warm Water

Ingredients | Pumpkin Pie Topping

  • 4 Tablespoons Light Brown Sugar
  • 2 Tablespoons White Sugar
  • 2 Tablespoons Turbanado Sugar
  • 1 Teaspoon Cinnamon
  • 1 Teaspoon Cardamom
  • Salted Butter, melted

Ingredients | Additionals

  • 8 Cups Water – for boiling
  • 2 Tablespoons Brown Sugar – for boiling
  • 1 Egg yolk – for egg wash
  • 1 Tablespoon-ish Water – for egg wash

Directions

  • Add dry ingredients to the bowl of your Kitchenaid Stand Mixer then whisk together until combined.
  • Add wet ingredients to the dry ingredients and mix together using the dough hook.
  • Transfer dough to a greased bowl to rise for at least 2 hours.
  • Cut dough into 8 equal pieces. Knead into balls and use your thumb to punch a hole through to form a bagel shape and place on a baking sheet with parchment paper. Let rise at least 30 minutes to overnight.
  • Boil 8 cups water with 2 Tablespoons Brown Sugar on stove. Preheat oven to 425°F.
  • Add Bagels to boiling water 2 at a time for 30 seconds on each side. Remove from boiling water and set aside on a wire rack to cool while you finish boiling the rest of the Bagels. 
  • Transfer cooled bagels back to your baking sheet with parchment paper. Whisk together Egg Yolk with 1 Tablespoon-ish water. (I usually just fill up the bigger half of the egg shell with water). Brush egg wash over each bagel getting the tops and sides really well covered.
  • Top each bagel with the Pumpkin Pie topping, pressing in lightly.
  • Bake for 20 minutes at 425°F. Flip baking sheet after 10 minutes (set timer so you don’t forget).
  • Let cool before serving with Cream Cheese: plain, pumpkin spice, or maple pecan flavors would all be delicious. Enjoy!

Until next time ♡ Mama Morozov

Autumn Apple Crisp 🍎

Recipes, Uncategorized

I love baking all year round, but I especially love baking in the Fall & Winter months. The cozy, nature-inspired Fall decor is up. The weather outside is getting cooler, and the nights shorter. Our home is filled with smells of cinnamon, cardamom, nutmeg, and clove. Every day brings a new delicious treat for us to try.

I try to keep September for apples, October for pumpkins, and November for pecans but I’m not strict about it. This year, I began the Apple theme with this Autumn Apple Crisp. It was sooo good, the family already asked me to remake it. I’ll have to use both skillets next time because one was definitely not enough for us! This one is for sure going in our family cookbook!

Ingredients | Crumble

  • 3/4 cup All-Purpose Flour
  • 1/2 cup packed Light Brown Sugar
  • 1/4 cup Sugar
  • 1 teaspoon Cinnamon
  • 1 teaspoon Nutmeg
  • 1/2 teaspoon Clove
  • 1/2 teaspoon Sea Salt
  • 1 stick butter, cut into small cubes

Ingredients | Apple Crisp

  • 4 tablespoons butter
  • 8 Granny Smith Apples, sliced thinly
  • 1/2 teaspoon Sea Salt
  • 2 tablespoons packed Light Brown Sugar
  • 2 tablespoons Cornstarch
  • 1 tablespoon Vanilla Extract
  • Juice of 1 small lemon

Directions

  1. Peel apples, set aside.
  2. Make crumble topping: in a medium-to-large mixing bowl, whisk together all ingredients except butter. Once whisked, add the butter cubes and use your hands to blend together until it reaches a Crumbly, sandy texture, then set aside.
  3. Melt the butter in a cast iron skillet on medium-low heat on the stove. Once melted, add the apples and salt. Mix together until apples are fully coated in butter.
  4. Add the rest of the ingredients and mix together until fully coated again, continue cooking for 5 minutes.
  5. Turn off the heat, but do not remove your skillet. Sprinkle crumble topping evenly on top of warm apples.
  6. Cover with foil and cook for 20 minutes at 350°.
  7. Remove foil, cook for an additional 20 minutes.
  8. Serve warm with Vanilla Ice Cream {and maybe a Caramel Glaze?} & enjoy 😋!!!

What is your favorite Fall dessert?

Until next time ♡ Mama Morozov

Banana Scones With Hazelnut Drizzle

Recipes, Uncategorized

Mia, Sasha, and I made the most delicious banana Scones for breakfast this morning & they went FAST! I’m definitely going to have to double the recipe next time because the kids were each so bummed when they went back only to find an already emptied sheet pan.

They are the perfect amount of banana, perfect amount of hazelnut, and perfect texture. Some scones can be so dry and dusty that you actually risk dying from choking, but not these! These are moist, but firm, and just sweet enough. Even my husband who isn’t a fan of sweets loved them!

Ingredients

  • 3 1/2 cups All-Purpose Flour
  • 1/3 cup Brown Sugar
  • 2 1/2 teaspoons Baking Powder
  • 1 1/2 teaspoons Cinnamon
  • 1/2 teaspoon Sea Salt
  • 1/2 teaspoon Baking Soda
  • 1.5 sticks Salted Butter, cut into cubes
  • 2/3 cup Coconut Milk
  • 2 teaspoons Vanilla Extract
  • 3 Mashed Bananas
  • 3 Tablespoons Melted Salted Butter (for brushing)
  • 3 Tablespoons Heavy Cream (for brushing)

Directions

  • Preheat oven to 425°F & line a baking sheet with parchment paper.
  • In a large mixing bowl, whisk together the dry ingredients: flour, brown sugar, baking powder, baking salt, cinnamon, & sea salt until combined.
  • Add the butter cubes then incorporate using your hands until the mixture is coarse & crumbly like sand.
  • Make a well in the center and add the liquid ingredients: mashed Bananas, coconut milk, and vanilla extract. Mix together until a dough forms, adding a little extra flour if the mixture is too sticky.
  • Divide the dough into 2 even disks, form each disk into a 6″ patty. Cut each patty into 8 equal triangle pieces and place onto the parchment paper lined baking sheet. There should be a total of 16 scones on the sheet.
  • Bake for 10 minutes. While baking, whisk together the melted butter and heavy whipping cream.
  • Remove pan from oven, brush scones with butter & cream mixture. Place back into oven for 5 more minutes.
  • Remove from oven to let cool.
  • While cooling, mix together 1 cup Hazelnut Spread, 3 tablespoons Heavy Cream, and 1 teaspoon Vanilla Extract. Warm mixture in microwave for 30 seconds, stir.
  • Drizzle warm Hazelnut mixture on top of scones, let rest a moment to let the Hazelnut drizzle settle, and serve. Enjoy!

Until next time ♡ Mama Morozov

Baking with Kids | Berry Cream Cheese Biscuit Muffins

Motherhood, Recipes, Uncategorized

Are you looking for an insanely easy & fun recipe for your kids to bake almost entirely by themselves? This is it! My 4 year old – Athena – did literally everything by herself, except handle the oven, and left behind NO mess at all, except for the dirty dishes for me to wash. 

I love breakfast foods, but I do not love eating when I first wake up. It takes me a good 6+ hours of being awake to begin to feel hungry. My children, however, love to stuff their face the second their eyes open. Allowing them to make their own kid-friendly breakfasts has worked out really great for our family.

Ingredients

  • 2 3/4 cups All-Purpose Flour
  • 1 Tablespoon Baking Powder
  • 1 Teaspoon Sugar
  • 1/2 Teaspoon Sea Salt
  • 4 oz. Cold Cream Cheese
  • 1 stick Salted Butter, cut into small pieces
  • 1 1/4 cup Buttermilk
  • 2/3 cup Blueberries* {or whatever berries/fruit you have on hand… could also substitute Chocolate Chips, Sprinkles, raisins, or nuts even, or omit if plain is more your style.}

Directions

  • In a large mixing bowl, whisk together flour, baking powder, baking salt, sugar, and salt.
  • Add cream cheese & butter cubes to the mixture, set a timer for 5 minutes, then use your hands to mix together until all crumbly & combined.
  • Dig a hole in the center with your hands, then pour in buttermilk. Using a rubber spatula, stir until combined.
  • Fold in Blueberries {or other mix in choice.}
  • Scoop mixture into a greased muffin tin & bake for 15 minutes at 425°F {Adult Supervision Required}.

While the Biscuit Muffins are baking, prepare your Sea Salt Vanilla Butter for serving.

Ingredients

  • 6 Tablespoons Salted Butter, softened
  • 1 Teaspoon Vanilla Extract
  • 1/2 Teaspoon Sea Salt

Directions

  • Mix ingredients together with a kid-sized rubber spatula until blended & easily spreadable.

Let cool for a few minutes before serving with a heaping spoonful of Sea Salt Vanilla Butter.

This really is such a kid-friendly recipe. It takes very little time from start to finish, involves super fun “play-learning” using their hands {make sure to wash first!!}, leaves them feeling accomplished & successful, as well as provides them with useful baking skills that they can use for the rest of their lives. Happy baking!!!

Until next time ♡ Mama Morozov

Milk + Honey хліб 🍞

Recipes, Uncategorized

It’s no surprise that large families go through large amounts of bread, and food in general. My family is no different! In our home, we typically go through 4-6 loaves of bread a week, easily.

While grabbing that many loaves of bread off a grocery store shelf – especially a bulk warehouse store like Costco – is certainly much more convenient, it isn’t as good tasting or good for your body {it isn’t a secret that America has the worst bread on Earth, in every category}. If you buy better quality bread, it might be better tasting and have better ingredients, but it definitely won’t be better on your wallet.

This bread takes longer to make, but it’s so worth it! You absolutely cannot find bread in any grocery store that is as delicious as homemade. This bread is quality ingredients, great taste, & low-cost! If you keep a well-stocked kitchen & Pantry, you should already have most of these ingredients on hand at any time.

I promise that once you try this bread, you’ll never want to go back to store-bought sandwich bread again!!!

Ingredients

  • 2 1/2 cups King Arthur’s Bread Flour + 3 Tablespoons set aside
  • 3/4 cup Half & Half, putting 2 Tablespoons from that aside.
  • 3 Tablespoons water, + 1 Tablespoon set aside.
  • 1/4 cup raw, local honey
  • 2 Tablespoons Bob’s Red Mill Instant Non-Fat Dry Milk Powder
  • 1 Tablespoon Active Dry Yeast
  • 1 Teaspoon Sea Salt
  • 1 large egg, + 1 yolk set aside
  • 4 Tablespoons salted butter, room temperature, cut into 8 pieces.
  • Flaky Sea Salt, for sprinkling on crust.

Directions

  • Over medium-high heat, whisk together the 3 Tablespoons Bread Flour, 2 Tablespoons Half & Half, and 3 Tablespoons water until a thick, paste-like mixture is formed.
  • Begin slowly whisking in the rest of the Half & Half until mixed in, then whisk in honey until fully dissolved. Remove from heat.
  • Transfer your mixture into the bowl of your Kitchenaid Mixer. Cover mixture with Instant Non-Fat Dry Milk Powder, Active Dry Yeast, egg, and Bread Flour. Set a timer for 10 minutes and let rest.
  • Attach your dough hook & knead on medium speed until a ball of dough is formed. Once formed, begin adding 1 piece of butter at a time until it is fully mixed into the dough ball before adding another until all 8 pieces are incorporated.
  • Grease a large bowl & place dough inside. Cover with plastic wrap, a reusable cloth cover {my favorite}, or just a dish towel if that’s all you have! Place in dark area {like an oven that is turned OFF} for at least 1 hour.
  • After at least 1 hour, grease your 9 x 5 loaf pan. Punch down risen dough and knead again using your hands while you form your dough ball into a Loaf shape to place in your Loaf pan. Cover again, and let rise again in the same dark place for at least 1 more hour.
  • After at least 1 hour, remove from oven & then preheat to 350°F. While oven is preheating, mix together egg yolk with 1 Tablespoon of water using a fork, then paint onto top of risen dough using a silicone pastry brush. Sprinkle sea salt on top to your desire.
  • Bake for 30 minutes, flipping Loaf pan halfway through to get an even, golden crust. {Tip: always set a timer when flipping is required. It’s too easy to forget, especially if you use baking time for kitchen clean up like I do.}
  • Let cool in Loaf pan for about 10-20 minutes, then remove to a wire cooling rack until ready to eat.
  • Slice & Enjoy!!! 🍞

Until next time ♡ Mama Morozov

Vegetarian Savory Farmhouse Muffins

Recipes, Uncategorized

Good morning, world! 

I am enjoying the most delicious, savory, yet, still sweet muffin this morning & had to share the recipe with you so that you can enjoy them with me! They are SO good! Not only are they tasty, but they make a great grab & go Breakfast that is both yummy and filling.

The moistness of the muffin & maple flavor from the vegetarian sausage makes the Muffins taste like pancakes, but hand-held & without mess! The Jalapeños give the perfect amount of heat/flavor. The cheese crust ties the whole thing together & gives a little crunch. They are seriously the PERFECT savory Breakfast muffin if you ask me!

I hope that you enjoy them as much as I do!

Ingredients

  • 3 cups all-purpose flour
  • 3/4 cup sugar
  • 1 tablespoon baking powder
  • 1/2 teaspoon sea salt
  • 1 stick salted butter, melted
  • 3 large eggs
  • 3/4 cup whole milk
  • 1 tablespoon Minced pickled jalapeño
  • 1 tablespoon dried Chives
  • 3/4 cup Shredded Sharp Cheddar, + extra for topping
  • 4 oz cream cheese {warmed 30 seconds.}
  • 3 Morning Star Farms Maple Flavored Veggie Breakfast Sausage patties, warmed.

Directions

  • Preheat oven to 375° & grease 12 count muffin pan, set aside.
  • Heat Morning Star Farms Maple Flavored Veggie Breakfast Sausage by your preferred method on package, Crumble into bite size pieces using a fork, then set aside.
  • In a medium mixing bowl, whisk together: flour, sugar, baking powder, and salt.
  • In a large mixing bowl, whisk together eggs, milk, & melted butter.
  • Pour flour mixture to liquid mixture, stir with a rubber spatula until combined. Fold in jalapeño, cream cheese, Shredded Cheese, and Chives. Finally, fold in vegetarian sausage.
  • Scoop mixture into each muffin tin, filling evenly until all batter is used & top with Shredded Sharp Cheddar Cheese.
  • Bake for 20 minutes. Cool for 5 minutes. Enjoy! 

Until next time ♡ Mama Morozov

Veggie Fried Rice | Fast & Stress-Free Meatless Monday Meals

Recipes, Uncategorized

This week we are extra busy with the kids at VBS, on top of their regular weekly commitments so I’m trying to keep our meals as quick & easy as possible!

This super-easy one skillet Vegetarian Fried Rice takes literally 10 minutes to put together and still tastes great! It is so simple and has very minimal clean up- it’s perfect for busy nights!

Since it is so simple, it’s also a great learning dish for older kids to learn to cook on their own (with adult supervision).

Ingredients

  • Butter, for cooking
  • 4 eggs
  • 1 white onion, diced.
  • 1 tbsp minced garlic
  • 2 20 oz bags frozen rice (white or brown)
  • 1 bag frozen mixed veggies
  • 4 tbsp soy sauce
  • 2 tsp Sesame oil
  • Sesame Seeds (option, for serving)

Easy Cooking

  • Scramble eggs & set aside.
  • While scrambling eggs, microwave the Frozen Rice, set aside. Microwave Frozen Veggies, set aside.
  • Sauté diced onions for a minute or two, add garlic & cook until fragrant.
  • Dump in rice, veggies, & eggs. Add soy sauce & sesame oil, mix until all combined.
  • Enjoy! 🥡

Seriously, it can’t get any easier than that!

Until next time ♡ Mama Morozov

Ukrainian Halva Fairy French Toast

Recipes

Our family loves French Toast. It’s such a delicious way to start your morning, but it can be really messy, especially when little hands get ahold of maple syrup.

This is a really fun & tasty way to switch up your French Toast to keep all the deliciousness, but lose the mess! Plus it’s cute as heck and sprinkles are a guaranteed way to start the morning out with a smile. Plus it’s so simple to make!

The halva is already sweet like candy, but with a nutty/toffee-like flavor to it so maple syrup is not needed for this recipe, but if you can’t imagine French Toast without it (like my Ella), go right ahead and add it!

Ingredients

  • Your Favorite Bread
  • 6 Eggs
  • 2 cups Milk
  • 2 tsp Vanilla Extract
  • Cinnamon (as much or little as you like)
  • Butter
  • Ukrainian Sunflower Seed Halva
  • Rainbow Sprinkles (optional)

Directions

  • Whisk together eggs, milk, cinnamon, & vanilla extract in a bowl and pour into a small square or rectangle dish (but still large enough to fit your bread slices).
  • Dip Bread, flipping after at least 10 seconds to make sure both sides get completely covered.
  • Fry in warmed cast iron skillet on medium low for 2 minutes on each side.
  • Spread butter, spread Ukrainian Halva, top with rainbow Sprinkles.

Enjoy! 🍽

Until next time ♡ Mama Morozov