HAPPY HALLOWEEN 🎃!!! I can’t believe that tomorrow is already November! This year has absolutely blown by abnormally fast. I’m not gonna lie though, this has been a rough (but also rewarding) year & I’m totally ready for a fresh new one.
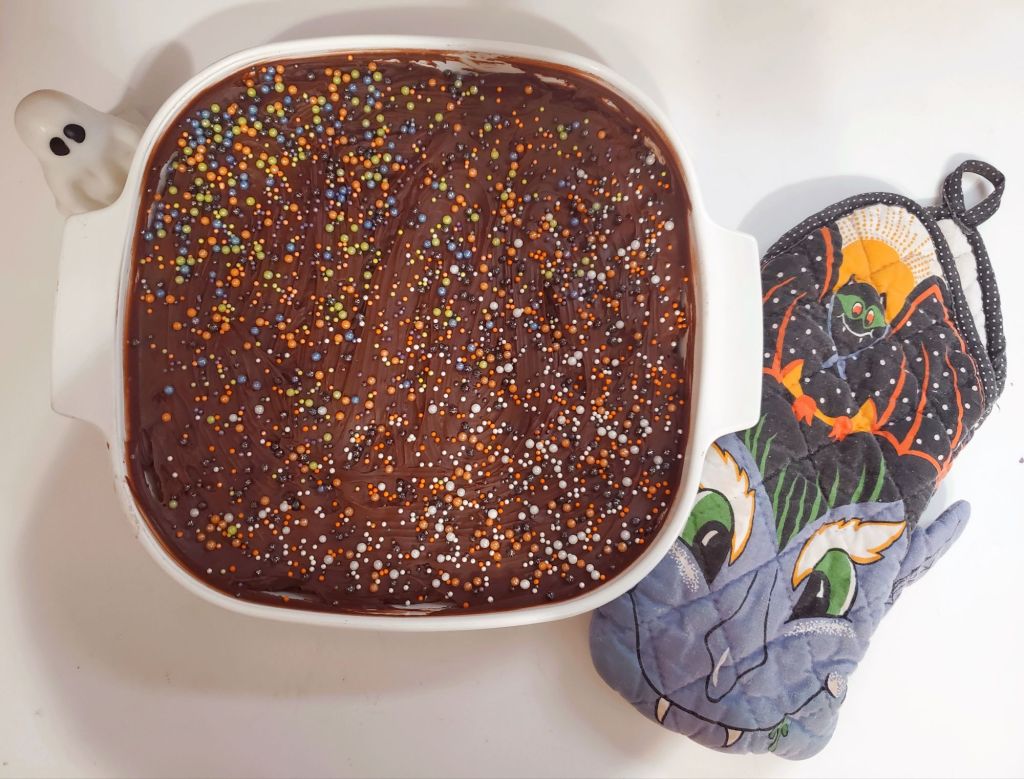
Anywho – These Sourdough Discard Brownies have easily become my favorite brownie ever! Usually I prefer to leave out the Mini M&Ms in this recipe and they are absolutely delicious, but for Halloween we decided to add the Mini M&M candy surprise then topped them with Halloween Sprinkles we had.
Ingredients
1 Stick Salted Butter
1 10oz Bag Semi-Sweet Chocolate Chips
1/2 Cup Cocoa Powder
2 Teaspoons Pure Vanilla Extract
2 Large Eggs, + 1 Egg Yolk
1 Cup Sugar
1/2 Cup Brown Sugar
1 Cup All-Purpose Flour
1 Teaspoon Salt
1/2 Cup Mini M&Ms (or other candy of choice)
Directions
Preheat oven to 350° and grease a 10×10 square baking dish.
On low heat, melt the butter. Once melted stir in chocolate chips, cocoa powder, and vanilla extract. Once everything is smooth, remove from heat and set aside.
In the bowl of your electric mixer, beat together the eggs & sugars for 5 minutes. Add the sourdough discard and chocolate mixture and beat again for another 5 minutes. Add flour and salt, and mix together until fully combined on a low setting.
Remove bowl from stand mixer and fold in Mini M&Ms.
Pour into prepared baking dish and bake for 35 minutes at 350°
Cool for at least 30 minutes before adding frosting & Halloween Sprinkles or other decorations.
Serve & Enjoy!
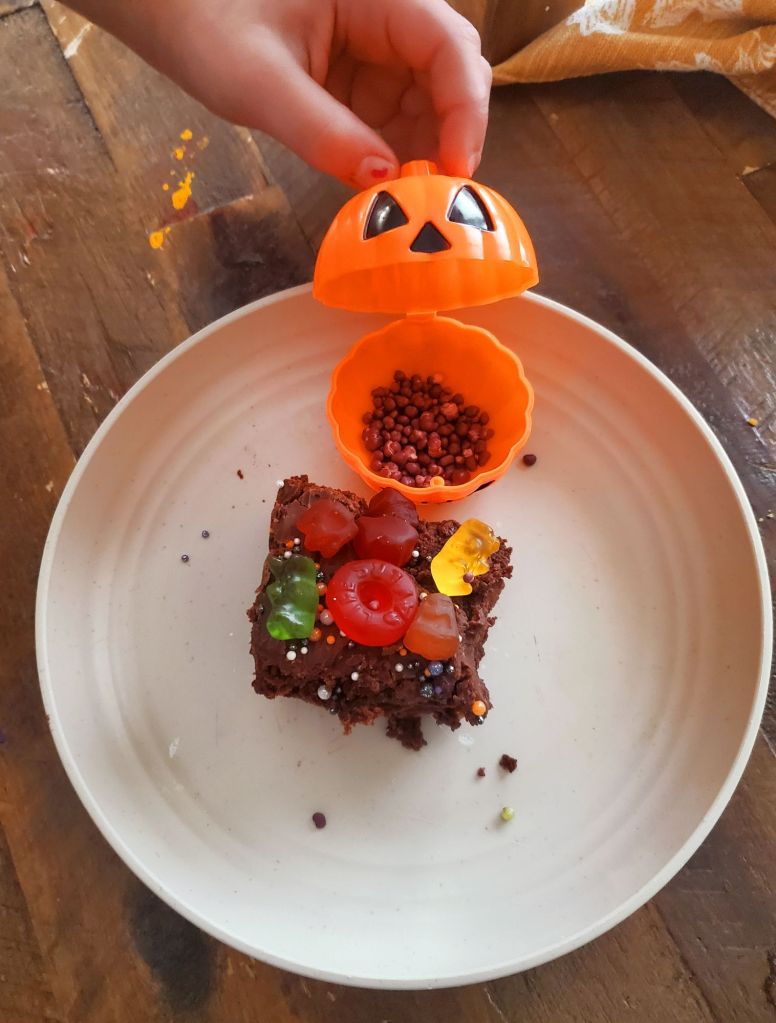
The kids decided to decorate theirs with some of the Halloween candy they received too. They were definitely a hit for Halloween!
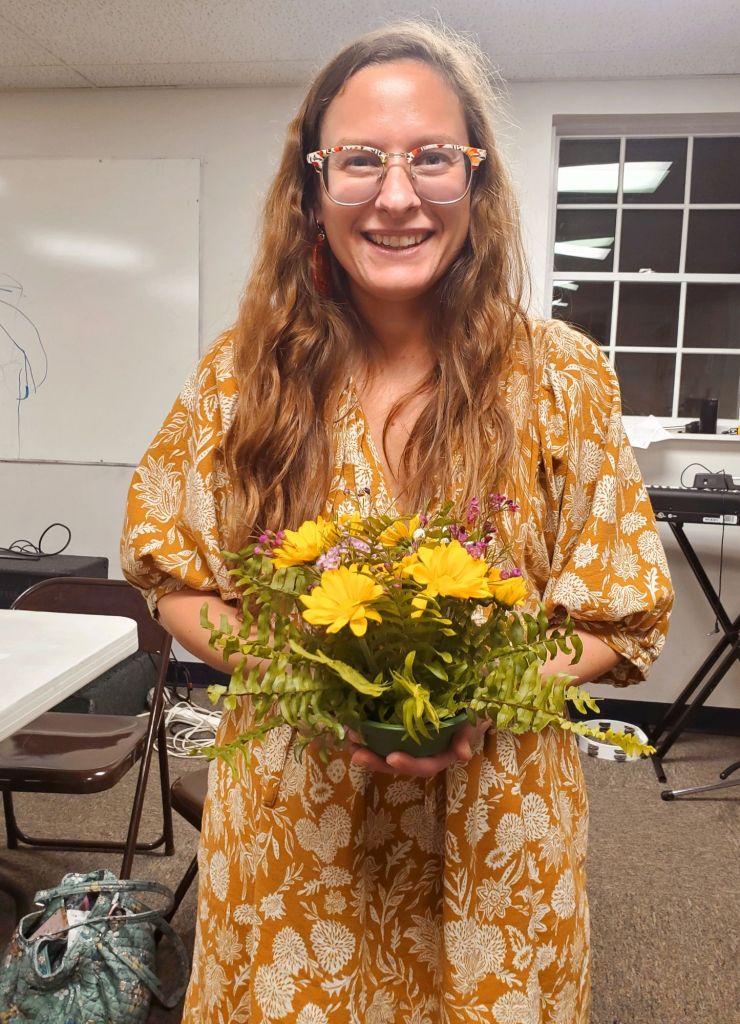
Our Grace Girls meeting this week was learning about floral arrangements, how to create one, and when it would be useful.
This was a really great topic for us! In fact, I have felt like all of the classes we have attended lately have been aligning perfectly with our new venture to open our general store – Morozov Mini Market. Flower Presses, Soap Making, Arranging Flowers. The universe is sending very clear messages to me right now, preparing us for our new journey.
When we arrived, the room was set up with a large table in front for the flowers to be visibly arranged on so everyone could see what we were working with.
The first thing we did was soak our “oasis” foams in buckets while we went over our lesson. Our teacher tonight, Ms. Kathy, had grown up creating floral arrangements with her grandmother for their church & has taken 3 professional floral arrangement classes. During the lesson we discussed when people use flowers:
Weddings, funerals, welcome home celebrations, sick/in hospital, new baby, holidays, house warming/thanks for inviting me gift, birthdays, etc.
We also went over tips such as:
💐 Removing the lower flowers so they don’t rot.
💐 The little packets that come packaged in store-bought flower bouquets aren’t meant to be dumped at once, they are meant to be used throughout water changes as well to keep the flowers alive longer.
💐 Always trim the stems, when you get the flowers and when you change the water.
💐 You can check a flowers freshness by pinching the stem gently under the base of the flower. The more tough it is, the more fresh the flower.
💐 Don’t bend the stems
💐 Always use a lot of greenery to fill in the vase or arrangement. The more the better.
Once we finished our lesson, we collected our oasis from the buckets of water and received our flowers that we were to work with.
I love these little reusable “buckets” they come in. The buckets are re-useable, but the standard oasis foam is not, due to bacterial growth. The unused foam rounds should be stored in a dark & dry place so they don’t get damaged from sunlight or dampness. After some research I did find that oasis recently designed a more eco-friendly reuseable option, Terrabrick.
I had no idea that these were able to be used with real flowers. I only ever see then at stores like Michael’s or Hobby Lobby next to the fake flowers. I thought they were only for fake ones, but now that I know they are for real flowers too, it’s a total game changer for me! My options are endless!
We began grouping into small piles of greenery & different types of flowers.
Everyone was given greenery, yellow flowers, and purple flowers. There was light and dark purple to chose from, or you could do a little of both. There were a few different yellows to work with. There was a very small amount of white to work with also.
At the end of the night, each girl got to choose a special flower from the vase arrangement display to bring home. We already have ours set up in the propagation station hoping to get some roots growing and new flower varieties to add to our gardens next Spring for free.
Once we were ready, we began filling in our oasis with greenery. You need to remove about 2 inches of the lowest leaves to be able to stick the stem into the oasis. Make sure to have your compost bin ready!
You’ll want to stick them in all over the sides of the oasis, the outer ring of the top of the oasis, and put some aside for filling in the center. For those center pieces of greenery, try to find the pieces that stick out to you the most: maybe the size, the way the leaves are shaped, maybe they are more fun looking or bend in an interesting way. Just let the greenery work it’s magic.
For real, the more greenery, the more beautiful & full-looking it will be. Even if it looks like it’s going to be too much, it’s not.
After adding greenery, we filled in the center with our flowers.
🌿 Start by placing one flower directly in the center then the rest of the flowers surrounding the center flower, spread out as evenly as possible, working with one color at a time.
🌿 Add smaller flowers or accent pieces.
🌿 Then fill in the remaining spaces with the remaining greenery you set aside.
I love that each girls arrangement looked so different even though we all used the same flowers, with slight variations in color. It showed their creativity.
Athena did not follow directions on this lesson, but that’s kind of who she is in general. She lives outside the box and does not any want limitations in art. She has her own visions, and will see that they are carried out. She is a true artist & free-spirit.
Out of all the girls, Mia holds the most love and appreciation for flowers & nature. At home she loves putting together bouquets for her favorite people & loves pointing out beautiful flowers wherever we go. She loudly exclaims “this one is BEAUTIFUL!!!” anytime she finds out she adores. She’s already asked for her own flower press for all of the flowers she falls in love with.
I was really happy that the moms were also able to participate in creating floral arrangements. A lot of the activities so far have been for only the girls, or mom supervision required (learning knife skills or building/cooking over a fire). I had SO much fun! It was really exciting for me to get to make my own rather than help the girls build theirs. It also gave them much more creative freedom with focusing on my own arrangement instead of how theirs is turning out.
I absolutely adore how it looks & I am SO happy to learn how to perfect my bouquets & now, arrangements.
This was such a great class, I feel like we learned so much. Ms. Kathy did such a great & thoughful job putting this lesson together for us and it was truly a blessing. This is a skill that our family will definitely be using for the rest of our lives & I am so happy that we are learning these skills together as a family – that makes it even more special.
The arrangements look beautiful on our table & I love that they are created with love by us.
I was offered one of the ferns to take home to continue creating more arrangements with. Ms. Kathy said they were at the end of their cycle, but I plan to keep it inside through the winter, hopefully giving it a much longer life span and many more beautiful arrangements.
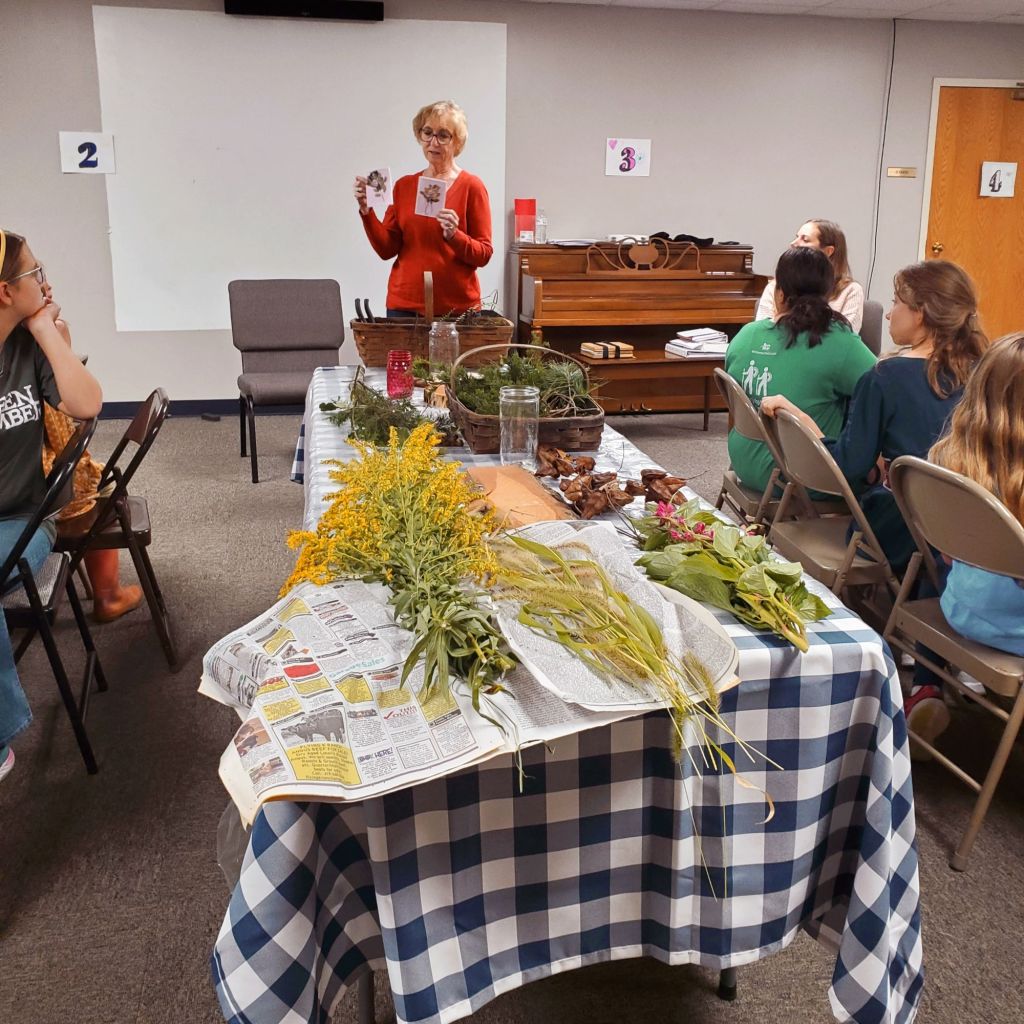
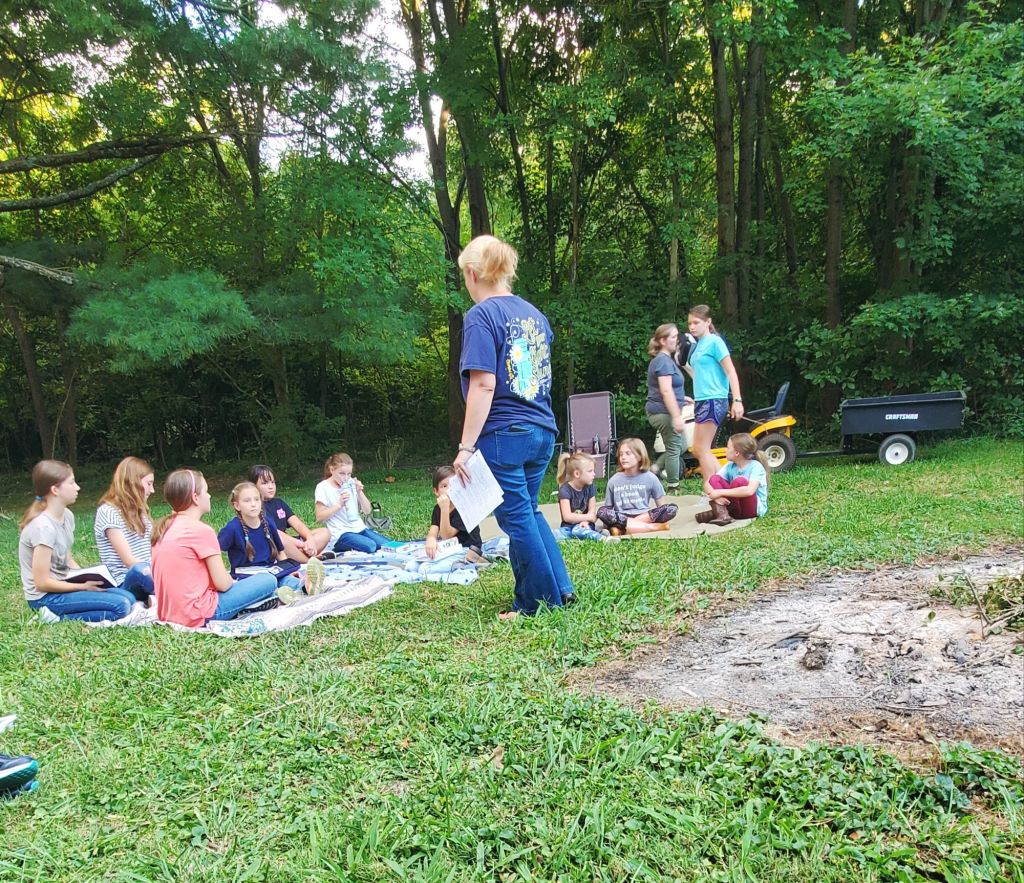
We had our 3rd Grace Girls meeting this week. We learned about foraging nature to use to craft & decorate with. Mrs. Mary led this topic.
The original plan had been to head out into the woods to forage nature ourselves, but because of the recent heavy storms we have been having as a result of Hurricane Helene, along with the early darkness of Fall evenings, some of the moms brought the nature from their backyards inside to us.
The girls had so much fun “foraging” for nature items that stood out to them to decorate a tablescape with. I thought it was funny that we just decorated our table using Nature last week to celebrate the Autumn Equinox and had to share ours with Mrs. Mary. I love that she also celebrates nature and prioritizes creating family traditions, like me, and that she didn’t judge me for celebrating pagan holidays.
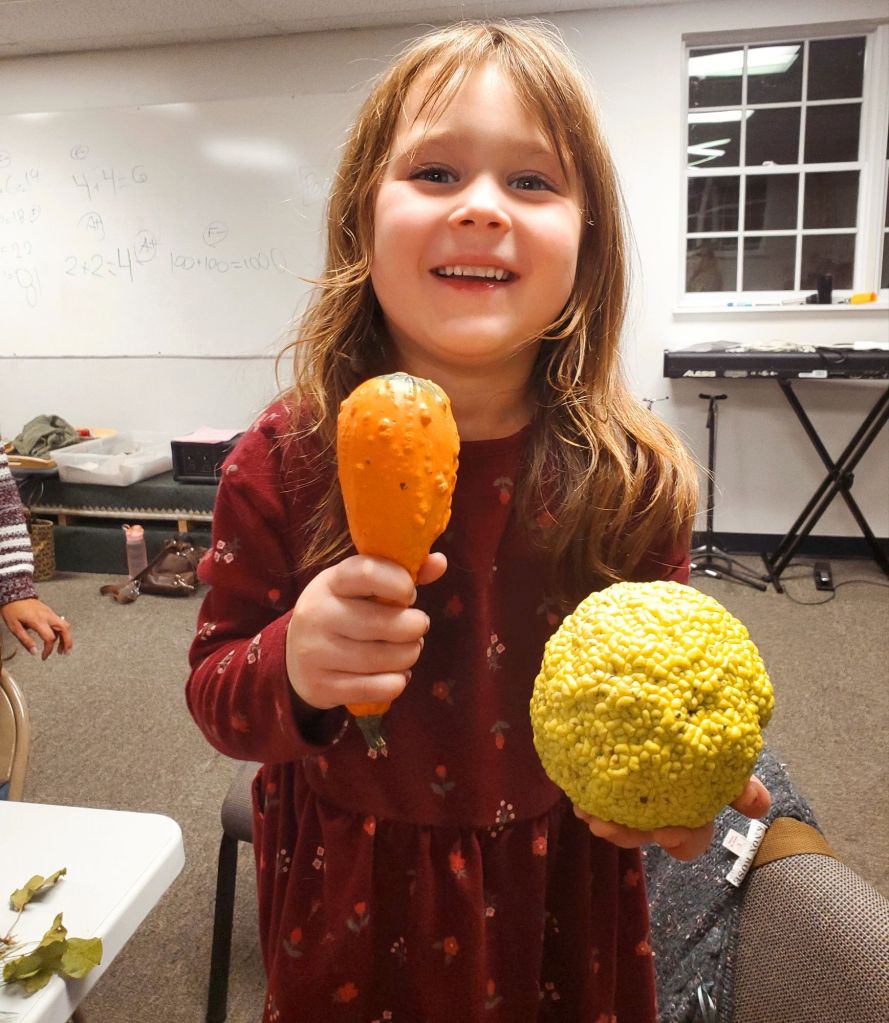
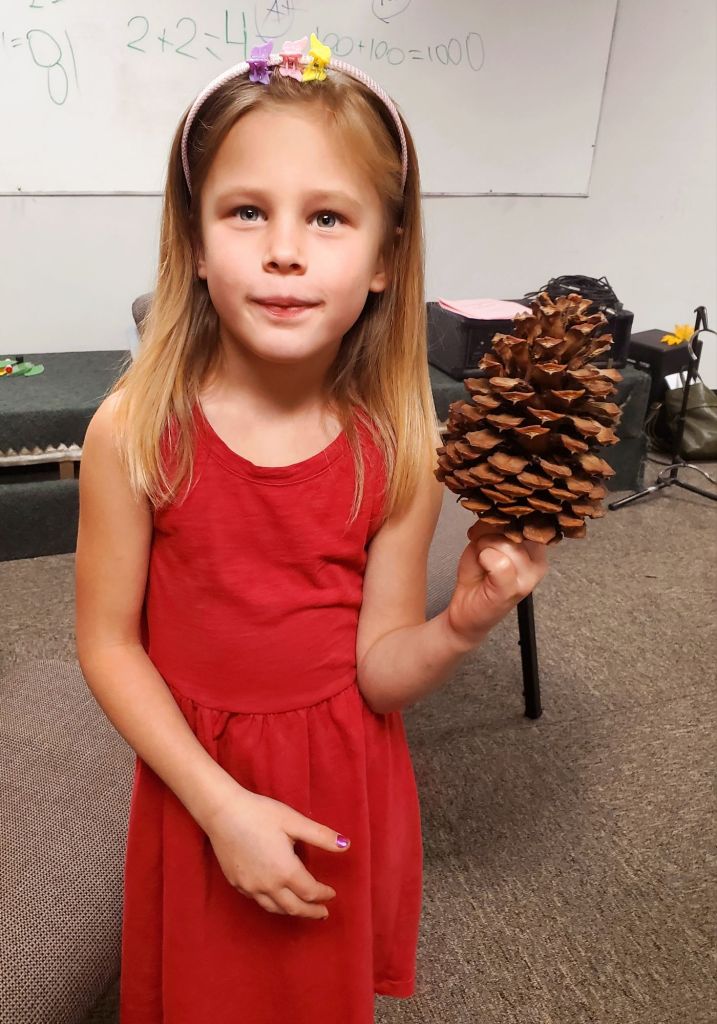
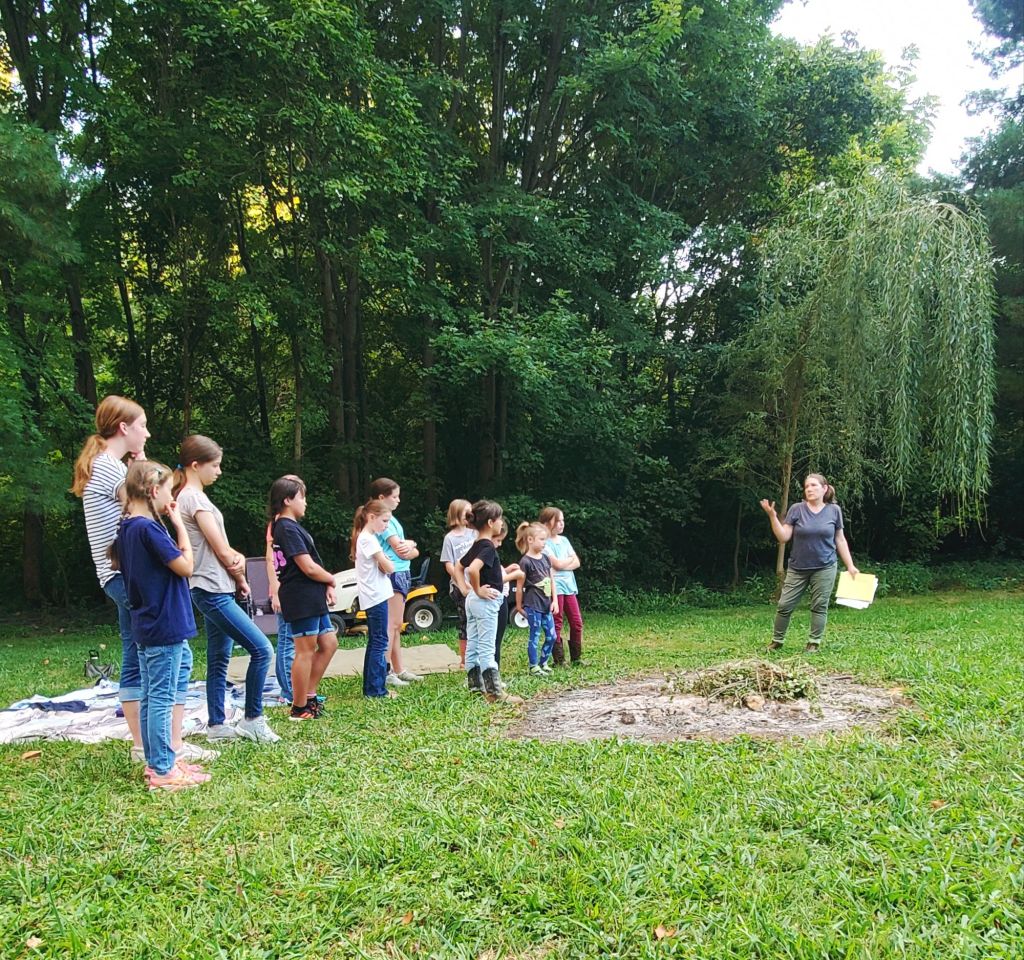
There was a really neat variety of nature to admire. There were pumpkins, gourds, okra, flowers, pine, leaves, plants, wheat, & pinecone.
I got some new inspiration also! I’d love to get some tree stumps to use for my centerpieces! I have a faux one from a cakestand that I put my wedding cake on, but the real ones are way cooler. I didn’t get a photo, but she also had a long, more rectangle-shaped log piece that was perfect for this!!!
They had fun trying out different methods. Some used baskets, some used tree stump rounds or rectangles, some used Mason Jars or directly on the table itself.
I think Athena did really good for her first time. She’s definitely the youngest girl in the group currently, since she just turned 5 this same week and that is the minimum age requirement.
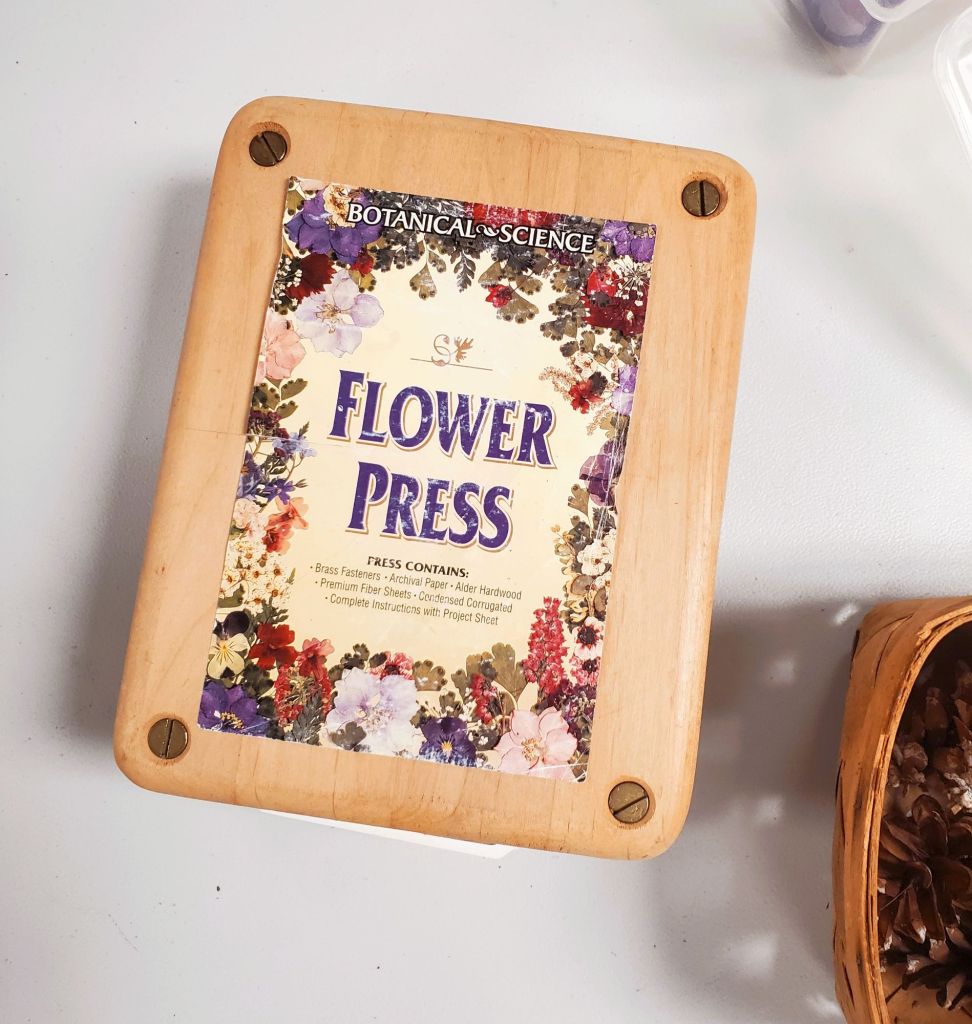
The next part of our night was learning about Flower Presses and getting to use them and the beautiful flowers & plants that Mrs. Mary had pressed for us.
As an old fashioned girl, I always just used heavy books to press my flowers! This was my first time seeing an actual press, and I’m officially obsessed.
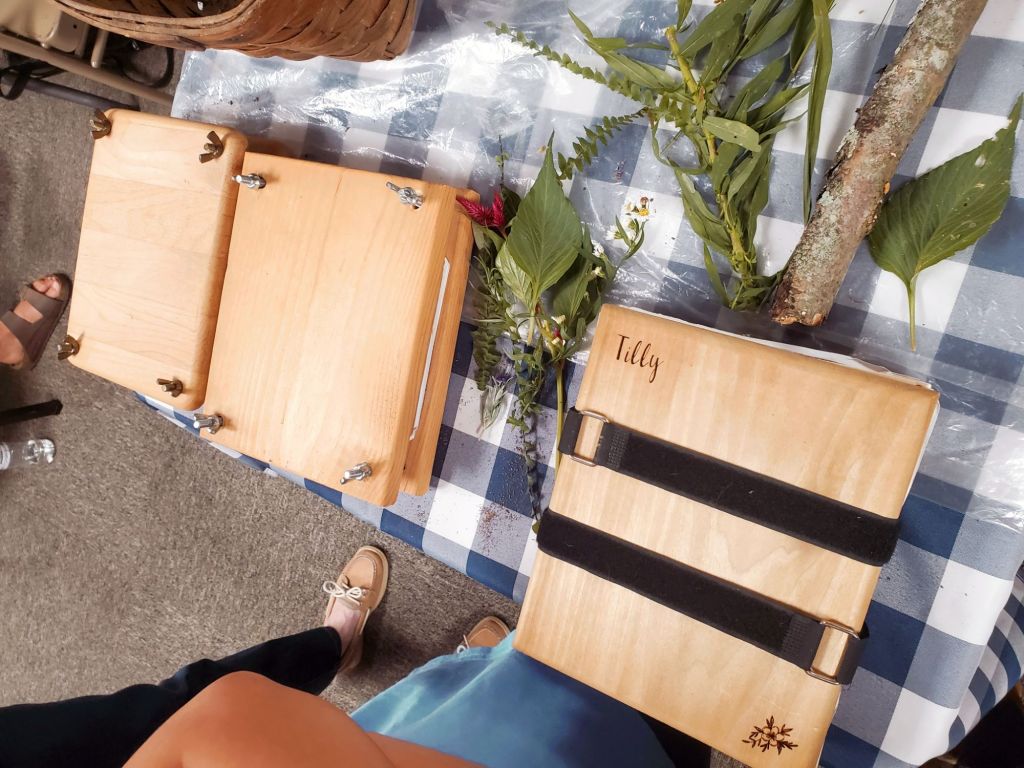
I literally sped directly home to beg my husband to make me a simple flower press over the weekend, if we have wood pieces to spare that could work for this. The screws we definitely have, and I can easily obtain thick cardboard from my work, repurposing extra wine boxes.
One of the girls’ mom’s made her the most beautiful flower press for a gift with her name engraved in the wood, and straps to keep it closed instead of screws for much easier accessibility. She said the straps were very affordable from Amazon, so that’s an option I can consider in the future too.
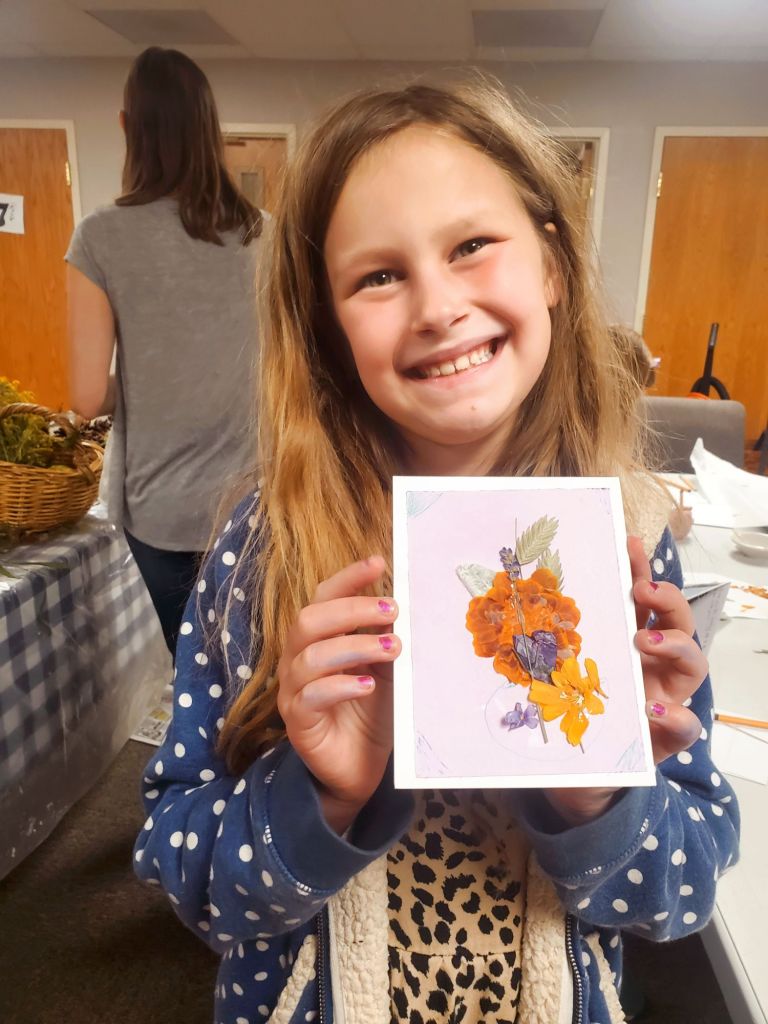
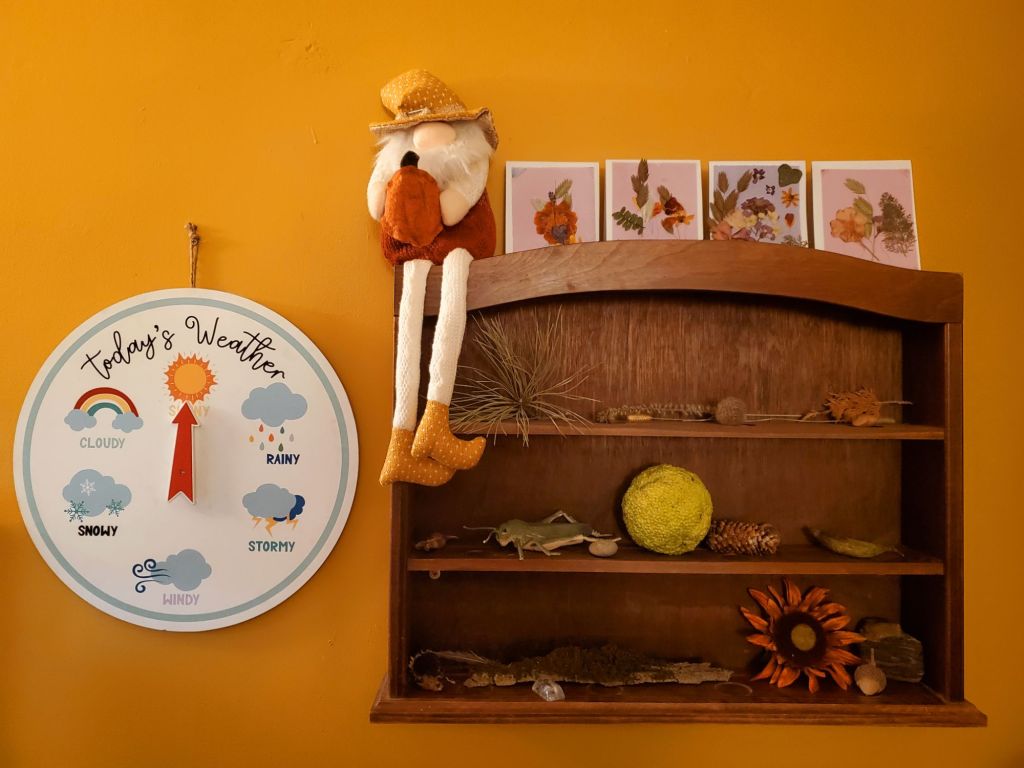
She printed out examples for us to use the pressed flowers to make a card for someone we love, but I decided to hold onto our first pressed flower crafts that we made together as a family. I love the way they turned out.
The pressed leaves looked so cool & still so fresh! The Lambs Ear was still so soft & velvety, and even shone a bit in the light.
The girls picked the color of the cardstock they wanted to use as the background for their cards. Then they chose their pressed nature they wanted to use.
Some girls drew vases, others made small photos. Some decorated their envelopes or inside of the cards too. I really enjoy seeing each girls creativity & ideas. I love that these tiny nature-loving seeds are being planted in these girls heads at such young ages.
I also love how many other moms in the group make nature a priority in their families lives & homeschooling. There is such a huge disconnect in most of “society’s children” from nature, to the point where it is now considered a “disorder.” Nature really is the greatest gift our Creator ever created for us. Nature provides everything a human needs, and not enough people truly celebrate Mother Nature & definitely not enough give back to her in this technology-driven world. My wish for each of these girls is that the seeds planted continues to grow strong in their love & appreciation for nature and that they continue to grow a deeper connection with Mother Nature as they learn more about her & her blessings she provides to us.
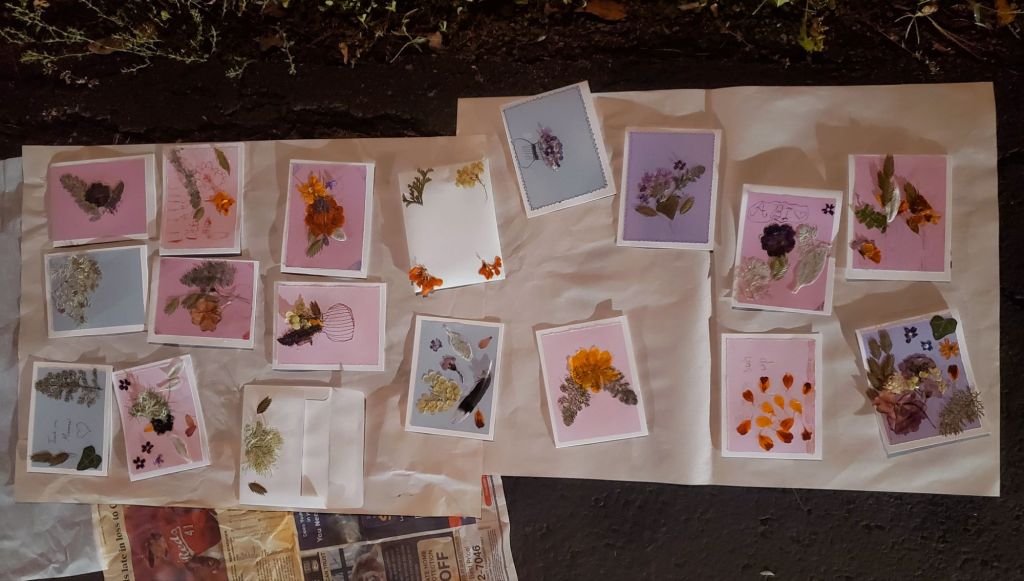
These were our cards. They had extras and immediately asked me if I would like to make one too because they knew it would be “right up my alley.” Since I was the very last person to begin, with such a late start I just picked whatever was left that spoke out to me. I’d love to do this again with more time to plan what I want to create! The wheels in my brain are already going crazy with all the ideas for how perfect this hobby is to go with our other gardening projects & future plans.
I placed them above our newest Nature Wall. I thought it was the perfect spot for them & love how they look up there. I’m so glad we attended this meeting – it was such a good one!
Happy October!!! Yesterday (October 1st) was Athena’s 5th birthday & I gotta say, that for being very last minute, not very well planned, & on an extremely tight budget, I think I did a great job pulling it together…… “with a little help from my friends”, as The Beatles would say.
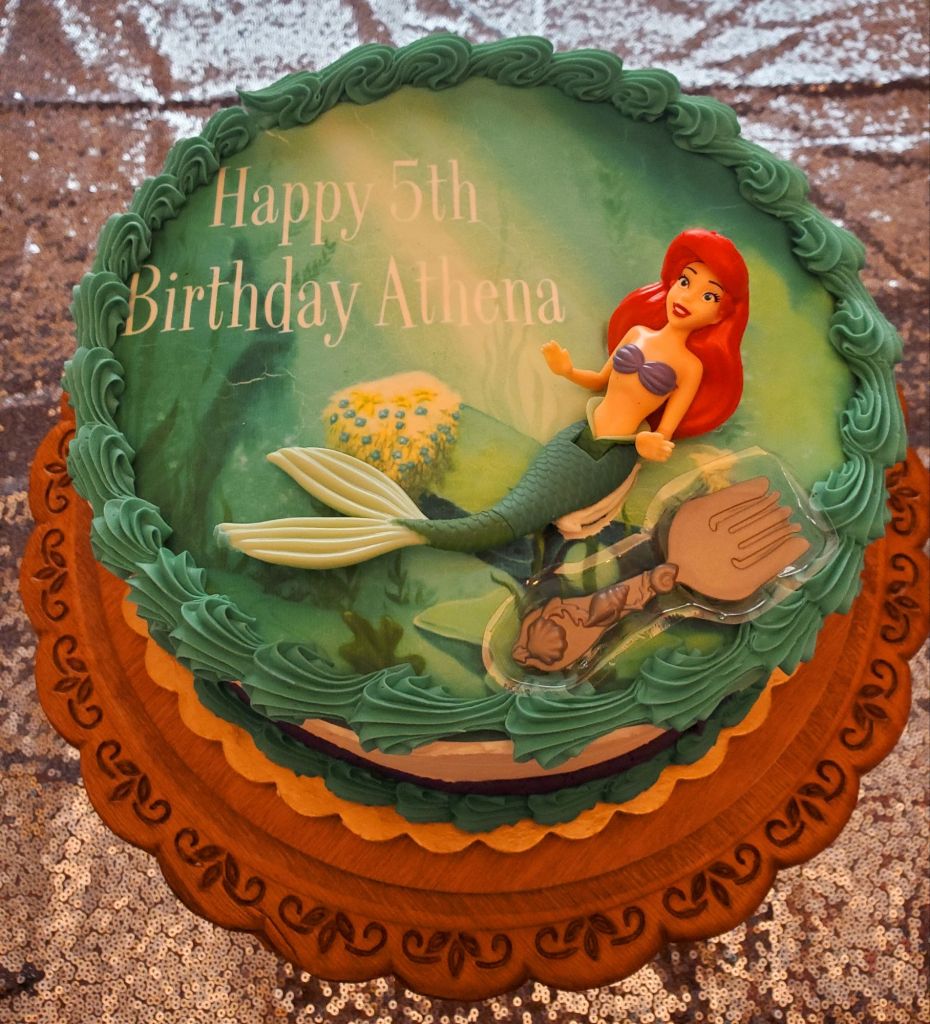
Here is how the room looked when she woke up. I wanted her to be surprised & happy as soon as she came into the dining room. She had asked for an Ariel theme.
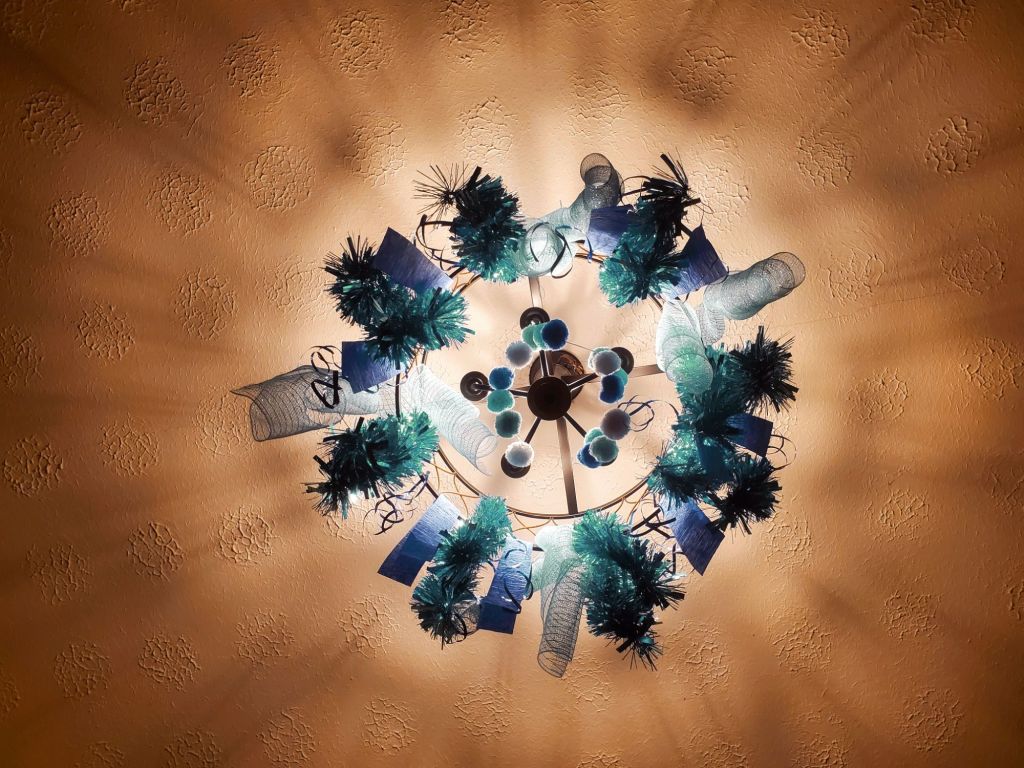
I went to Dollar Tree ($1.25 Store now, and all items are no longer that price either. They now offer $5 and $10 items 🙀) and grabbed a small variety ribbon & streamers in different shades of blue. I hung them from the chandelier to resemble water.
I reused this ball garland inside from one of Sasha’s birthdays that was a Frozen theme and wrapped it around the lights in the center.
I thought this chandelier decor looked really beautiful and all around cost less than $5 to put together.
My best friend, Kara, ordered this Little Mermaid garland to hang in the room for her. Mia & I put it together and hung it from the curtain rod in-between the dining room & living room. It really pulled the theme together. She also ordered some gifts for Athena “from us.”
I really appreciate her so much. Not only did she go above & beyond to help me throw Athena a party she wanted & deserves, but she also pulled me out of the depression hole that I had been slowly sinking further into. I’m really lucky to have her.
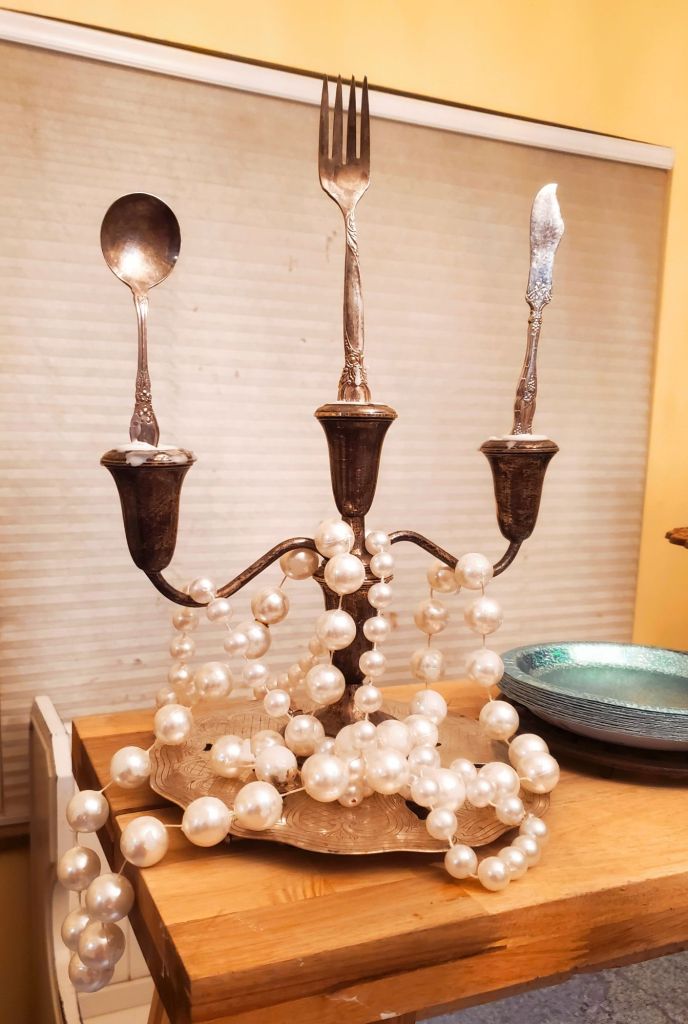
Mia & I also made this decoration using an old school candelabra. I came across the idea on Pinterest.
Over the summer I picked up a box of super cool, old metal teaset items for my kids to play with in their backyard playhouse, but my husband convinced me to stash them away to one day attempt to restore them, but they have sat in a tote in my closet untouched.
I pulled out the tote, grabbed the candelabra, and all the utensils. I picked the ones that were smallest and most light-weight. I lit some candles and let the wax pool up, then dumped into the candle holder spot with each utensil and held it in place until the wax cooled. I repeated this process until the utensils were safely stuck in place and each holder was completely full of wax.
I then asked Grammy Kat if she had any pretend pearls I could use to drape around it. She did, of course.
For breakfast, I made homemade donuts and icing and let the kids decorate their own donut using Sprinkles I already had. This was mine.
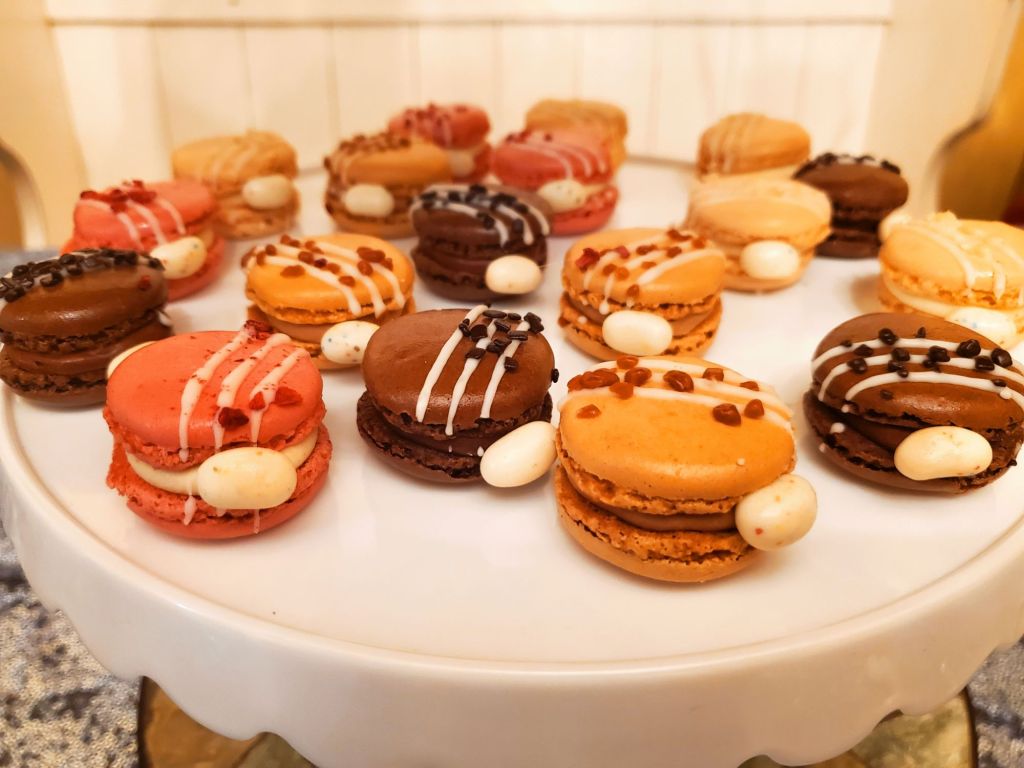
For a special treat, we made these little “oysters” which were pre-made macaroons with a birthday-cake flavored “pearl” jellybean.
I ordered her cake from Kroger for $22. I usually prefer to make my own cakes, but with everything going on lately I really wanted to have a stress-free day for her birthday so that I could be fully present with her. It made her happy & that’s what really matters.
My parents & Grammy Kat stopped by to celebrate Athena during the day.
For dinner, she requested “Dad’s burgers” so he grilled burgers for the family & a Veggie burger for me.
After dinner, we went to see Kozak Siromaha in a small concert hosted by UNWLA & the Ukrainian community. It was our first Ukrainian concert experience by a famous artist.
After the concert, we went home to sing happy birthday to Athena & eat cake.
I can’t believe she’s already 5! It seems like she was just a baby!!! I’m so grateful for these last 5 years with her. She is always smiling and lights up every room she enters. She’s so kind & so thoughtful. She truly makes the world a brighter place. I’m so grateful I get to be her mama.
We welcomed the shifting of seasons into Fall yesterday with a Mabon Celebration. If you do not know what Mabon is, it is the official day of Autumn’s beginning and a day that we are supposed to give thanks to Mother Earth for all that she gave us over this last season of summer.
It is a time to reflect and relax after working hard all summer. Let go of what is no longer serving you or your soul. Let go of toxic relationships that are holding you back, as well let go of bad habits & self-destructive thoughts in yourself. Finish up the tasks you started, but have not yet completed. Reflect on goals you’ve accomplished, focus on the goals you have set for yourself that you still need to work towards, or set new ones all together.
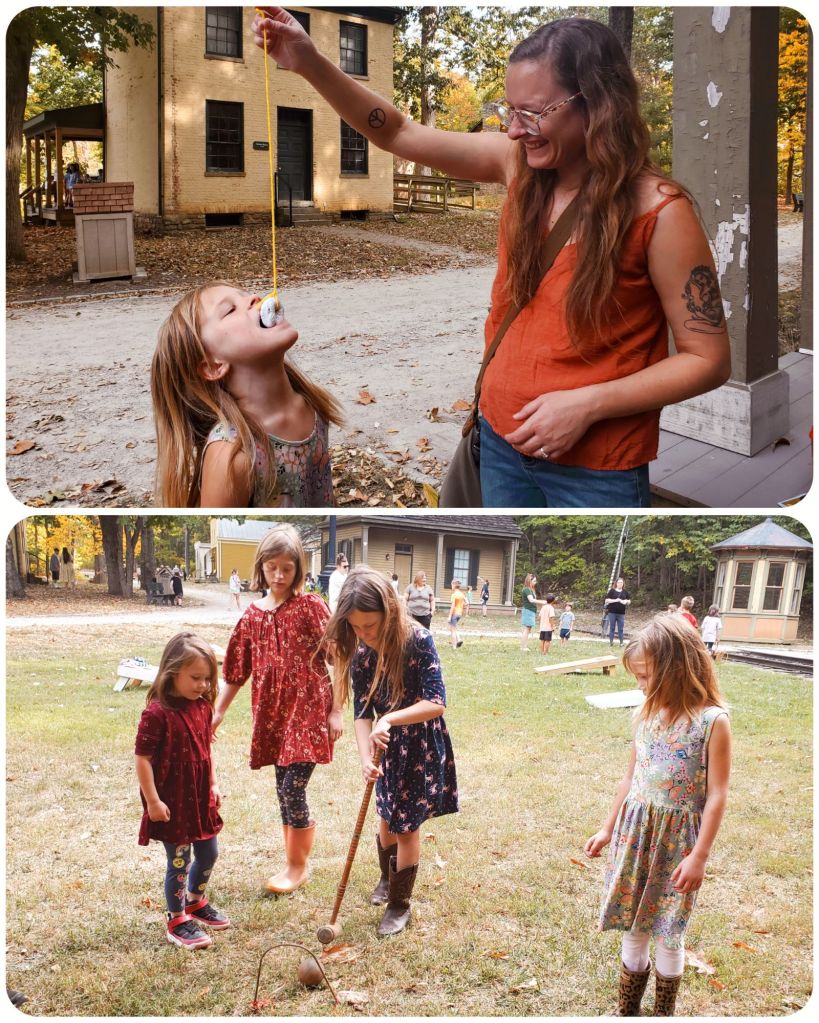
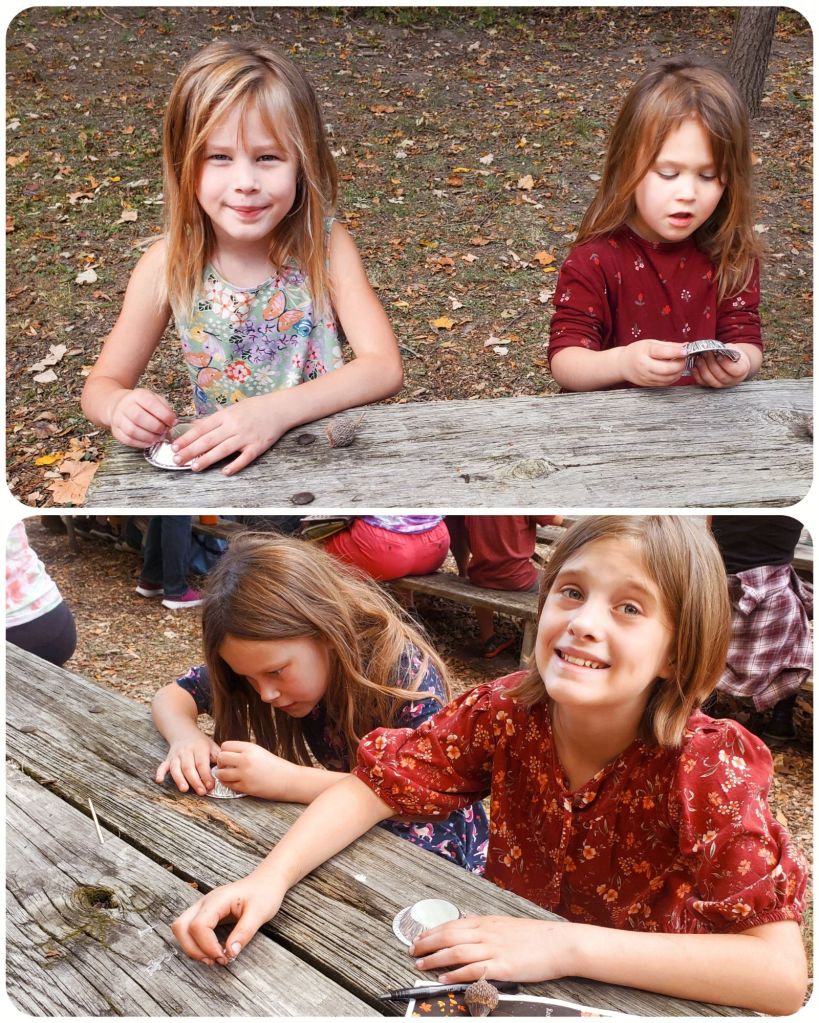
We began our Fall festivities with a field trip attending the Homeschool Harvest Festival in Heritage Village.
We played old-fashioned games like Bobbing For Donuts. Bobbing For Apples would be a more historically accurate game, but for sanitary purposes donuts was the modern chosen object. It was still really cute, and was actually in one of my books that I use as inspiration for celebrating each season. I think that Bobbing For Apples for would still be a fun fall activity to try together – maybe as a family game night.
I loved the old time vibes mixed with all of the nature. The leaves were as big as the younger girls heads! There were so many different kinds of acorns. We collected a few of our favorite things for our Fall dinner table for our Autumn Feast.
We learned about pickling foods; why we do it and what different types of foods that people would pickle to preserve. My girls are already pros at this, and they were the only children who knew what Beets were.
We learned about using a meat smoker to smoke meat and that back then it would take 2-3 days before it was finished smoking. That would have been my husband’s favorite part of the festival.
We also learned how to make bread in the brick bread oven and Cornbread over a hearth stove. It reminded us of our latest Grace Girls meeting where we learned to make pizza over a fire. Making bread was an entire day of work from early in the morning until the sun was down, making Loaf after Loaf for a weeks worth of bread. The family who lived in that home {before it was a museum} had 15 children, so they needed a lot of bread!
It made me really grateful that today I can spread my bread baking out more than one day and that I don’t have to wear full length, full sleeve dresses with bonnets while I bake. I’d be baking myself in that attire.
During question time, one child asked how they are supposed to microwave their food.
We learned about trains and different ways of transportation since cars did not exist.
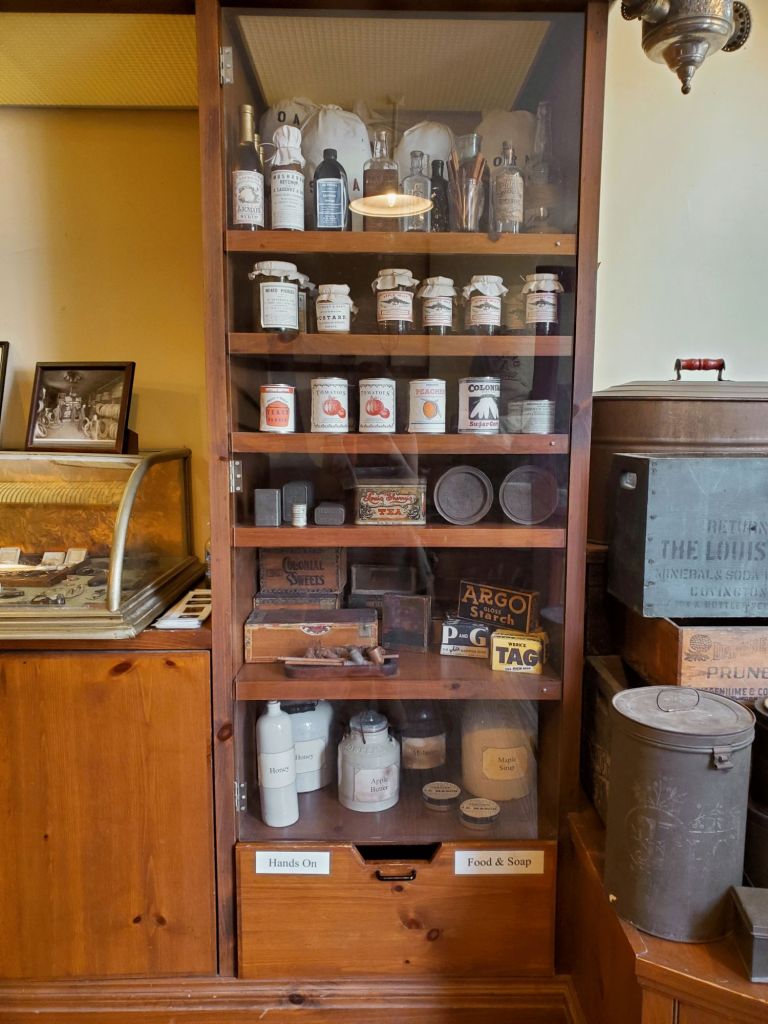
We learned about old fashioned tools, made a pumpkin on the printing press, and explored the General Store. We all really enjoyed looking at all of the antique items. They were things we’d still want today!
Their pumpkins were so cute. I think I’m going to laminate them and find a way to use them for decor. Another possibility would be to use them in our Fall Sale.
We learned about how doctors used leeches as medicine to suck the bad blood out of a patient. Each of the girls got a gummy leech.
I really loved The General Store and this Pantry. I love vintage things so much amd honestly prefer them over any of the cheaply made things today. The things back then were meant to last. You’d buy once and it would last multiple lifetimes, passed down through generations, still working. In fact, everything in the museum was still in perfect condition. The things today are meant to last one to a couple uses then either breaks or you must soon replace with a newer model to keep up. I can’t stand this way of life.
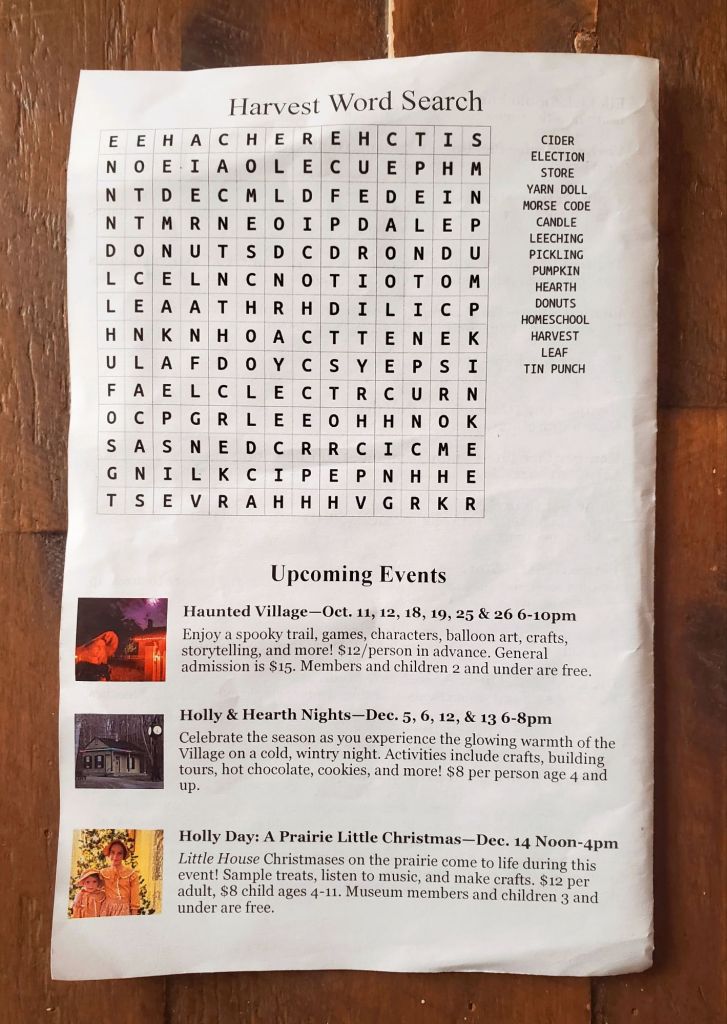
I loved how the store is set up. All of the bottom rows and anything out are meant for children to play with, and everything behind the glass is meant only for looking at. They had so much fun playing with everything and doing the scavenger hunt.
The girls learned about how electricity was not available, so people had to make their own metal lanterns to keep a candle in once the sun went down. They would push holes in the metal in pretty designs for the light to shine through. They made tin ornaments to represent the candles.
The girls didn’t want to stay for the Yarn Dolls. The line was ridiculously long. They saw some children holding theirs, and made a statement that the Corn Husk Dolls that they made in Grace Girls was a lot better to make than the Yarn. I think Yarn was a lot cheaper, faster, and easier though so for a big event like this, that would make more sense.
A cute throwback from 2022
We also didn’t get to do candle dipping which is one I was looking forward to. We were under a heat advisory by the Park Rangers and weren’t allowed to do an outdoor fire. They prepared take-home kits for 400 children, but ran out much quicker than expected. Even though we didn’t get a kit, that makes me really happy that so many more families have decided to join the homeschool world this year.
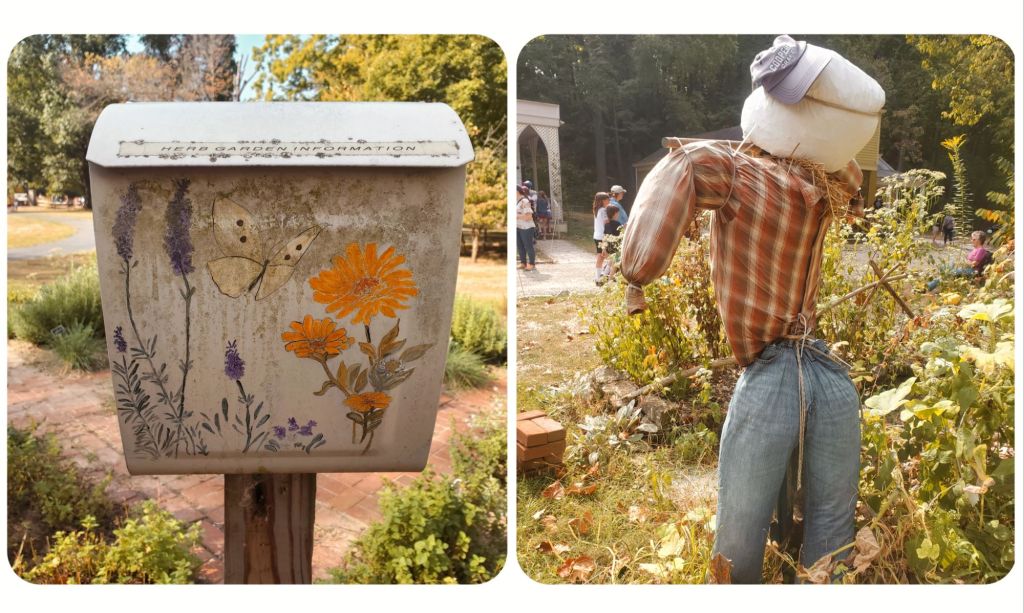
I really want to add a scarecrow to our garden next year. I think they are so fun. I also really loved this box that was supposed to contain Herb Garden Information, but instead it contained spiderwebs. It was still really cute and would be fun to add something similiar somewhere in my front yard as maybe a Seed Sharing Box.
We enjoyed ourselves and are glad we went. It was a nice way to begin this new Fall season together. After going, I realized that I give my kids a really good blend of both the old world, and the more modern one as far as homemaking goes.
The upcoming events all sound really fun. I’m hoping for us to be able to attend at least one of them.
I also took the time to put our Fall poem we are memorizing in Ukrainian School in a beautiful layout so that I was able to print it out and hang it up for us to read daily with our Sing a Song of Seasons poem. It helps me a lot to read along to what I am listening to in Ukrainian language. Without the words, I can get a bit lost.
The Decor
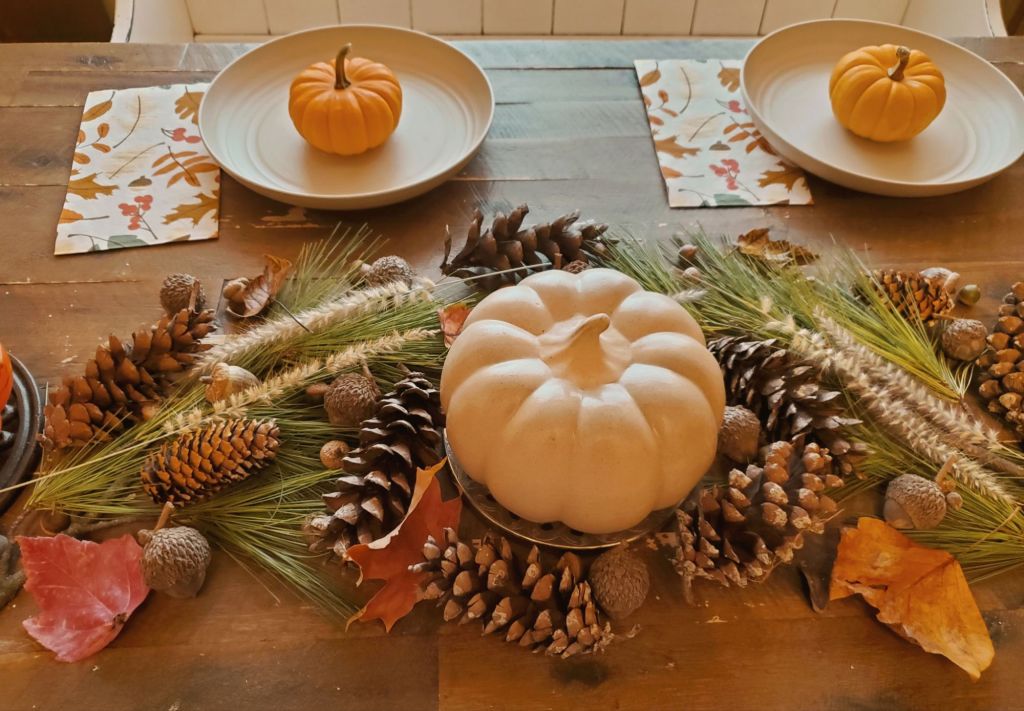
We collected nature to create our tablescape. I really wanted to decorate without buying new items & show that you really don’t need to spend any money at all and still have a beautiful Fall home.
I decluttered most of my holiday stuff last year. As much as I love decorating, it bothers me that we only use these items for a very small fraction of the year while they sit in a bin in storage taking up a lot of valuable space for the rest of the year. This is a really great way to still decorate and not have to store the items once we are finished with them. Instead, we can just move some to our Nature Walls & the rest right into our compost to move on to its next life phase in our garden.
I think it ended up looking really beautiful and it meant more that we collected the nature together as a family than just bought at a store. It is just way more us.
The Menu:
The rest of the family had Pork Chops with apples, onions, and cornbread stuffing; I made Vegetarian Apple & Sage Sausage (Field Roast brand) for myself with the same side of stuffing mixture. It was my first time having apples in my stuffing and it was seriously a game changer!!!
The sides were Sweet Potato Casserole, Harvest Salad, & Sourdough Discard Sweet Rolls.
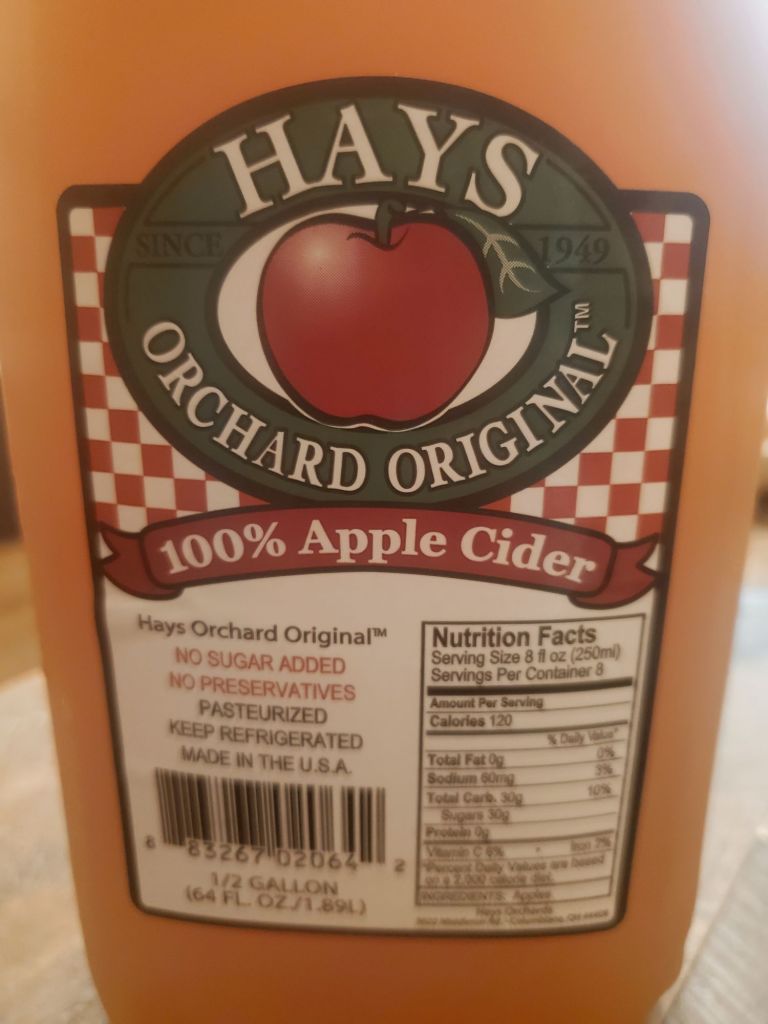
To drink, we had Apple Cider.
All of the different Fall flavors came together SOO deliciously! I’m definitely going to be remaking a couple of these dishes again at Thanksgiving!!!
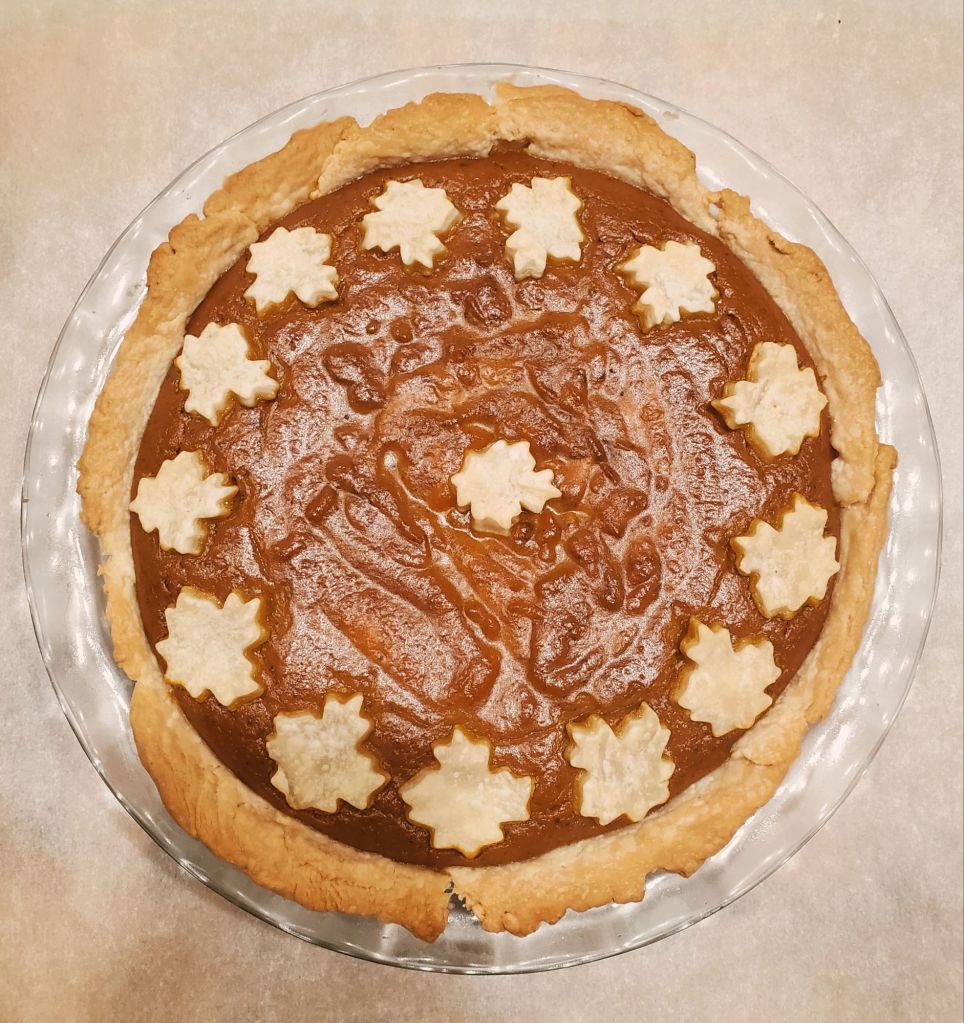
For dessert, I made a Pumpkin Pie with homemade whipped cream to go with it. I loved making the little leaves for the crust and will definitely be doing that again, but with way more leaves next time. I loved the flavor of this pie, but not the texture so I’ll be re-working that in the coming weeks to prepare for Thanksgiving.
We have so many more fun Fall activities planned this year. I really want to take in each day of this season and make it extra special for our family. The last year has really been a struggle for us financially & instead of continuing to live in constant worry, I really want to slow down, live in gratitude, and begin appreciating what this last year has blessed us with instead of money, because it’s been so much. We may not have any money, but we are so very rich in all the right ways.
This week we had our second Grace Girls meeting of the new school year. Our last meeting was learning how to properly set a table.
We started our night out with the devotion reading and a light discussion about what we read in our Bright Lights curriculum.
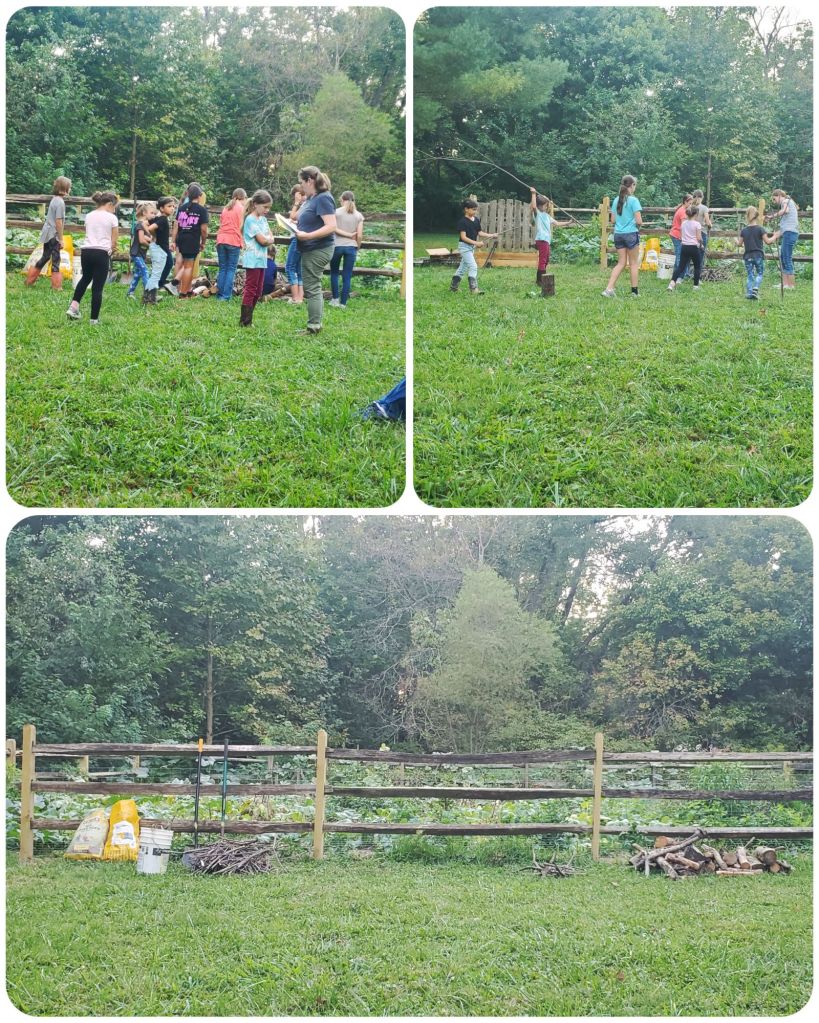
The meeting was hosted again by Ms. Darla and she taught the girls a lot about Fire Safety.
We learned what to wear and not wear around a fire. You want to wear jeans and short sleeves preferably. No flowy tops, dresses, or skirts. Hair must be secured back safely away from your face or cut short so it doesn’t catch on fire.
The most important question to always ask before building a fire is if it is legal to for a fire to be built there. Certain states have different regulations & seasons when fires are permitted, while other states ban fires all together due to high risk of forest fires.
When choosing a location to build your fire you want to look for:
No overhanging branches
Nothing flammable within 10 feet
The amount of wind the location gets
Is a pit provided? If not, dig one before building a fire to keep it safely secured in one location. It is best to line your pit with rocks.
Next Ms. Darla explained that we only burn wood for fuel. However for tinder & kindling you can use small branches or twigs, pinecone, evergreen branches and needles, pet fur, dryer lint, sawdust, or paper.
The girls worked together to group the wood in piles of large & small, and tinder/kindling in a bucket. She had bags of pinecone she had already collected over time.
Ms. Darla taught the girls different ways to build a fire, and what each kind is called. I had absolutely no idea there were so many different ways to make a fire. I thought it was just one way: build it 😂. The visual designs were really neat & helpful.
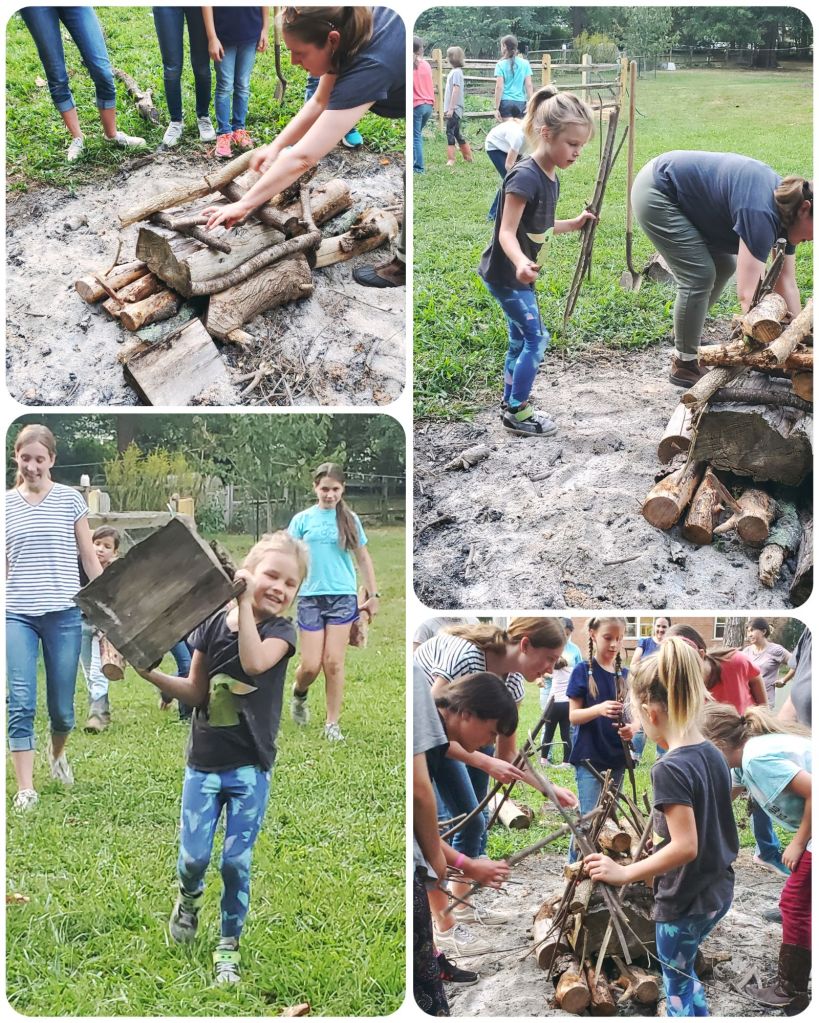
The girls then got into groups to pick a type of fire to build. Each group did a really good job!
We then went back around the fire to learn a bit more fire safety before we could get started.
We learned that you NEVER leave a fire unattended, and that you NEVER build a fire without adult permission & supervision.
If you do need to leave your fire for any reason: put it out first using water, covering with dirt or sand, or by spreading it out to reduce the heat.
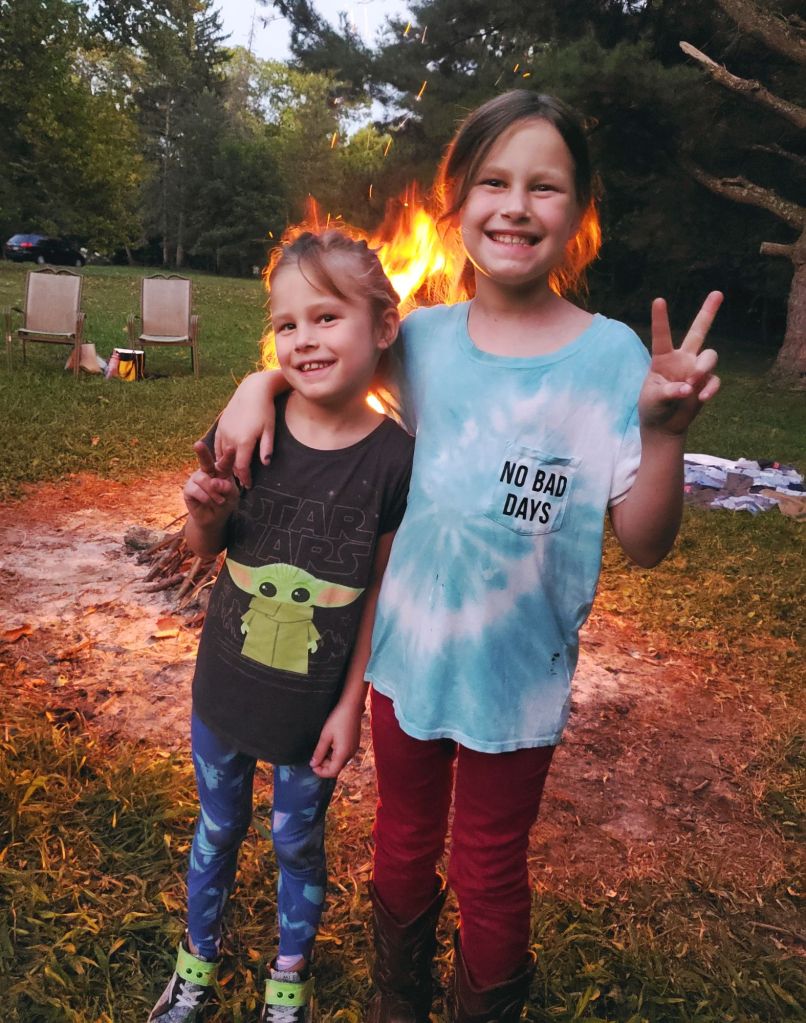
Next, it was time to build the fire. Sasha really enjoyed this part. She was so adorable carrying the biggest log she could hold over for fuel.
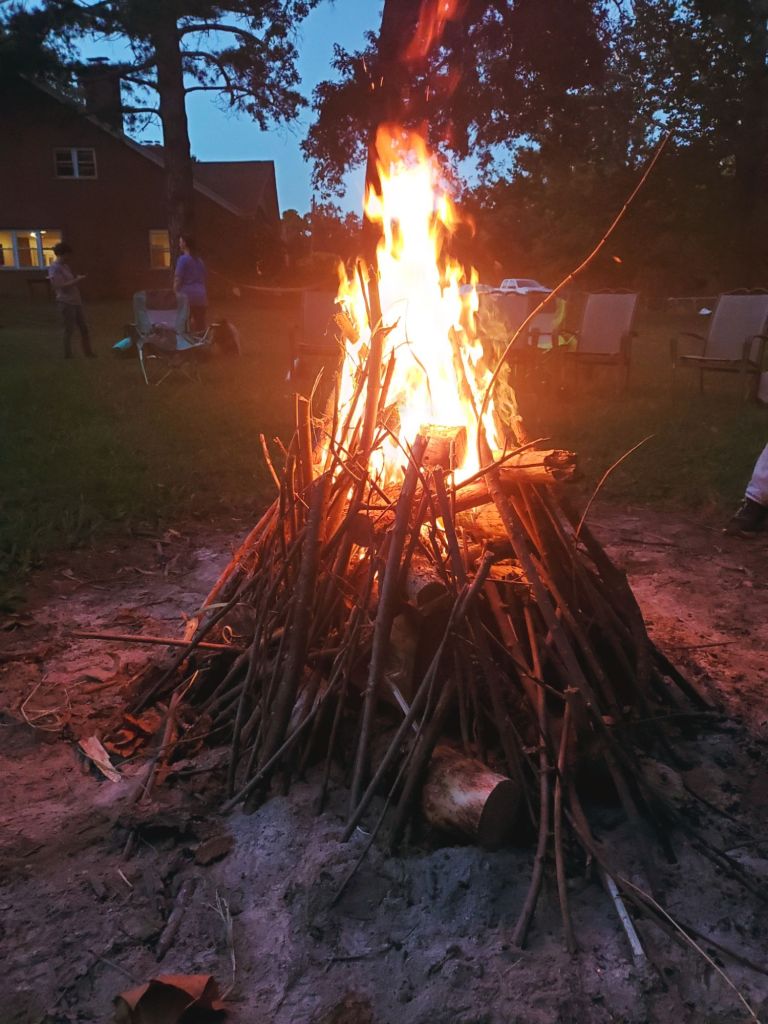
The girls did a really good job building the fire. They even decorated it with pinecone and evergreen, draping kindling along the top and sides to make it pretty. It definitely was the prettiest fire I’ve ever seen!
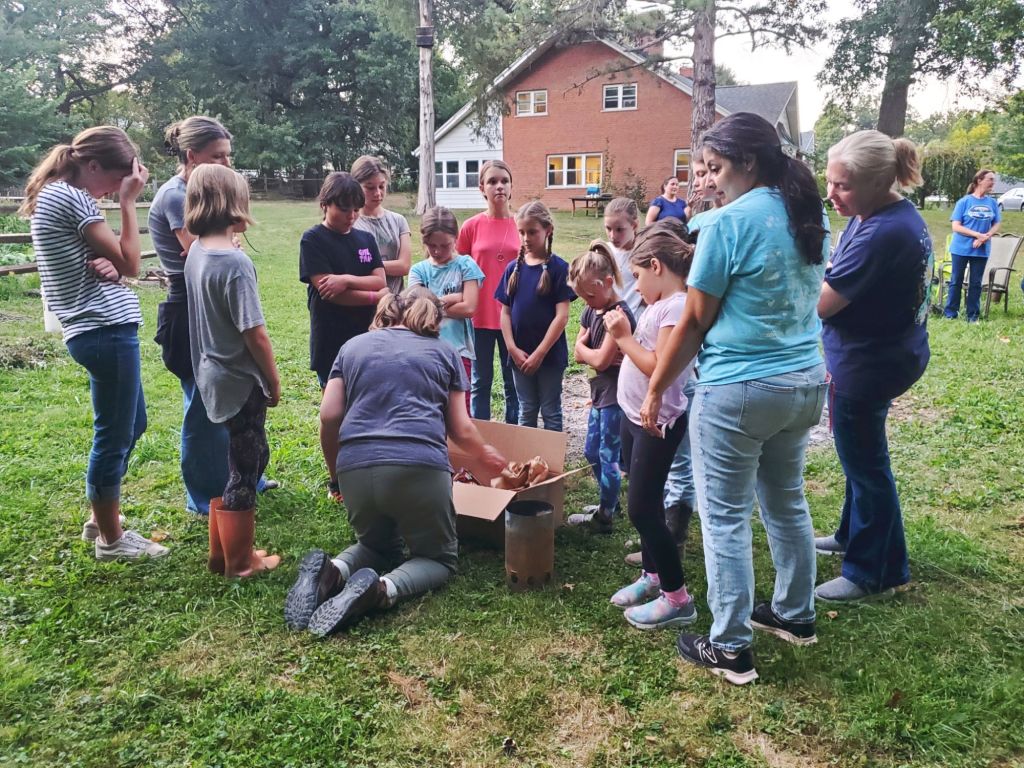
Ms. Darla taught the girls about different tools needed to start a fire. She taught them about using fire starters and how they are important tools to pack when camping. She also taught things we could use if we don’t have Firestarter handy. She taught about the different size lighters and what each is good for. She also taught that when handling fire, we always use leather gloves to protect our hands.
For liability reasons, Ms. Darla lit the fire for the girls. They did such a great job building it! It burned really, really well and evenly. It was so beautiful and cozy – a perfect way to welcome in the start of cold nights here in Ohio.
The girls hung out for awhile, running around playing Ghost in the Graveyard together – another fun & spooky way to welcome in the season changing to Fall. They swung in the tree-swing and caught up with friends, while Mom’s got a chance to catch up with each other too.
Once the embers were hot enough, Ms. Darla began getting the fire ready for cooking while the girls went to the table under the light to start making their campfire Pizzas.
Once they were finished assembling their campfire Pizzas, Ms. Darla put them carefully on her makeshift oven set up.
She used fire grates, with racks on top of those. She then placed a baking sheet on top of the racks, and used a disposable baking pan lid as a cover to trap heat. Once the lid was on, she placed a smaller secondary disposable lid on top and filled it with hot embers to add heat coming from under, around, and above.
Once the Pizzas were finished cooking, she carefully removed them from heat and transferred to each girls paper plate. Ella said it was the best pizza she’d ever had, and that’s a big compliment coming from someone who doesn’t typically enjoy pizza.
This was such an awesome experience for the girls! I really wish I had a group like this when I was little – it really would have set me up for homemaking success later in life and taught me really necessary skills for living as an adult. I’m grateful to have it now with my own girls though – it’s even better together than it would have been on my own as a child. I’m grateful for the strong mother & daughter relationship foundation we are building. I really appreciate these classes and feel like I learn so much with them! The girls are always very excited to go.
Are you looking for an insanely easy & fun recipe for your kids to bake almost entirely by themselves? This is it! My 4 year old – Athena – did literally everything by herself, except handle the oven, and left behind NO mess at all, except for the dirty dishes for me to wash.
I love breakfast foods, but I do not love eating when I first wake up. It takes me a good 6+ hours of being awake to begin to feel hungry. My children, however, love to stuff their face the second their eyes open. Allowing them to make their own kid-friendly breakfasts has worked out really great for our family.
Ingredients
2 3/4 cups All-Purpose Flour
1 Tablespoon Baking Powder
1 Teaspoon Sugar
1/2 Teaspoon Sea Salt
4 oz. Cold Cream Cheese
1 stick Salted Butter, cut into small pieces
1 1/4 cup Buttermilk
2/3 cup Blueberries* {or whatever berries/fruit you have on hand… could also substitute Chocolate Chips, Sprinkles, raisins, or nuts even, or omit if plain is more your style.}
Directions
In a large mixing bowl, whisk together flour, baking powder, baking salt, sugar, and salt.
Add cream cheese & butter cubes to the mixture, set a timer for 5 minutes, then use your hands to mix together until all crumbly & combined.
Dig a hole in the center with your hands, then pour in buttermilk. Using a rubber spatula, stir until combined.
Fold in Blueberries {or other mix in choice.}
Scoop mixture into a greased muffin tin & bake for 15 minutes at 425°F {Adult Supervision Required}.
While the Biscuit Muffins are baking, prepare your Sea Salt Vanilla Butter for serving.
Ingredients
6 Tablespoons Salted Butter, softened
1 Teaspoon Vanilla Extract
1/2 Teaspoon Sea Salt
Directions
Mix ingredients together with a kid-sized rubber spatula until blended & easily spreadable.
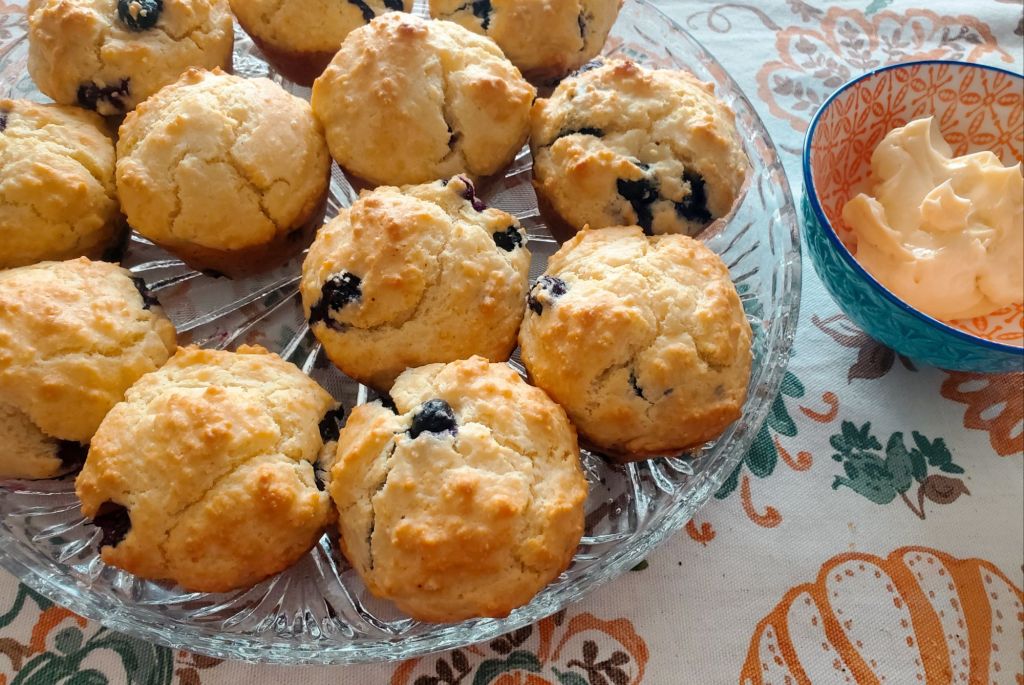
Let cool for a few minutes before serving with a heaping spoonful of Sea Salt Vanilla Butter.
This really is such a kid-friendly recipe. It takes very little time from start to finish, involves super fun “play-learning” using their hands {make sure to wash first!!}, leaves them feeling accomplished & successful, as well as provides them with useful baking skills that they can use for the rest of their lives. Happy baking!!!
Hey friends! I hope that you are as happy as I am that summer is coming to an end!!! For homeschoolers that means no more crowds!!! We get our libraries, museums, parks, and everywhere else back!!! Plus, of course, everything about Fall is awesome!!! 🎃
We are required to send a Notice of Intent to Homeschool to our local School Board of Education along with an Assurance of Home Education, which is due by August 30th of each subsequent year. Here is your gentle reminder to make sure to get yours in! However, if you are new to homeschooling, you are allowed to pull your child from public school at any time, it does not have to be before the school year begins.
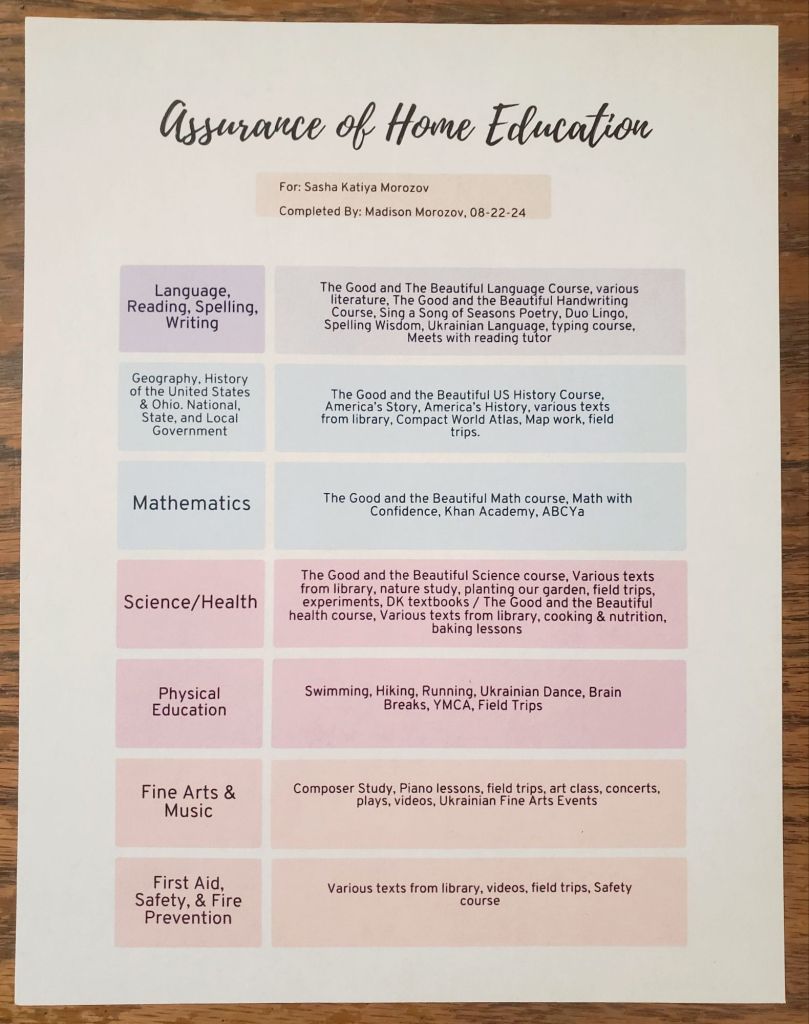
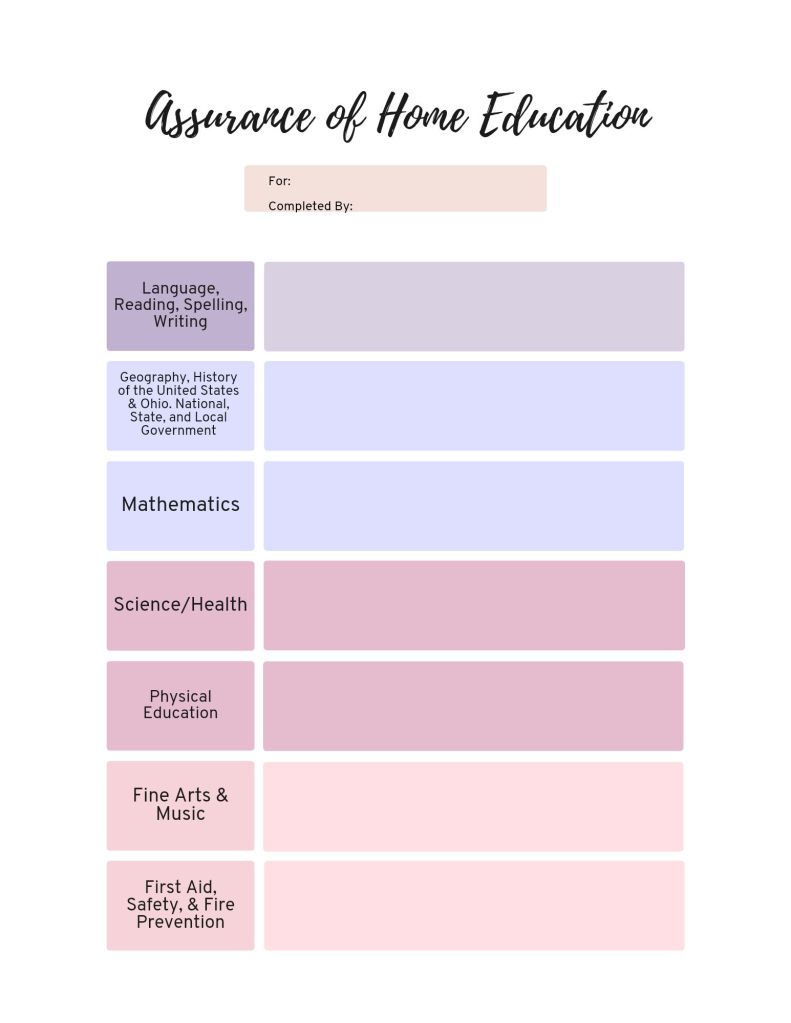
I decided to make a new template this year for my Assurance of Home Education. I wanted to keep it simple, but still fun & aestheticially pleasing! This is how I made ours for the 2024-2025 school year!
♡ Reminder: you do not need to go into excessive detail about your curriculum. As long as they are able to see that you have a plan and an approved curriculum, you’ve put enough.
I organized it by Course of Study on the left, and what we’ll be using on the right. These are the subjects required by the State of Ohio. If you are in another check, please check with your homeschool laws to see if you have any other requirements.
♡ I also made a BLANK & EDITABLE version HERE to make things easier for you! Or if you are the kind of person who prefers to write things in by hand, you can download a non-editable copy below to fill in yourself.
Grace Girls is back in session for the new academic year! This makes our third year attending Grace Girls! Our first meeting was last night & the girls learned How to Set a Table.
Grace Girls is sort of like an etiquette class where homeschooled girls get together to both socialize and learn how to grow up to be Proverbs 31 Women (aka homemakers). They have so far learned knife cutting & Kitchen safety skills, how to preserve fresh vegetables from the garden, how to plan meals, how to host a fall feast, how & when to start a meal train cooking for someone in need (elderly or sick neighbor, a family who welcomed a new baby, new family moved in, a death in the family, etc.), how to make corn husk dolls, and how to hand sew, mend, & embroider clothes. My girls have mentioned to me how grateful they are to learn these skills & how useful the classes have been for them.
Homemaking is something I had to teach myself starting from the very, very basics. I did not have a homemaking mother growing up. I am very grateful to be able to pass these skills on to my children while also still constantly learning new things myself.
Ms. Darla hosted our meeting. She taught the girls different ways to properly set a table. She worked on a tray, placing different styles, layers, & color schemes together.
She taught us that the most important parts to setting a table are consistency & making our guests feel welcome & wanted, rather than overwhelmed & intimidated.
She had different learning stations set up for the girls to take turns at so that no one space was too overcrowded.
Ella really enjoyed learning how to fold napkins at the first station. I particularly liked her napkin with the flower pocket. I would like to start setting our own table napkins that way for fancy meals & gatherings. It is so beautiful & will be an interesting way to use our flowers from our garden.
Mia loved picking flowers & putting together mini bouquets for table settings. I have never thought to do miniature personal bouquets for each guest, but I love that idea for future gatherings too. It especially sounds nice for a breakfast or brunch gathering.
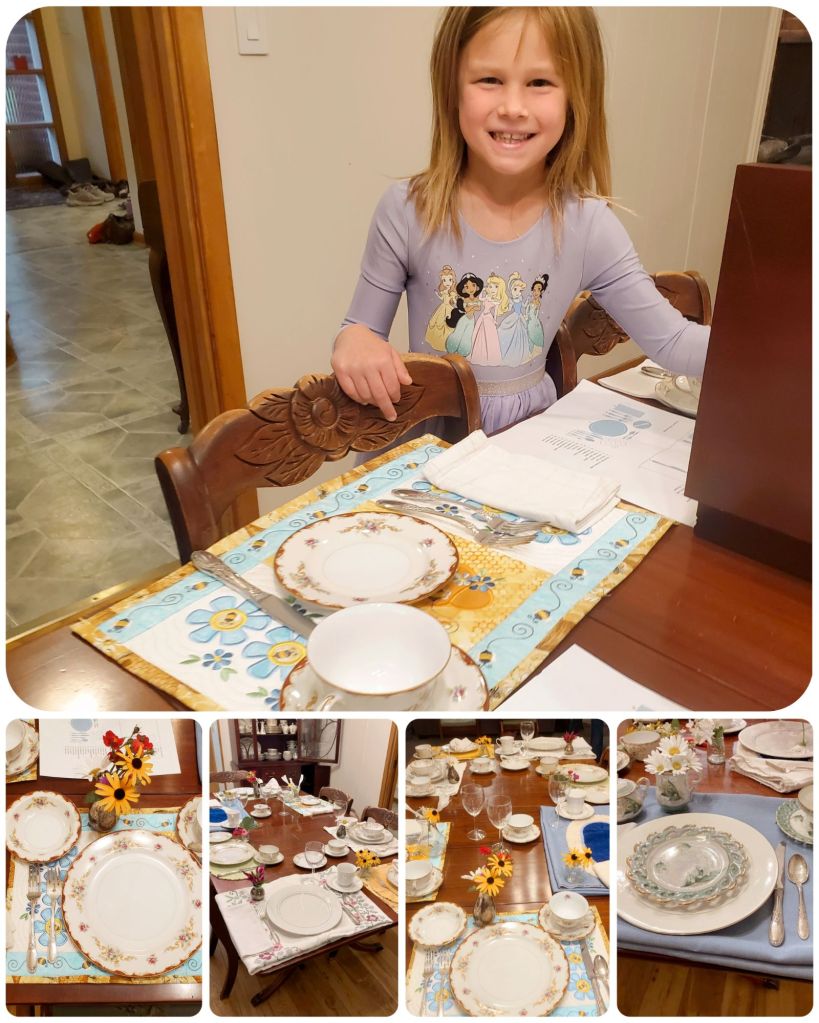
At the second station, the girls each took turns setting their own place settings using fancy dishes. They enjoyed creating color schemes with the dishes, napkins, & placemats. Sasha had a lovely time arranging her favorite dishes – they were so much fancier than ours at home.
The third station was to set a Christmas themed table. I love the use of real pine needles & pinecones. That is so beautiful & festive. I’ll have to remember that for our own Christmas dinner!
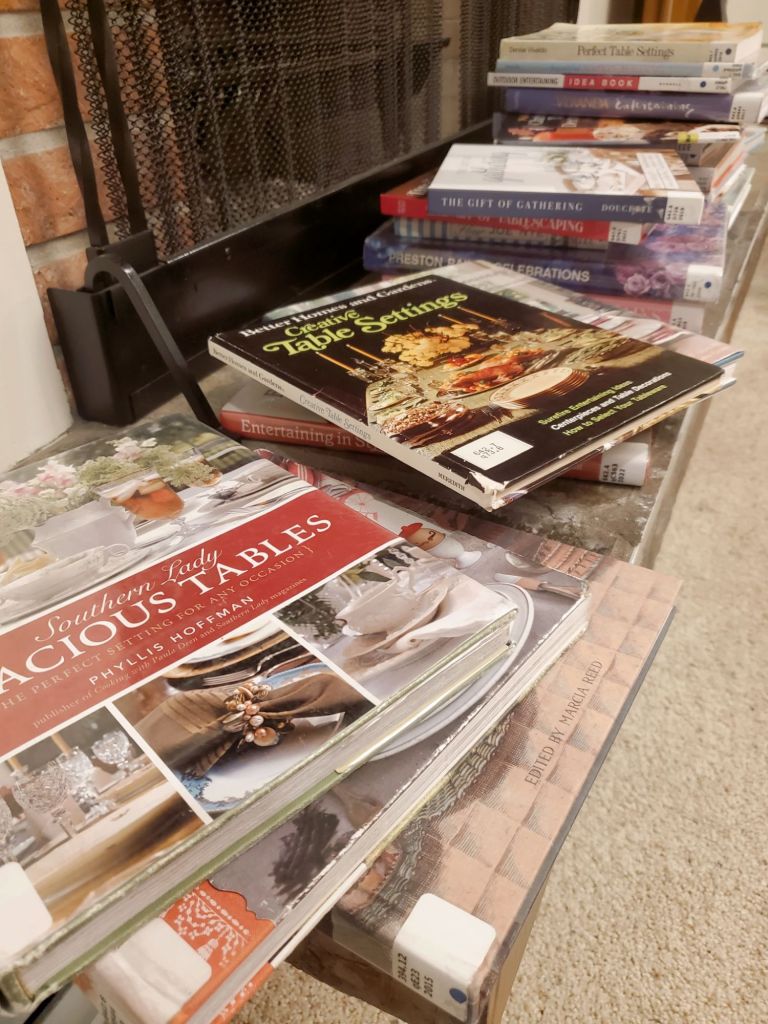
Ms. Darla rented every book her library currently had on table setting, napkin folding, and hosting for the girls to look through to pick their favorite tables. She asked the girls what meals & what seasons the tables were set for. I took some photos from different books that I plan to use at my own home!
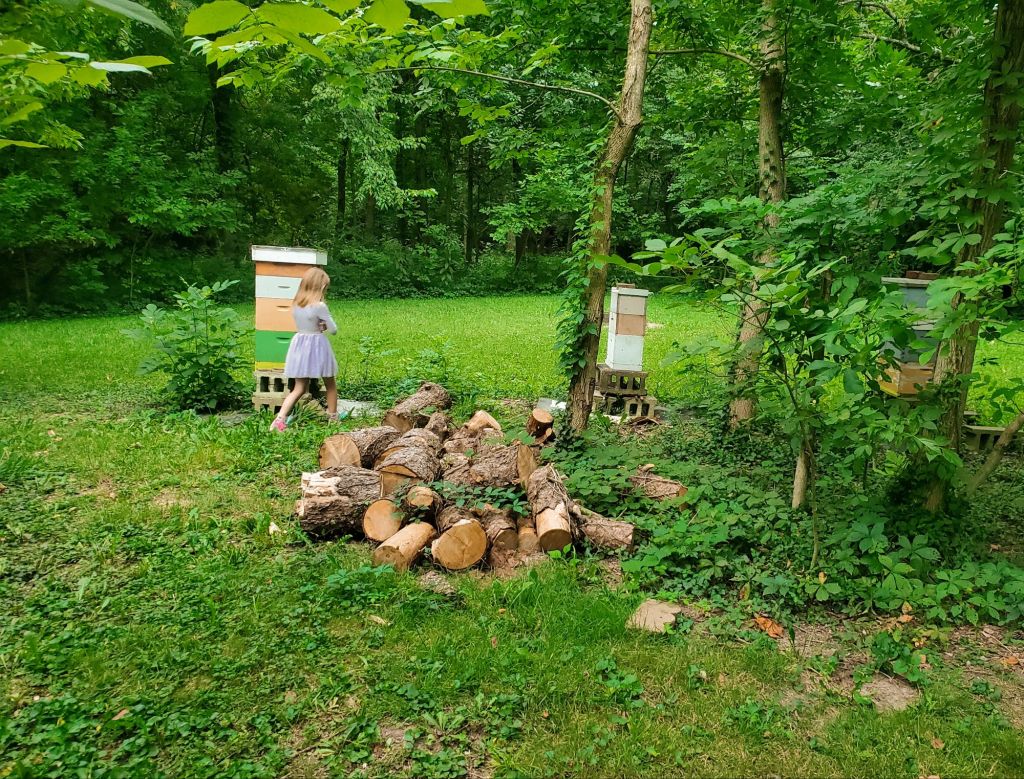
Of course we had to check our her beehives while we were there because we have plans to add our own to our home next year! Luckily, Ms. Darla also teaches homeschool families about beekeeping & honey extraction, so I’ll be able to get off to a good start!
We had a really fun time at last night’s meeting & we left feeling like we learned a lot. I love that each of my girls who attended found their own special talent to bring to homemaking & future gatherings. Ella found a way to make her love for origami useful at the table using napkins, Mia’s love for plants & nature brings creativity + beauty to the table’s decor and ambiance, & Sasha’s love for creating a beautiful space for each person she loves will be useful for setting each place at the table. Each person’s talents come together to create a magical gathering & after all, the most important part of the table is togetherness.
We are beginning our second year taking homeschool classes at Mason Cottage Day! It’s hard to believe it’s only been that long! I feel like Ms. Natalie is one of my dear lifelong friends who I’ve known forever.
So naturally, I wanted my first post of my new Series: Our Favorite Places, to be about her studio – Mason Cottage Day! In this series, I’ll be sharing about our very favorite places & what makes them our favorite.
Welcome to Mason Cottage Day
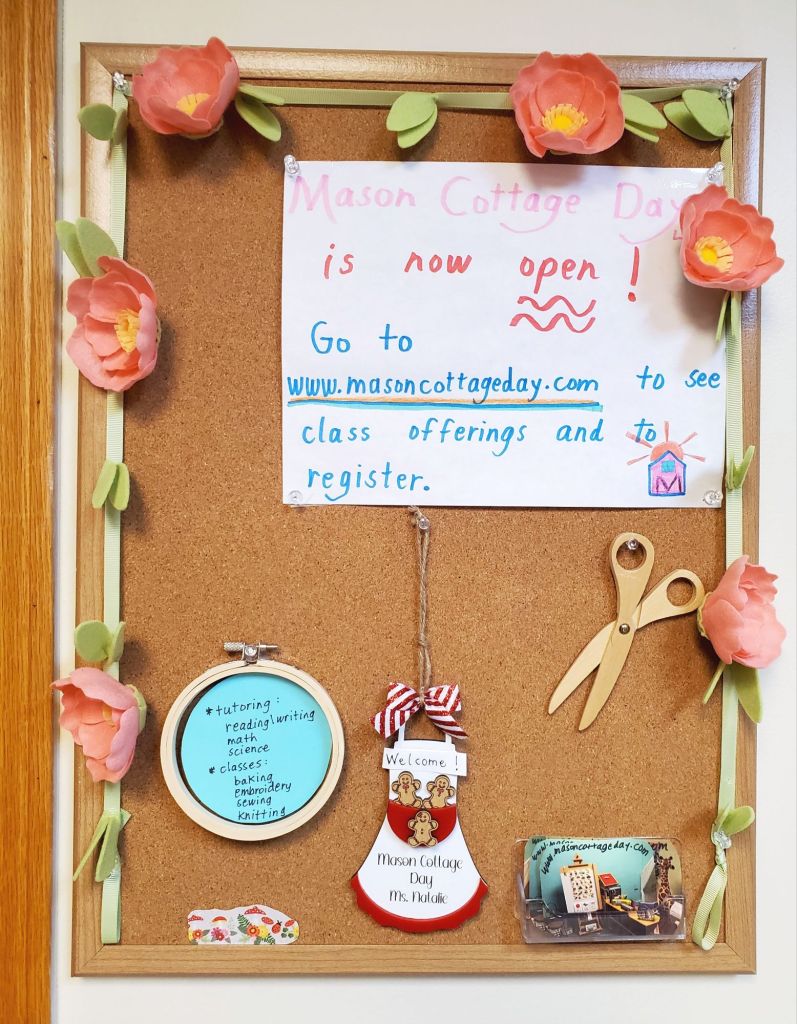
From the moment you arrive, her studio is so welcoming! She has a board outside her door with important information & business cards, as well as which classes she is currently offering.
We personally have taken Sewing, Embroidery, Baking, and Reading/Writing classes in our time at Mason Cottage Day. I think science would be a really fun class to take too!
One of Ms. Natalie’s former students made her this adorable giant wooden pencil & another student made her this name plaque. I love that she continues to display their artwork that they took the time to create for her even after they have moved on. It shows how much she truly cares about each and every one of her students.
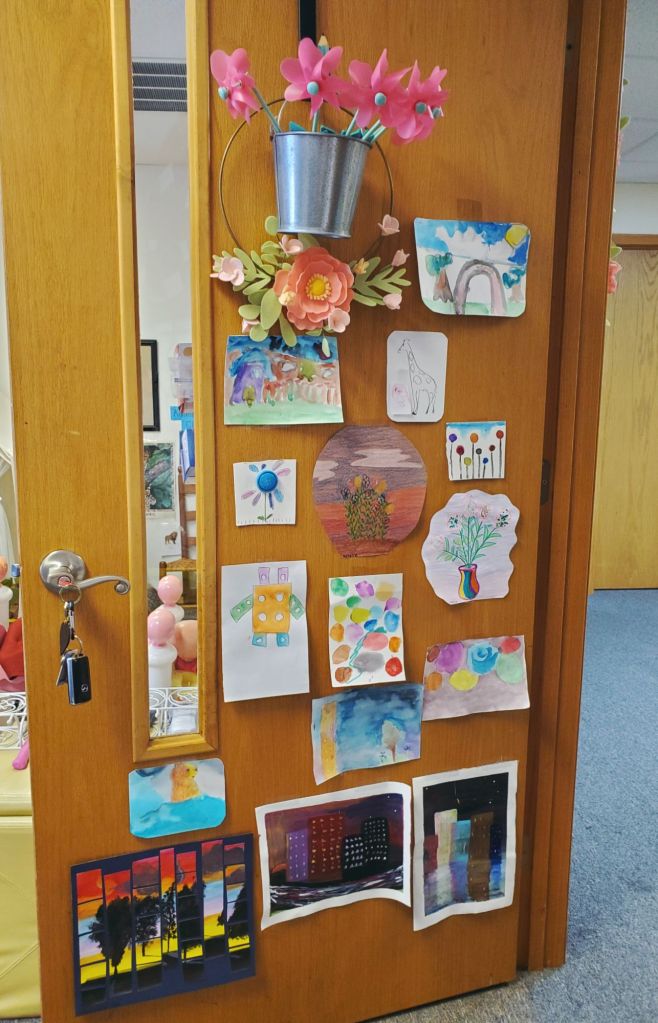
Each month, Ms. Natalie changes the artwork on display. It’s so fun to see the different projects & types of art the students are learning, as well as what students have come up with on their own in the art room.
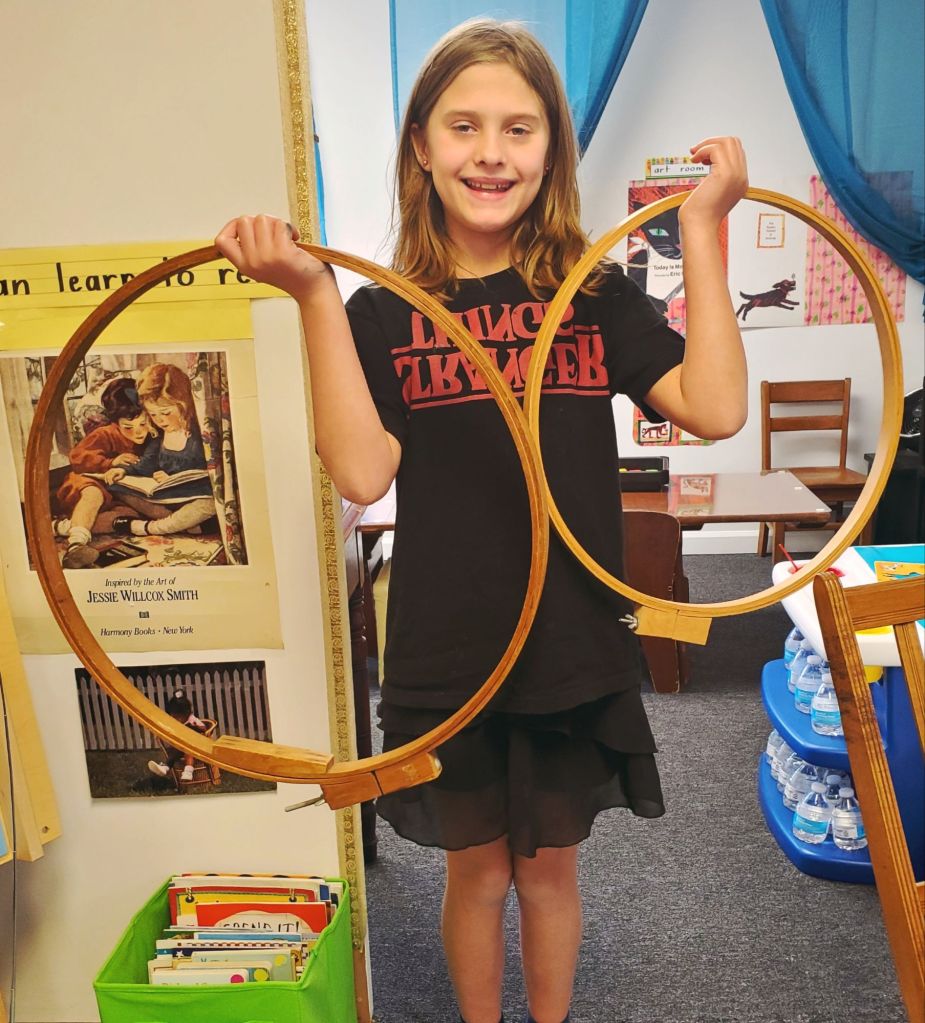
This is such a cozy reading corner for students learning to read, and I love the giant embroidery hoops on display. I had never seen them that large before!
She has a ton of books & learning games for all different ages. She has been working with Sasha on her reading, & it has been so impressive to see how fast Sasha has been making noticeable progress in her reading abilities.
One of my favorite things about Mason Cottage Day is that it is really geared toward homeschooling families. Siblings are welcome to come play for free during lessons! That’s incredibly helpful, especially for low-or-one-income large families who otherwise have to miss out due to pricing or scheduling conflicts.
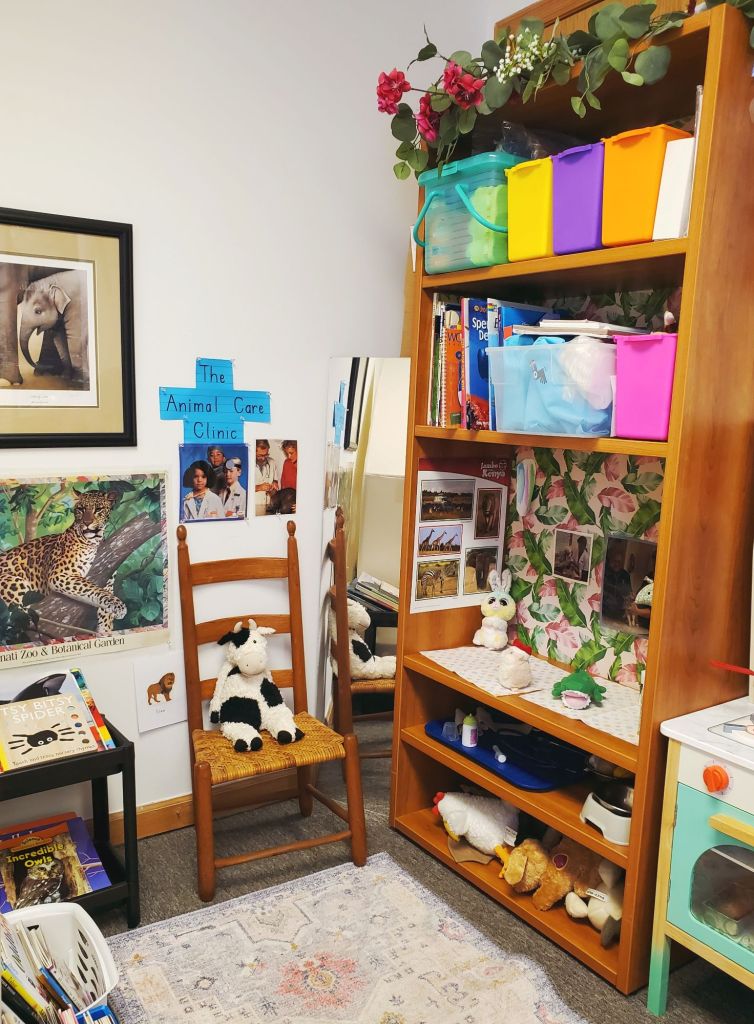
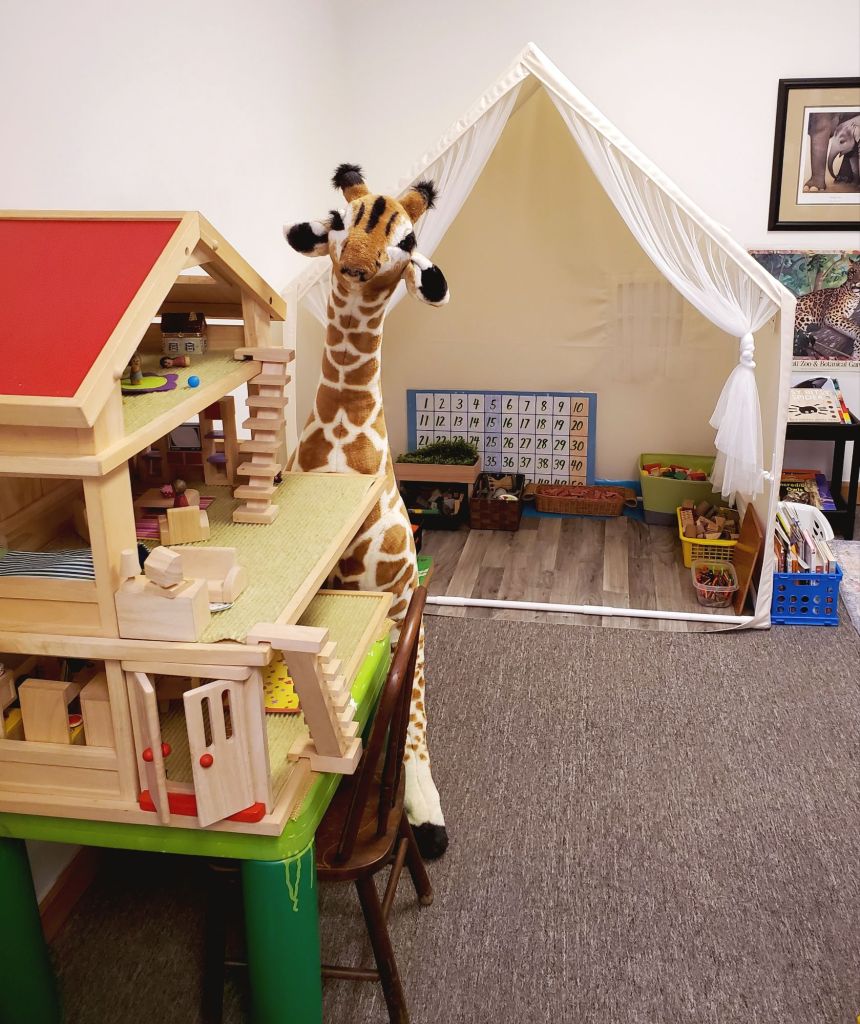
There are plenty of interactive areas to play such as a kitchen/nursery/home play area, a doctor or veterinarian area, a building area, and a doll house area for children to use their imagination.
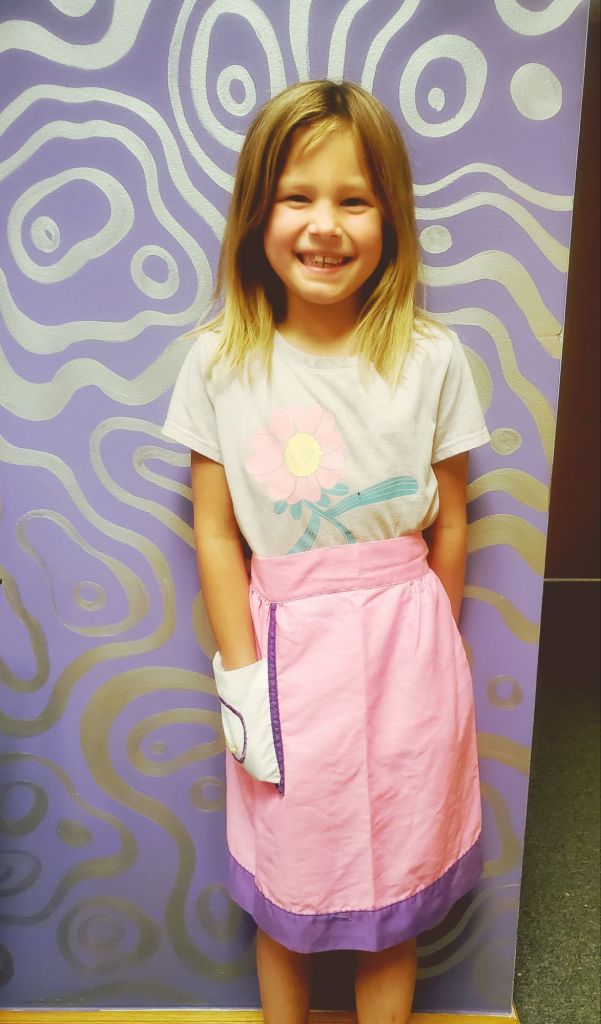
There is the cutest little hand-washing station for baking students, along with plenty of child-size aprons to choose from.
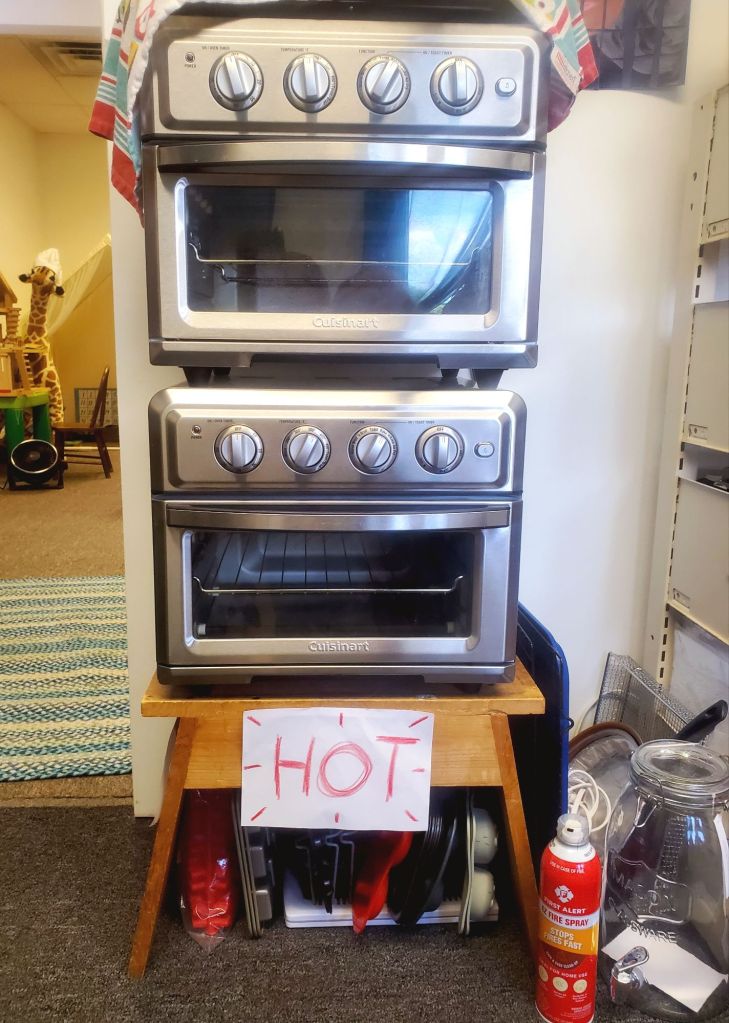
All of her baking is taught through these conventional ovens. They are the perfect child-size, beginner ovens to learn on.
Sasha has loved taking baking classes at Mason Cottage Day. She had learned how to make a good variety of different items. Her confidence in the kitchen is going up after each class & just like at our home, Ms. Natalie incorporates reading & math into her baking lessons, so those skills are also improving while she bakes. Sasha of course looks adorable in her little aprons & she’s always quick to let her siblings take turns helping her bake.
The art room gives students free-range to create to their hearts content. There is a painting table, all the coloring utensils you need, stencils, & tons of other various art supplies & tools. Anything out is able to be used, and if you see something in her art storage area that you want to use that isn’t out – just ask! She’s more than happy to accommodate little minds.
You can always count on seeing fun science projects or experiments going on from her science students – like this potato clock.
She even has a beautiful planter that is Ukrainian Petrykivka style, which makes my Ukrainian 💙💛 heart so happy to see.
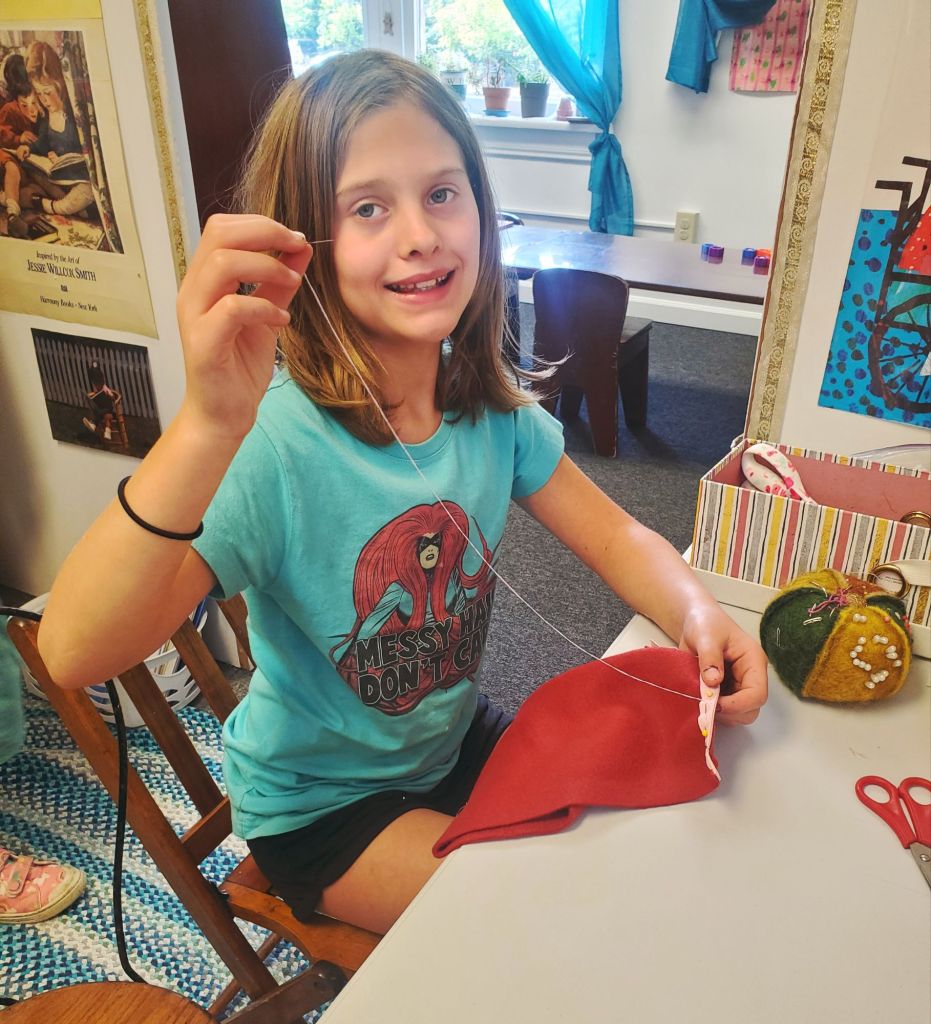
Ella loves learning sewing & embroidery from Ms. Natalie. I have loved every single project that Ella has created for me. Ms. Natalie comes up with super cute, child-friendly projects. One of my favorite projects she has made for me was the peekaboo picture frame with the cutest photo of our kids at the park.
Another thing you can always expect to find at Mason Cottage Day is plants! Ms. Natalie loves plants & nature. She teaches about Monarch Butterflies in season & grows her own pollinator garden outside.
Because of our mutual love of plants & Pollination, we made her a bouquet from our own pollinator garden to bring to her as a gift. We love creating bouquets for people we love!
She has been such a great teacher and role model in our children’s lives. She is helping them learn lifelong skills that they can & will regularly use. She has the kindest & understanding soul. I look forward to our visits with Ms. Natalie as much as the kids do!
“I want children to feel comfortable in the studio. Everything is set up so that they automatically know what to do. It’s a great joy to see children of every age play, pretend, and learn while using all the different materials! Children always have very good ideas about what should be included, and I always take their suggestions seriously. A simple thing such as including little squeeze ketchup and mustard containers made one young person so happy…he had noticed that the play kitchen did not have them, and he suggested adding them. Playing and learning are very definite collaborative communication pathways. I hope the studio allows children to learn in their best ways!” – Ms. Natalie
Classes are an affordable $20 each, which includes all necessary materials! *Beginning October 1, 2024 classes will be raised to $30 each*
Mason Cottage Day is located at 105 E. Main Street, Mason, Ohio 45040. The free parking lot is located behind the Pop Revolution Gallery Building off of Mason-Montgomery Road.
It is right along the cutest little shopping Street – while you are there check out the Mason Whippy Dip for a yummy ice cream treat, or the attached Thai Terrace for a delicious dinner!
You can contact Ms. Natalie to visit her studio or schedule classes at nataliebaxter@yahoo.com


