I went to the Oakley Kroger the other night with Moses. That place is HUGE! As we were walking (aka me walking & wearing all 23+ pounds of him) inside we decided to check out the outside floral section and I ended up buying a cherry tomato starter plant & a strawberry starter plant.
When we got home it was too late to start a gardening project, so I set them aside for the next morning.
When I went to plant them, I came to the conclusion that I really didn’t want to plant food that we plan to eat near our trash cans, even with a fence separating them. So I figured out a new solution!
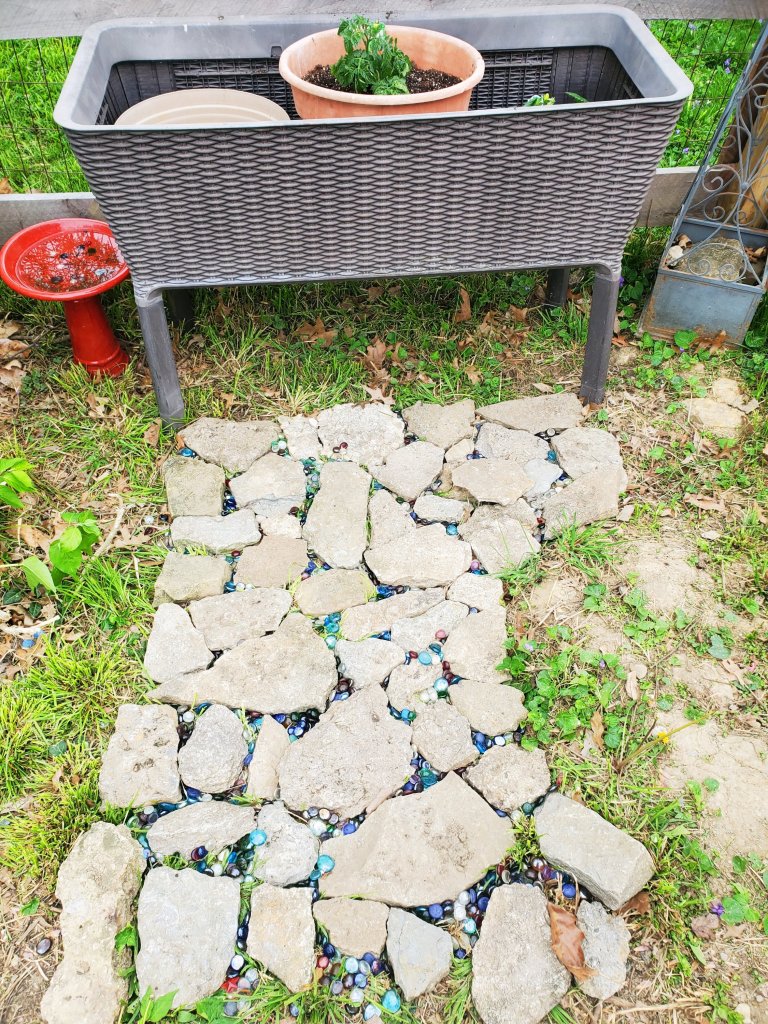
I moved the raised bed into this space along the fence.
I thought that it looked a little out of place by itself, so I built a little rock pathway with rocks out of the stockpile I already had.
Once I had all the rock placement laid out, I began collecting these mosaic tiles around my back yard. I had originally had them in the gravel patio area, but I think that they will be much more appreciated over here.
I’ve got a pretty good start going, but I definitely need to continue picking more out to make sure the spaces in between are really full.
I also moved this little red bird bath from a different garden space in my yard. It makes more sense over here since the hose can reach here, but not where it was previously.
I planted the cherry tomatoes in the middle container and strawberries to the right. I am going to plant lettuce in the container to the left when it isn’t raining.
To be completed:
• Finish filling in mosaic pieces between rock spaces.
• Plant a creeping flower in the tower growing up the sides.
• Weed and prepare the right side near the fence to sculpt out a garden bed + plant some flowers.
• Trim bush to the left side and sculpt out garden bed + plant some flowers.
• Create fun garden stakes with the kids for each container.
• Find and/or make more garden decor to personalize it more!
Just a small, spur of the moment project I wanted to document on here. I hope you like it and it Inspires you to do some gardening yourself! Gardening can be really, really therapeutic as well as a great work out & way to connect with nature.
Are you big into gardening, or a beginner? Have you tried raised garden beds or container gardens? What kind of things do you like to grow?
In our family, we celebrate the Earth every day, but for national Earth Day (& month) we are going to make sure to celebrate a little extra!
We wore our flower headbands to be extra festive on Earth Day on April 22.
Not Our Trash, but it IS Our Earth
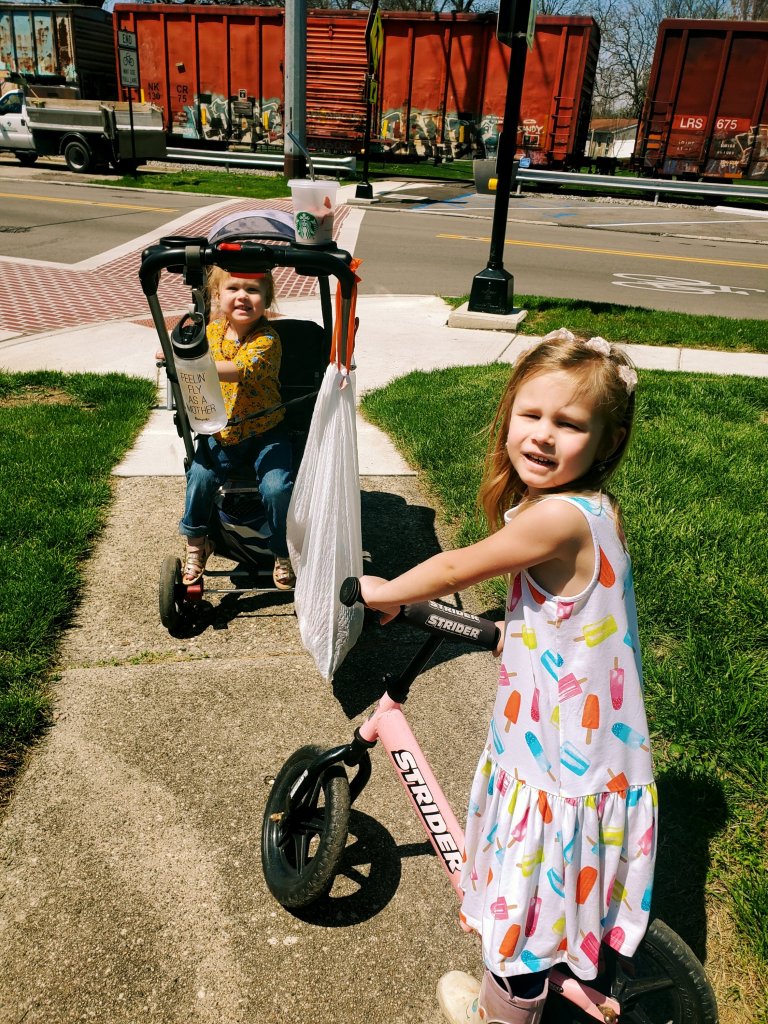
One of our very favorite outdoor family activities is plogging: picking up litter while jogging. Since my kids are pretty little, we mostly just walk briskly rather than jog, but it’s still exercise for our bodies and it’s still cleaning up our Earth.
We tied a trash bag to our stroller. The park is on the other side of the train, so all of the trash collected at this point was from our walk from our home to the park alone.
I want my children to know that it’s up to them to change the world. They cannot wait for someone else to do it for them. It is our duty to leave the Earth a better place than we found it.
By the end of our walk, we had filled our entire bag.
We ended up going back out the next morning with Niko + the older girls as well. We walked back to the park, a different way, and picked up more litter. When we got there, there was actually a Community Park Clean Up going on which was really cool! They were handing out free gloves and trash bags for people to volunteer to clean up the park. I was unaware that our park offered that, but I love it!
Dirt Dessert
We made “Dirt cake” which we decided to rename “Dirt Dessert” instead since it wasn’t exactly a cake.
It was really yummy and everyone gobbled it up! This is definitely a dessert that I will be remaking with different themes throughout the year!
We talked about the Earth & why worms are good for it. In case you didn’t know, worms are decomposers!
Drive Less, Walk More
This month our weather has really started warming up, so we have began walking to the bus stop to pick up Ella & Mia and then walking home. We bring a trash bag with us each time we walk.
Nature Art
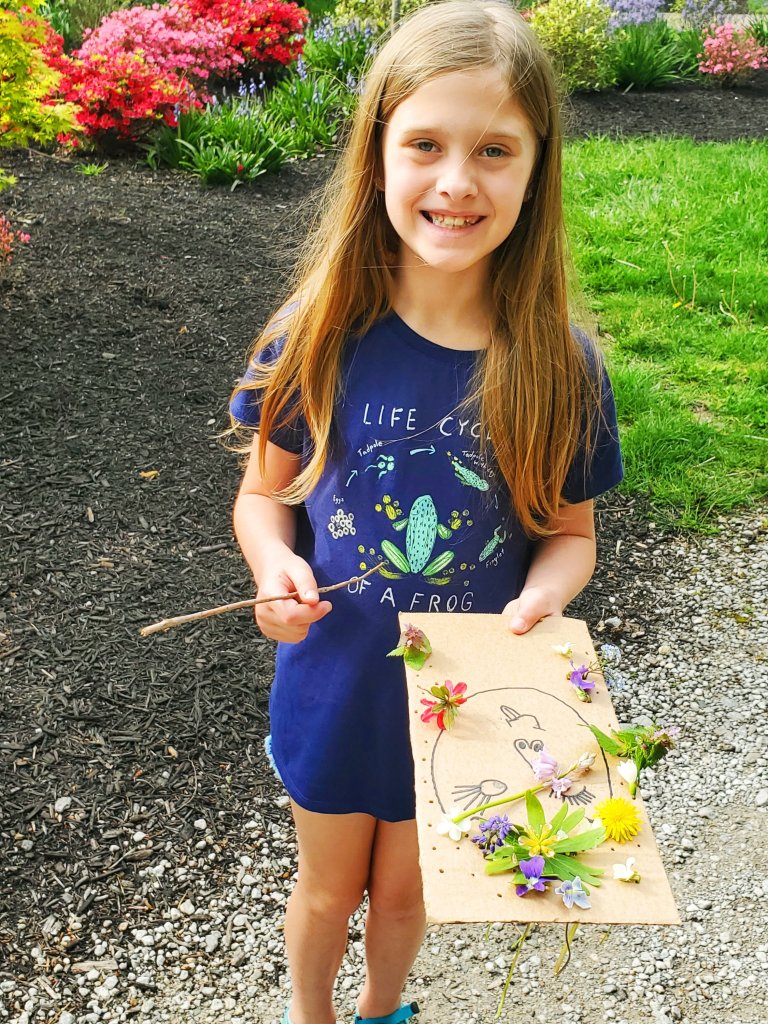
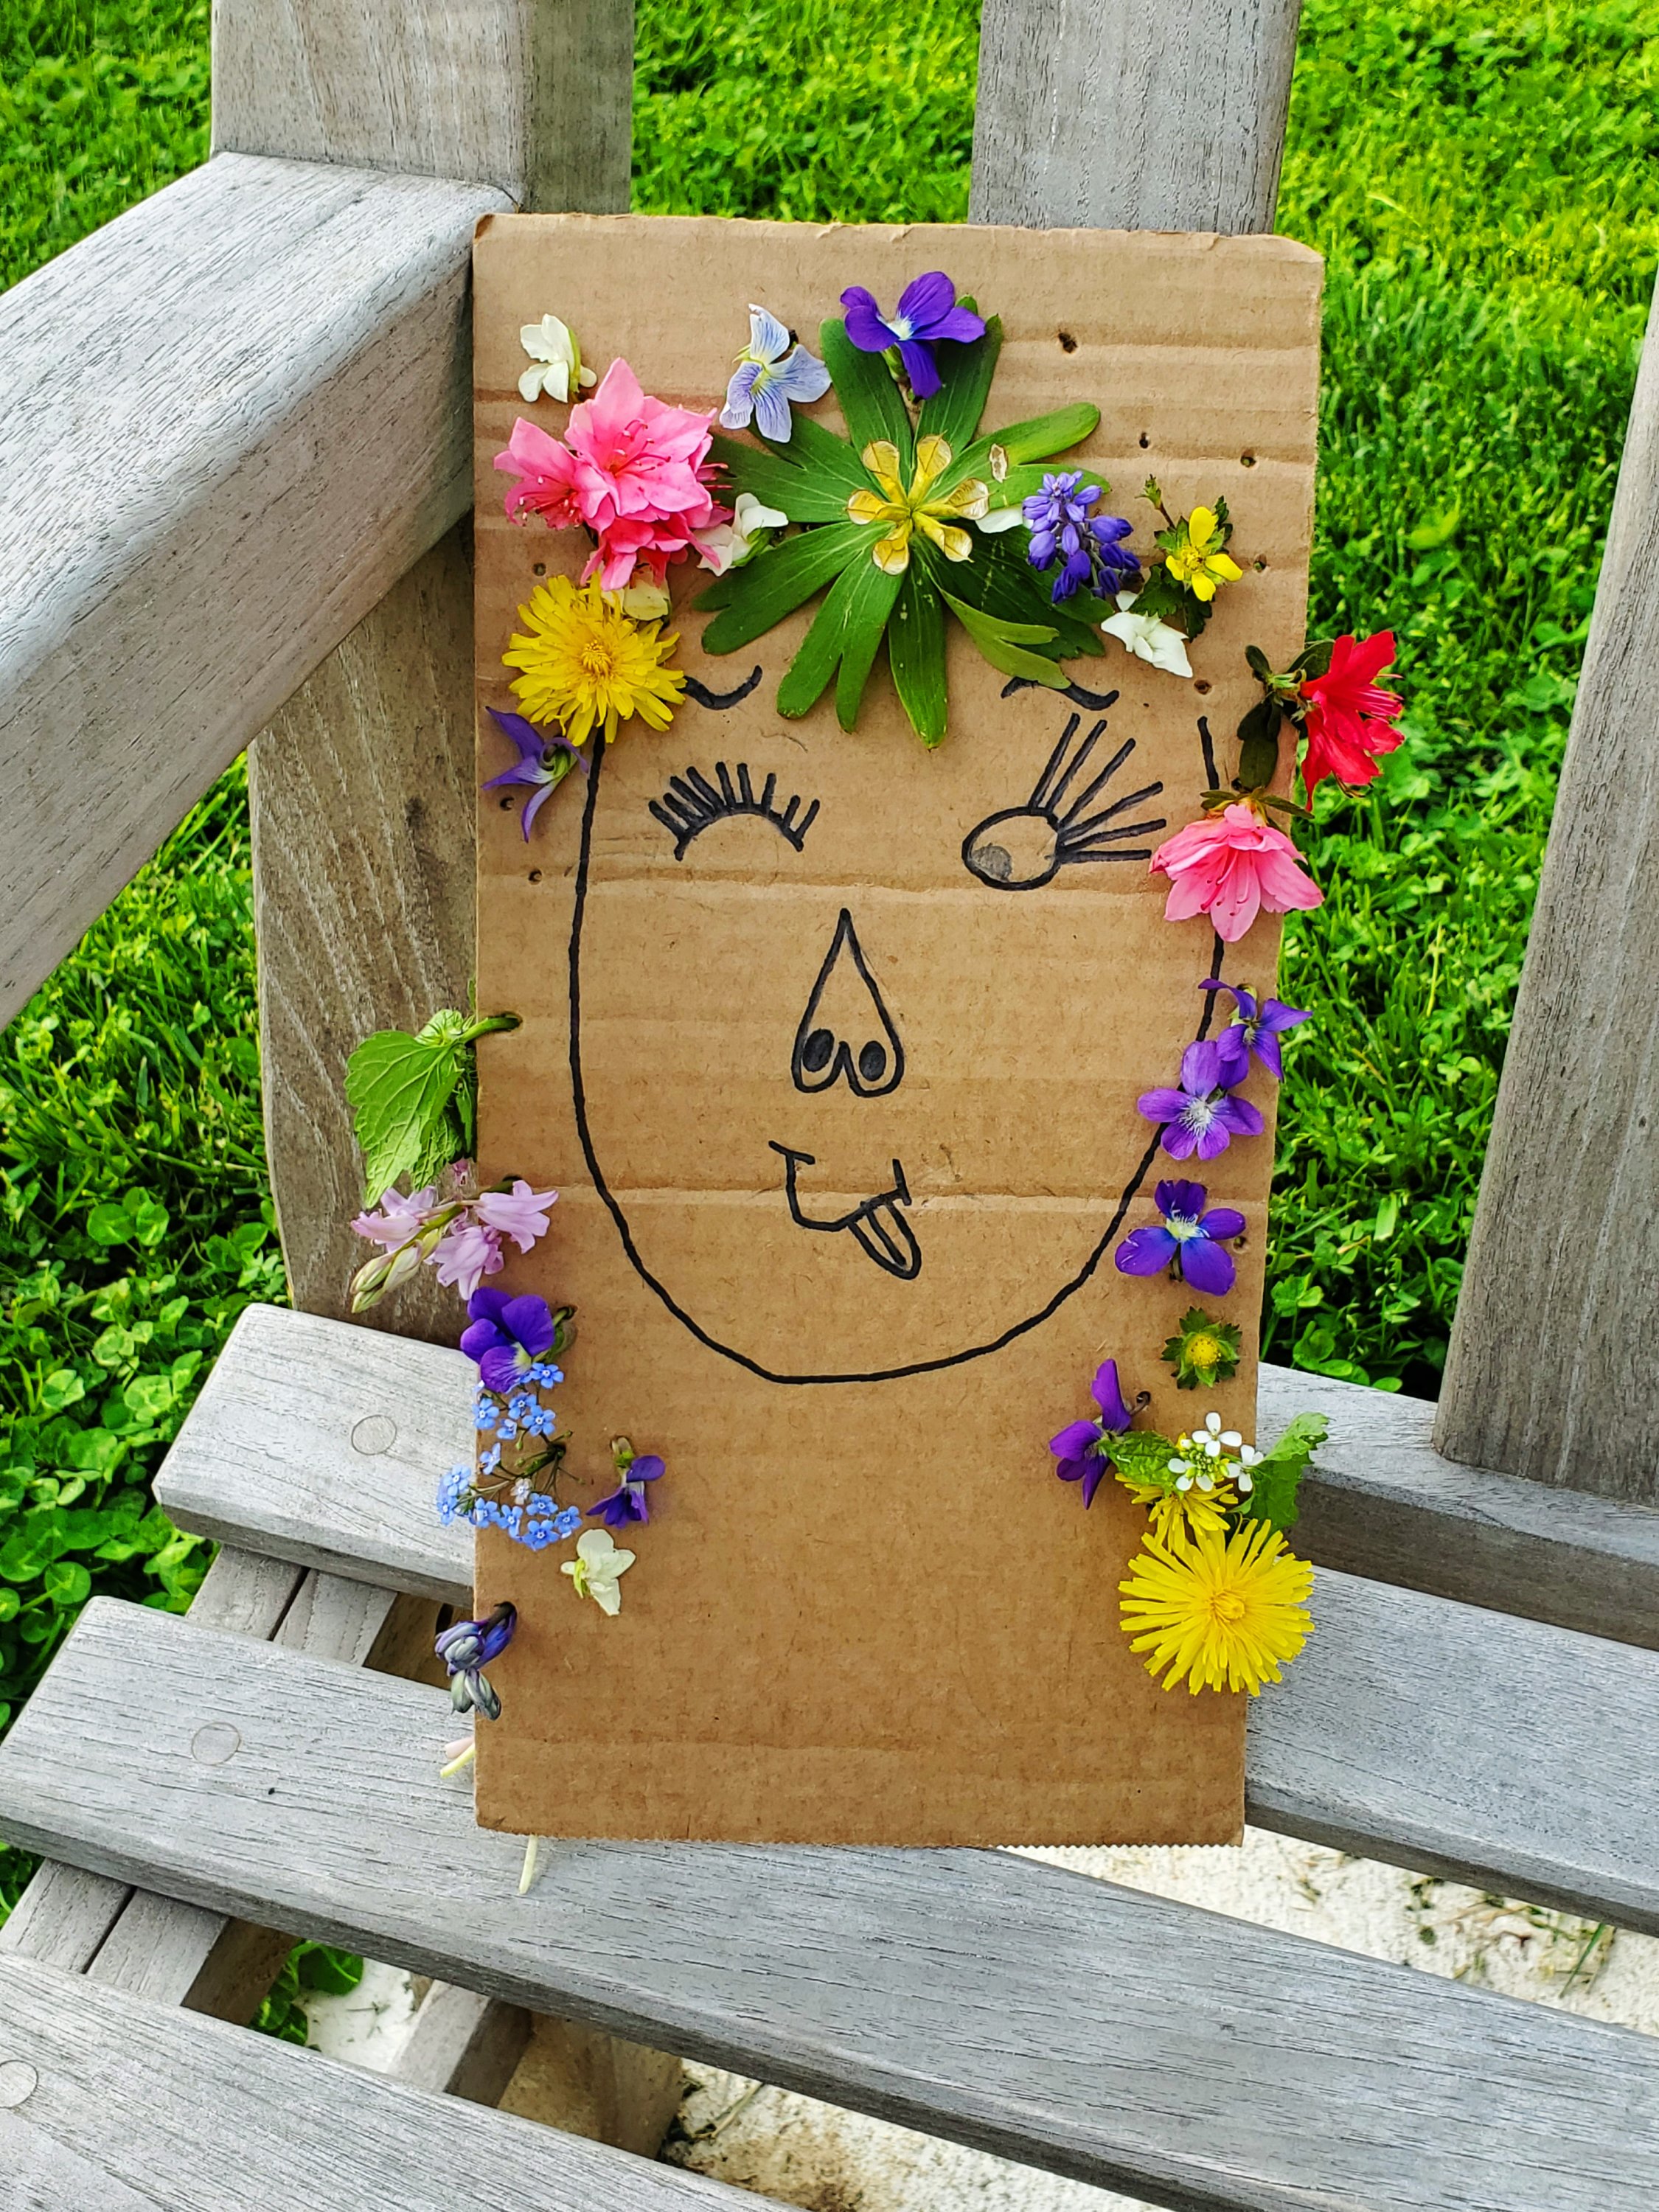
Mia drew a face on a piece of cardboard we cut from a box. Then we poked lots of holes where we wanted her hair to be.
We walked around the beautiful flower garden at Ault Park looking for flowers to use as our hair. We tried to use only flowers that had already fallen, or weeds that we thought they wouldn’t mind us picking for them.
Even though the playground distracted the kids & we didn’t end up filling all of our holes, I still think that it turned out really cute.
5 Easy Ways You Can Be More Eco Friendly!
1. Stop using plastic bags. Instead, opt for reusable insulated tote bags & mesh produce bags. It makes carrying groceries in from the car WAY easier too!
2. Use a refillable cleaning solution (like Thieves Household Cleaner). Thieves is non-toxic, plant-based, & can replace literally EVERY single cleaning product you currently own. (You can order Thieves HERE).
3. Shop at a second-hand store first before buying new. Chances are, a second-hand store will have what you are looking for at only a fraction of the price.
4. Utilize your local library. Libraries go WAY beyond just books. There are so many activities and classes that they offer, as well as information on local resources. It is a great place to bring children as well (just kindly remind them to use their inside voices.)
5. Use what you have before buying more. This goes for food, hygiene or household products, decor items, anything & everything. It helps cut down on waste & clutter as well.
🌍 I hope you had a good Earth Month. What did you do to celebrate the Earth this month?
I can’t believe tomorrow it will be May! Mothers Day is coming up as well as Moses FIRST BIRTHDAY!! How the heck has it already been a year?? Then after that it will be SUMMER BREAK ☀️! So many exciting things coming up! Don’t forget to subscribe so you don’t miss out on any of it!
Ella came home from school last Friday with a new school project: Economics Market.
All of her classmates will be opening their own “shops” at their desk where they will be selling a paper item that they make. They will be decorating the shops, telling a bit of information about the shop/what is being sold. Ella will be selling Pysanky, otherwise known as Ukrainian Easter Eggs.
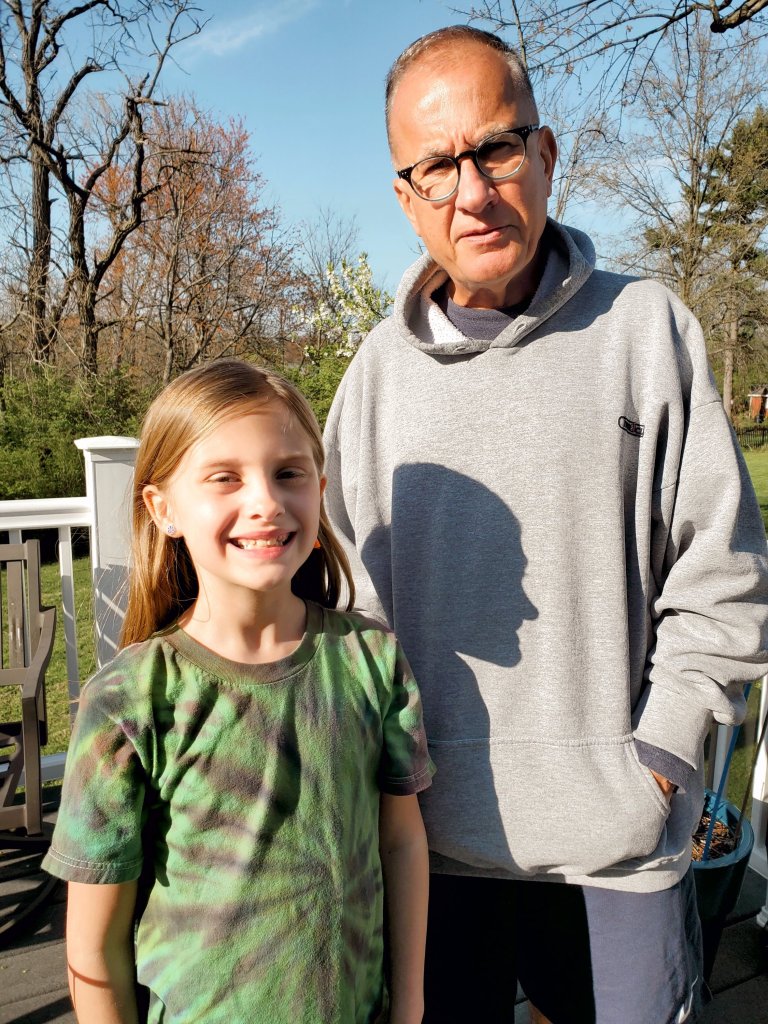
Ella is Ukrainian- we all are. Her grandfather, my dad, is a Ukrainian immigrant. Needless to say, even though we are living in America, I feel the deepest connection to this war currently happening in Ukraine.
I’ve always been extremely proud to be Ukrainian, but the amount of pride and gratitude I have for my heritage now is immeasurable. I grew up being taught that Ukrainians are strong people; the strongest in the world. I had no idea that I would ever have to witness the magnitude of their strength in my lifetime.
My dad & I on his birthday last year (April 2021) after celebrating with authentic Ukrainian cuisine including pierogies & borscht.
I know that we are very lucky to be living in America, yet I feel the strongest yearning to be there. If my dad never came to America, this war would be our lives right now and that is a scary thought. Yet I still for some reason feel as if that is where I belong.
That isn’t possible at this time, however, so for now I’ll just continue to embrace the culture at home with my family, even more so now. We’ll become fluent in the language and carry the traditions. One day, when it is safe for my small children, we will travel there. Today, we will make pysanky.
Pysanky
Pysanky is the word for Ukrainian Easter Eggs. Pysanky are believed to hold great power for peace & love in the world. They were originally used in Spring ceremonies to thank the glorious sun for warming the Earth after the cold, hard Winter.
The designs and symbols that are decorated on pysanky have significant meanings- usually a wish of good fortune for the person you are gifting your pysanky to. On Easter Sunday, you would gift your pysanky and kiss the recipient on each cheek for good luck.
There is an old Ukrainian folk tale that Evil (a vicious monster) is chained to a cliff. Each year his helpers go around the world and report back to him the number of pysanky that have been decorated.
If only a few eggs are made, his chains loosen and evil flows throughout the world. However if many eggs are made, his chains tighten; allowing love to conquer evil.
With all of the evil going on in the world, we are going to need a LOT of eggs.
Setting Up Shop
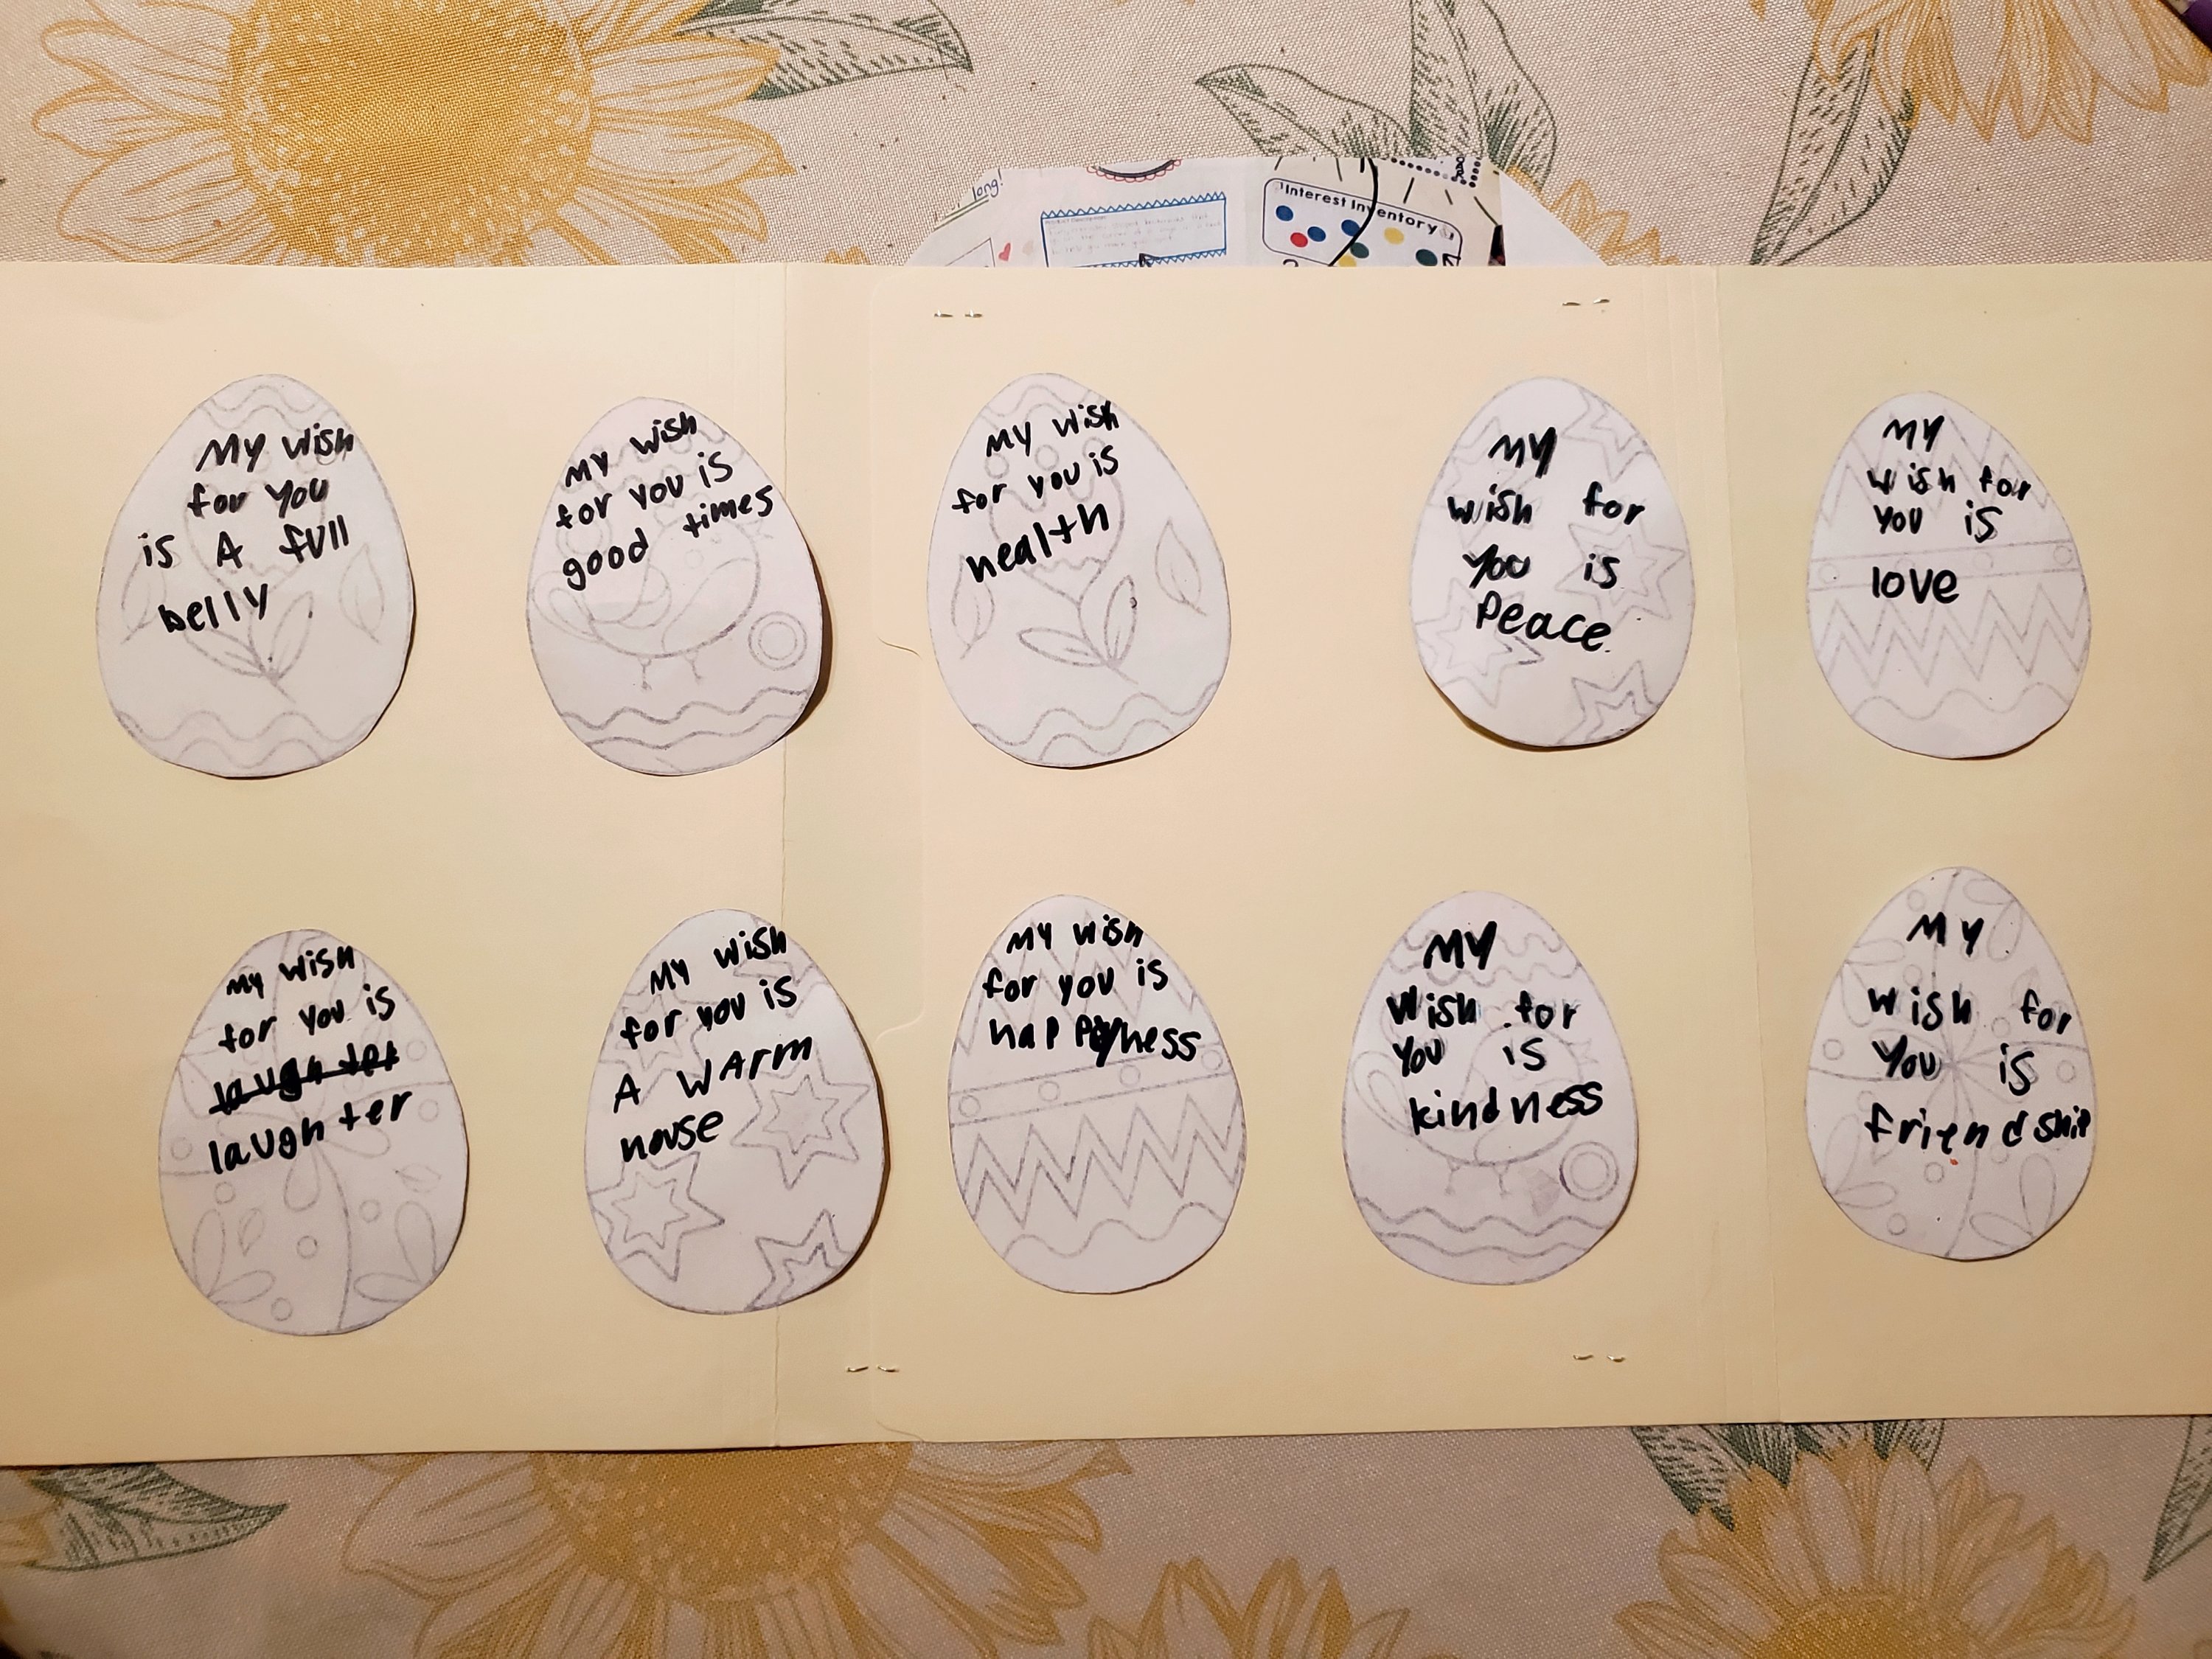
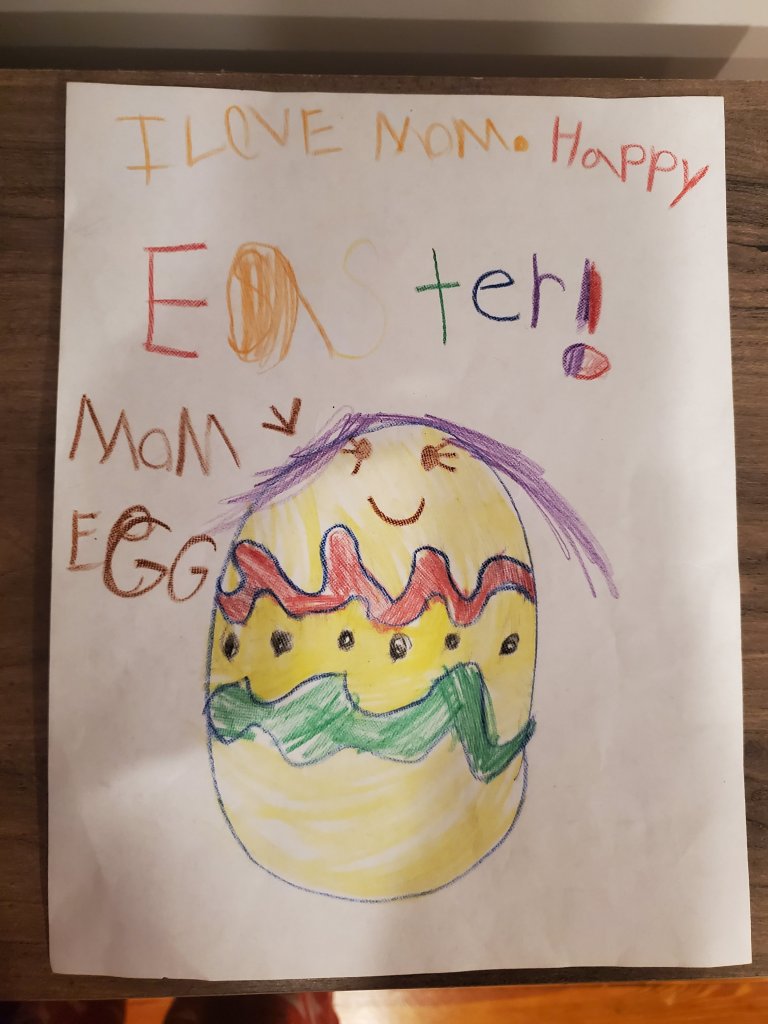
First, we found pysanky coloring pages on Pinterest then printed them out. Ella colored each egg and then wrote a wish for each egg on the back of them.
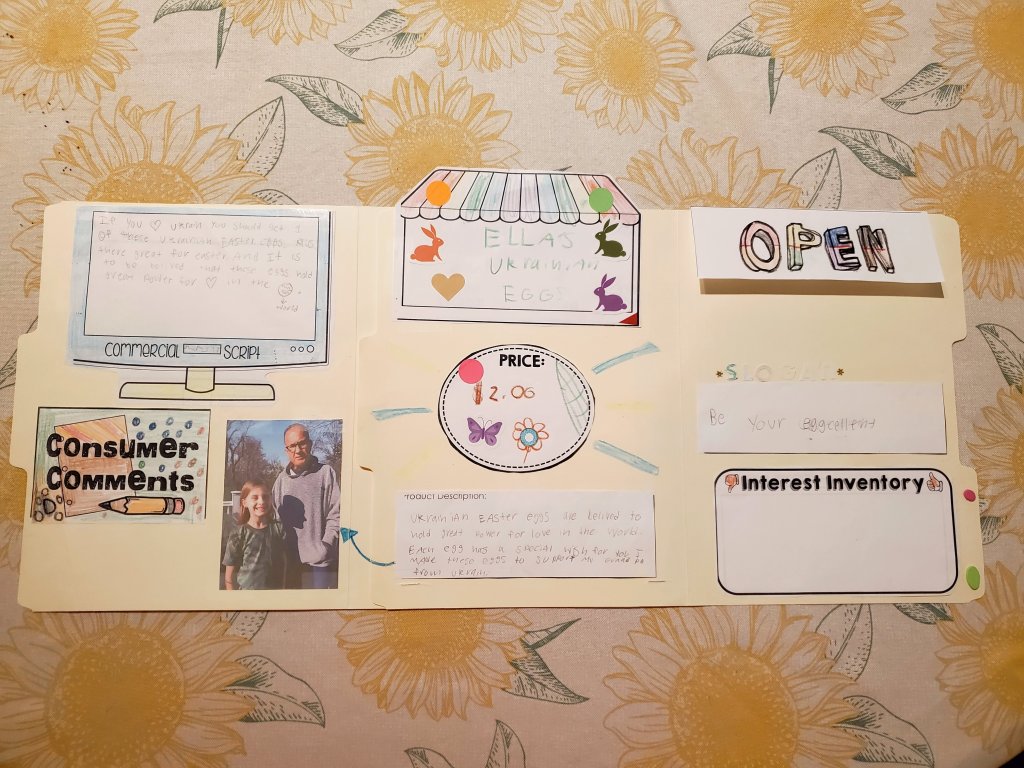
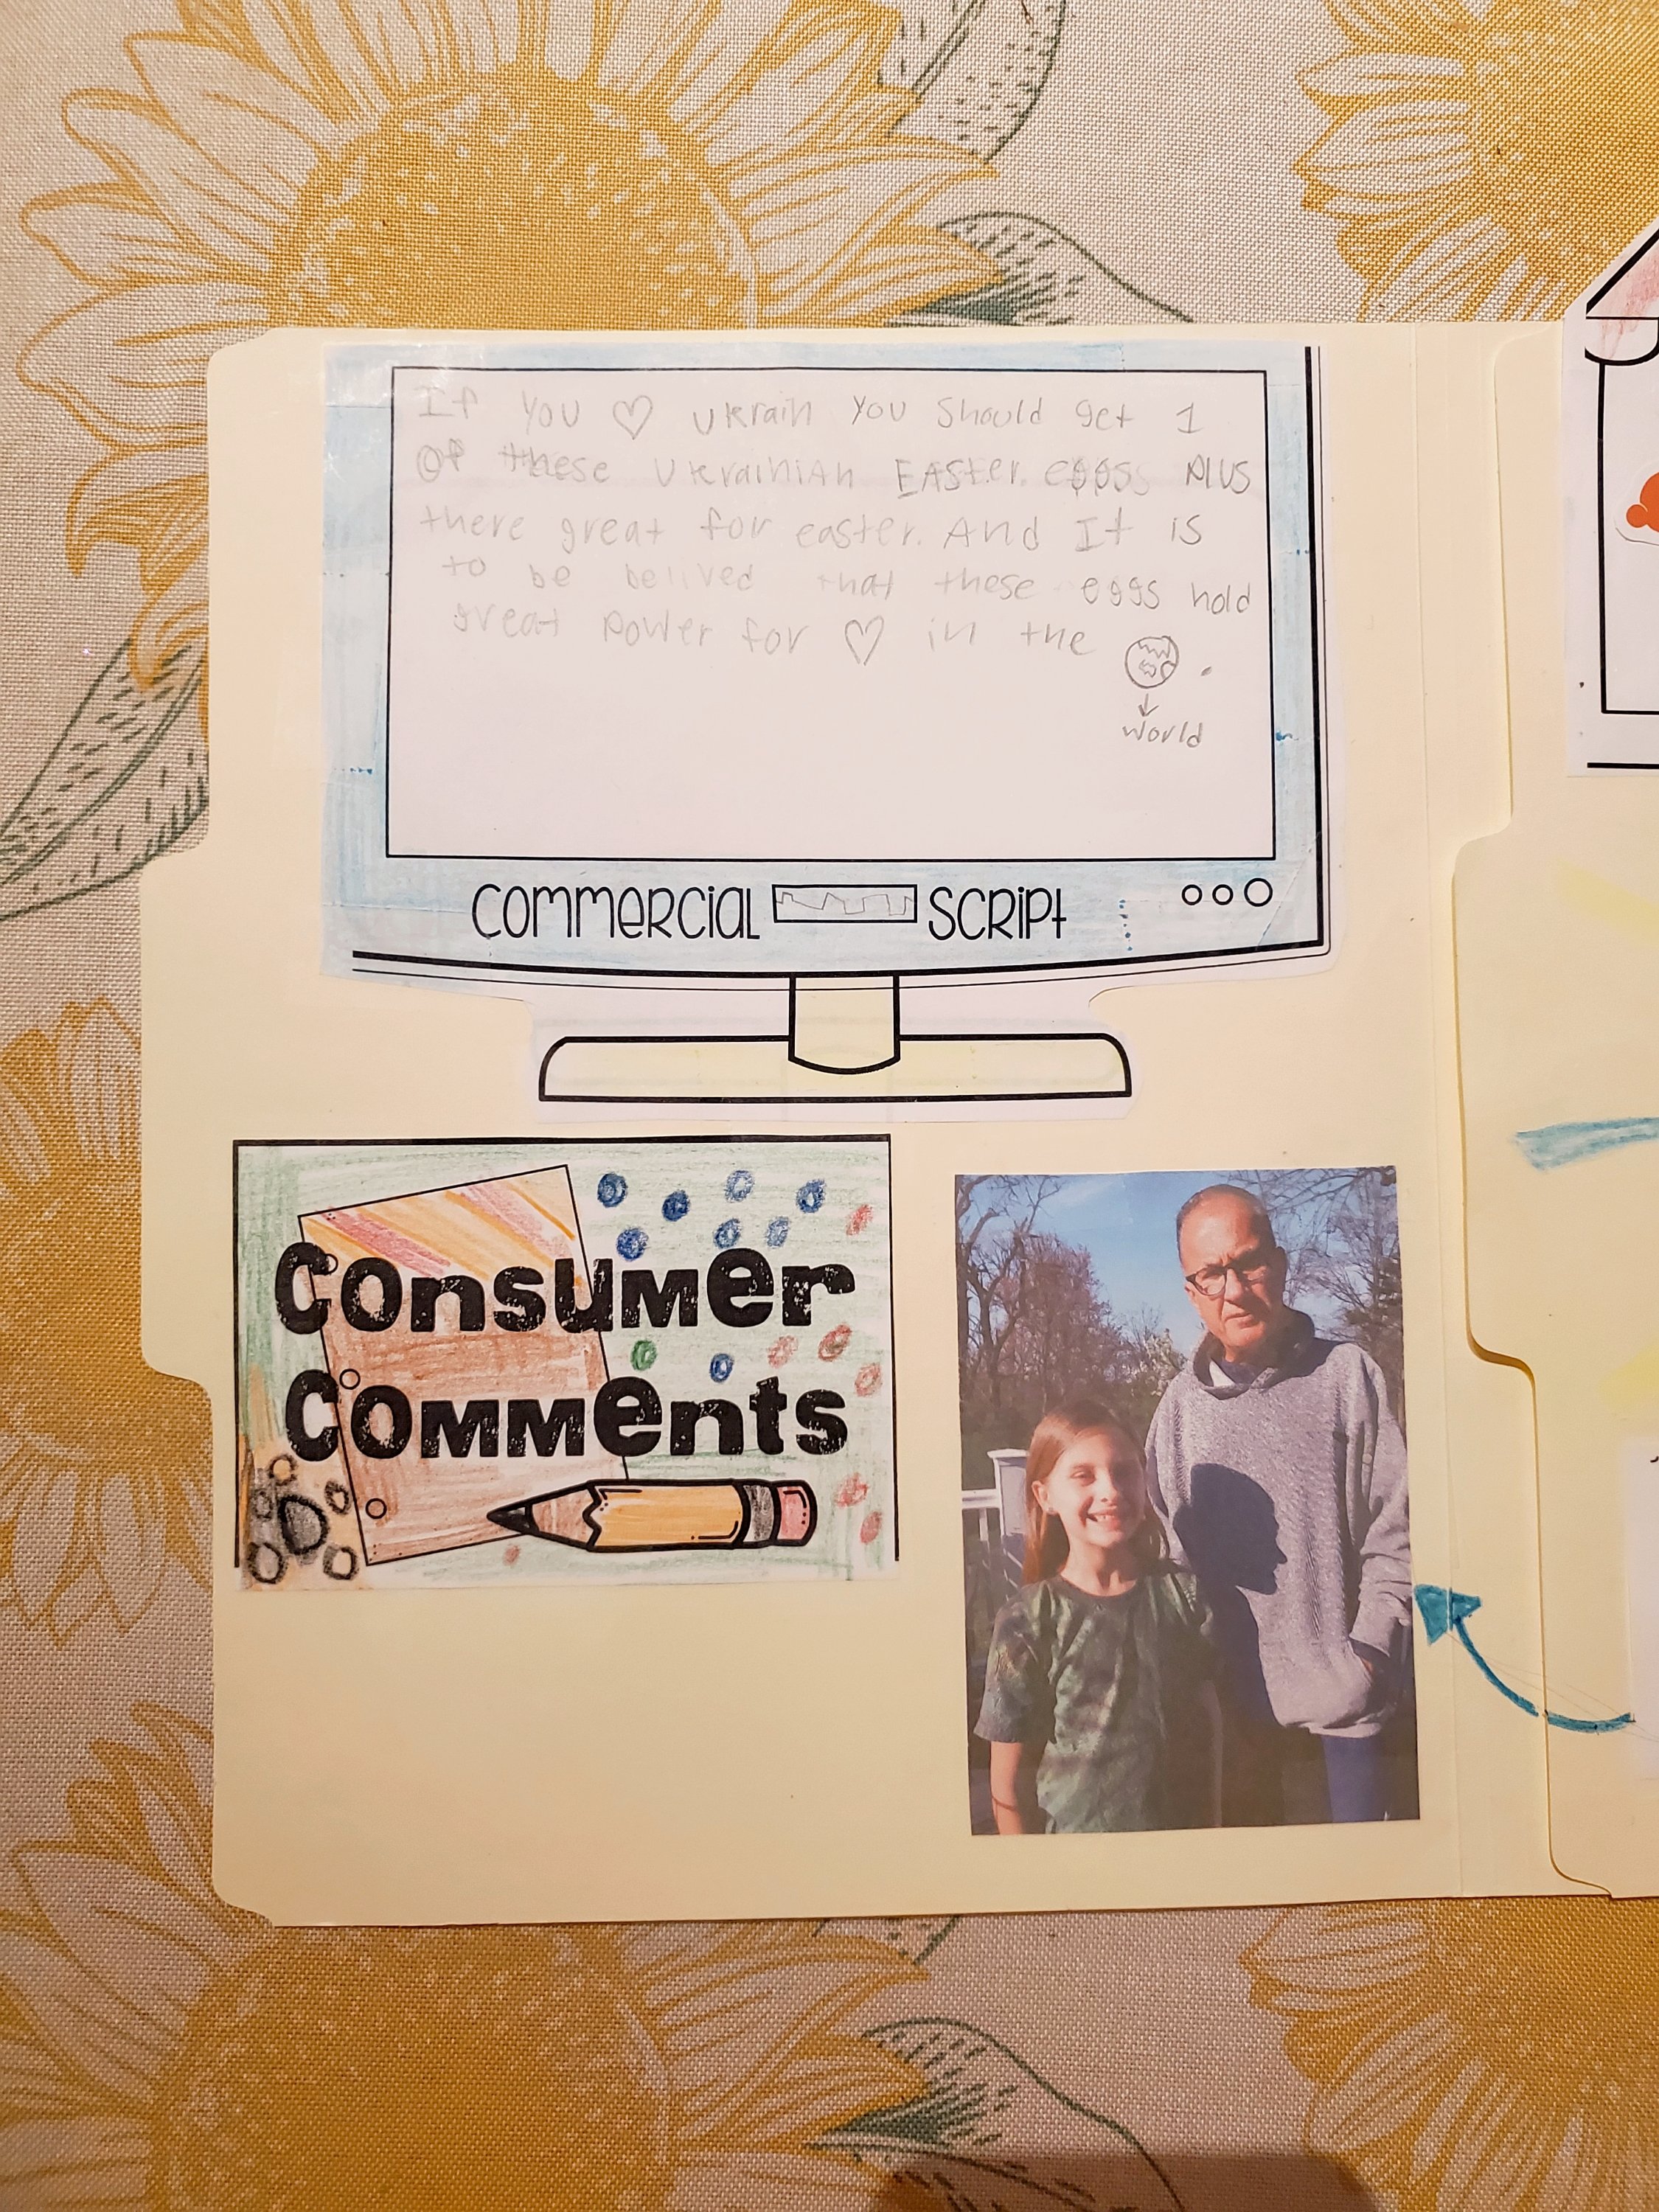
Next, we colored the pages for her shop and we cut them out and assembled them.
“At Ella’s Ukrainian Eggs, you can find Ukrainian Easter Eggs which are believed to hold great power for love in the world. Each egg has a special wish for you. Ella made these to support her Grandpa from Ukraine.”
“If you love ❤️ Ukraine, you should get one of these Ukrainian Easter Eggs. Plus they’re great for Easter and it is to be believed that these Eggs hold great power for love ❤ in the world 🌍.”
Her shop turned out SO cute! I’m very excited to hear how her project and “shopping” day goes. I am also excited to hear what the other children made for their shops. I really loved doing this project together with Ella. I loved that we were able to incorporate our heritage and culture to make it more meaningful to share with her friends at school.
Easter Celebration
My dad’s birthday coincided with Easter this year (the day after) so we went over to my parents home to celebrate both Easter and his birthday with an Easter Feast from the Wodka Bar. They offered a special, limited Easter menu which was perfect.
The pierogies & kolachi were SOOO yummy! I cannot wait to try more food from there from the regular menu! I also am going to learn how to make delicious kolachi at home so I can eat it alllll the time!
Mia also made a pysanky for each of us. I loved mine so much!
Overall, this was a lovely Easter weekend and my heart feels very full & blessed. We got to spend time with both sides of our family. We did an Easter egg hunt for the kids and they received nice spring time gifts. We had lovely food that I didn’t have to prepare or clean up. We truly are so blessed in this life on Earth.
I began my basement project a few years ago before I became pregnant with Athena. I had big plans in mind, but a seriously rough pregnancy left me to abandon this project until a later time, then another pregnancy + baby pushed it back even longer. The time has finally come to finish what I started!
Since this is such a BIG project, I am going to be splitting this up into 2 parts: 1. The kids area, this post, & 2. The “adult” area (laundry, entertainment/electronics area, & tool/cellar).
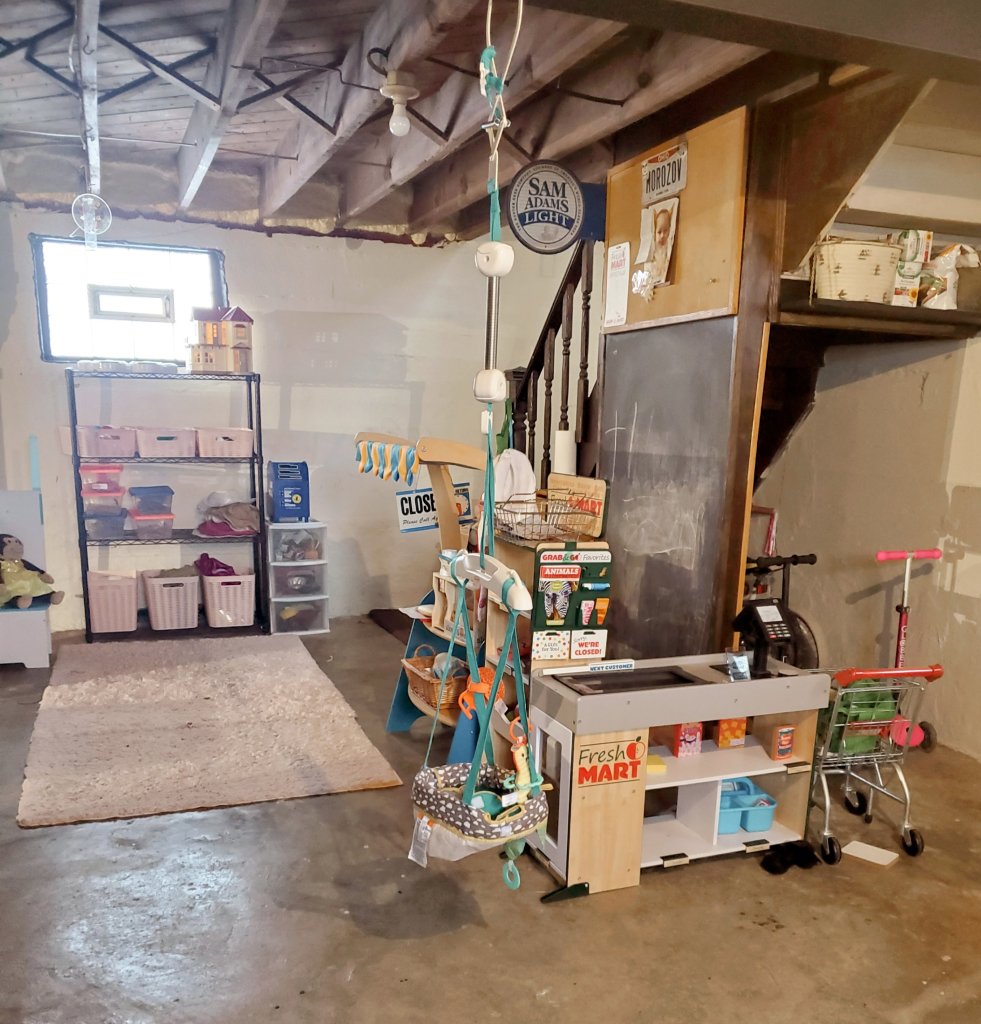
Imaginative Play
In the Imaginative Play area we have a grocery store/deli, doctor/wellness center, a mini roll top desk to play school, as well as the kids toy storage.
There is a chalkboard wall with a bulletin board on top for both school & “daily specials” at the deli.
This little stand is so cute and can be used for many Imaginative Play purposes. It is currently being used as a deli + coffee shop. They have their Melissa & Doug Sandwich Shop + their wooden utensils on top, and their Melissa & Doug coffee maker set on bottom.
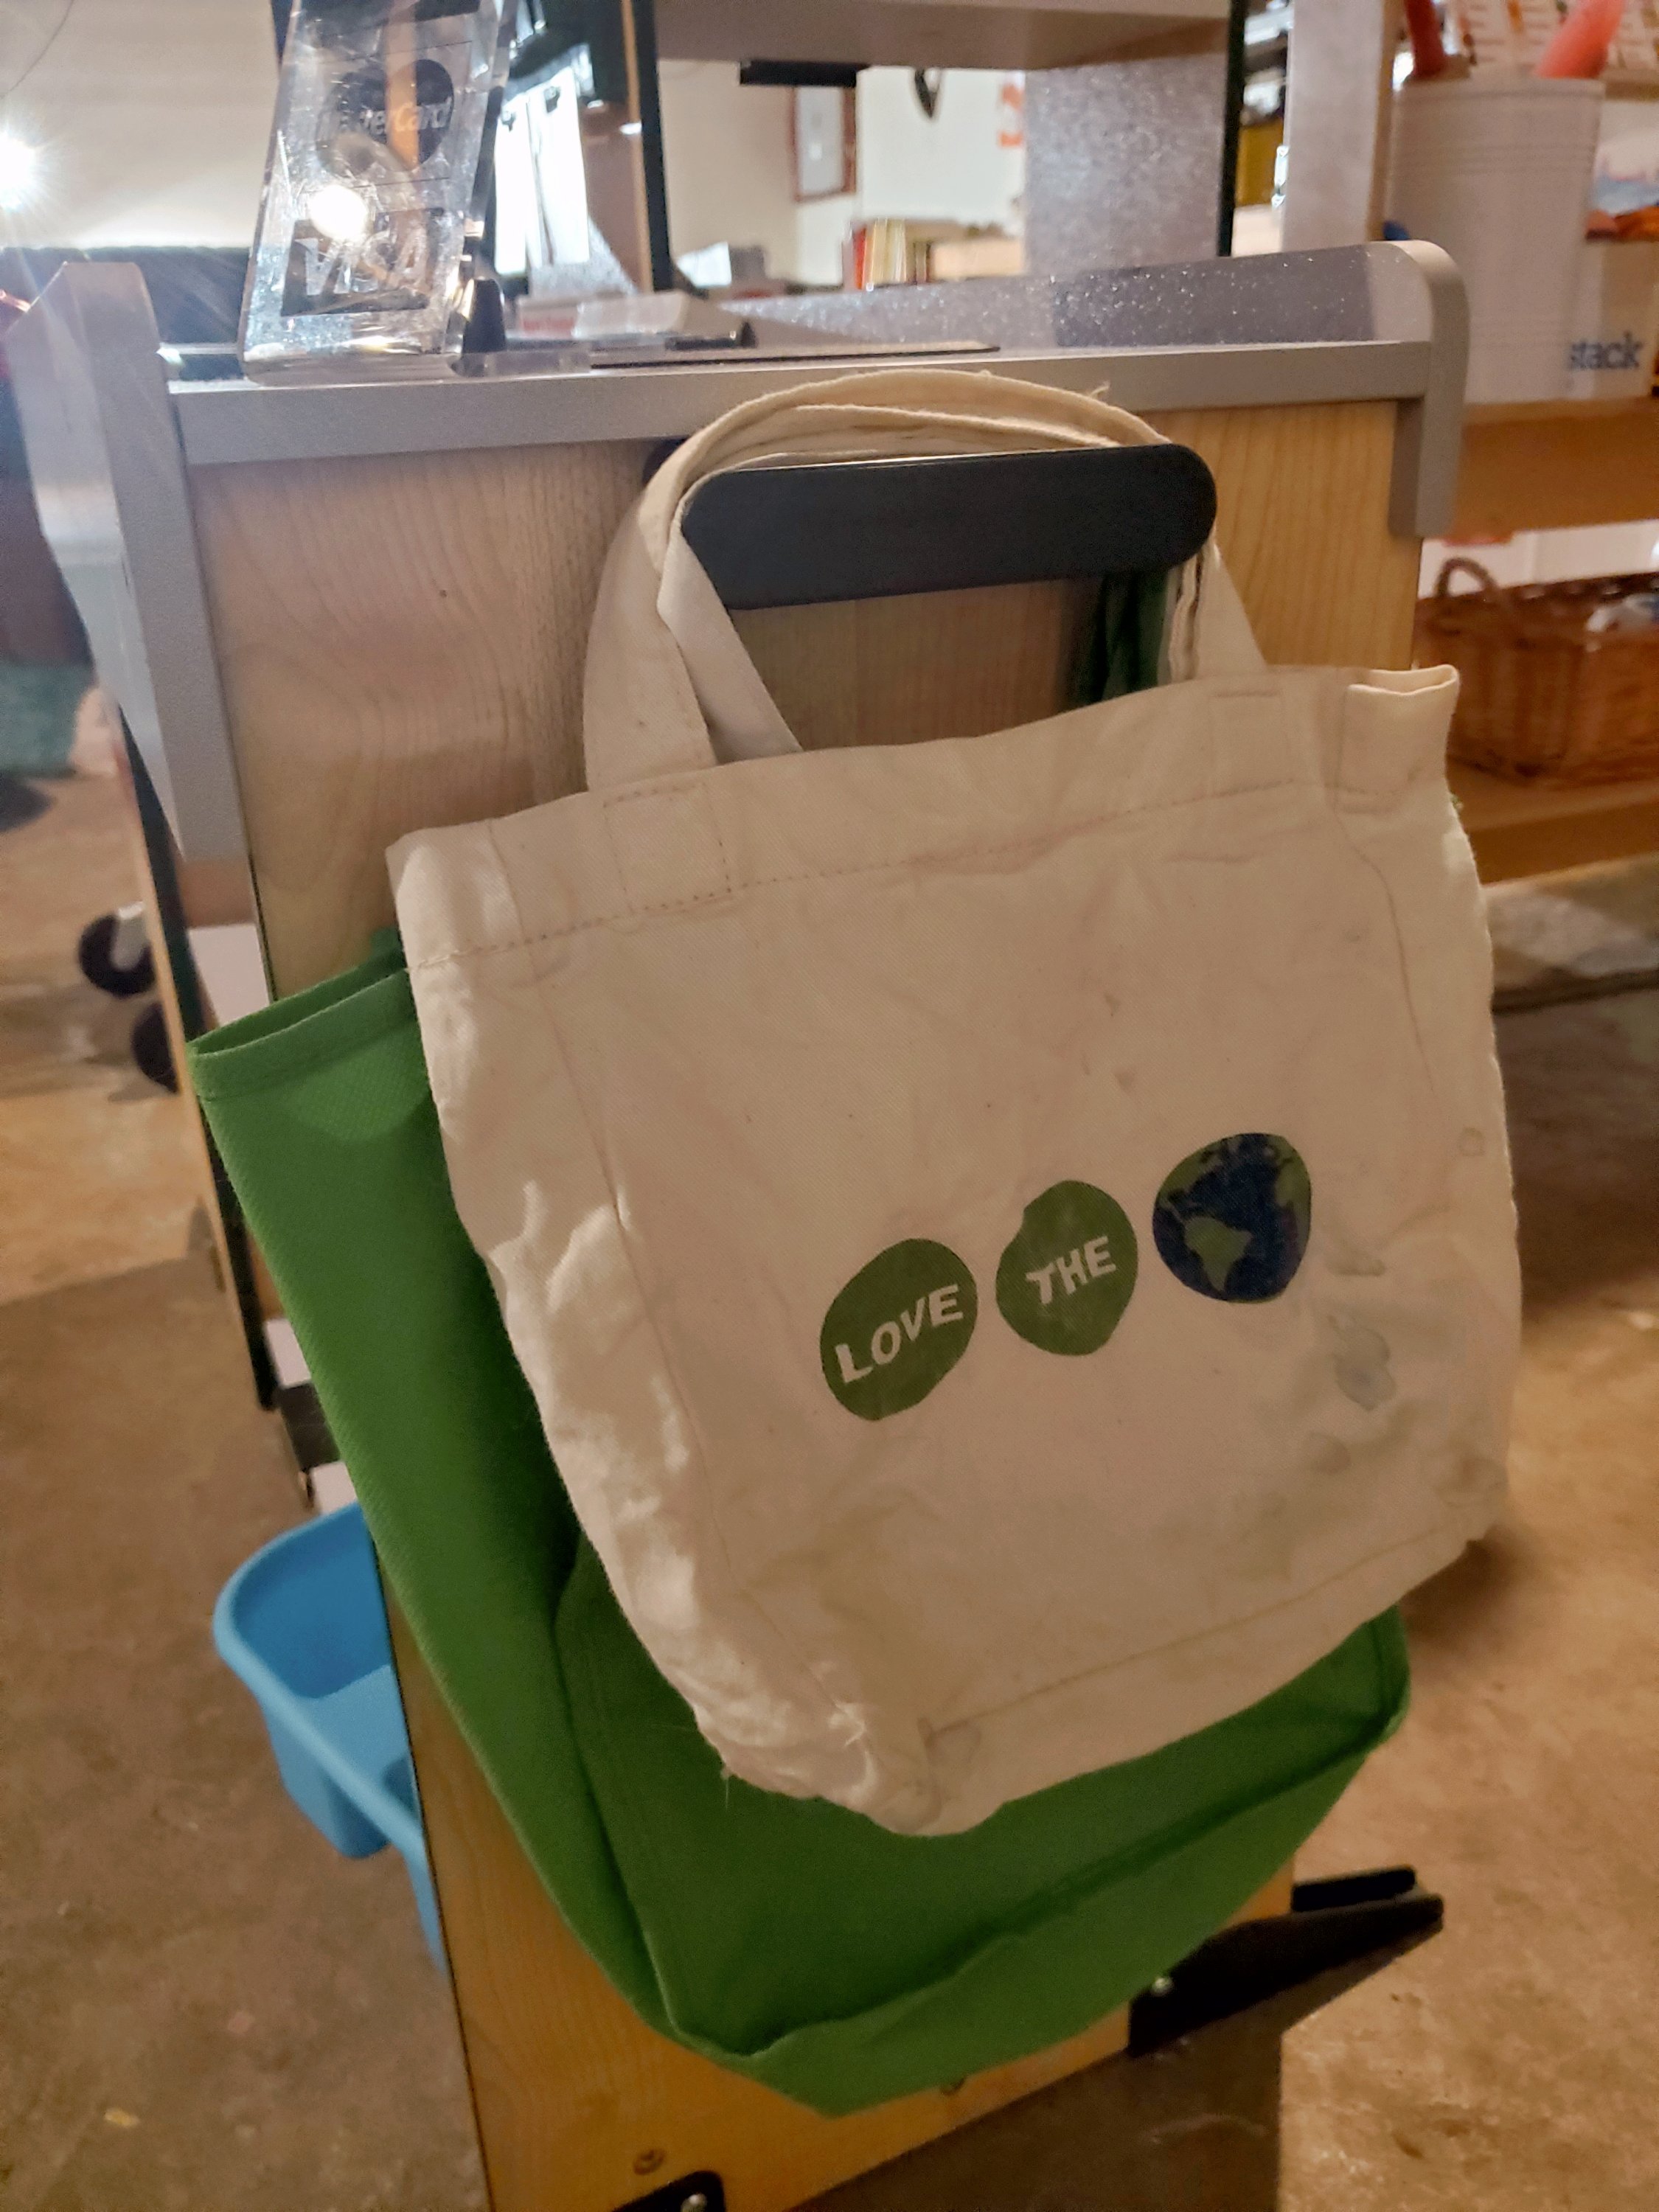
I am a huge lover & collector of reusable bags. I buy new ones constantly! Having miniature size ones for the grocery shop makes my heart SO happy!
Their little roll top desk with the miniature globe is SO cute. They love to play school with it.
Under the stairs is their “parking garage” for rideable things like scooters and ride-on cars. I do plan to change this space in the near future though.
Having so many little kids, it has been really nice to be able to have a space for them to play and be kids and not worry about them making messes. That alone has helped me SO much as an overly-stimulated and stressed out Mama. Kids need to be kids, and this is their home too. They need a place they are able to express themselves freely and I hope that this space is able to be that place for them.
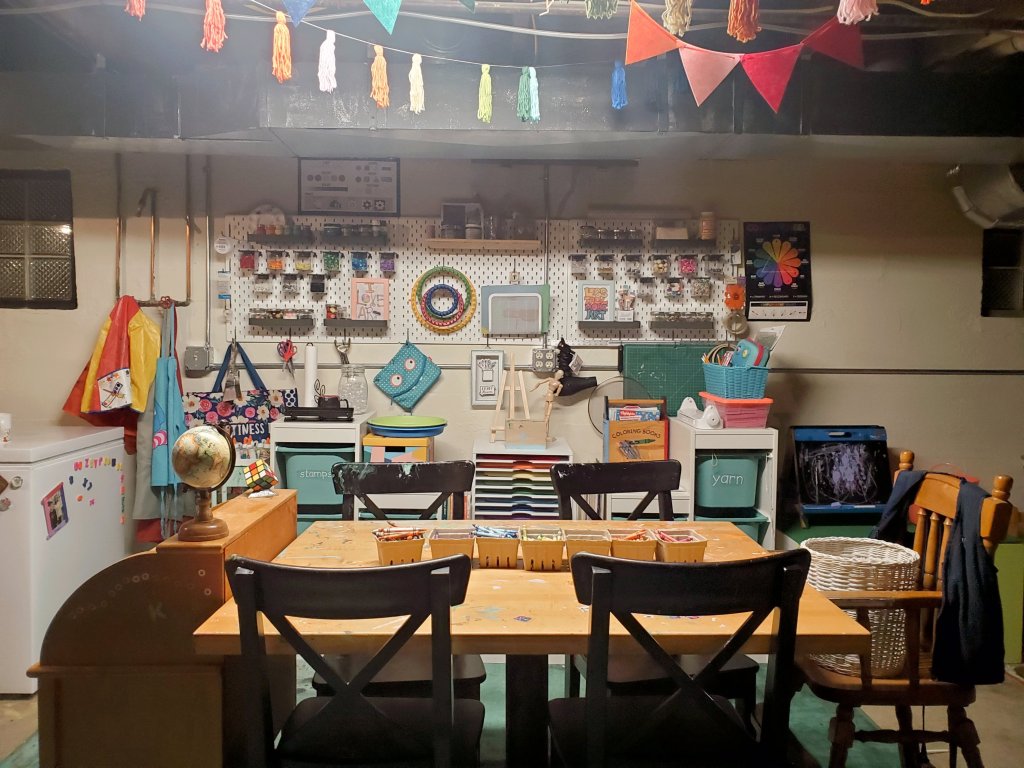
Art Studio
The first time I went to rehab, I went to Timberline Knolls in Lemont, Illinois. It had the most beautiful art studio with tables stained in paint and clay residue, colors and Empowering messages everywhere, and so many supplies.
Ever since then it has been a dream of mine to have my own art studio, but never really saw it as super realistic.
I recently spoke with a friend, who, ironically, I met at Timberline Knolls. I’ve always envied her life. She’s built her own little plot of homestead paradise in the middle of no where and spends her time homesteading and crafting and doing things her, her husband, and children love to do. That is literally my dream life.
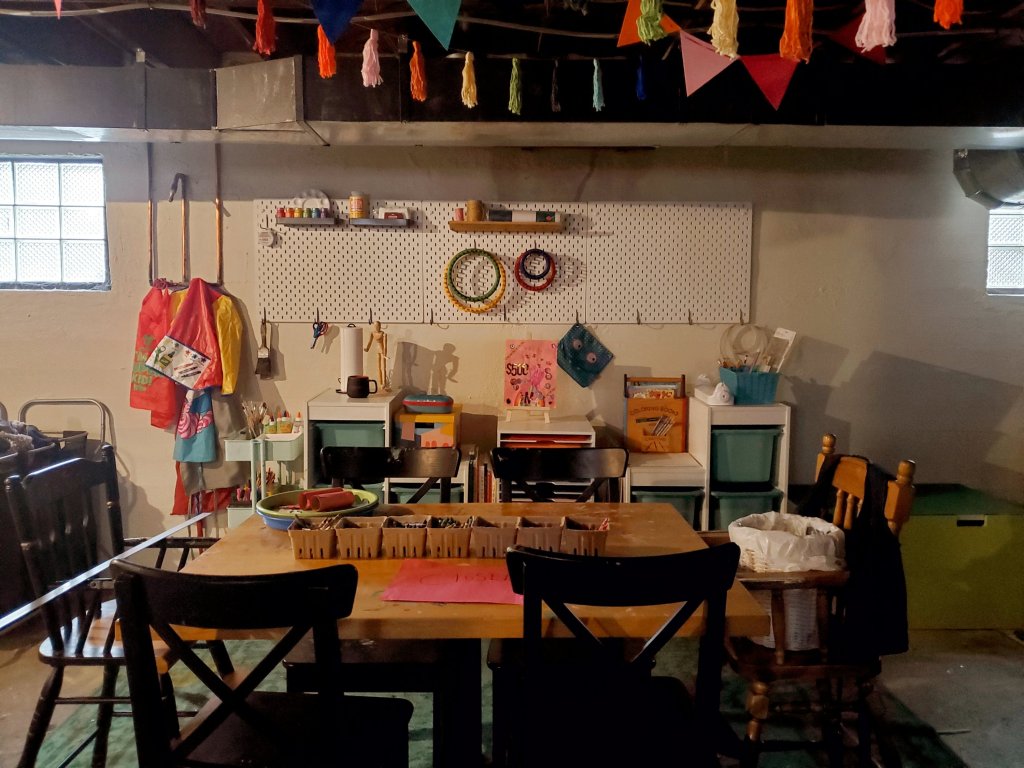
Anyway, she made me realize that life is what you make it. I need to stop waiting for better, for more space, for my children to get a little bigger. I need to stop waiting, and start building my happy place now with what I have. So I began building an “art studio.”
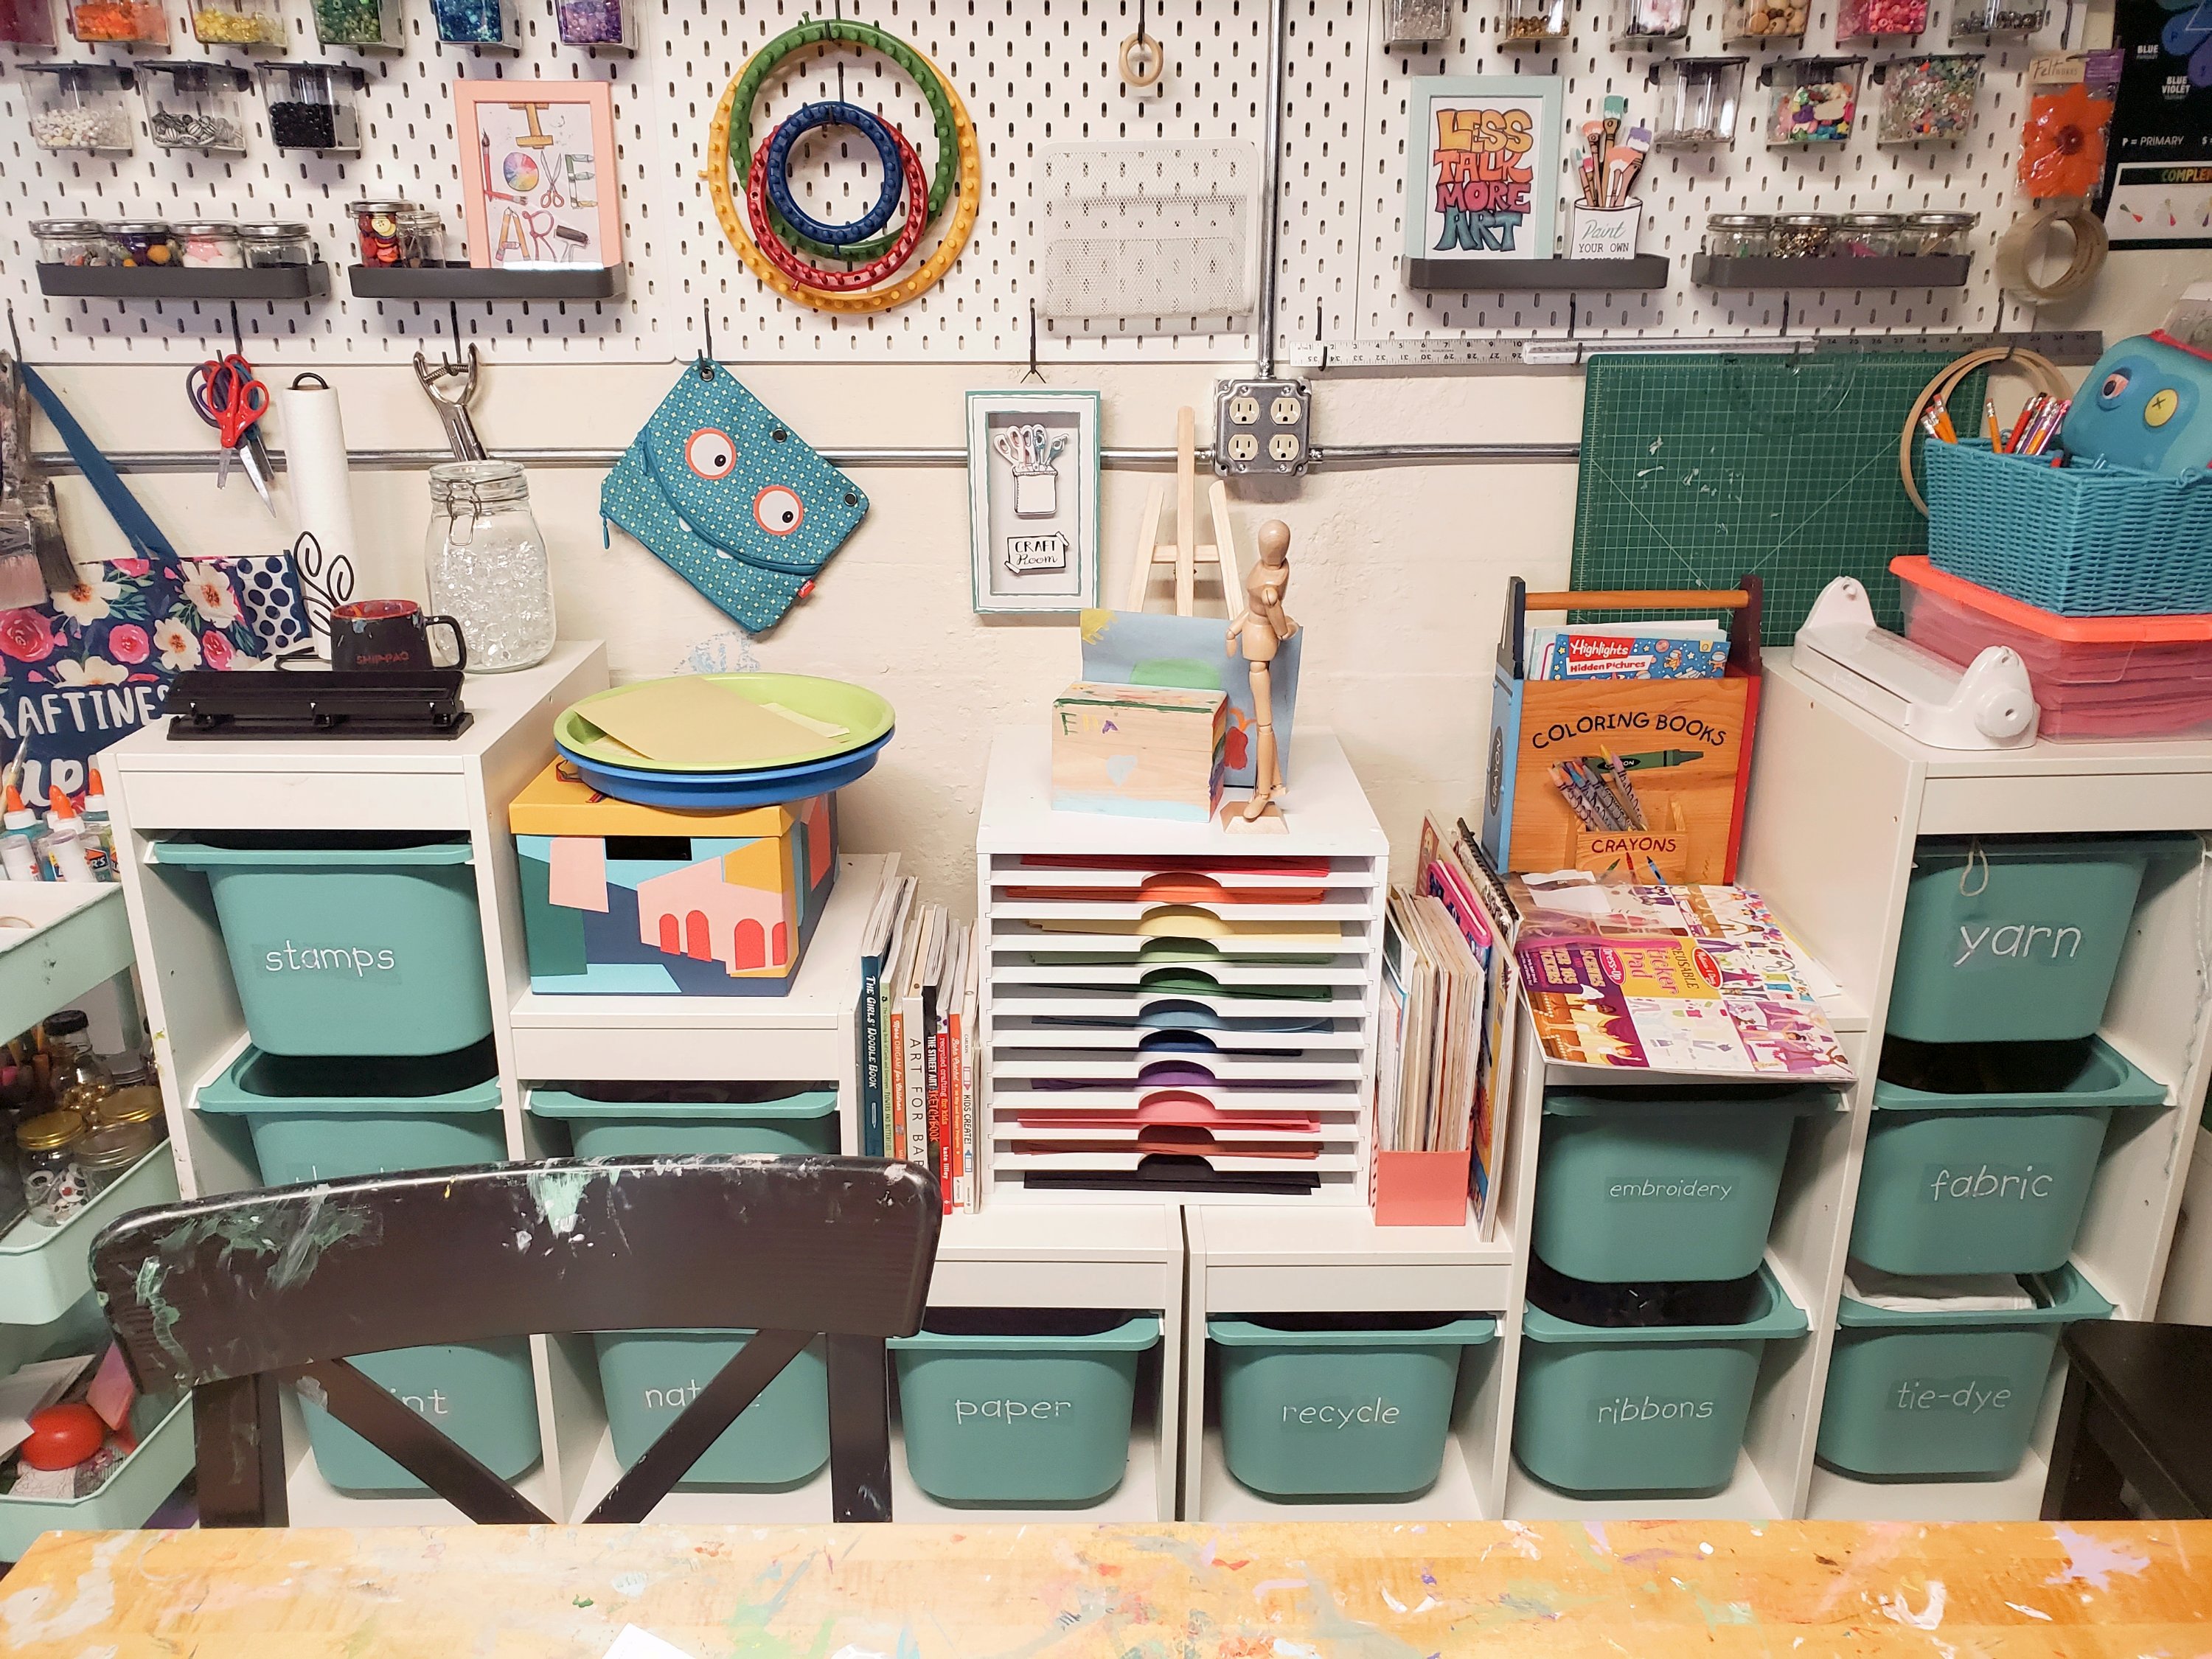
First, I set our old dining room table up in the soon to be art studio, then added this Trofast Storage Unit from IKEA for art supply storage. I used this rolling cart that I already had to organize more supplies like paintbrushes, glue, washi tapes, etc.
I added this paper sorter from Michael’s to color code their construction paper. Not only does color-coding items look beautiful, it helps cut down on mess because the kids can visibly see what they are working with instead of fumbling around for what they need.
I repurposed produce bins to color code their crayons in the middle of the table. It looks super cute and it helps teach my kiddos to put their supplies back where they belong.
Color coding is an easy way to help teach toddlers how to organize + learn their colors at the same time.
I began hanging these colorful banners to make it look fun and inspire creativity.
I also began picking up a few functional decor pieces that I was very excited to use in this space.
Next, we removed the old, random, oddly-placed cabinet. We found out why said cabinet was randomly & oddly placed. There was a MASSIVE crack/wall damage hiding behind it. We got cement filler, patched the damage and waited 24 hours.
After the 24 hour wait, we began hanging the pegboard. I had purchased + planned to hang 4, but I ended up deciding 3 was plenty to start. I bought a few accessories with the pegboard, but wanted to wait to go crazy with accessory shopping until I had a clear idea of how I was planning to arrange it to go back and purchase more.
My dad & his friend updated the electricity + added lights above the table & outlets in the middle to be able to use electronic tools. I cannot wait to add things like pottery wheels in the future now that I have this outlet.
Using my Cricut, I added labels to the bins so that we are easily able to find the items that we need.
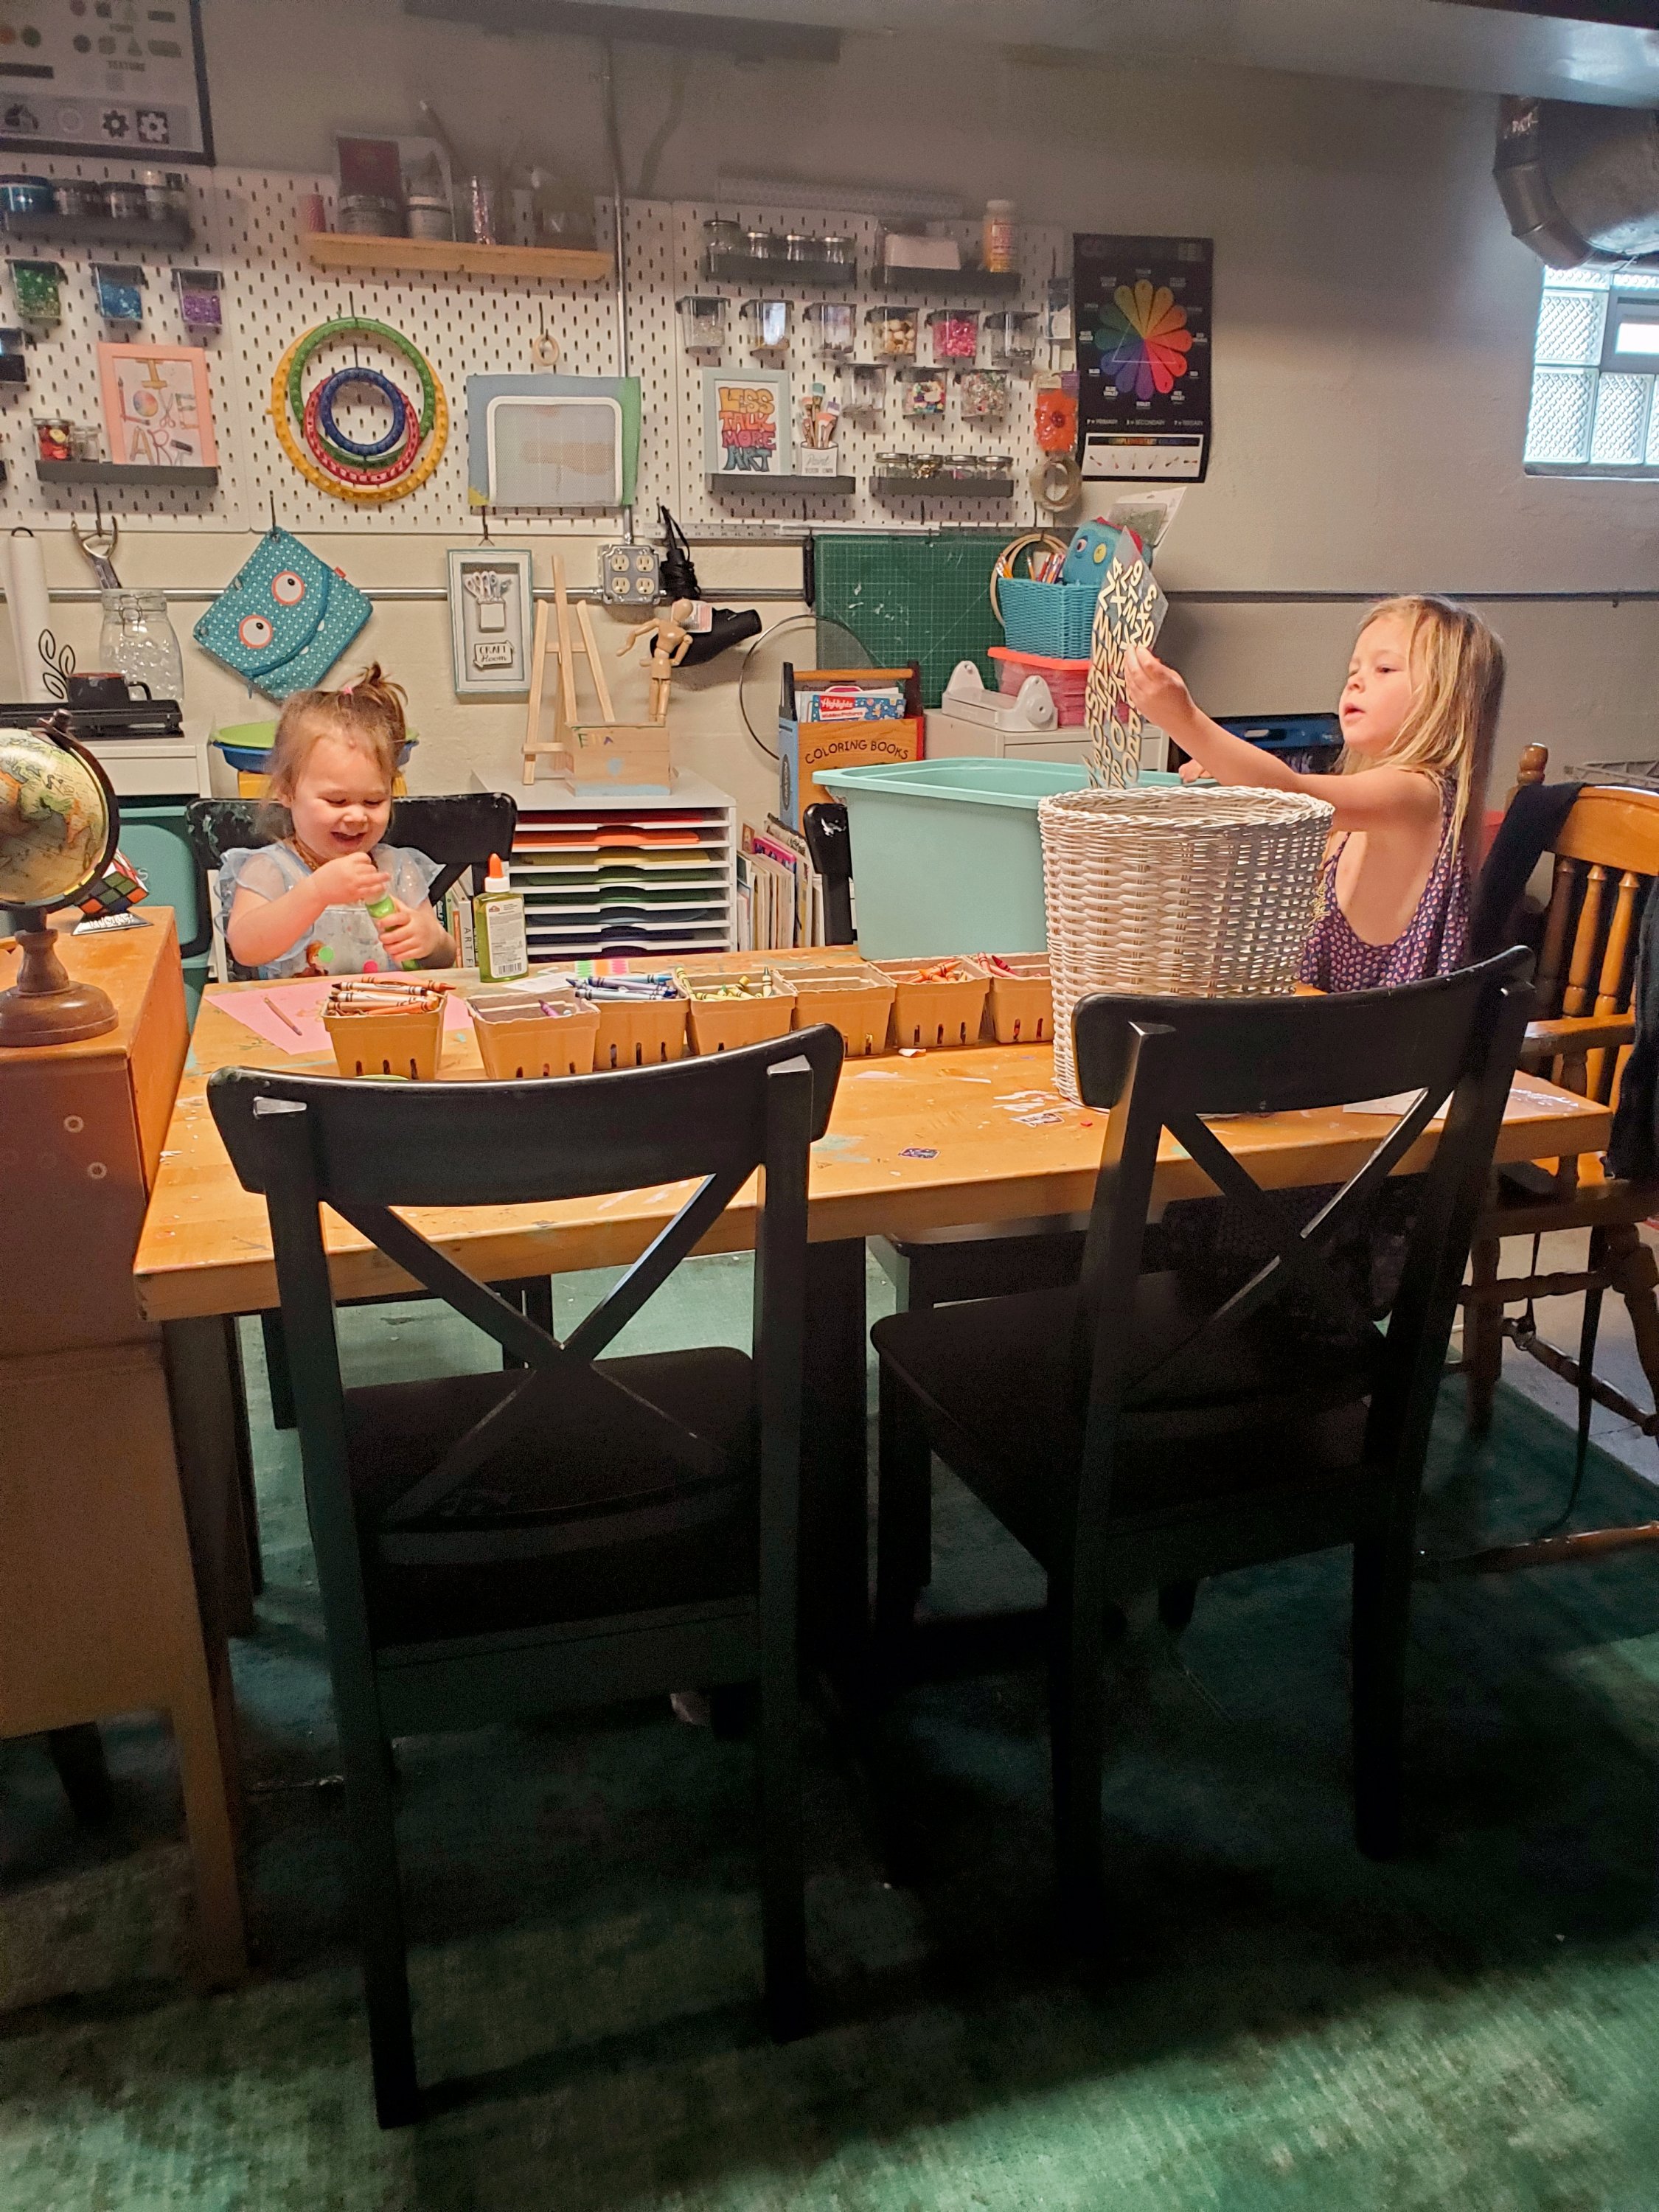
We moved the desk over here so they could play “Art Teacher.”
I am absolutely obsessed with it and the way that it turned out. I now have my very own art studio, filled with colors and paint stains and all kinds of materials for us to choose from. I am so in love with it and still in such awe every time I walk downstairs and think how is this mine?!
Baby + Soft Play Area
It’s a lot of work to try to keep babies & toddlers entertained for a long time, especially on days we are stuck inside.
This fun little climber tent was a birthday gift to Sasha. One side has a climbing wall, the other has a window.
The Nugget was a MUST for this area. We are OBSESSED with our Nugget. I got The Very Hungry Caterpiller print because it’s one of our favorite books & the print was just beautiful. It is SO soft and comfy too!
I have a lot of Primary colors in the baby area. I added lots of cushions, padding, & floor mats to encourage crawling + be able to roll around freely. The Lego storage blocks hold other toys so that we are able to rotate the toys that are out for open play.
We added a little library against this wall with the baby/younger children’s books.
I added these fun flower lights above this area. It’s somehow both a fun vibe and a calming one in one.
Well, that’s where I’m at in this stage of my basement makeover! I hope you got some inspiration for your own basement/family/play room.
I still have many plans to come in the future and just like with every space, it is forever evolving. Make sure to check back for part two to see how I did the “adult” areas!
This bathroom makeover has been on my to do list for a long time! I took a hiatus from working on any big projects around the house. Having our last three babies back to back took a pretty big toll on me physically and mentally.
After Moses was born, we had planned on moving and began the house-hunting process. Eventually, we landed on holding on this home while finishing up paying it off before we move, in order to gain a higher down-payment in the end. With Deer Park being an “up & coming neighborhood,” our home has already risen in value quite a bit from it’s purchase price & will only continue to rise as both our neighborhood & home continue to improve. Once we knew we were staying put, I really started getting to work on making our home work better for us and our growing kids. This room really got me excited to start getting our home together again, one space at a time.
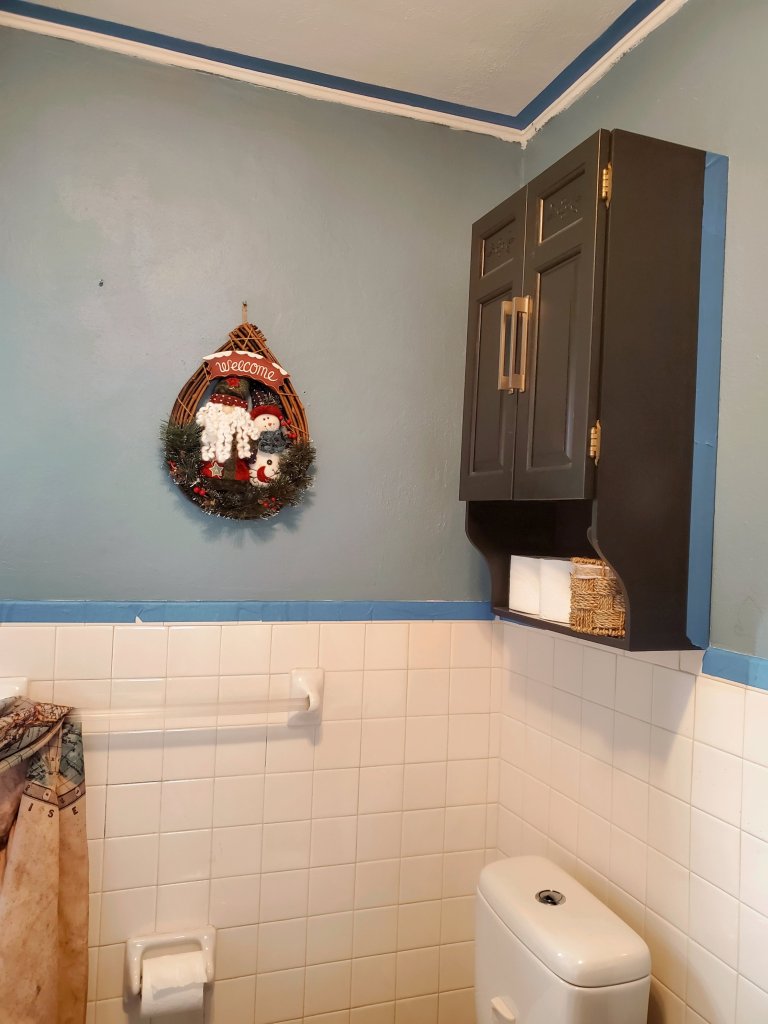
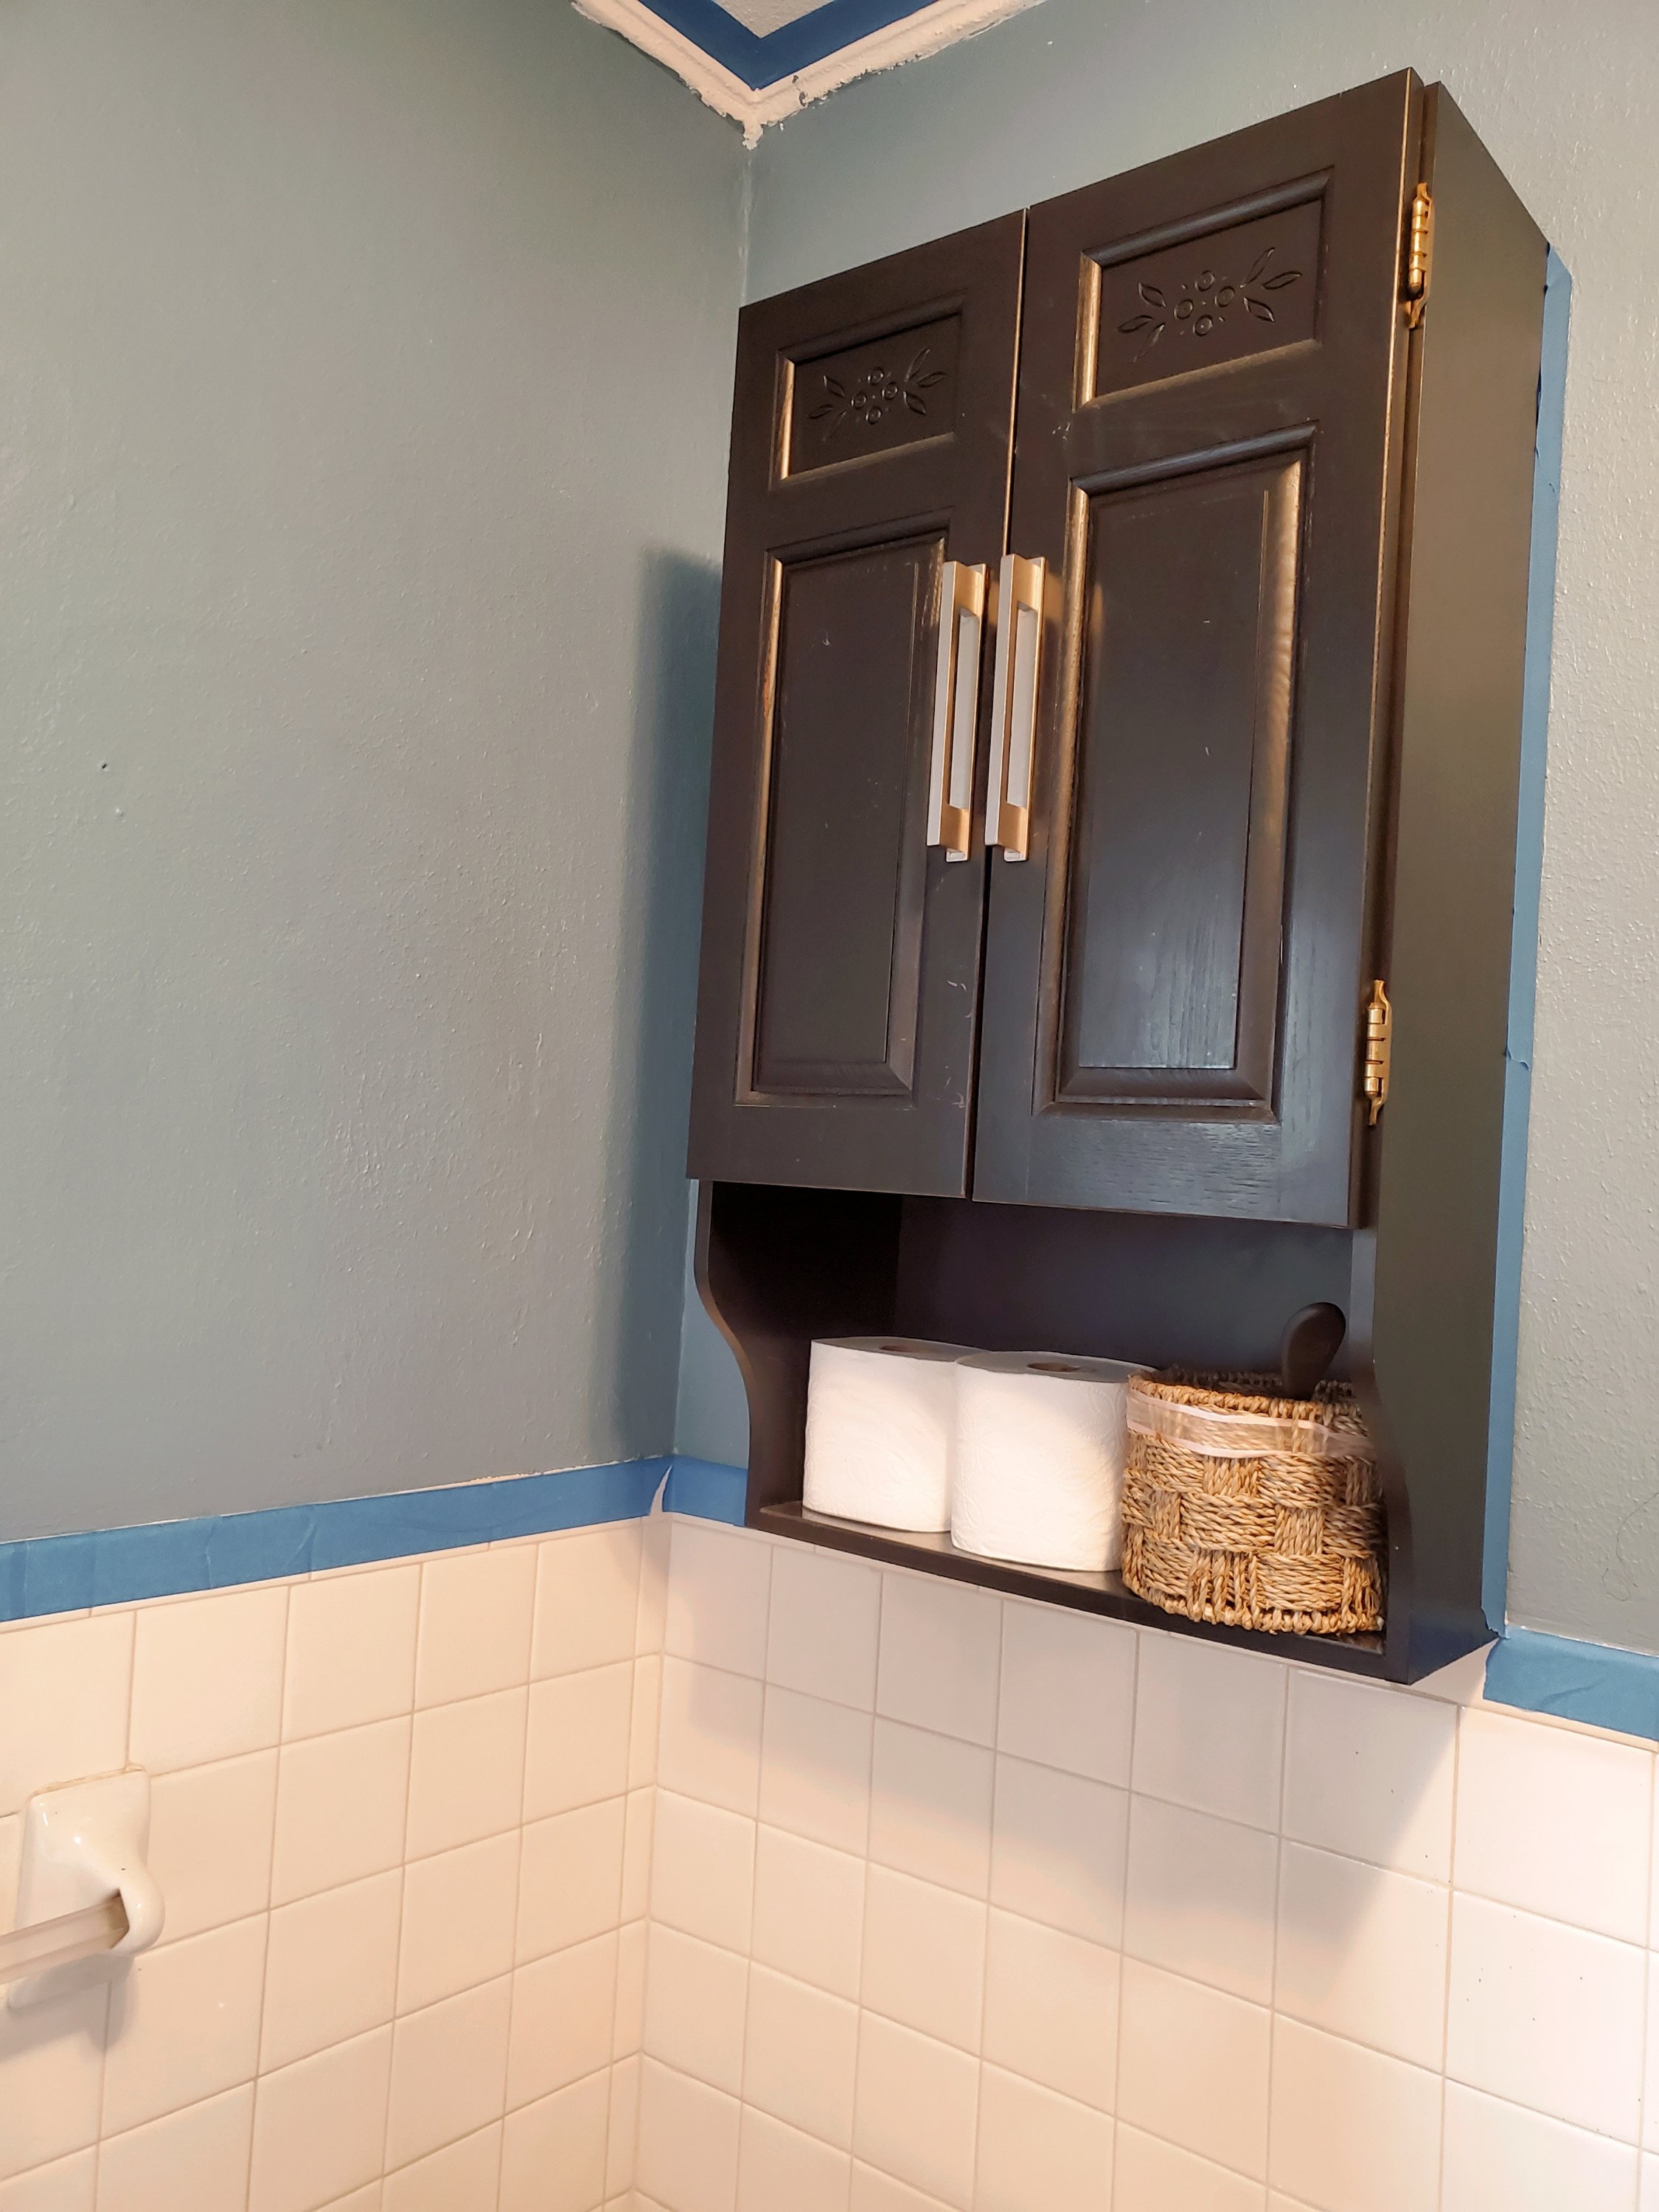
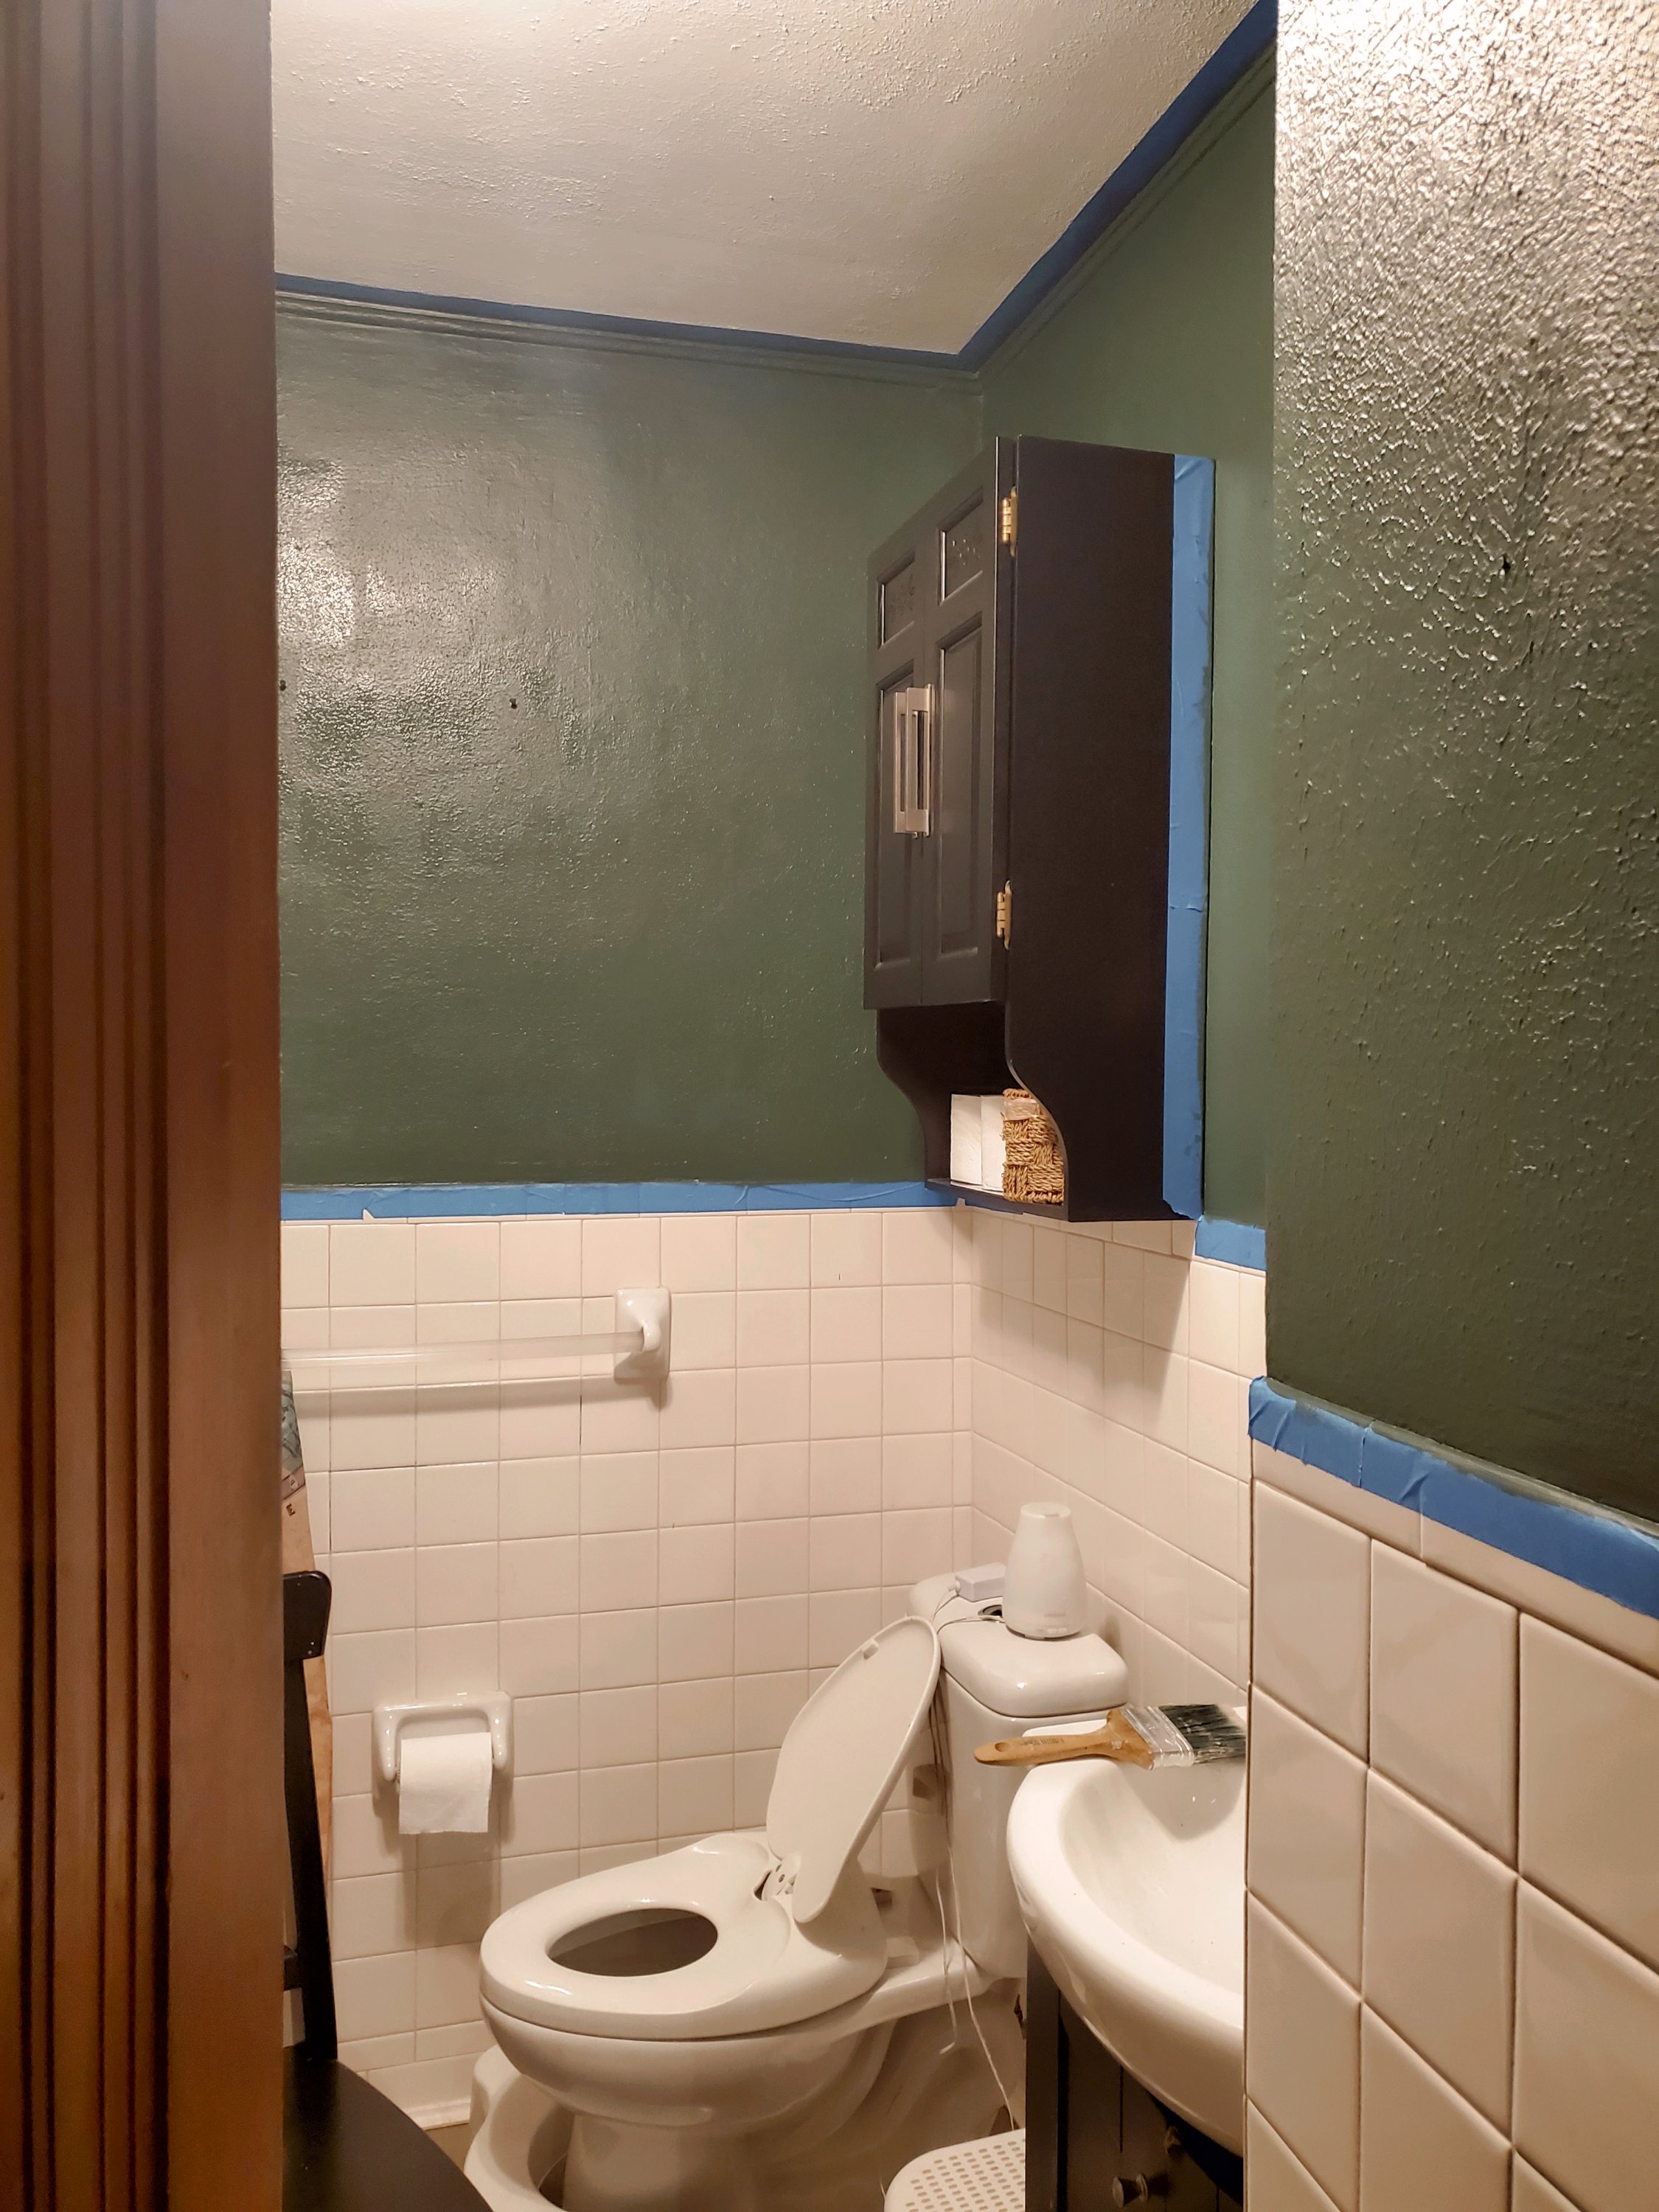
Before:
I’ll start out by saying: I couldn’t stand this room. While I like all colors, Blue is my least favorite. It does not bring me any joy, unless it’s teal. I love teal.
The bathroom is a heavy traffic, very used room by not only our family, but usually by any visitors we have also, so I really wanted it to be a room I enjoyed being in. Mission ACCOMPLISHED!!!! I’m now obsessed with it!
Looking back at these pictures made me remember how much I couldn’t stand this room. I always felt so angry every time I was in this room, which was a major problem considering I spend a significant portion of my life in this room.
The Process
First step: paint! I used Rock Garden by Sherwin Williams. It is SO beautiful. It’s even better than I imagined it would be.
I took these photos as soon as I finished the second coat, while it was still drying. I was already so in love with it!
I painted the trim this time so that the color goes all the way to the ceiling. This made the room feel a lot taller, which tricks us into feeling like it is a larger room than it is.
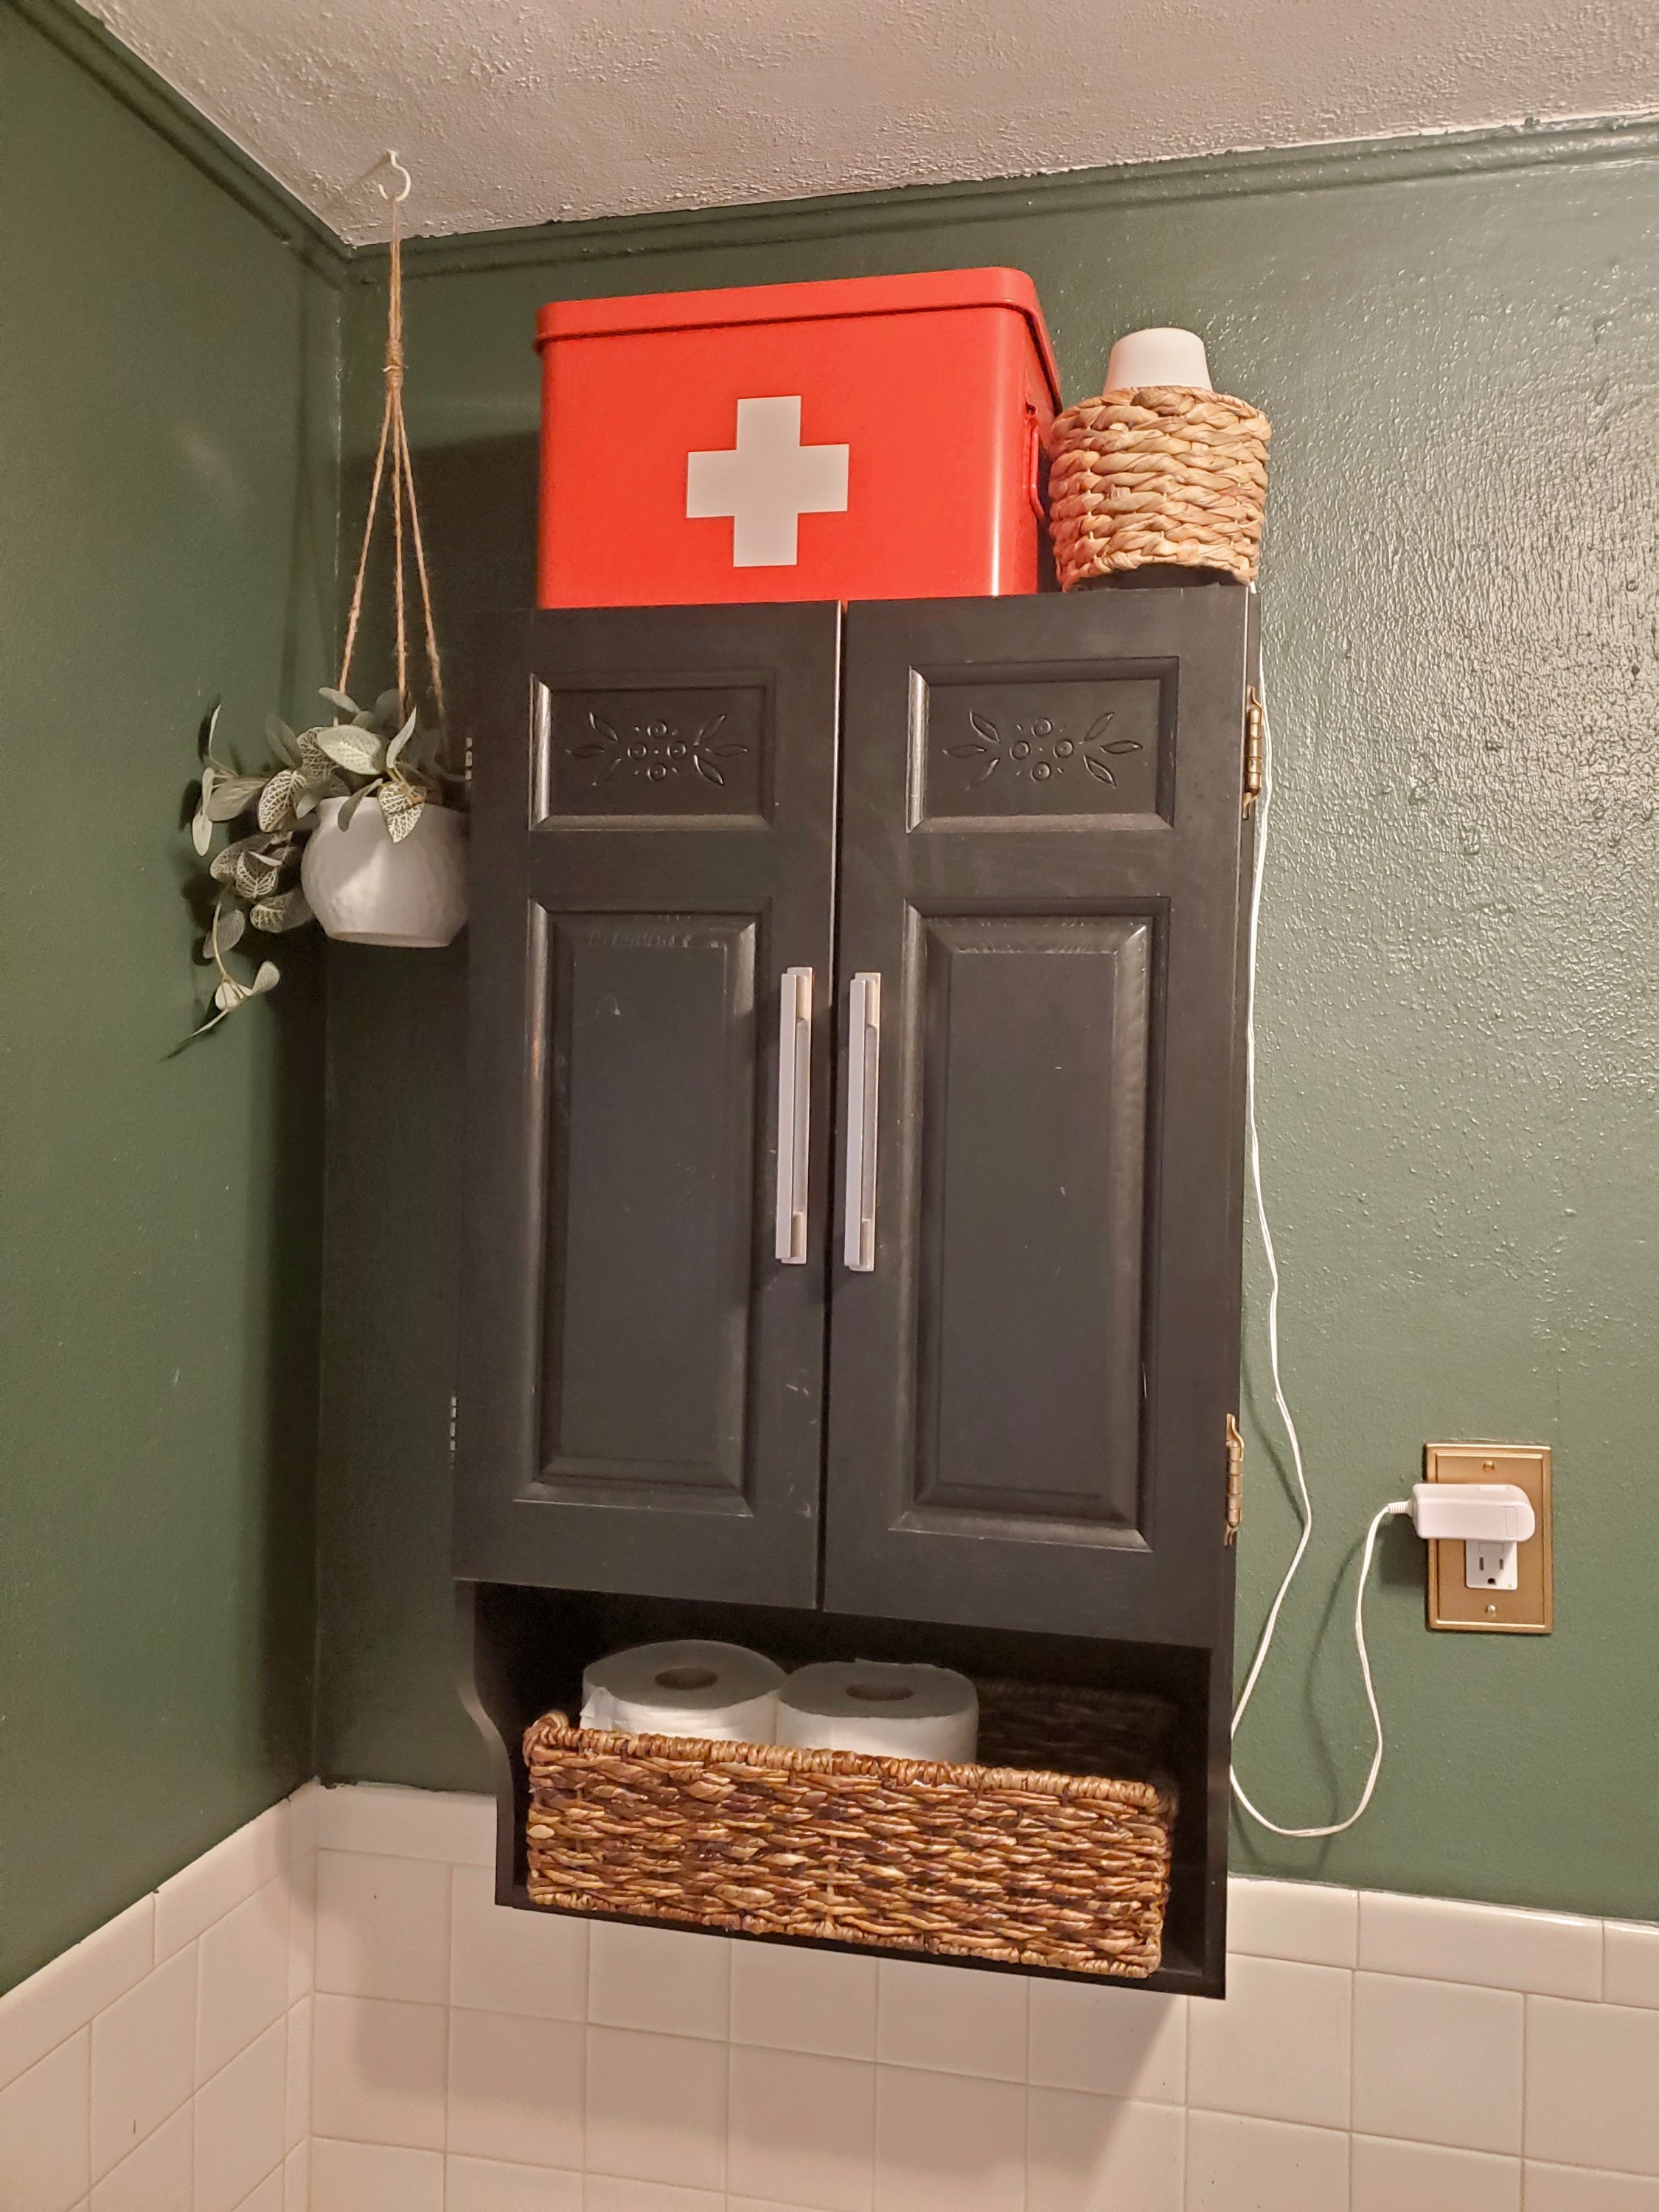
When it was dry the next morning, I loved it even more! It really is the perfect color!
Next, I switched out the plastic outlet covers for gold ones. I also found gold cabinet pulls + knobs for both the sink vanity and this cabinet as well and ordered those off Etsy.
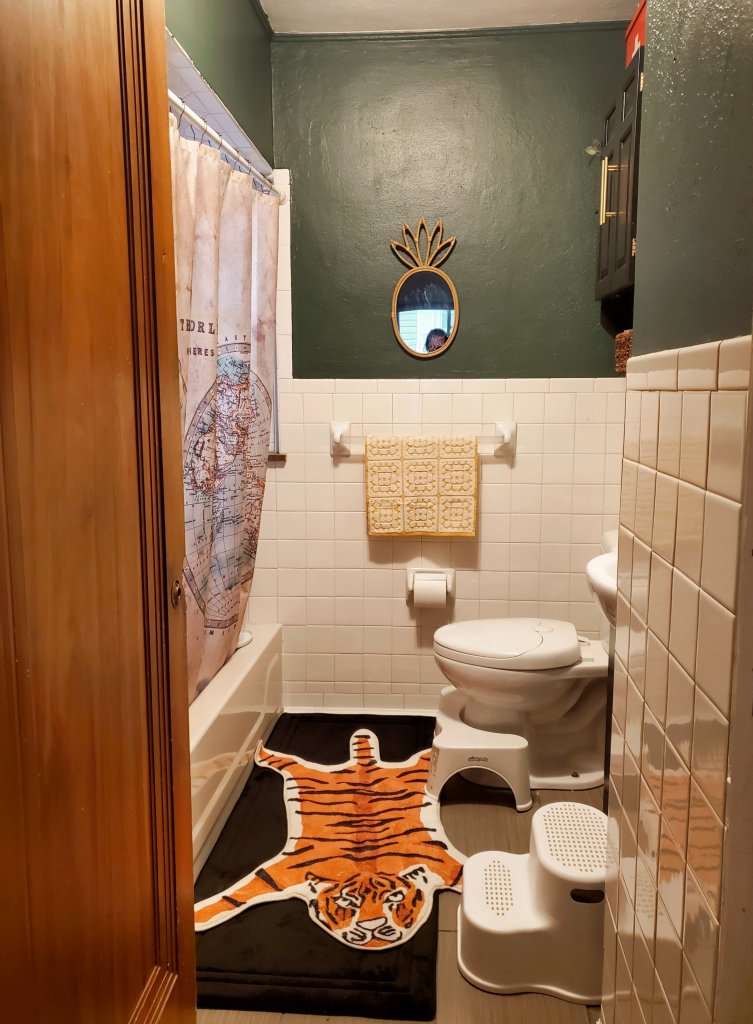
I put my First Aid box back (which I LOVE by the way, even more so now with the nice color contrast) and shopped my home for this basket to store toilet paper in. It fit perfectly! I had Niko hang a this planter in the corner with a faux plant. I found a similar little plant stand to place my small diffuser in.
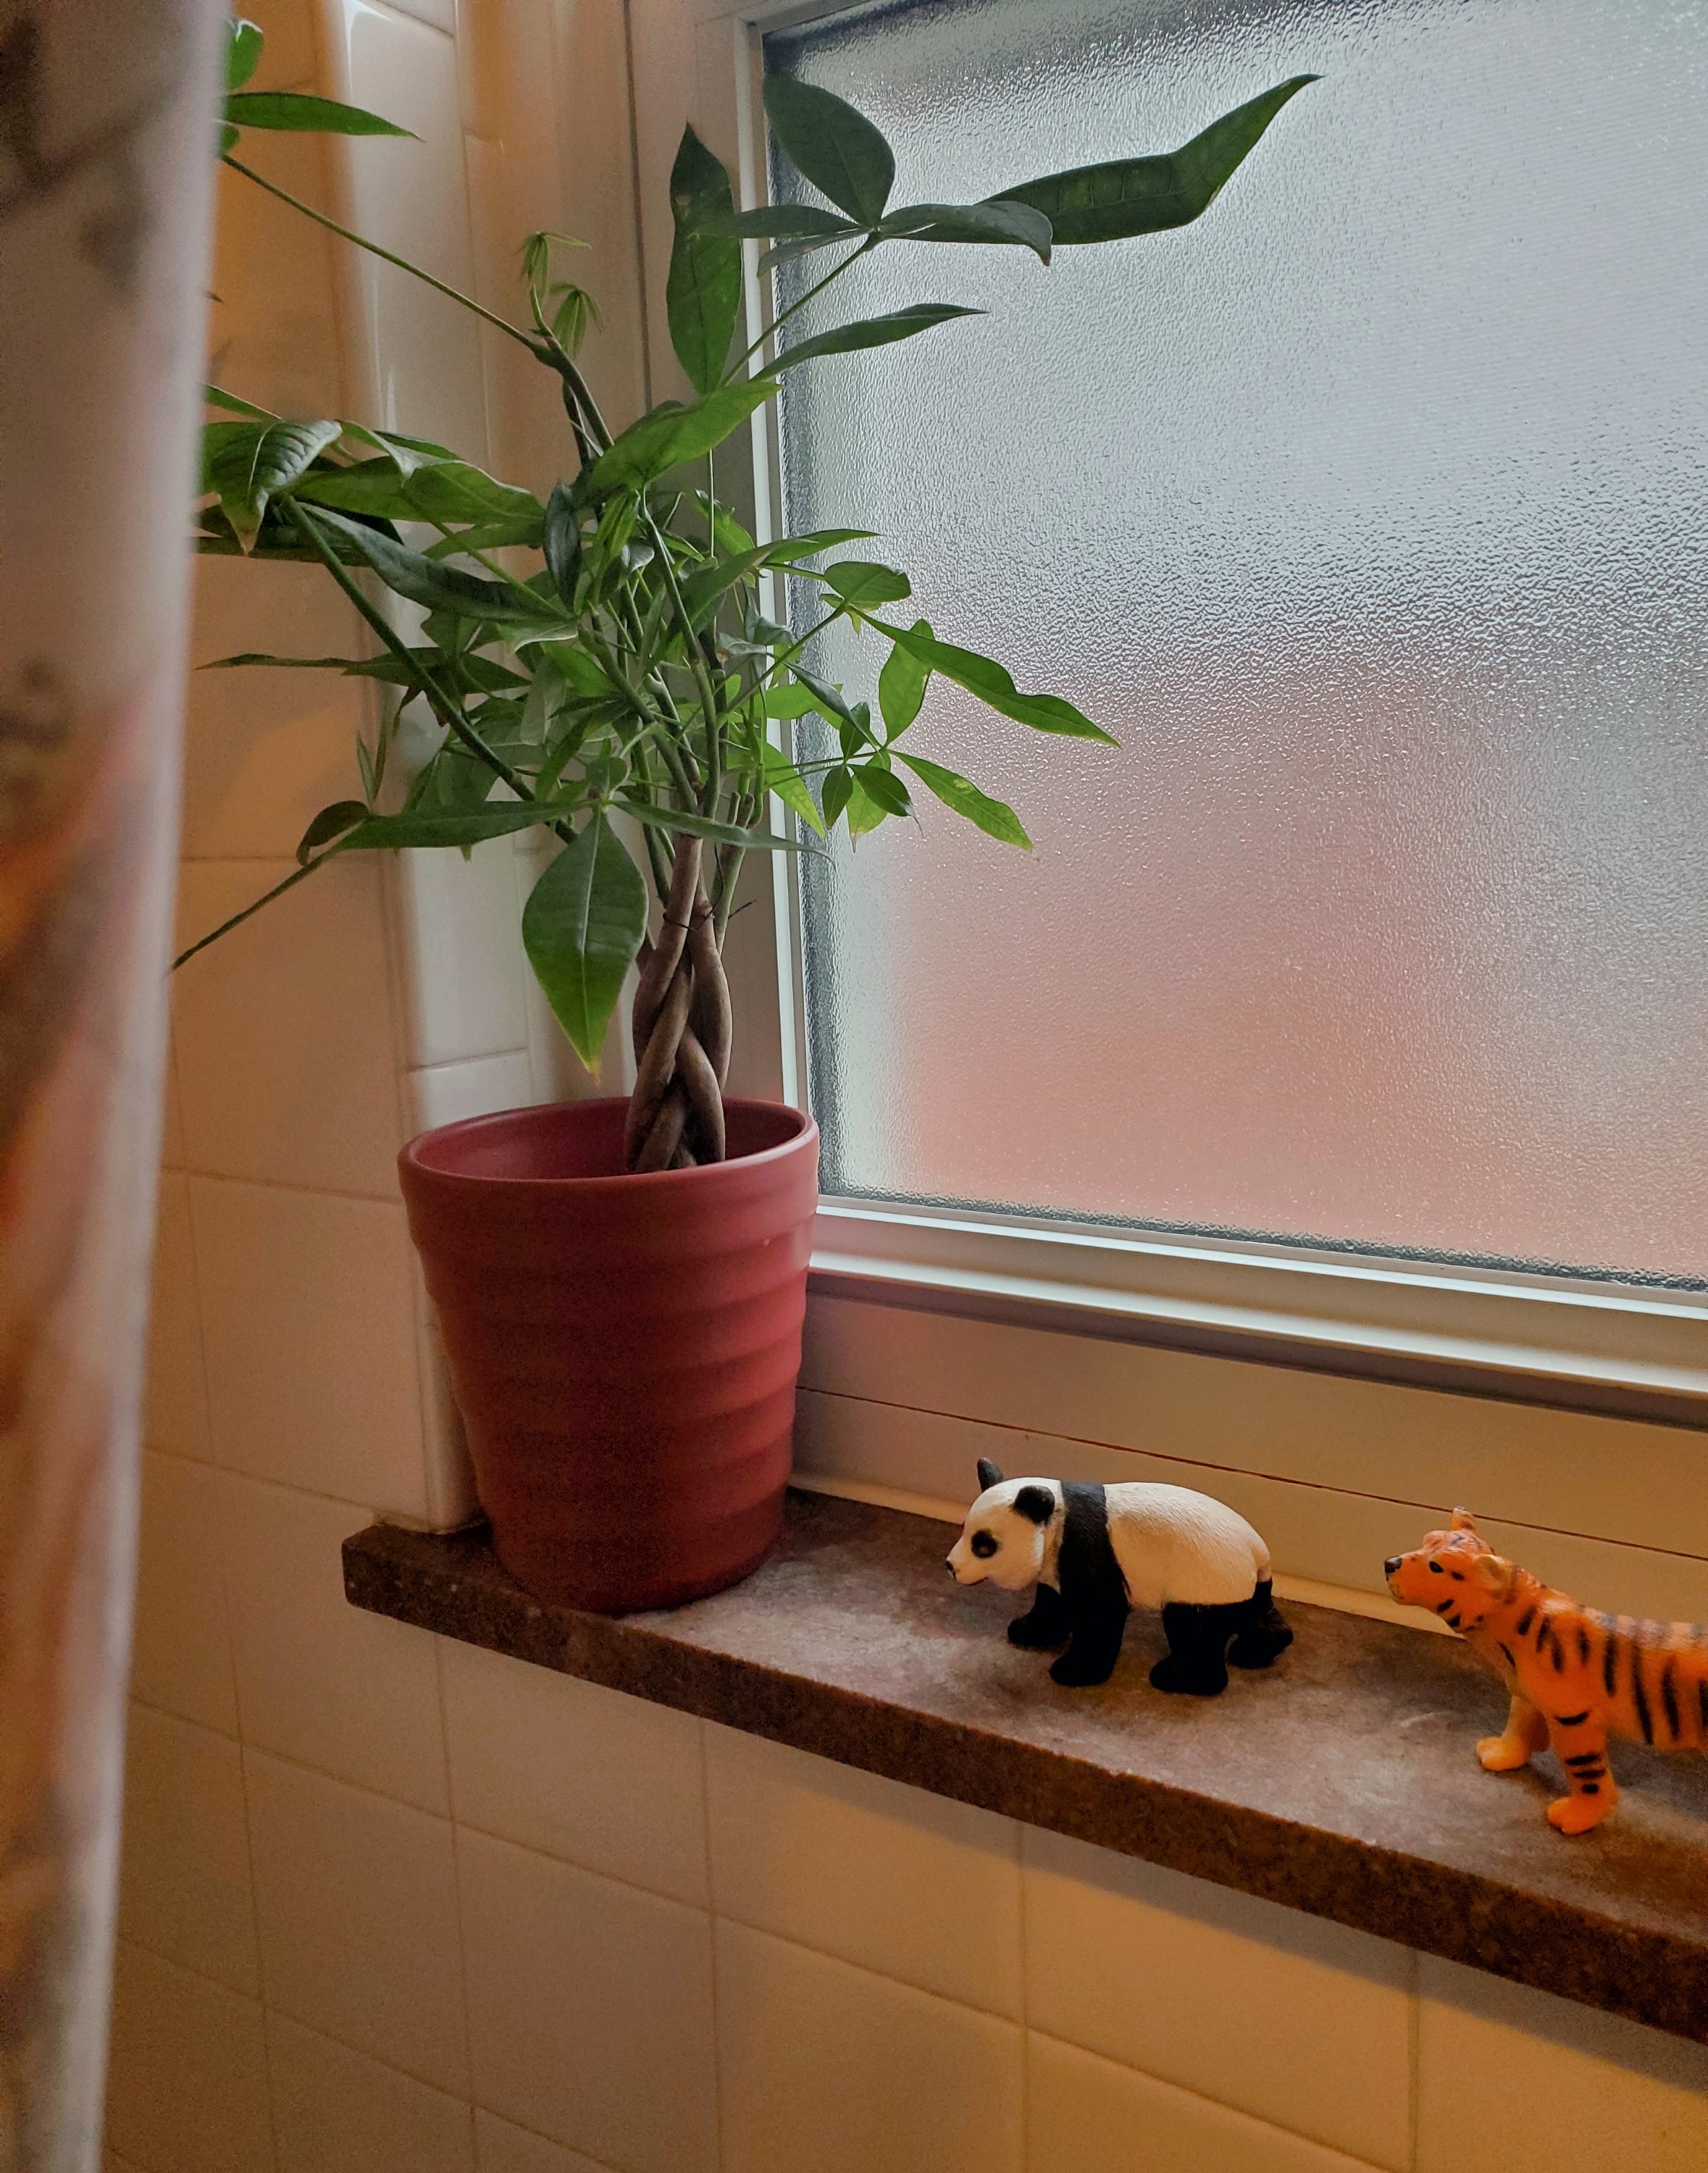
I found this beautiful indoor plant at Kroger. It was the only one, and also in the only unbreakable pot which is important in the event that one of my kids or cats happen to knock it off the windowsill. It is also on the list of the best plants for the bathroom! I took it as a sign that it was meant just for me! The girls added a couple of their bath toys which I thought looked cool next to it.
Our previous bath toy storage was not working out for us so I picked up this across the tub toy holder from Target.
As soon as my pulls + knobs arrived, Sasha & Daddy put them on for me. I love them so much!
I am going to have so much fun finding + collecting different hand towels for this room.
I swapped out the old small silver faucet for this beautiful gold one to pull together all the gold accessories. It matches perfectly with the pulls on the cabinet above the toilet.
Once I got it swapped out, I realized that it was too tall (this is why measuring is important 🤦🏼♀️) and I couldn’t open the medicine cabinet behind the mirror anymore. The cabinet is vintage, original to the house (minus the black paint) and built into the inside of the wall. At first I was devastated and thought it was a total failure, but then Niko pointed out that we could move the hinges on the cabinet door so that we could raise the door enough to open it. That worked out great!! I’m absolutely in love with it.
Right before I started this bathroom project, the kids broke the door and it split halfway and was dragging against the floor tile, scuffing it up, so we just decided to take it down. It immediately made the bathroom SO much bigger. I’m talking double in size. We decided to keep the door off.
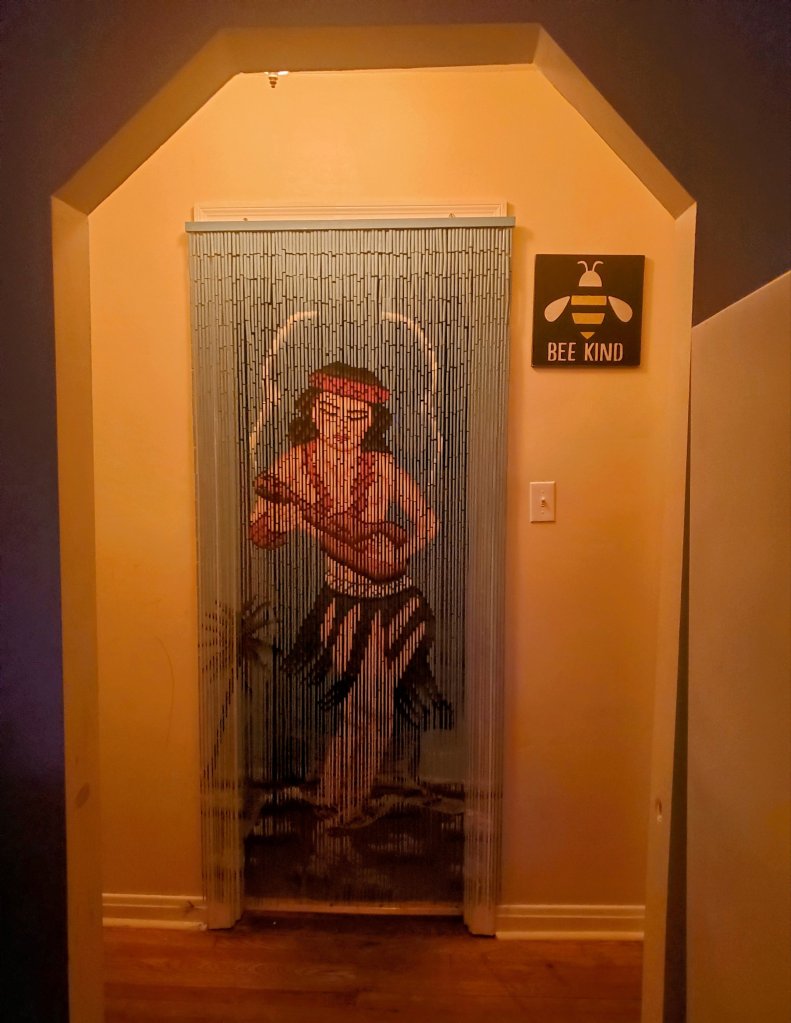
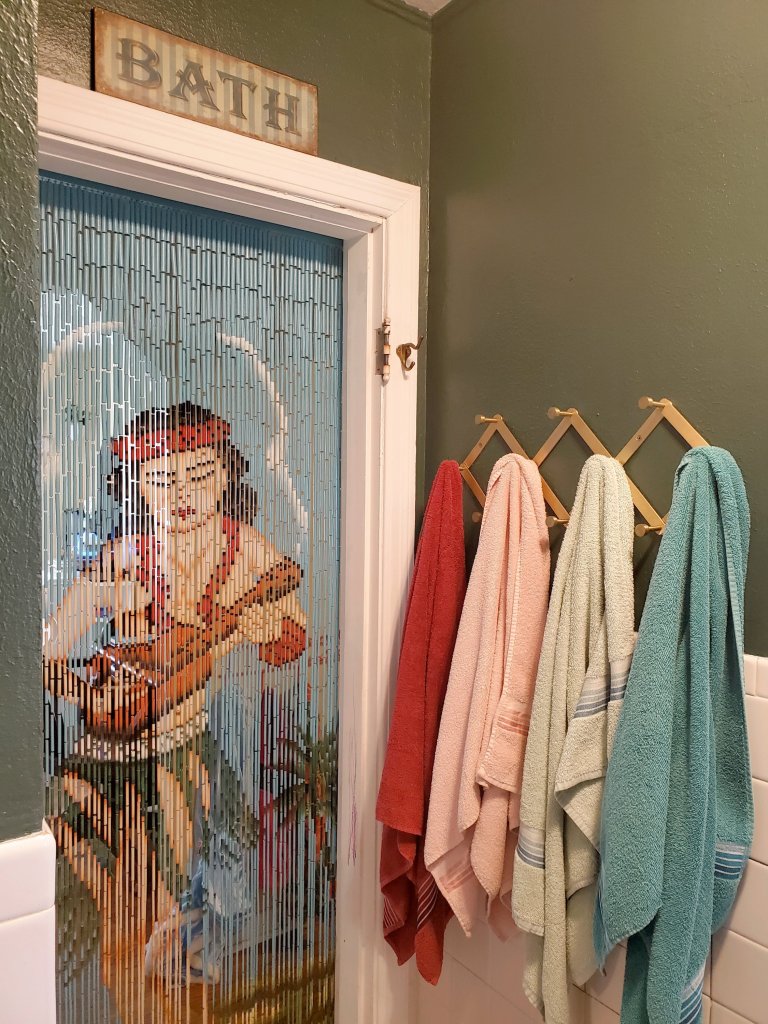
After a few weeks with it off, we decided that we need *some* privacy since the neighbors could see directly in our bathroom through our dining room window. We hung this hula girl bead curtain that we ordered from Etsy so we could get the privacy we need, without sacrificing space. She dances when you walk through the beads.
Eventually I plan to have “pocket doors” installed, because the next owners may not be aa fond of bead curtains as we are 😂. Having no door made me realize how crucial it is to not lose such a significant amount of space though. “Pocket doors” are the PERFECT solution for that. There will be actual, solid-door privacy, without compromising any space. I would also like to have the floor re-tiled with a beautiful black & white tile one day, but for now I’m considering this a finished project.
The bead curtain looks even better from the inside! You can see the details so well.
I also really love the new towel rack! I got that from Target for “free” using my Target Circle credits!
After finishing this bathroom makeover and hanging the bead curtain, I’ve officially decided that this tiny, dingy hallway in front of the bathroom is going to be my next indoor project. The rooms branching off from it are all finished and looking SO nice, but this hallway really takes away from the full potential. Plus small projects always lead to big impacts!
I hope you enjoyed my bathroom makeover! Make sure to subscribe so you do not miss out on future projects! I have a few REALLY fun ones in the works that you definitely won’t want to miss!
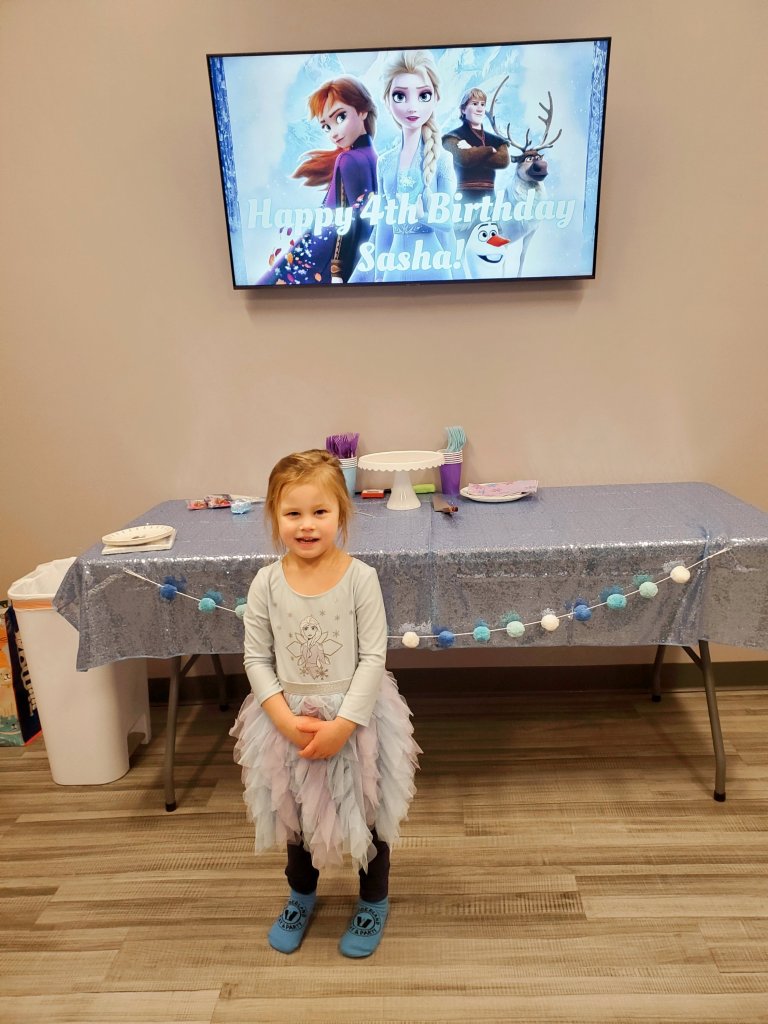
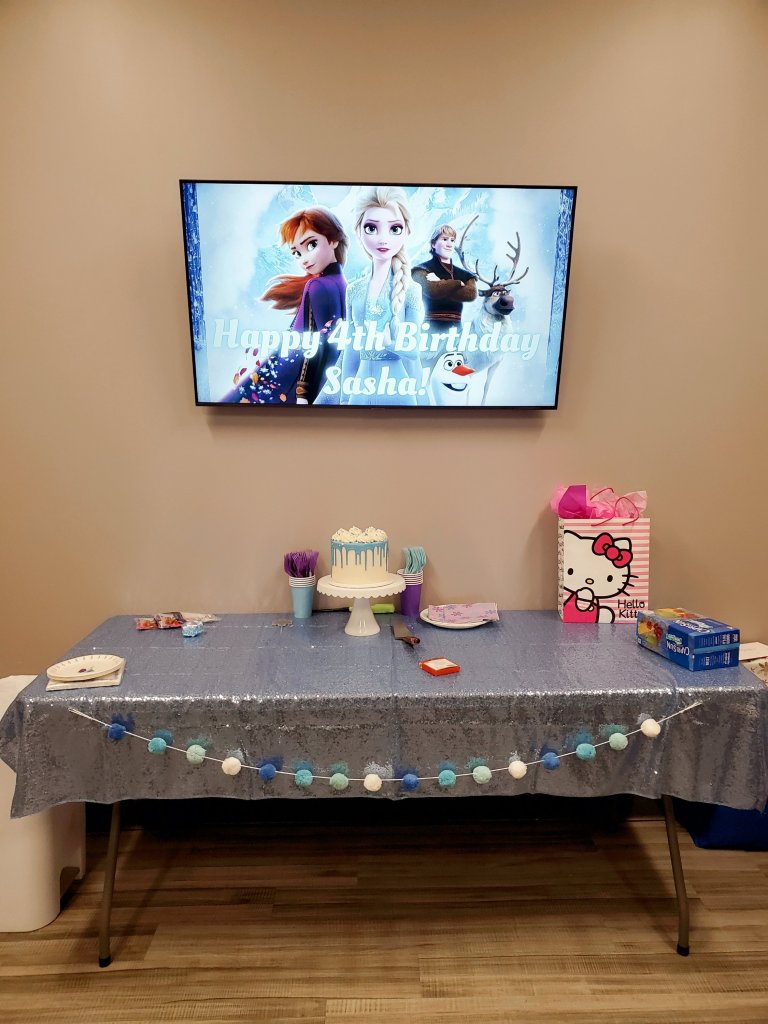
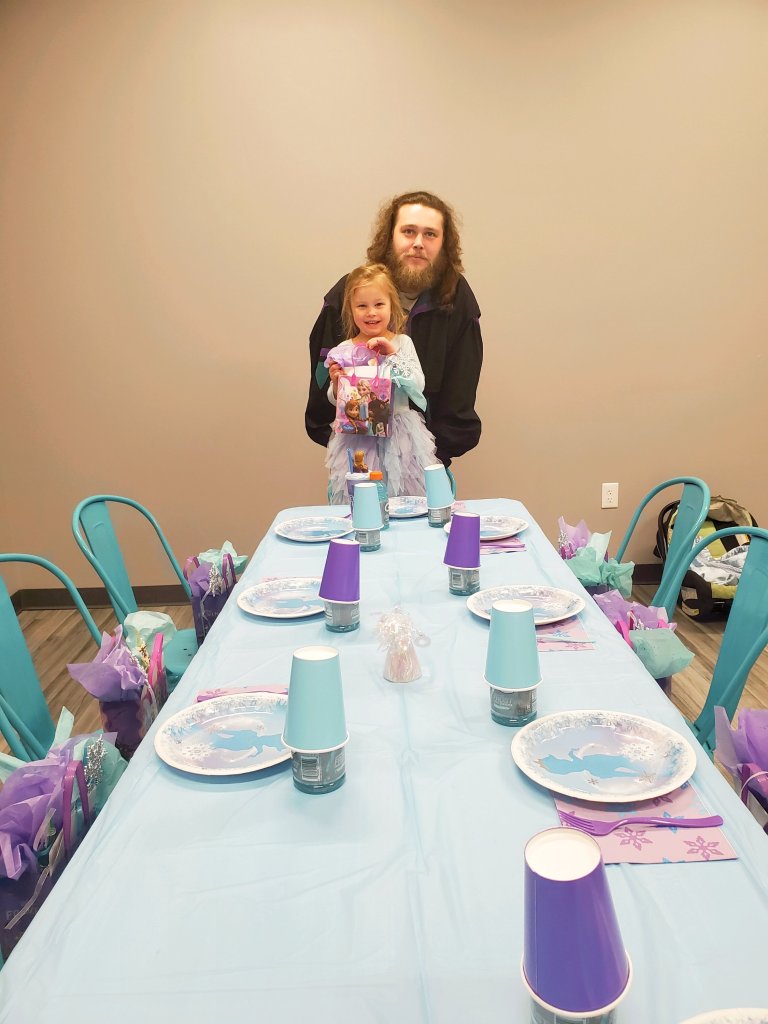
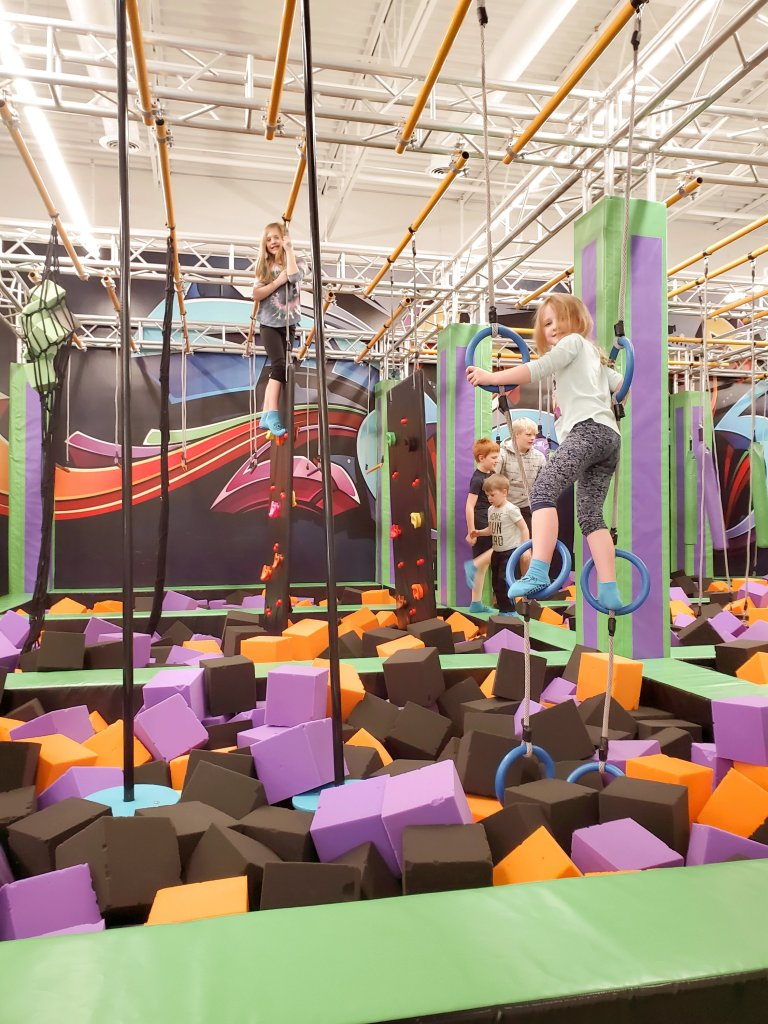
Happy Sunday! We celebrated Sasha’s 4th Birthday today at The Wonderland Playground.
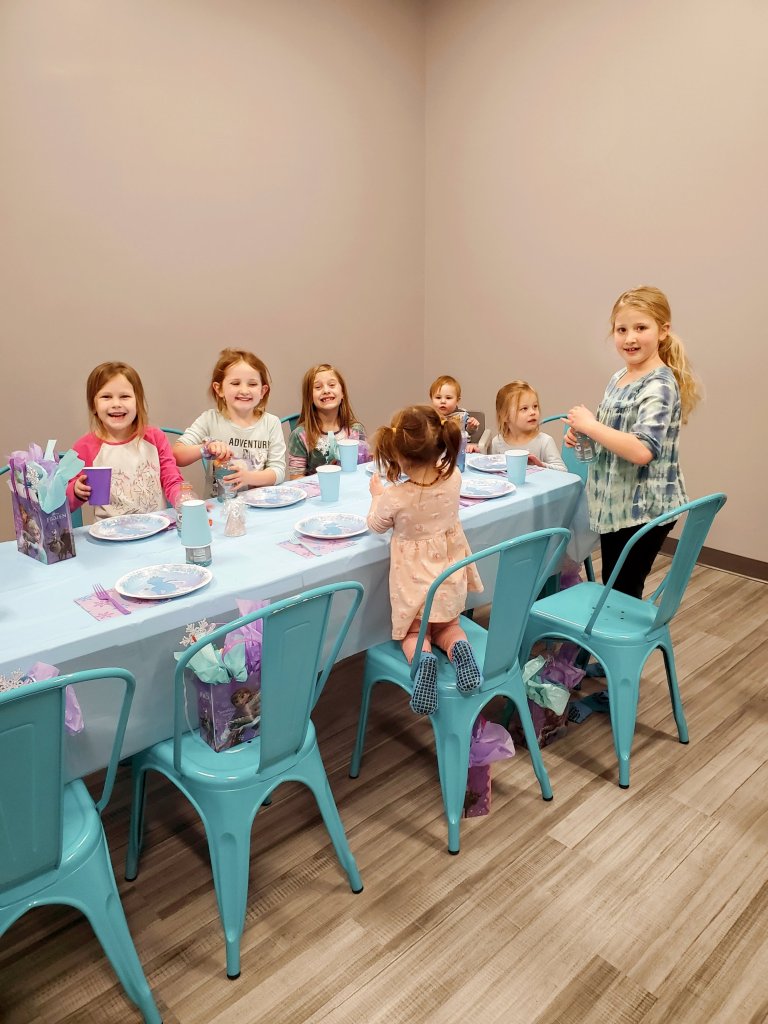
It was a really great place to host a party, especially for our crew because we have an older group of kids and a younger group of kids so there was something for everyone to do and enjoy themselves.
Sasha wanted a Frozen-themed party. I’m not big on specific character themed anything, so I tried my best to make it as Frozen-themed as possible without making it too overdone.
Sasha wore one of her new dresses that she got for her birthday and I French braided her hair to look just like Elsa. She looked so cute and she was so happy for her day!
I got the shimmery baby blue table cloth from Amazon & the blue garland + cake stand from Target. I liked that the cake stand was white and not breakable. It will go with all cakes and definitely get much use out of it.
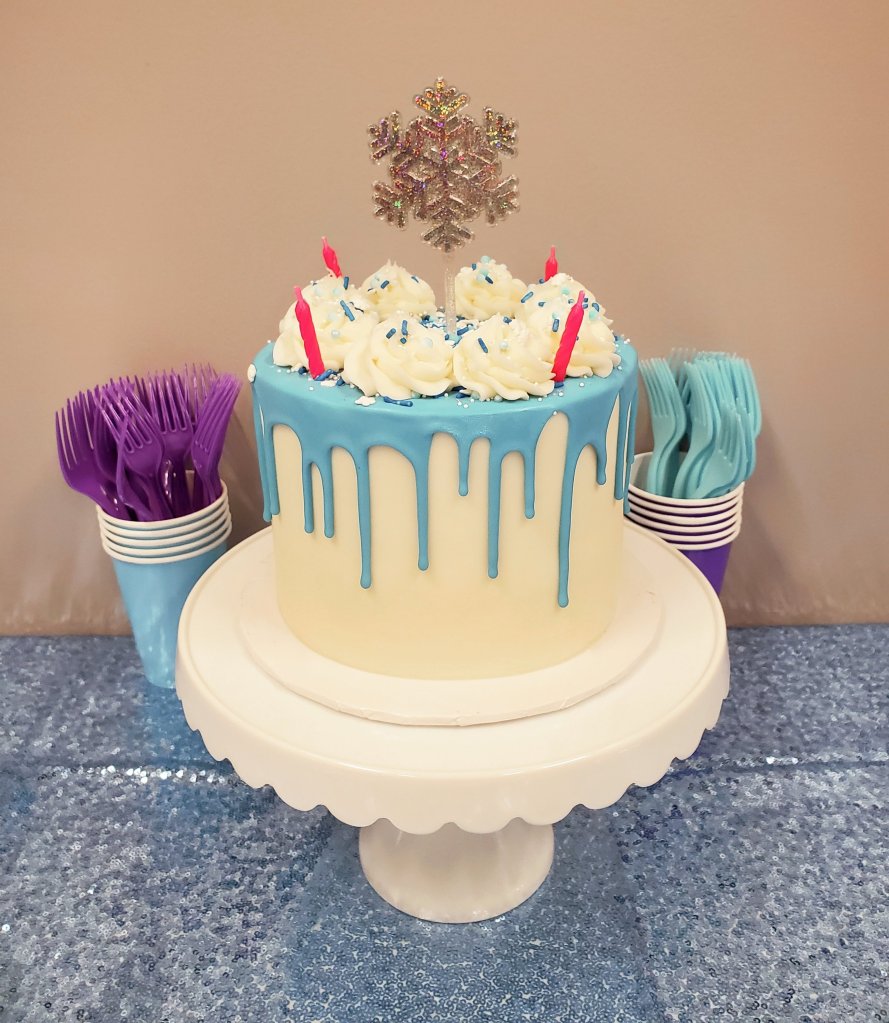
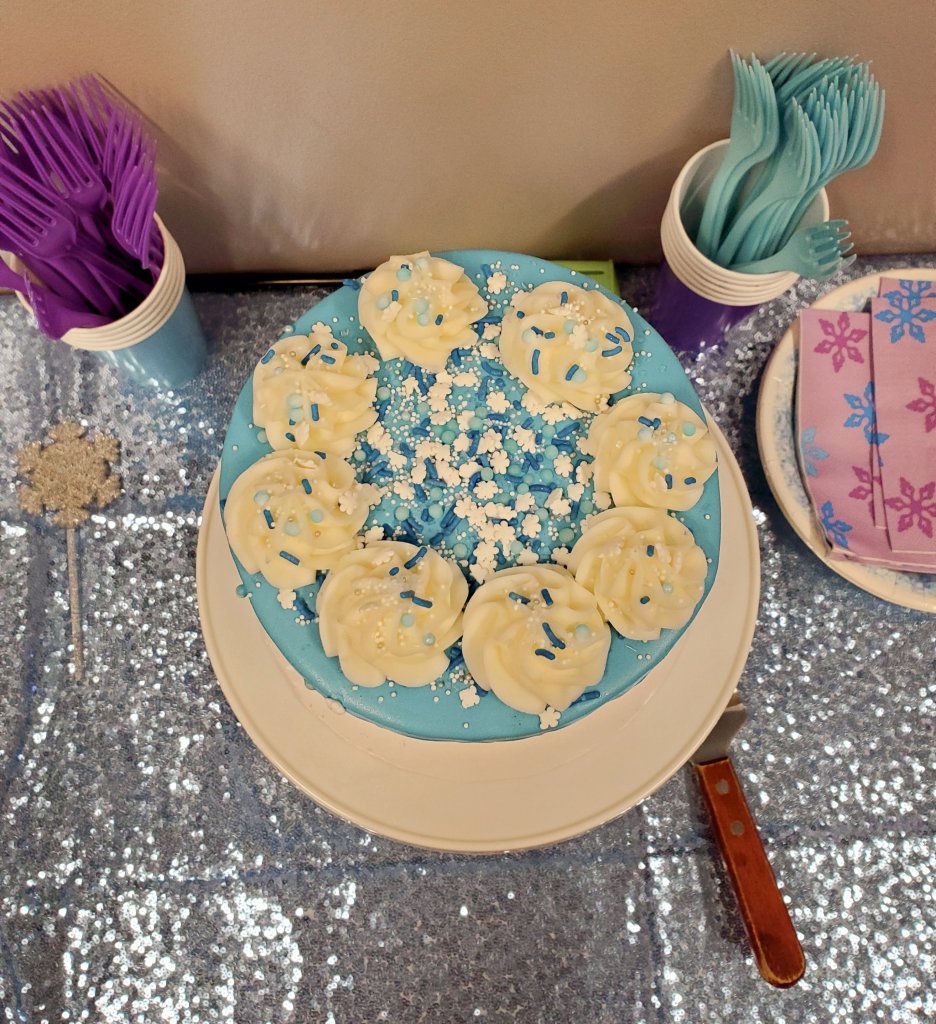
I got this beautiful wintery/Frozen theme drip cake from 3 Sweet Girls in a birthday cake flavor. Sasha picked out the snowflake cake topper and we added that with the candles.
It was yummy, but I did not set it out early enough to reach room temperature. With these cakes you need to refrigerate until about 30 minutes before serving, but I was so afraid the butter cream frosting would melt, I left it refrigerated for too long. I ate a slice of leftover cake that had not been refrigerated since the start of the party and it tasted SO much better. Next time I will set it out at the beginning of the party with the rest of the set up to ensure it reaches the perfect room temperature.
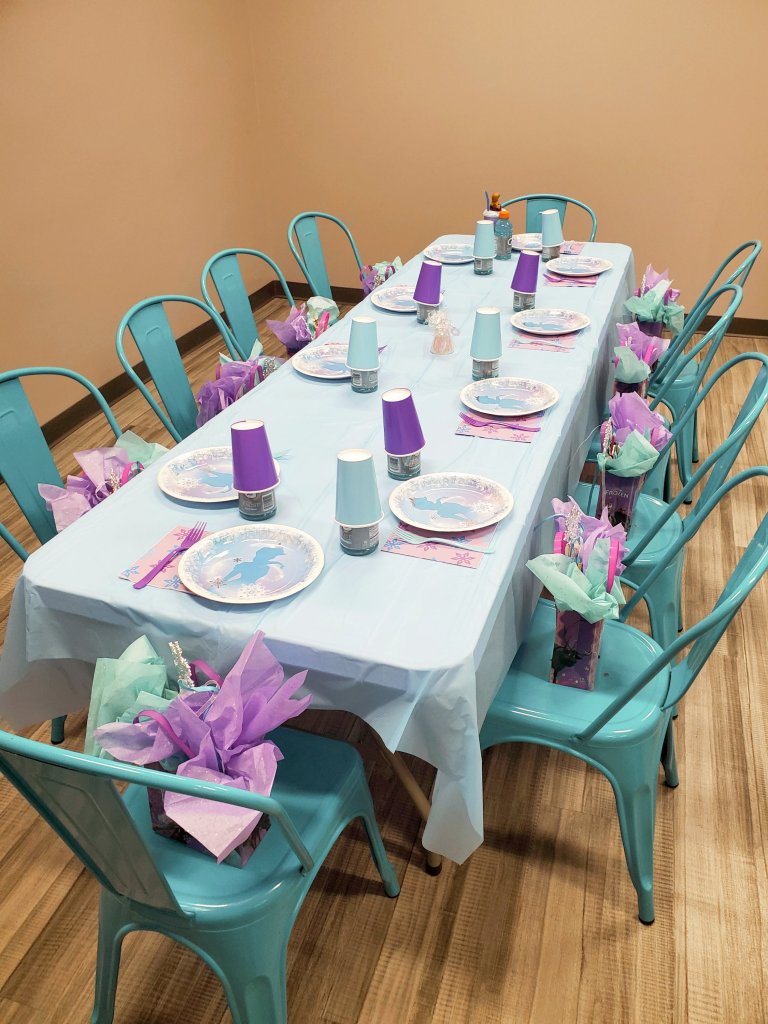
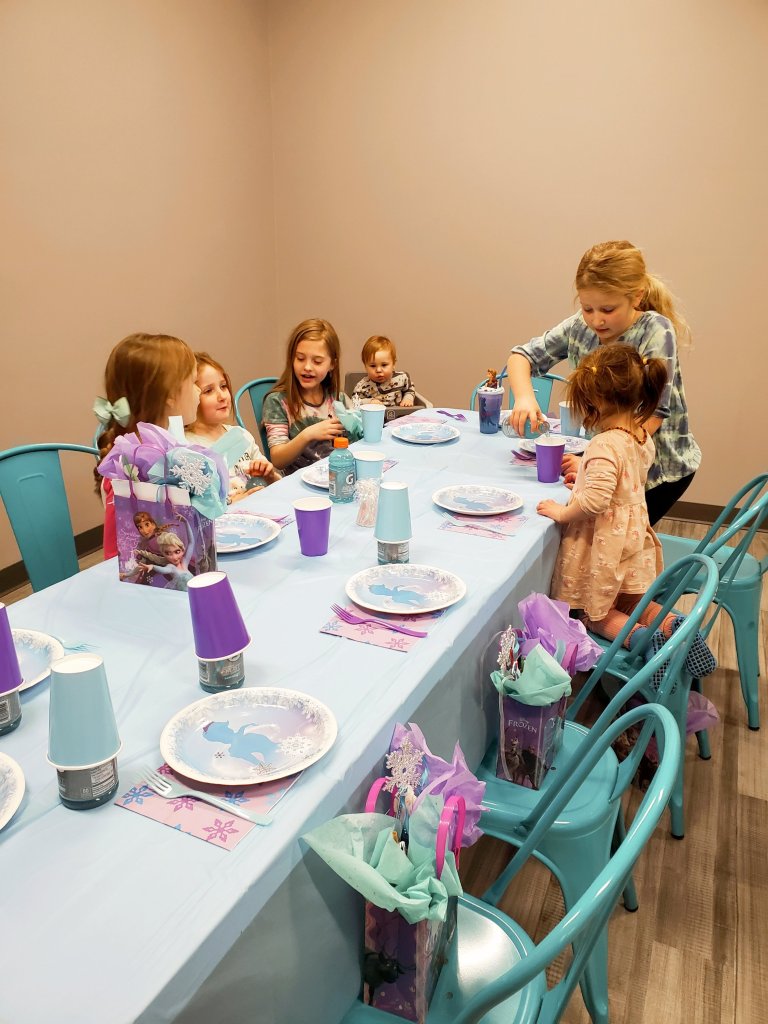
We set up all of the spots with Frozen theme plates, napkins, cups, and forks. I got the Frozen plates + napkins from Amazon & the blue & purple cups + forks from Walmart.
Under each cup was a Blue Frost Gatorade. I thought those went along well with the Frozen theme. I thought it all looked really cute.
Since Sasha was the birthday girl, we brought her special Anna cup to drink from instead of the cups.
Sasha is my shy girl 👧🏼. She got so shy & uncomfortable when all the focus was on her to sing happy birthday to her. She hid her face and waited to blow out her candles until everyone closed their eyes.
Athena loved the big kid side. She was just so happy running and jumping around. She would get completely buried under the foam blocks and just come out with the biggest smile on her face.
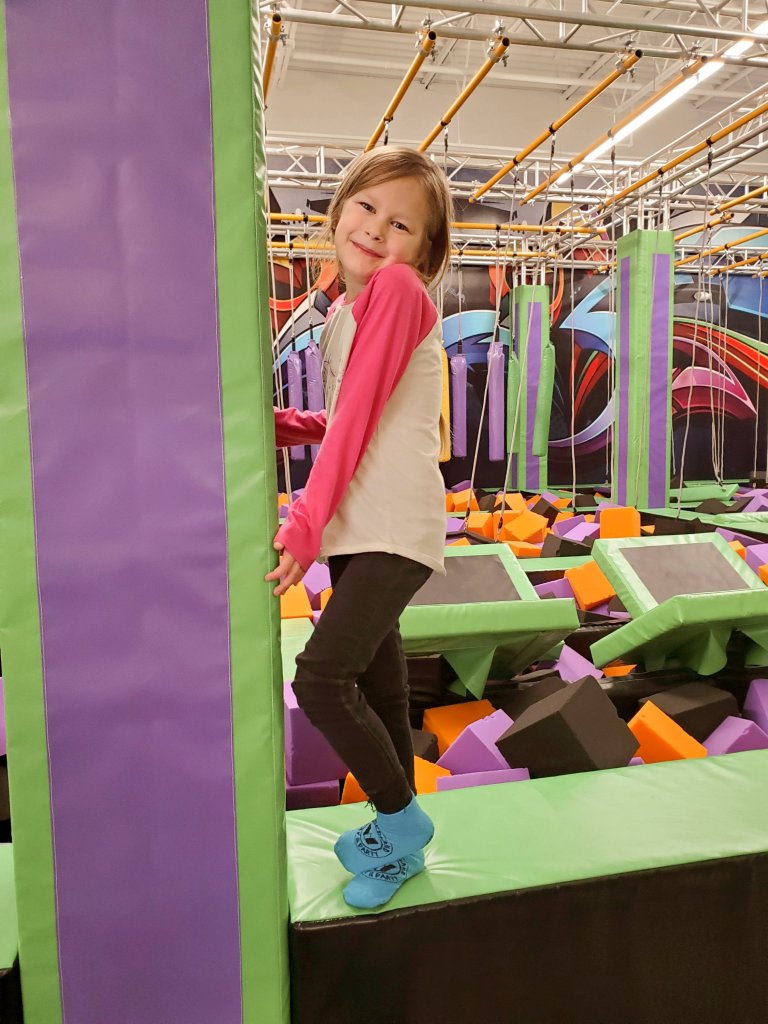
This was part of the bigger kids playground side. It was a lot like the modern-day Discovery Zone. The kids had so much fun and I was honestly jealous I couldn’t go up there with them 😂.
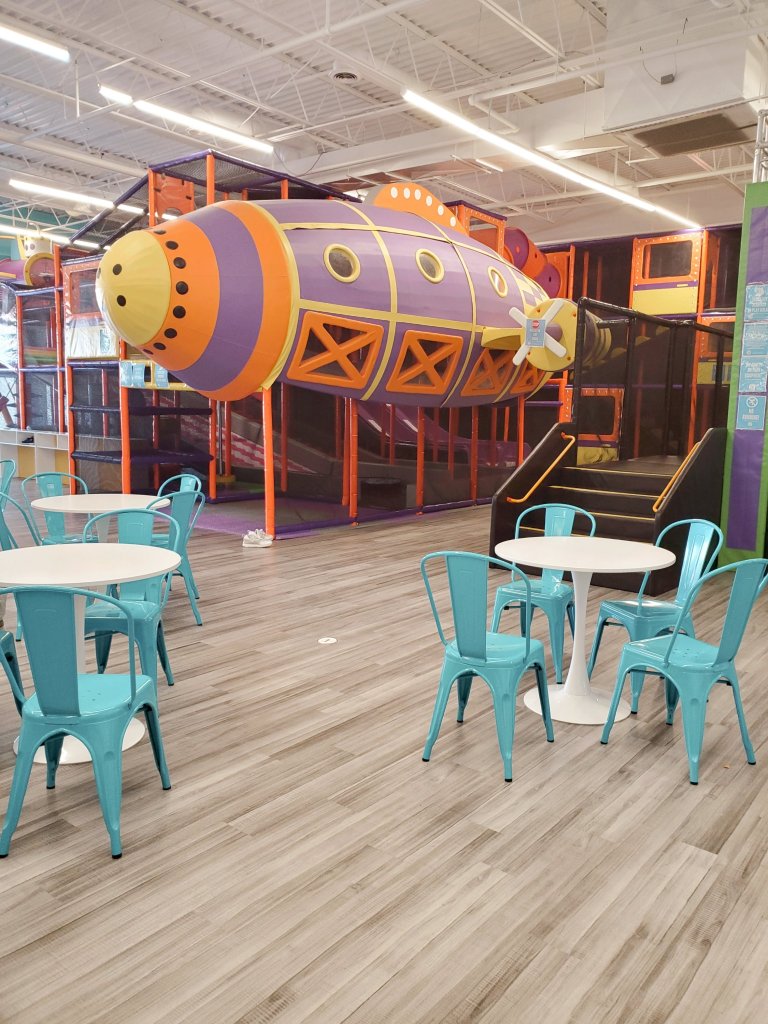
One of the reasons that I really wanted to host Sasha’s birthday party at The Wonderland Playground is because she LOVES to watch Blippi.
If you don’t know who Blippi is, he’s a man who dresses up in this funny little outfit and goes around checking out + playing on the most fun children’s play lands. The Wonderland Playground reminded me so much of a play land that you would see in one of his episodes and I knew that she would be so excited when she saw it.
Moses loved this little carousel & he looked so cute riding it!
This was the baby + toddler side. It was SO cute and had so much for them to do! I love that they had just as big of a section for them as the big children.
It was a really nice place to host a party. Although the price is a bit steep, I would definitely host another party here in the future, especially when Moses gets a little bigger & can really enjoy all the baby side has to offer. The facility was extremely clean and the staff was so friendly and helpful.
I am really happy with our experience and even more happy that Sasha told me it was “the best birthday ever.” My mama heart is so full! ❤
Things I did BETTER this party:
• I remembered to bring candles + a candle lighter. • I remembered to bring a cake cutter/server. • We arrived early and gave ourselves plenty of time to set up stress-free.
Tips to remember for the next party:
• Bring a knife (to cut baby + toddler food). • Bring a roll of paper towels – kids are messy. • Bring scissors. • Invest in the helium machine, or at least the portable plug in one. We will get our money worth from it. • Put the cake out earlier to give it more time to reach room temperature.
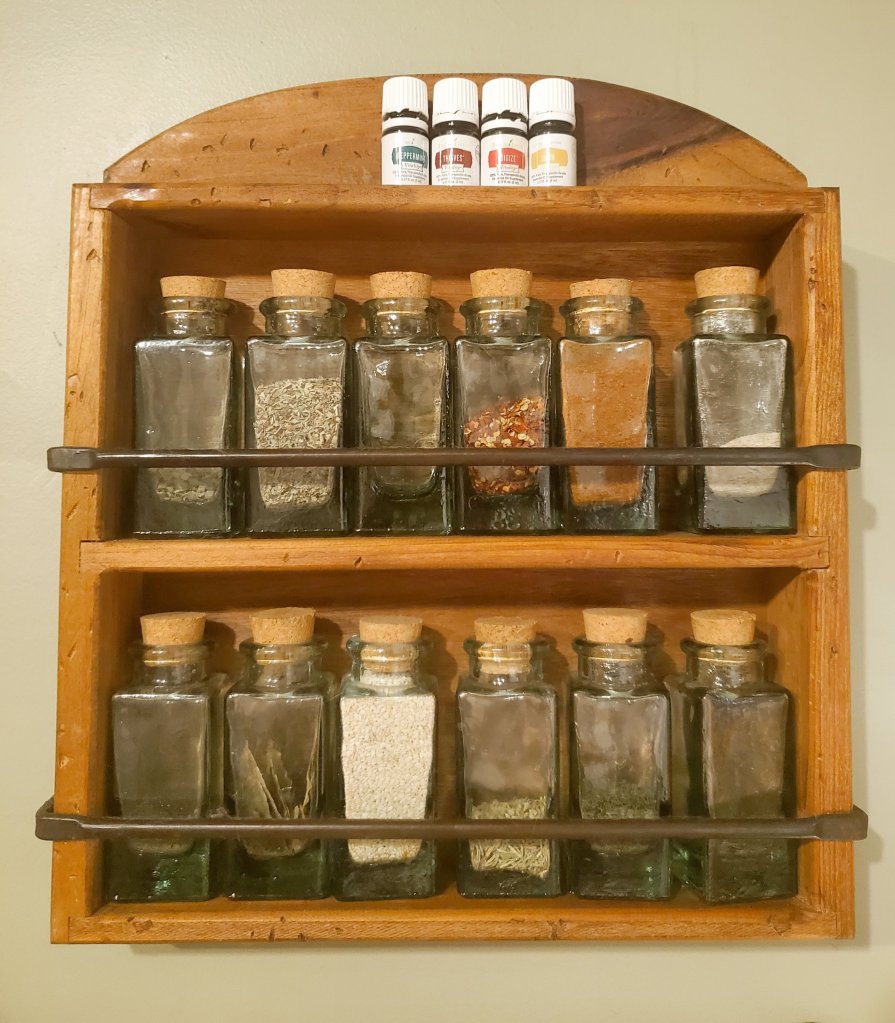
Happy Saturday! I have a declutter challenge for you this weekend: Your Spice Rack/Cabinet!
“CR tested 126 products from McCormick, Trader Joe’s, Whole Foods, and other popular brands. Roughly one-third of the tested products, 40 in total, had high enough levels of arsenic, lead, and cadmium combined, on average, to pose a health concern for children when regularly consumed in typical serving sizes. Most raised concern for adults, too.”
“Frequent exposure to even small amounts of lead, arsenic, cadmium, and other heavy metals is dangerous, in part because it’s difficult for the human body to break them down or excrete them. And over time, exposure to those heavy metals can harm health. In children, it can affect brain development, increasing the risk for behavioral problems and lower IQ. In adults, it can contribute to central nervous system problems, reproductive problems, and hypertension, and can damage kidney and immune function.”
We are supposed to trust that the beauty, self-care, and feminine-care products we use are safe, they’re not. We are supposed to trust that the food on the shelves is safe for us to consume, it’s not. And don’t even get me started on Big Pharma. (Don’t forget to check if you or a loved one are entitled to compensation though 😉.)
Growing up, I ate nothing but Kraft Macaroni and Cheese (not an exaggeration). Those powder packets have already been proven horrendous for you, and Kraft could care less. #KleanUpKraft
As a stay at home mom, I cook nearly every meal at home. Using spices all day, every day. I LOVE SPICES!!!! ALL THE SPICES!!! Needless to say, this report hit me hard. Especially because after switching to a strictly organic diet for our home, it seems that my organic spices are just as contaminated as the rest of them. I feel like I was robbed. Those spices are sometimes triple (if not more) the the price of their non-organic counterpart, which I thought I was paying for, for our health.
Turns out I was wrong. In fact, spices (even organic ones) have a long history of containing BPA and Phthalates as well. If you are unfamiliar with Phthalates, HERE is a good place to start.
So since our spices are contaminated, what are we supposed to do?
If possible, start an organic garden and grow your own herbs so that you know exactly where your herbs are coming from 👩🏼🌾.
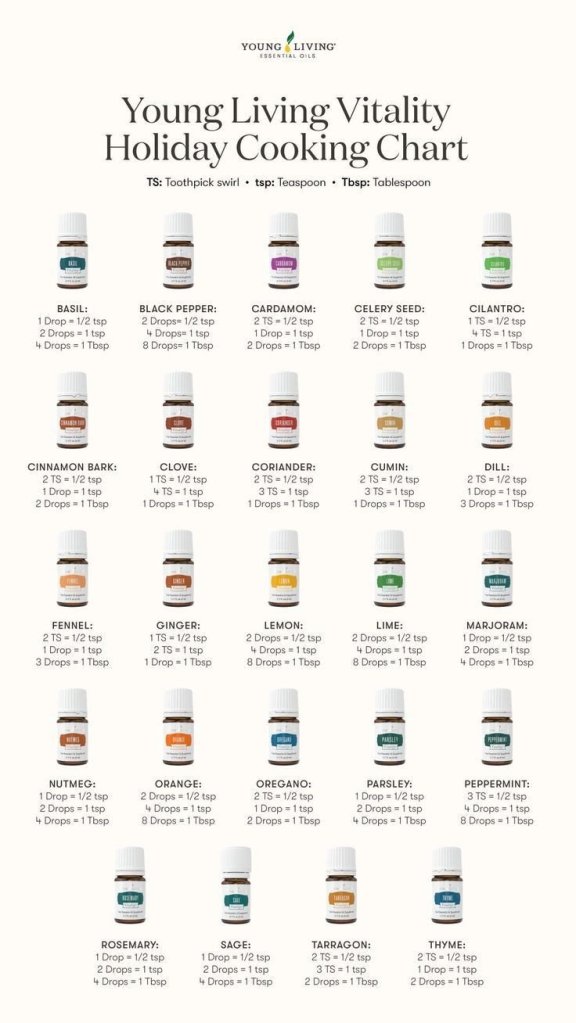
But for those of us who just don’t have time for that (but have dreams of getting to that point one day), Young Living offers a Vitality Line of essential oils. The Vitality Line is perfect for adding flavor without adding heavy metals to your food.
I also love adding a few drops of lemon (& other citrus oils) to water to give it flavor without wasting any unused lemon slices. Plus they provide added health benefits! A few drops of lemon in water can help boost your energy + improve skin appearance. It can help detoxify your liver & alkalize your body. A few drops of orange Vitality oil can boost your metabolism + help with indigestion. It can also act as an anti-depressant + immune booster. Adding grapefruit can help curb sugar cravings + help with bloating.
Having an oil on hand cuts down on prep work which is perfect for busy moms. It is also nice to be able to have an oil of those hard to find spices that you need for one recipe you’re dying to try, but know you probably aren’t going to need again, at least any time soon.
Save & print out this conversion chart to use while cooking with Vitality Oils. You can frame it and hang it in your kitchen to double as decor 🙂
The entire Vitality Line is NON-GMO certified as well as EarthKosher certified. Read about Young Livings Seed to Seal promise HERE.
Check the list of concerning spices on the Consumer Report, and if you currently have them in your kitchen, toss them out. Do not finish them for the sake of wasted money or products. Your life is more important than that ❤. Have fun decluttering & enjoy the rest of your weekend.
When I had a really bad mental breakdown in 2018, I did the (now-trending) Swedish Death Clean. Basically, you do an extreme declutter so that in the event of your death your loved ones aren’t left with the burden of doing it for you. I cleared out about 75% of ALL our belongings and I felt AMAZING. I haven’t missed a single thing since doing it, I developed new values and ways of looking at life, and was reminded once again that material items are absolutely worthless at the end of your life and just create chaos around you while you still have the chance to live it.
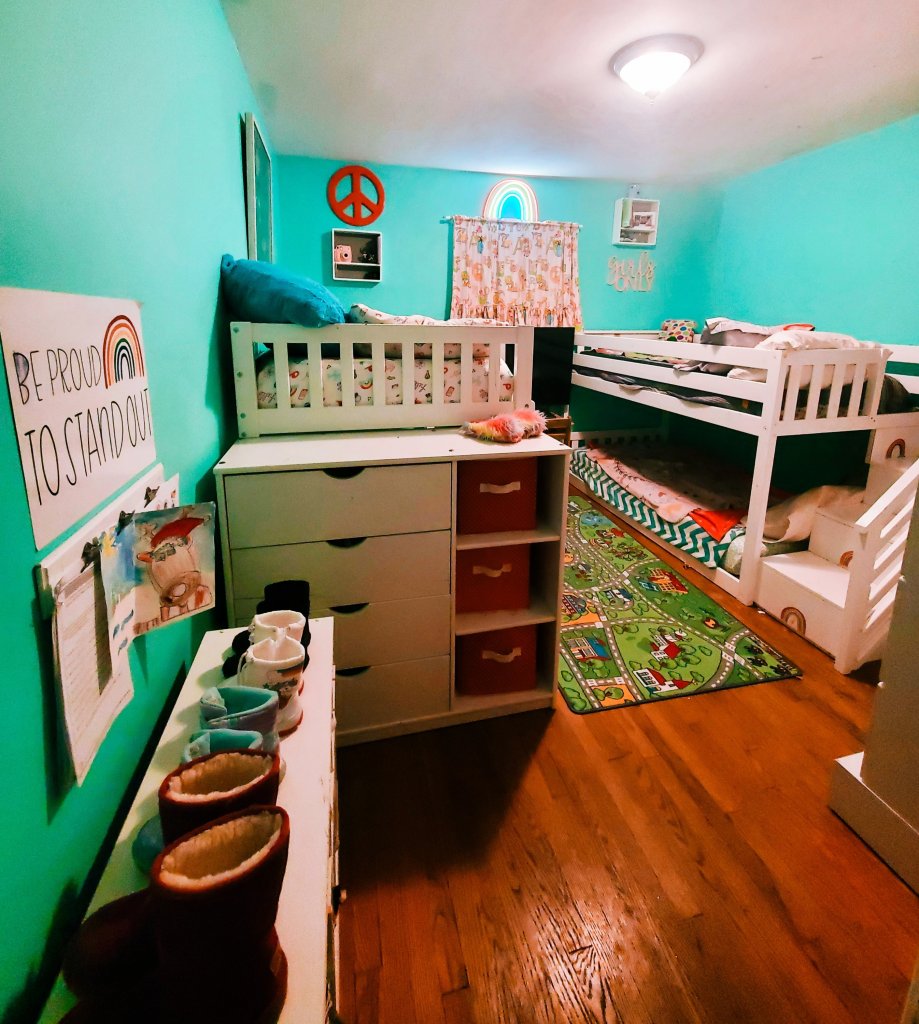
Anyway, while I went with an entire neutral/minimalist approach to my entire home, I wanted my girls room to be full of bright colors and happiness. The room I could fill the walls with their favorite things and cool treasures we find along the way, create art, inspire play, provide a safe and comfortable space, and make them happy. I didn’t want to take the colors out of their world.
Fitting 4 girls into one room has certainly been a process. It didn’t happen overnight. It happened piece by piece, over years of time. I am finally seeing the big picture come together. It’s going to be a room that continues to evolve over time, but I’m really in love with how it is at this moment in time & the girls are as well.
Welcome, come on in!
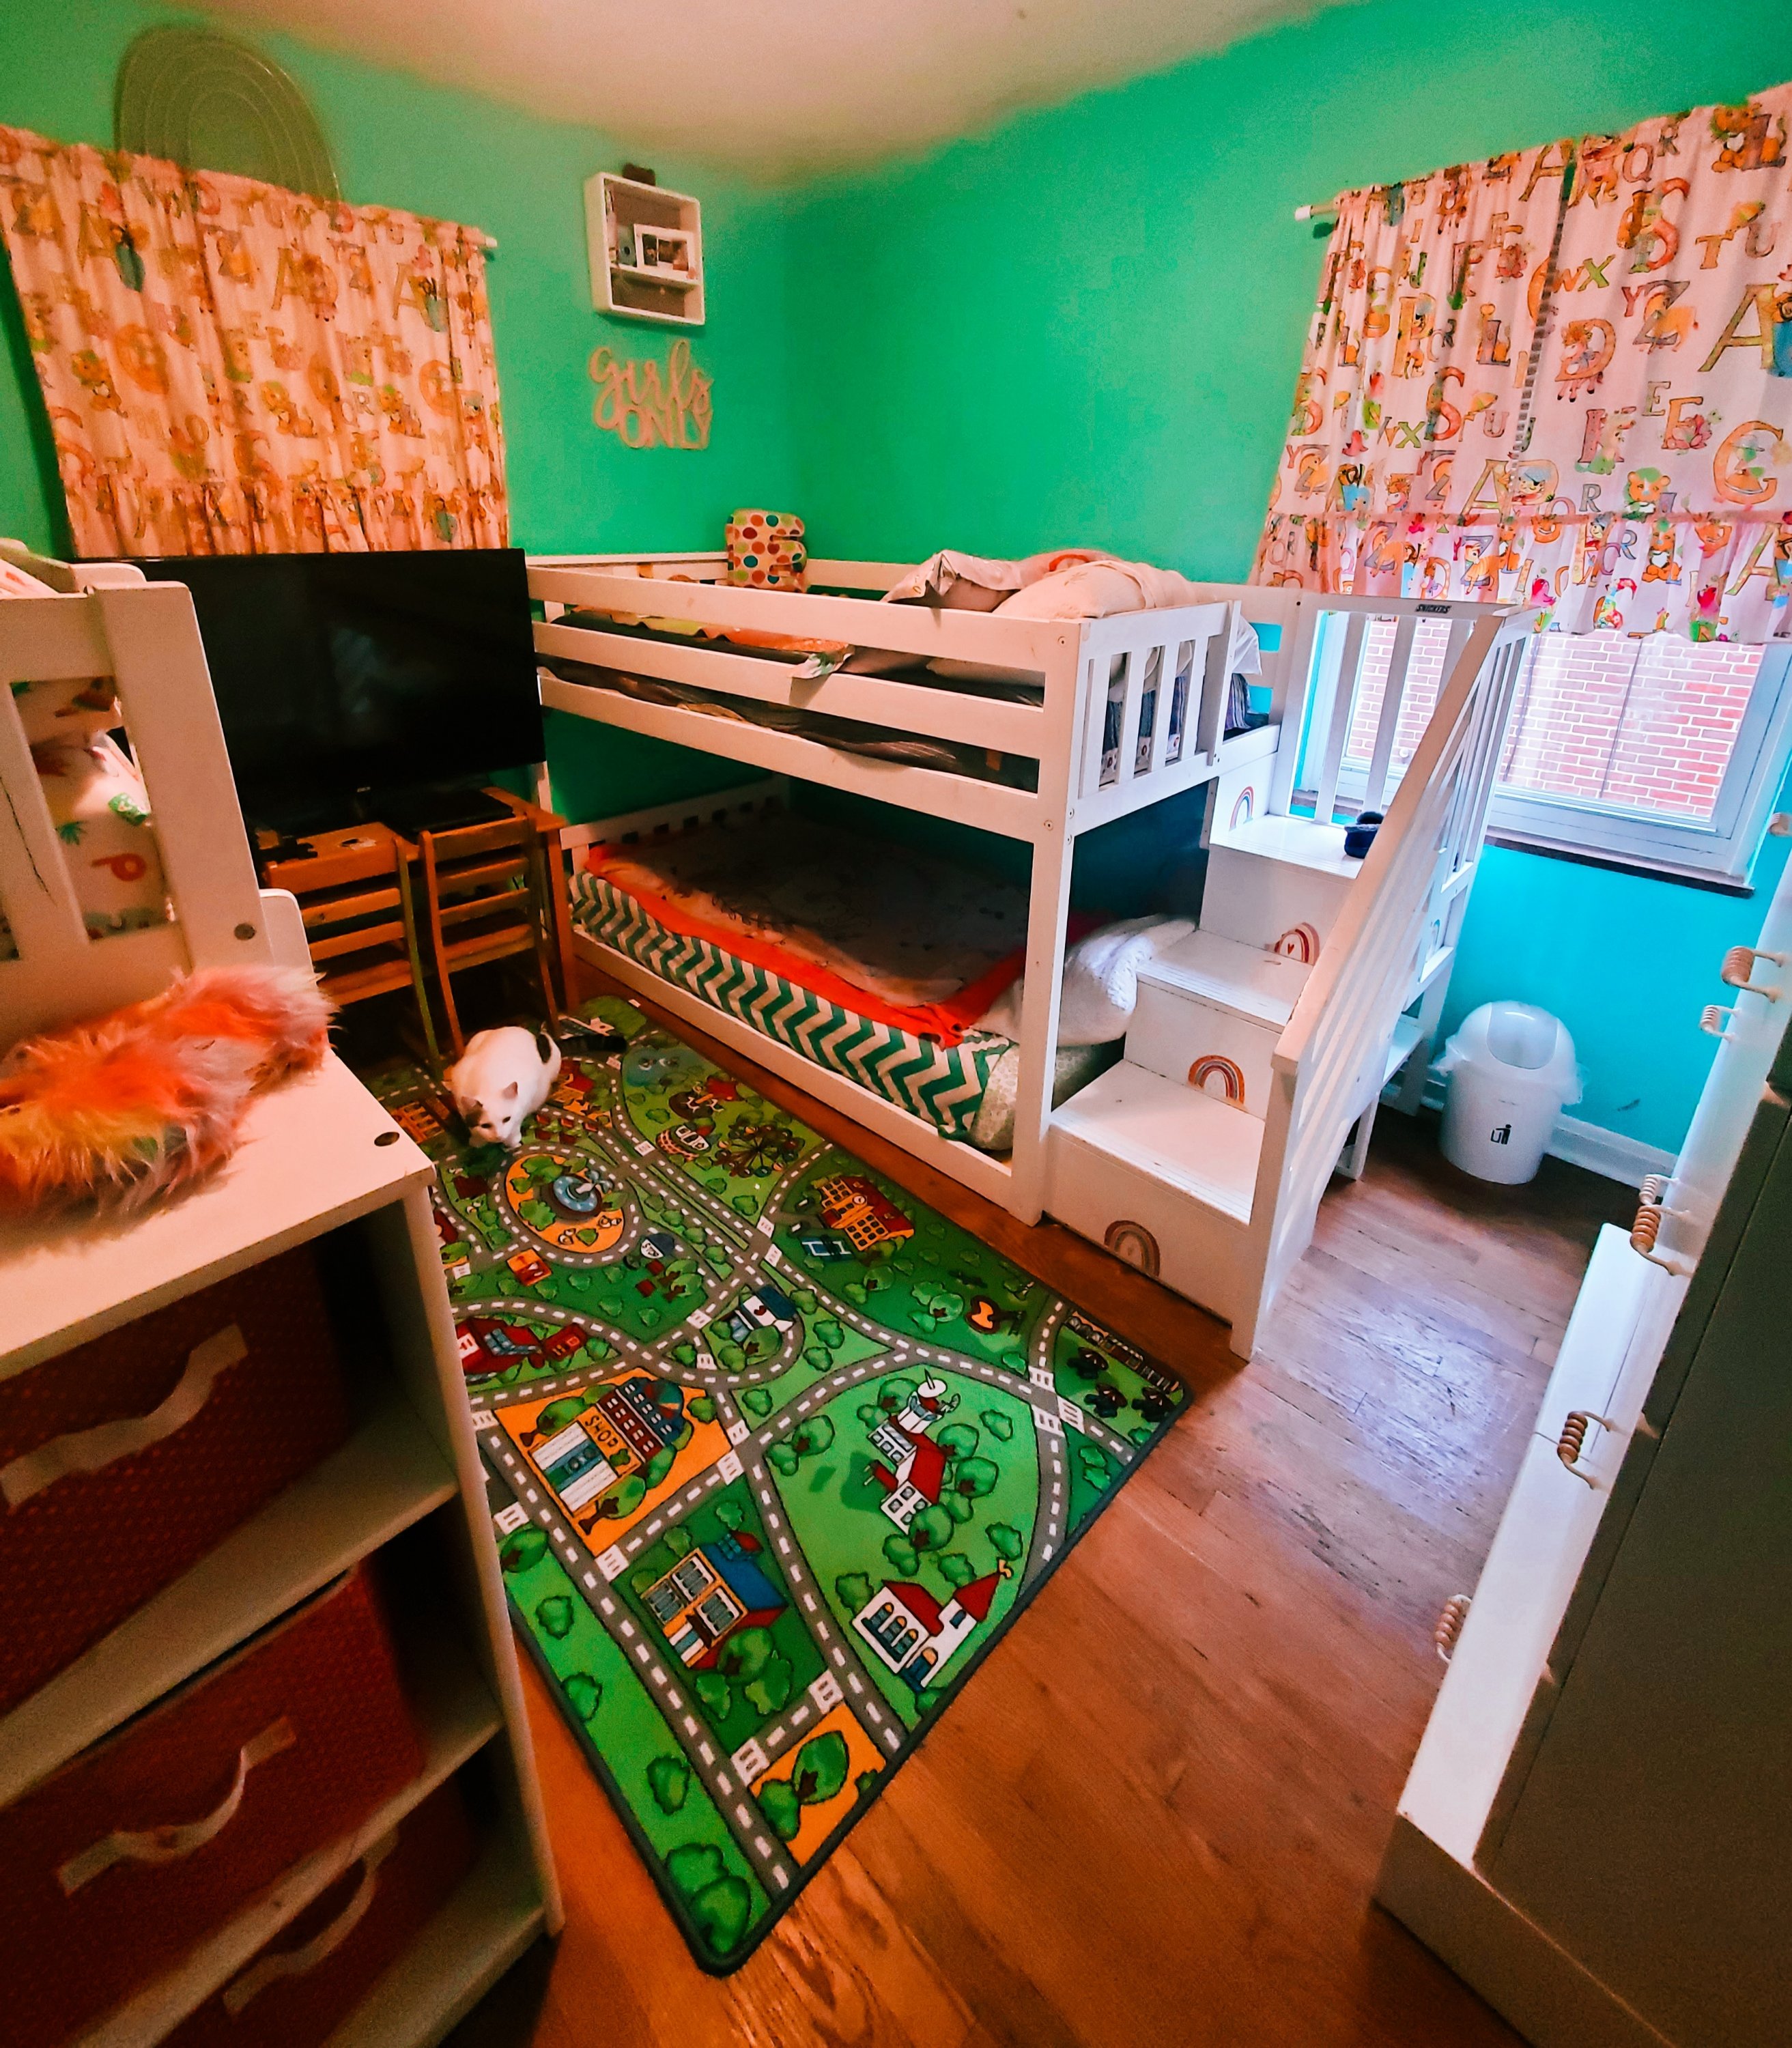
Double bunk beds are a MUST to fit all of the girls. The older girls (Ella & Mia) are on the top, while the younger girls (Sasha & Athena) are on the bottom bunks. Both bottom bunks touch the ground so we don’t have to worry about toddlers rolling out of their beds.
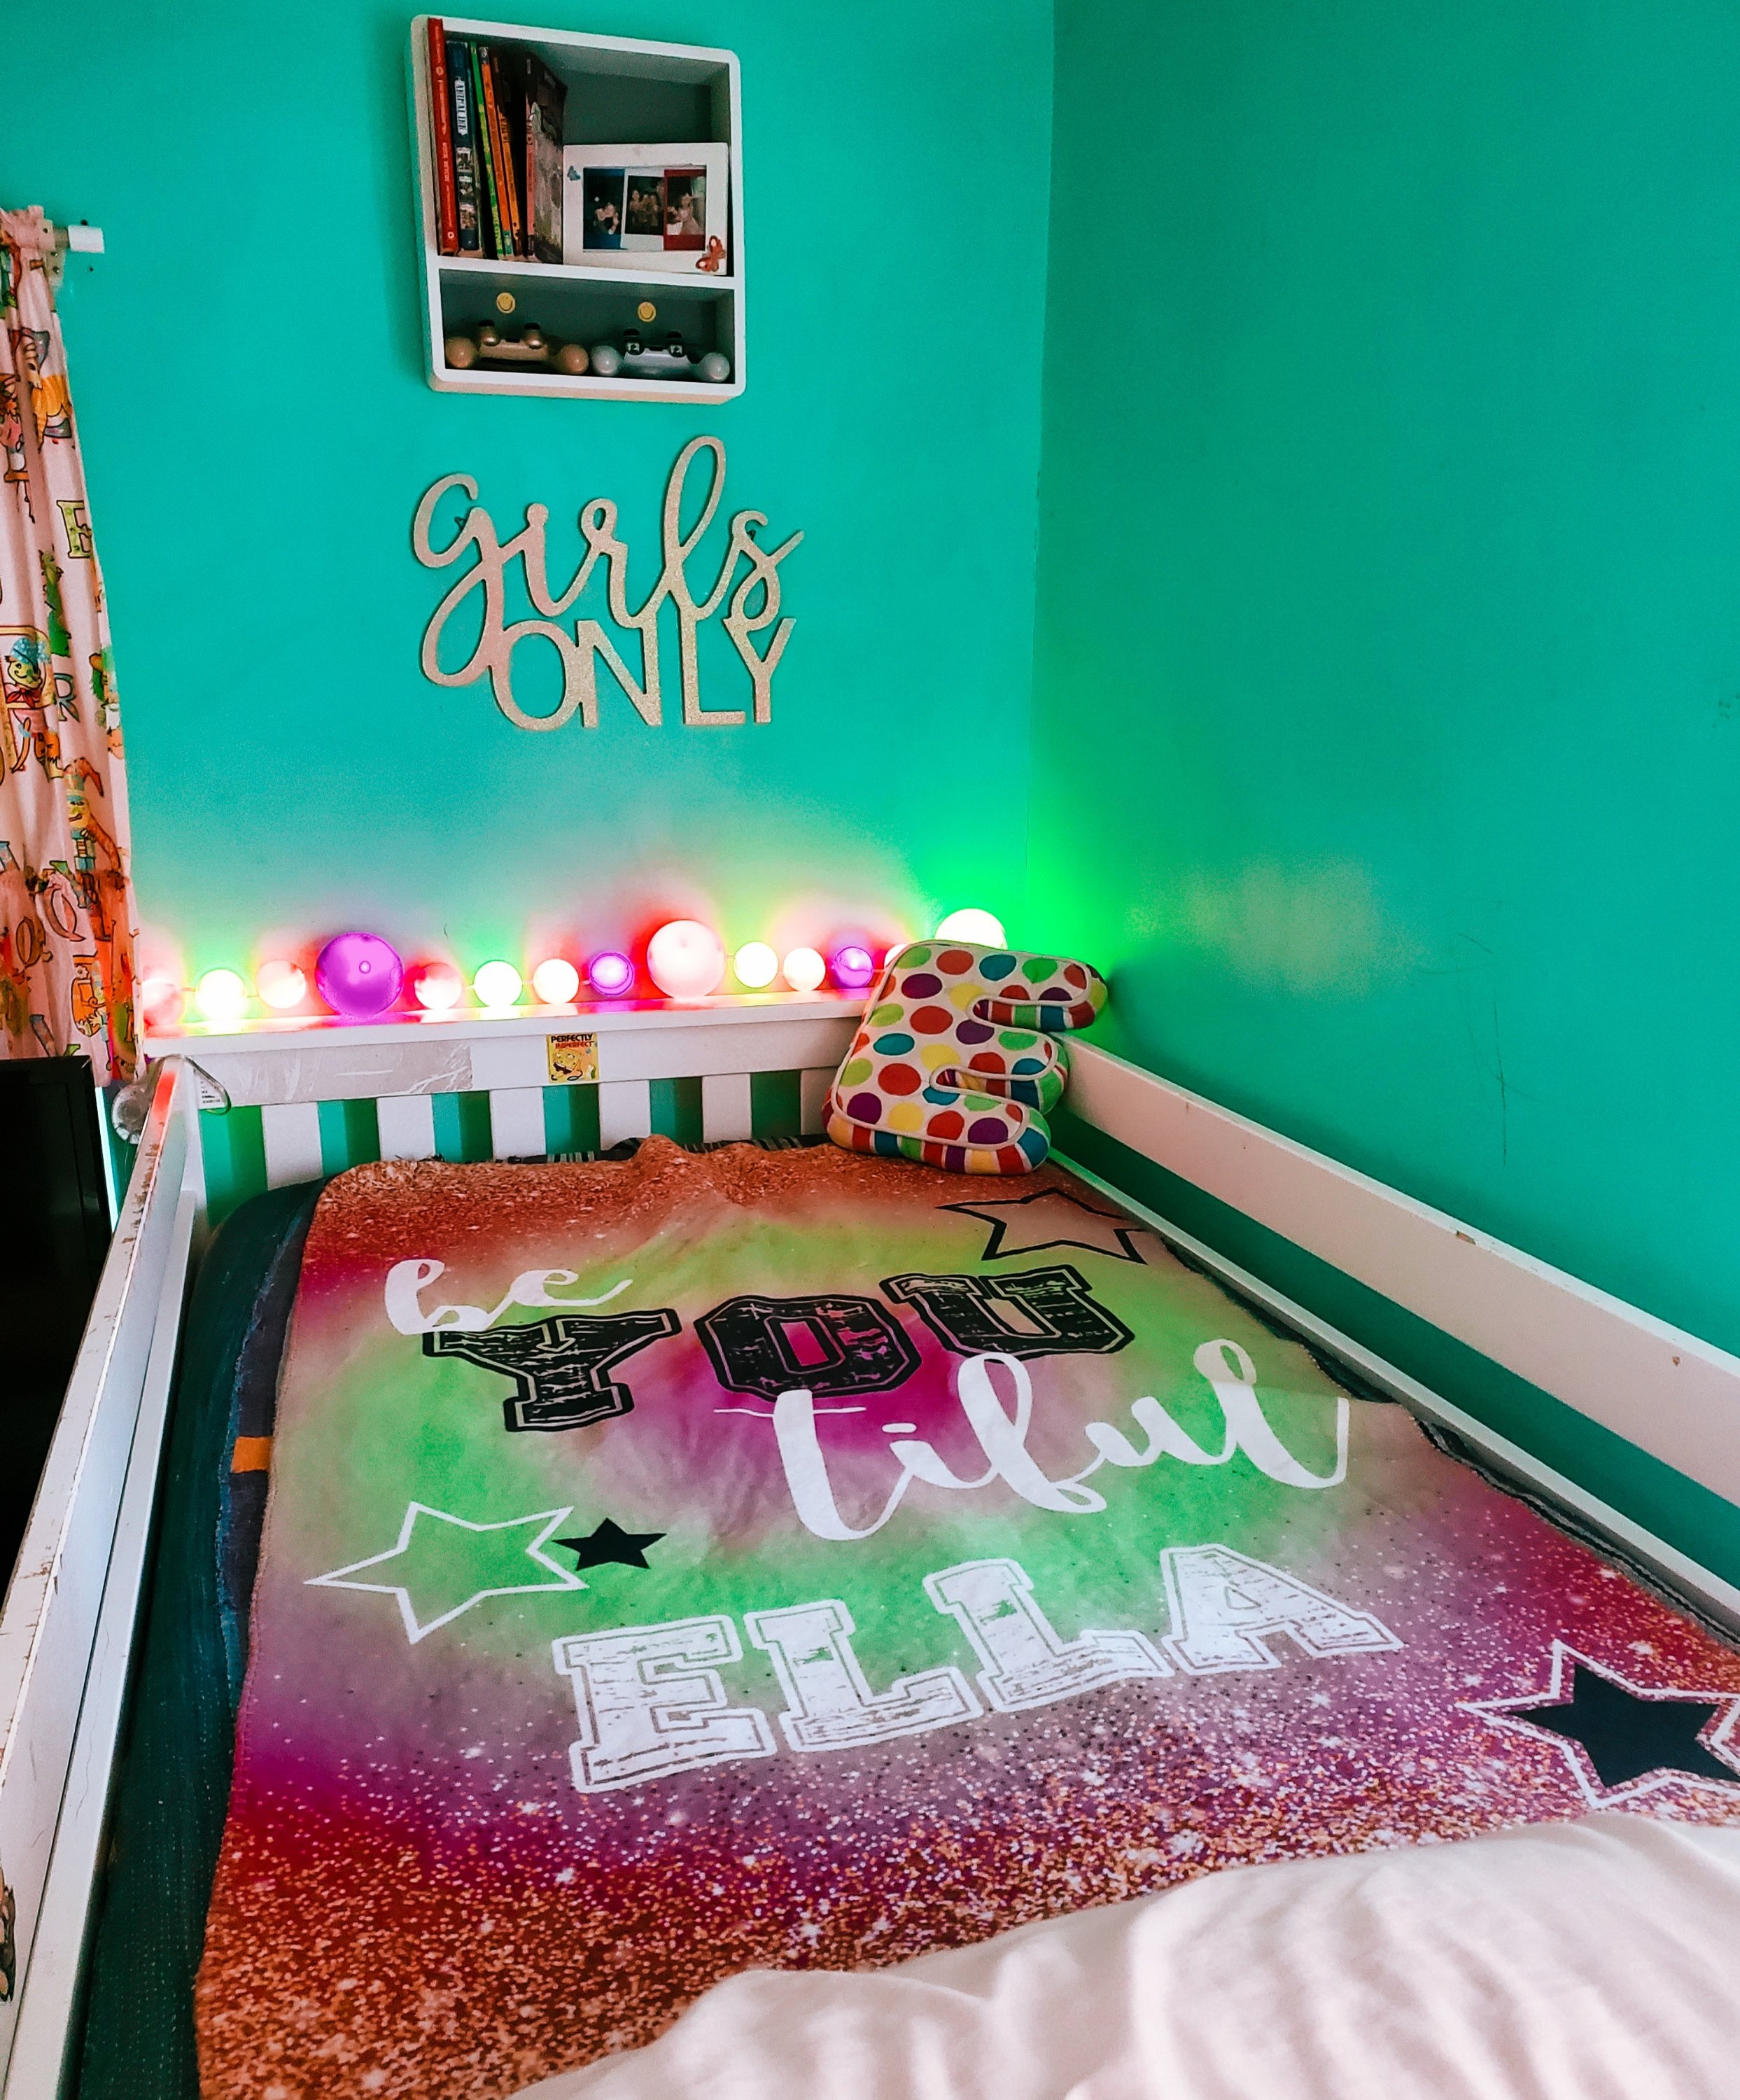
Ella & Sasha’s bunks have stairs. I added rainbow decals going up their stairs. I also really love the vintage 60s curtains that I found for their room.
Their bunk has 3 small shelves in the stairs. I am still trying to figure out what to do in that space.
Ella is on top & Sasha is on the bottom.
Ella has this cute shelf to keep her things. I thought it was the absolute perfect one because it matched with their other furniture and has a space for her books & controllers.
I LOVE these lights on Ella’s bed, but when they got the rainbow light for Christmas they had to choose one or the other for the outlet. I put them aside for now until I can figure out another solution.
My mom got all of the girls each their own blanket with their name on it. Ella’s blanket says “Be-You-Tiful Ella” and she has a fun color E pillow also. I love adding personalization where I can without being over the top.
Sasha’s blanket has a cute little unicorn with her name & other little doodles.
In between their beds they have their TV. In order to earn their remotes, they have to have their chores finished first.
Sasha got this rug for Christmas to play with her hot wheels and wooden vehicles. They love driving their cars all around the town making up stories and being different characters for each place.
Mia & Athena’s bed has a ladder instead of stairs. Mia is on top, Athena is on the bottom.
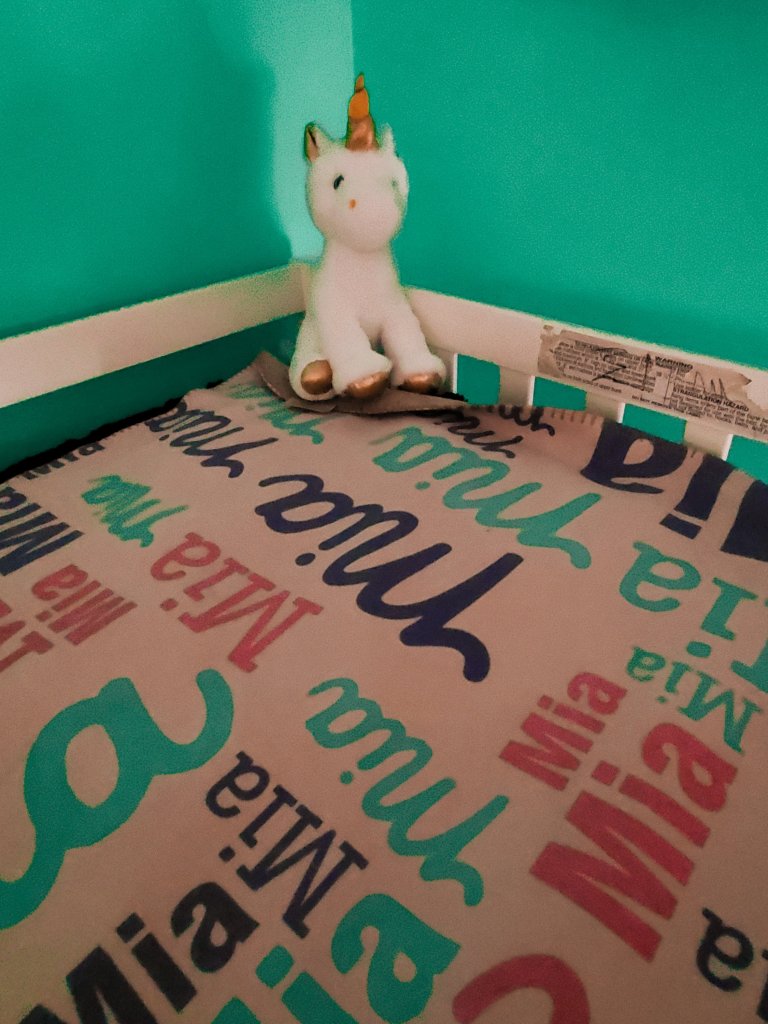
Mia has her own shelf like Ella’s to keep her things. Her blanket is all of her favorite colors with her name in different fonts.
Athena’s blanket is SO beautiful. It is flowers and her name in a pretty pink font.
This bunk has 4 drawers. The top is Sasha + Athena undies & socks. The bottom 3 are Sasha’s shirts, pants, and pajamas. It also has 3 shelves which I added cute cube baskets that have Athena’s shirts, pants, and pajamas.
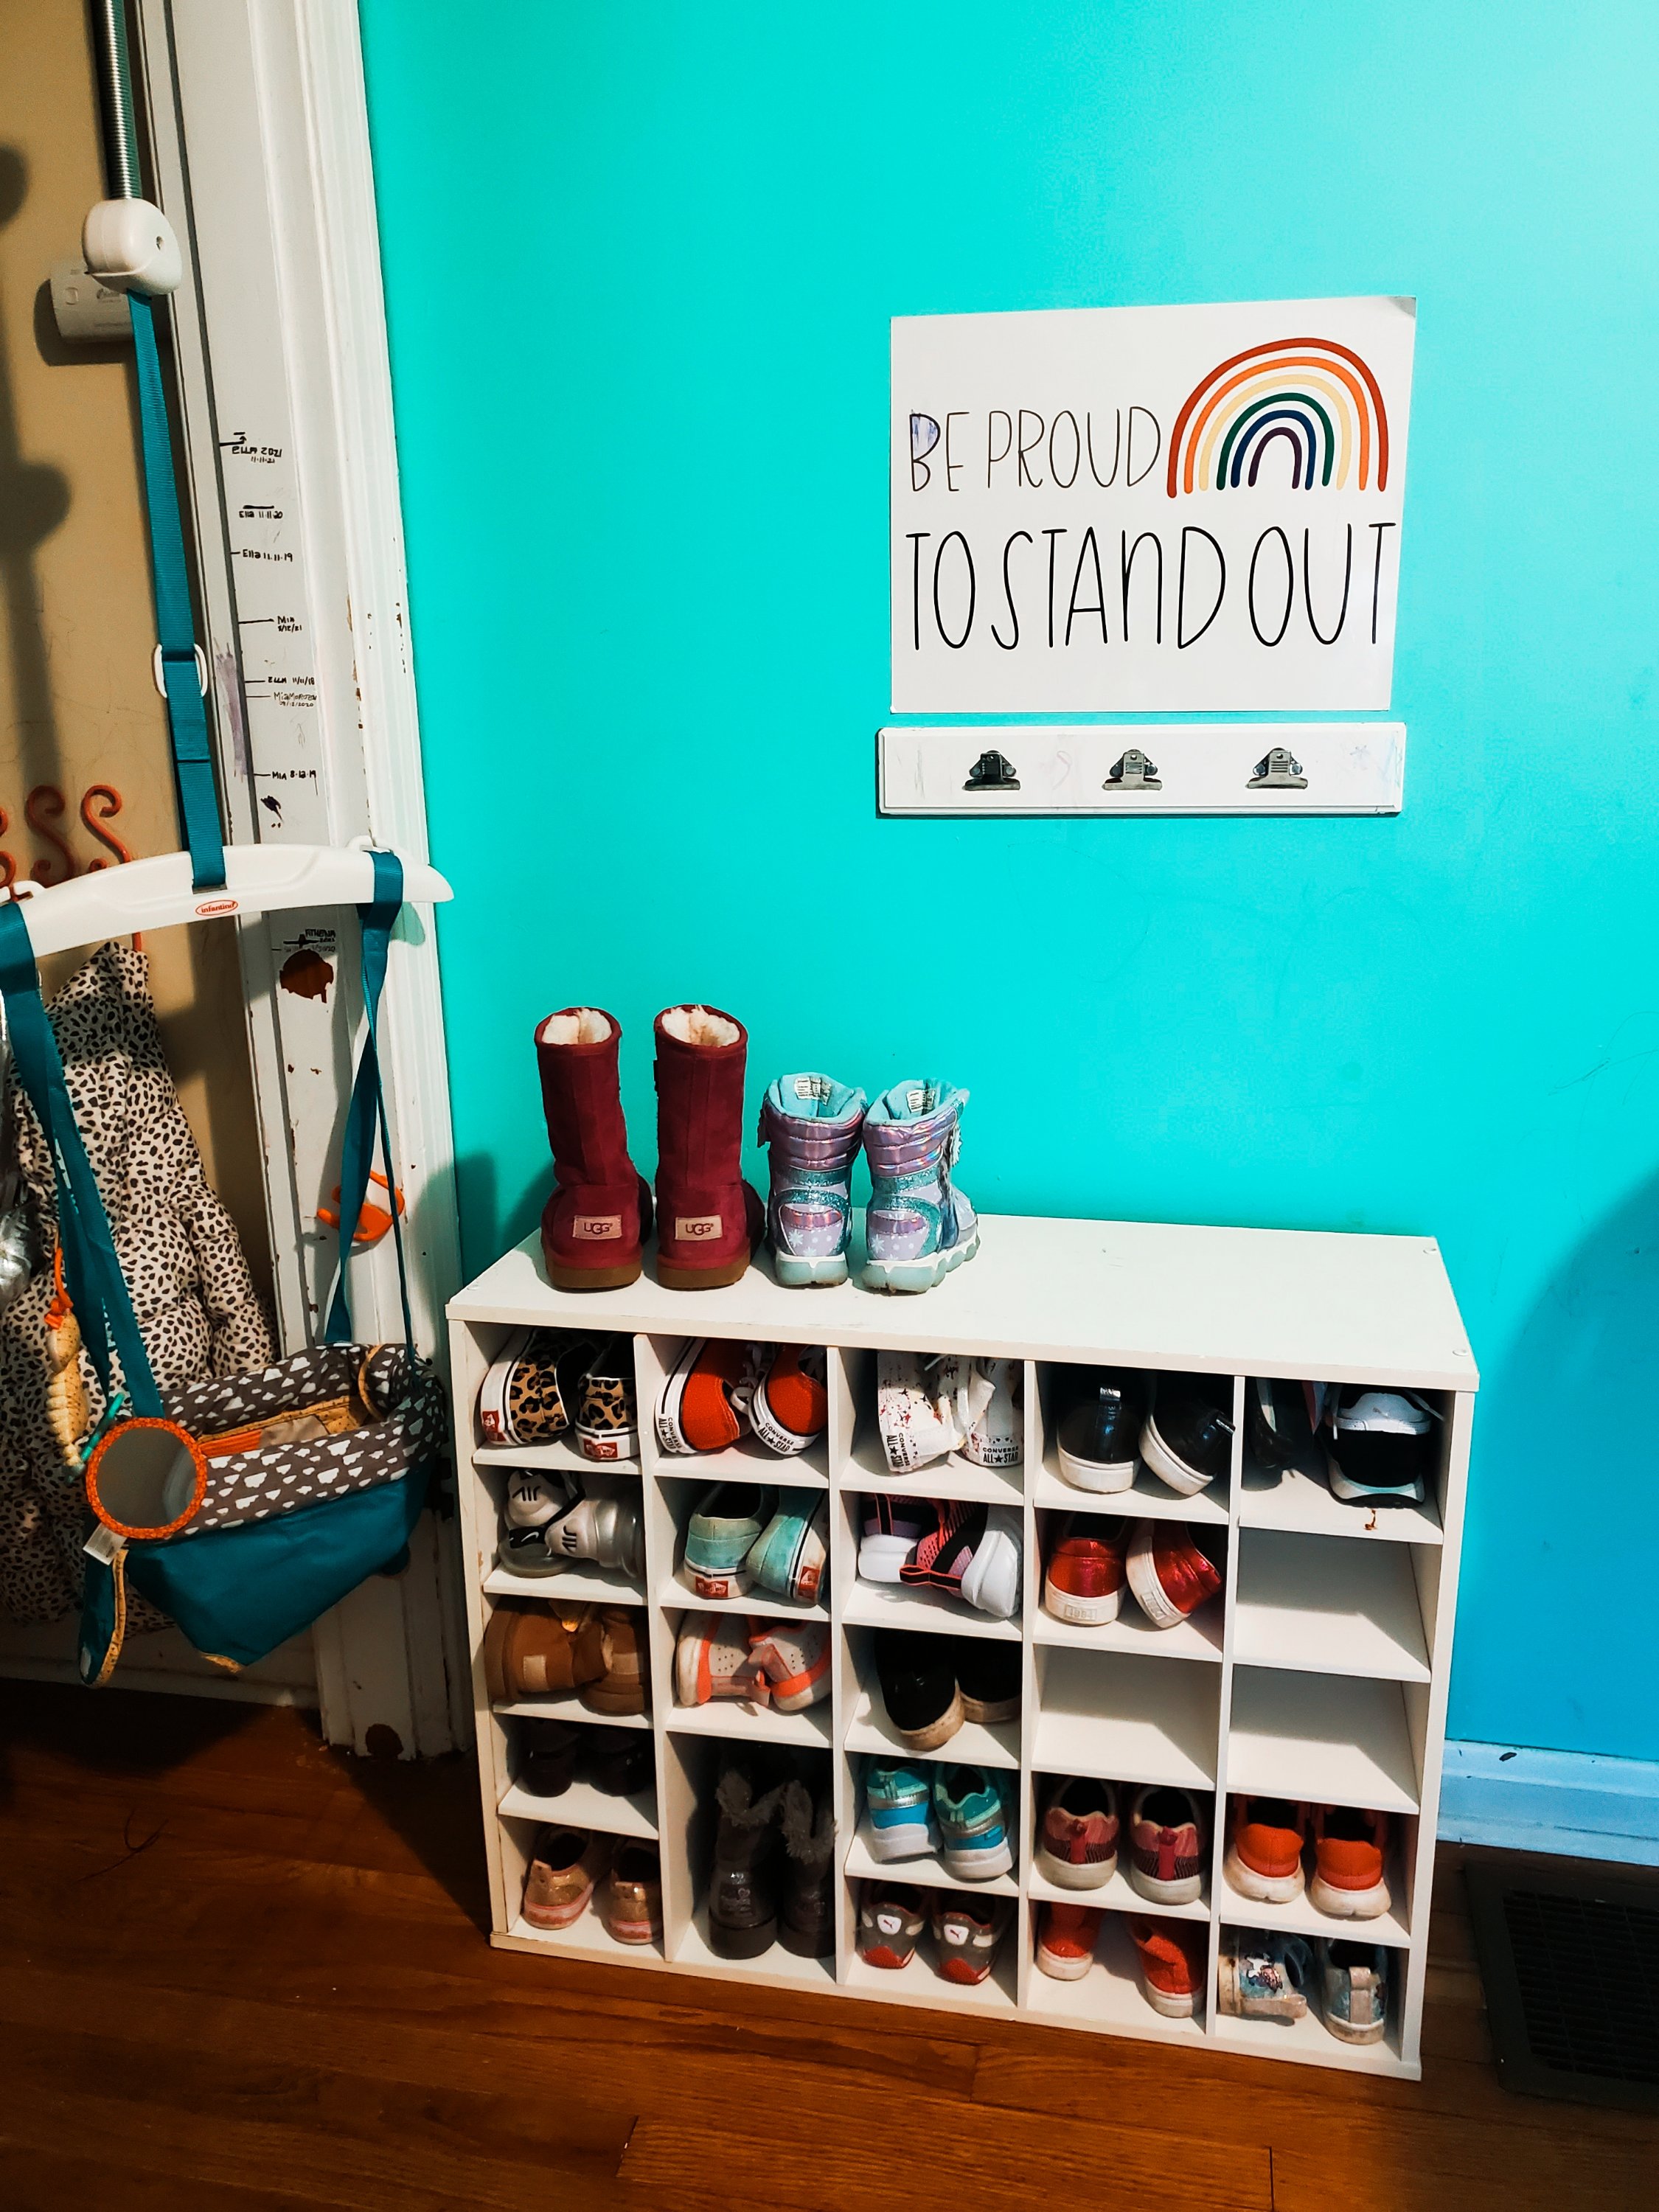
A lot of girls equals a lot of shoes! I’ve actually had this since I was a kid at my parents house and now I passed it down to my own girls. One of the slots broke so I turned it into a boot slot instead.
Above their shoes is a space for them to hang up their artwork. We are not a family that keeps every piece of art or else our entire home would be overflowing with mountains of crafts. This gives them a space to hang their favorites for a bit, then change them out when they have a new favorite.
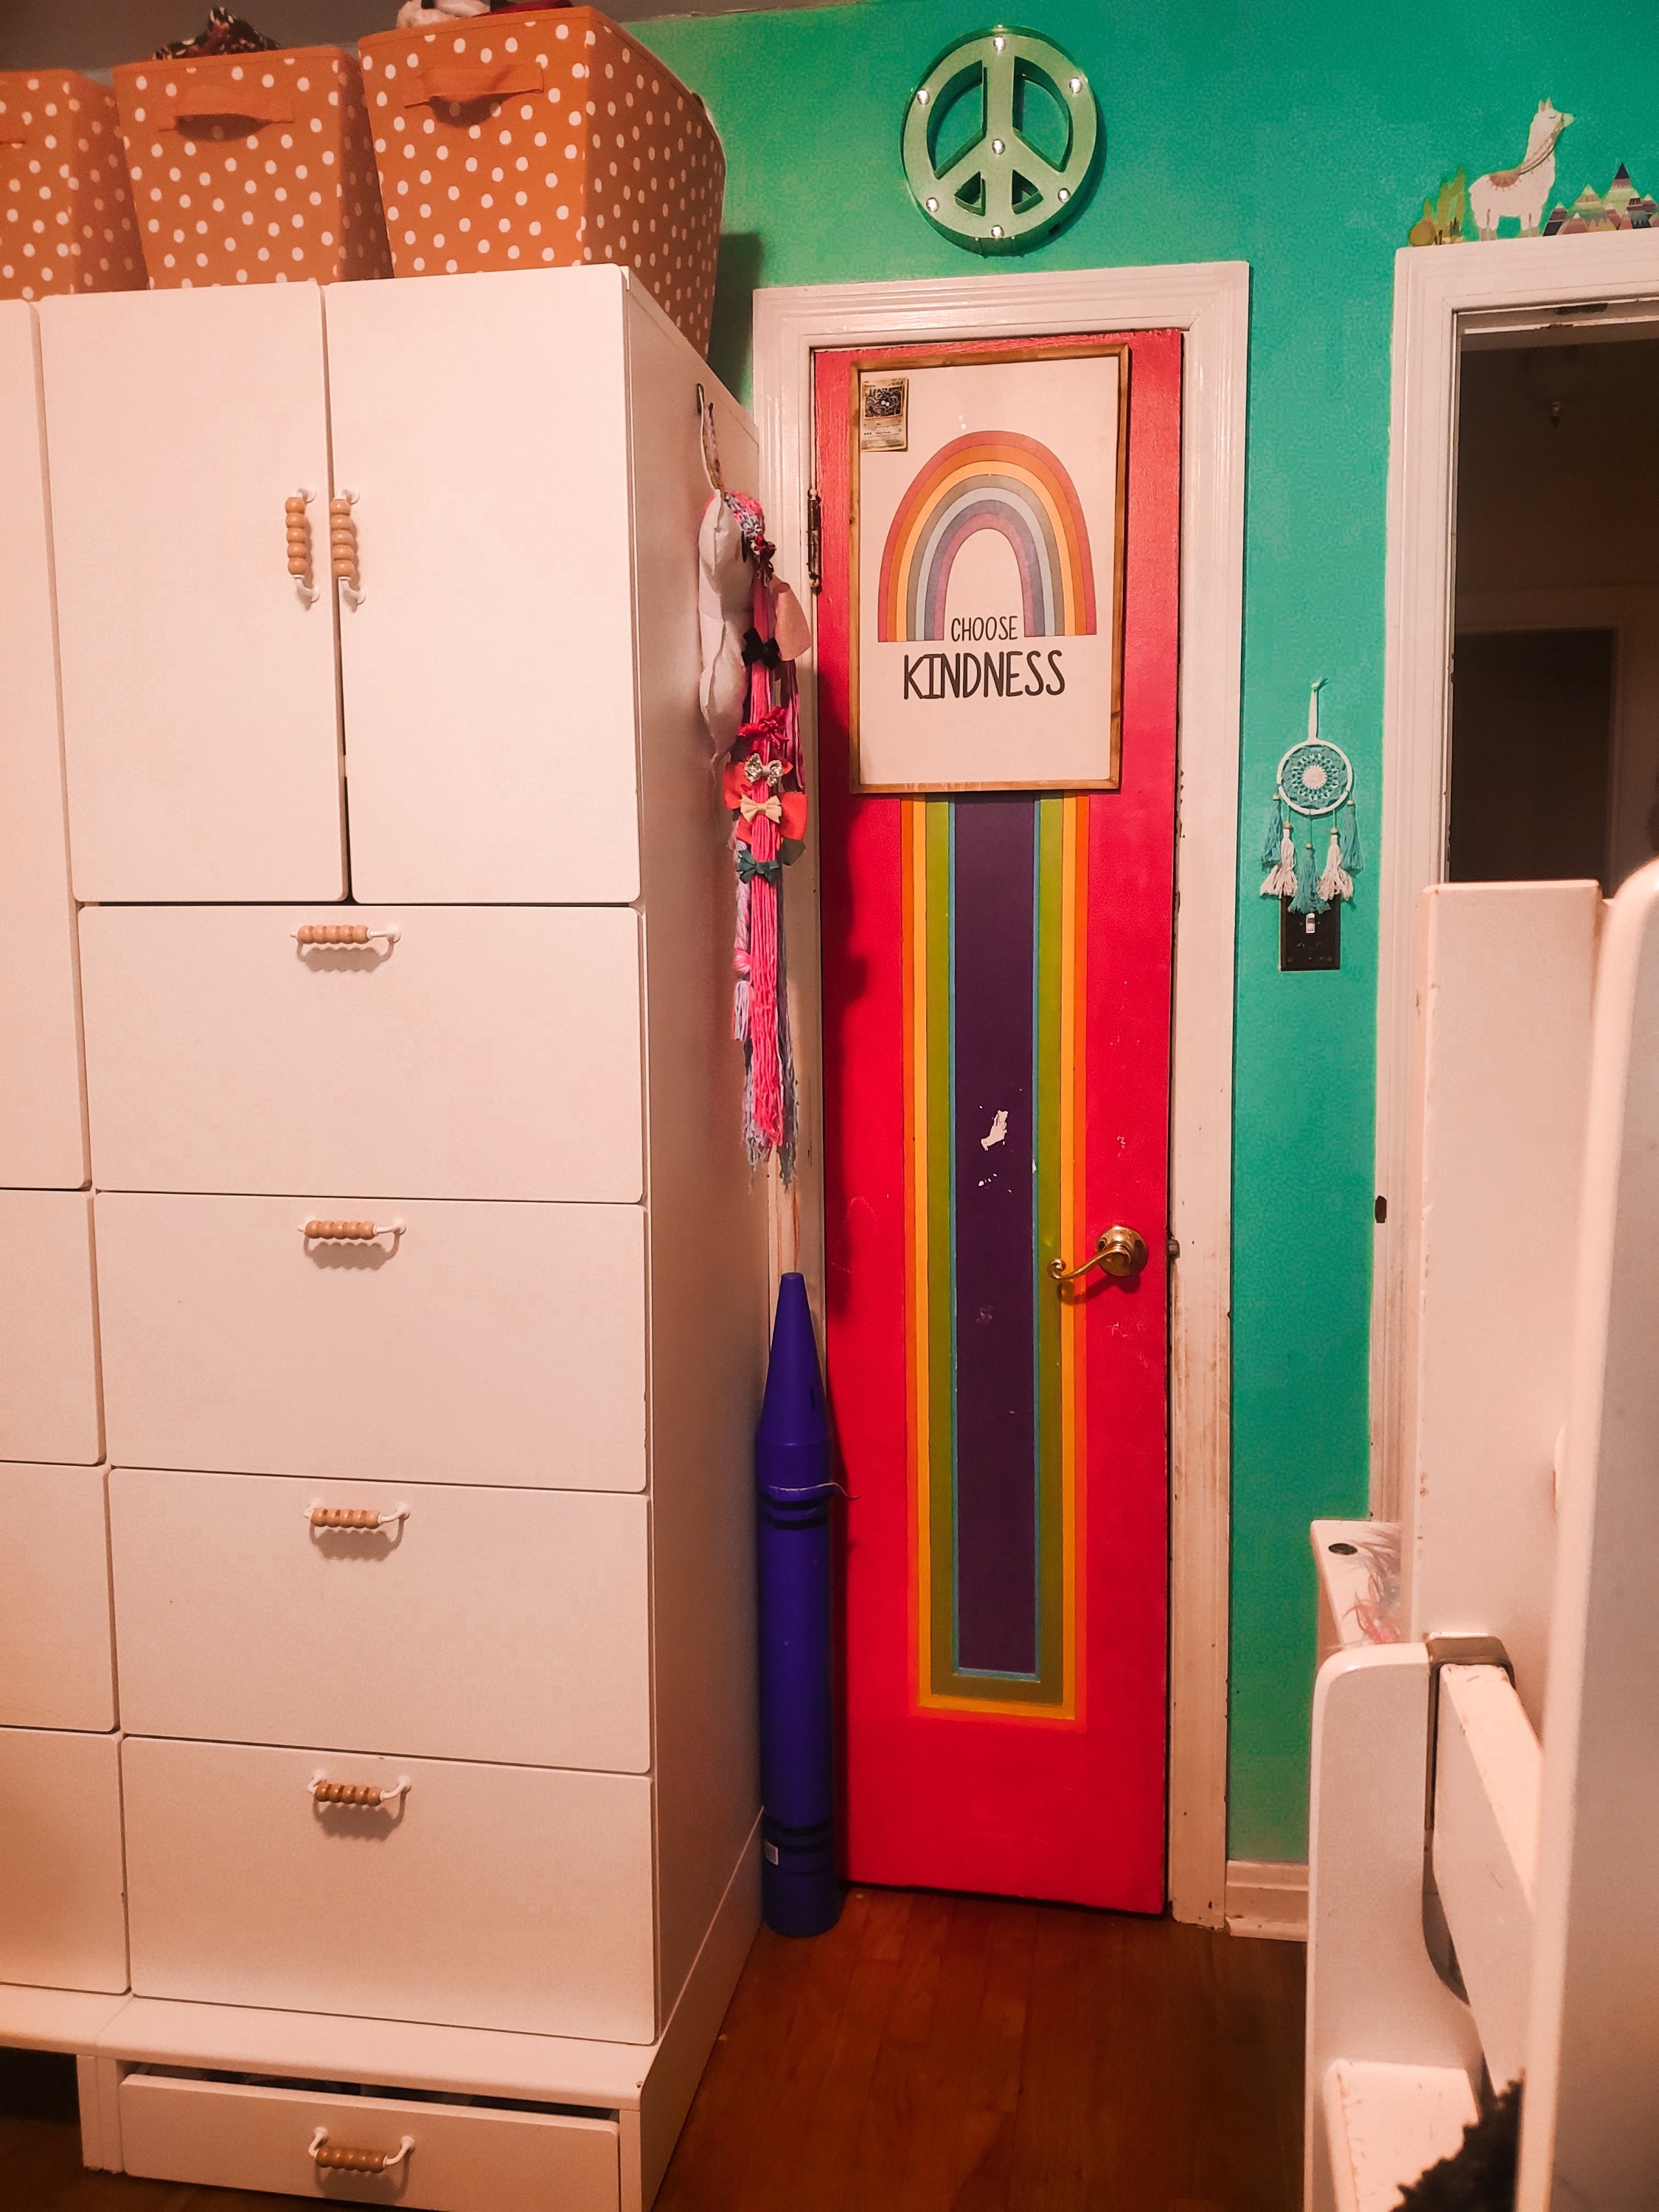
I painted their closet door the colors of the rainbow and added this “Choose Kindness” sign. I love their peace sign light above it.
I love how their crayon piggy bank looks next to the rainbow painted closet.
I have the inside of their closet divided by this shoe hanger. Ella & Mia both get 3 slots. Mia’s dresses & jackets are on the left, Ella’s dresses & jackets are on the right.
On the shelves I keep Ella & Mia’s sports cases. I got them each a suitcase to both store & roll their sports gear themselves so that I am not stuck carting everything around myself while also wearing a baby and carrying my own items. Whatever sport is currently being played gets their case on the lower shelf while the off season sport case goes up top. It helps to keep all of their gear together in one place and away from the toddlers who love to get into all their big sisters things.
On the bottom is another shoe rack with boots & rainboots.
I added these adorable mirror butterflies that I found at the thrift store up their wall on this small space.
The girls hang their bows on this adorable unicorn bow holder. I really fell in love with bows during cheer season and want to begin collecting bows for the girls. I got some holiday related ones this year that I put into the holiday bin until that season is upon us again.
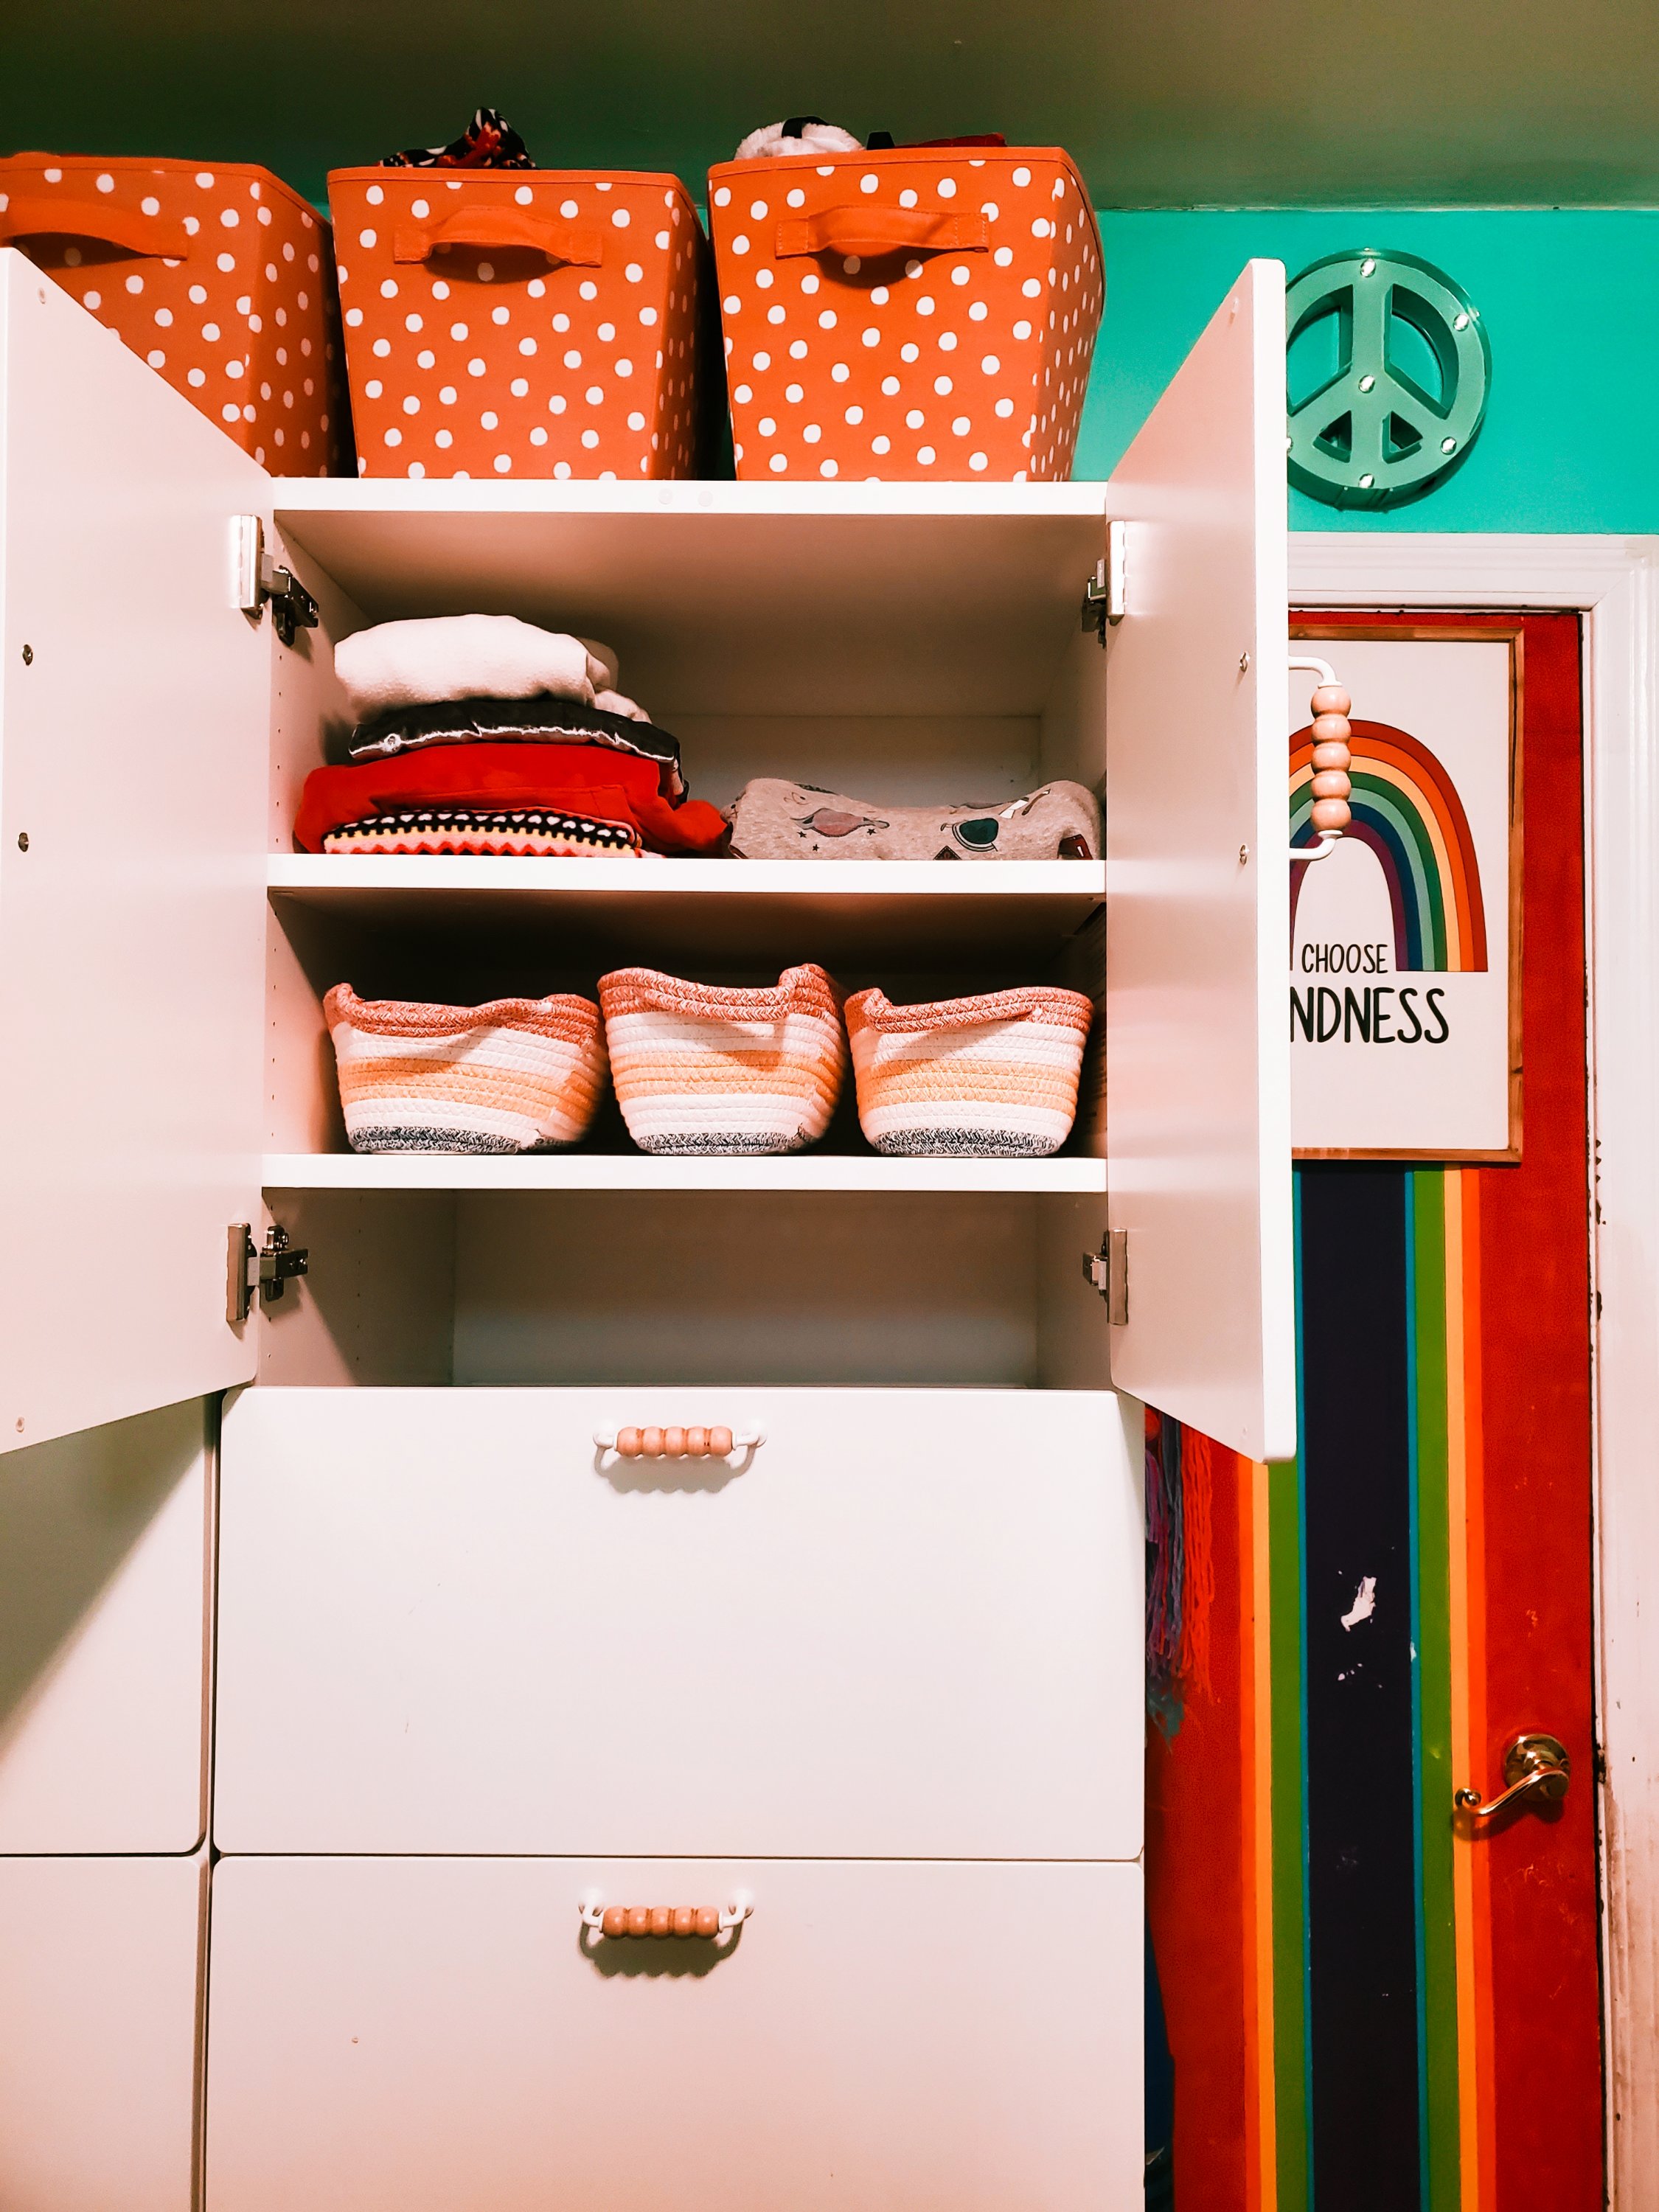
This unit from Ikea is EVERYTHING. As you can see, their closet is extremely small. This unit is completely build-able piece by piece. You can work it so many ways to be able to suit your own needs at a very affordable price.
The top left corner is Sasha + Athena’s dresses and jackets. The left drawers are Mia’s shirts, pants, & pajamas. The top right corner is Mia + Ella’s sweatshirts and 3 baskets filled with their headbands, scrunchies, and various accessories like sunglasses. The top right side drawer is Ella + Mia’s undies & socks, the three lower are Ella’s shirts, pants, & pajamas. The roll-out drawer are Athena’s shoes/boots.
I added 4 matching baskets from Target on top. 1st: Sasha + Athena’s sweatshirts. 2nd: Swimsuits. 3rd: Holiday outfits/accessories. 4th: Purses
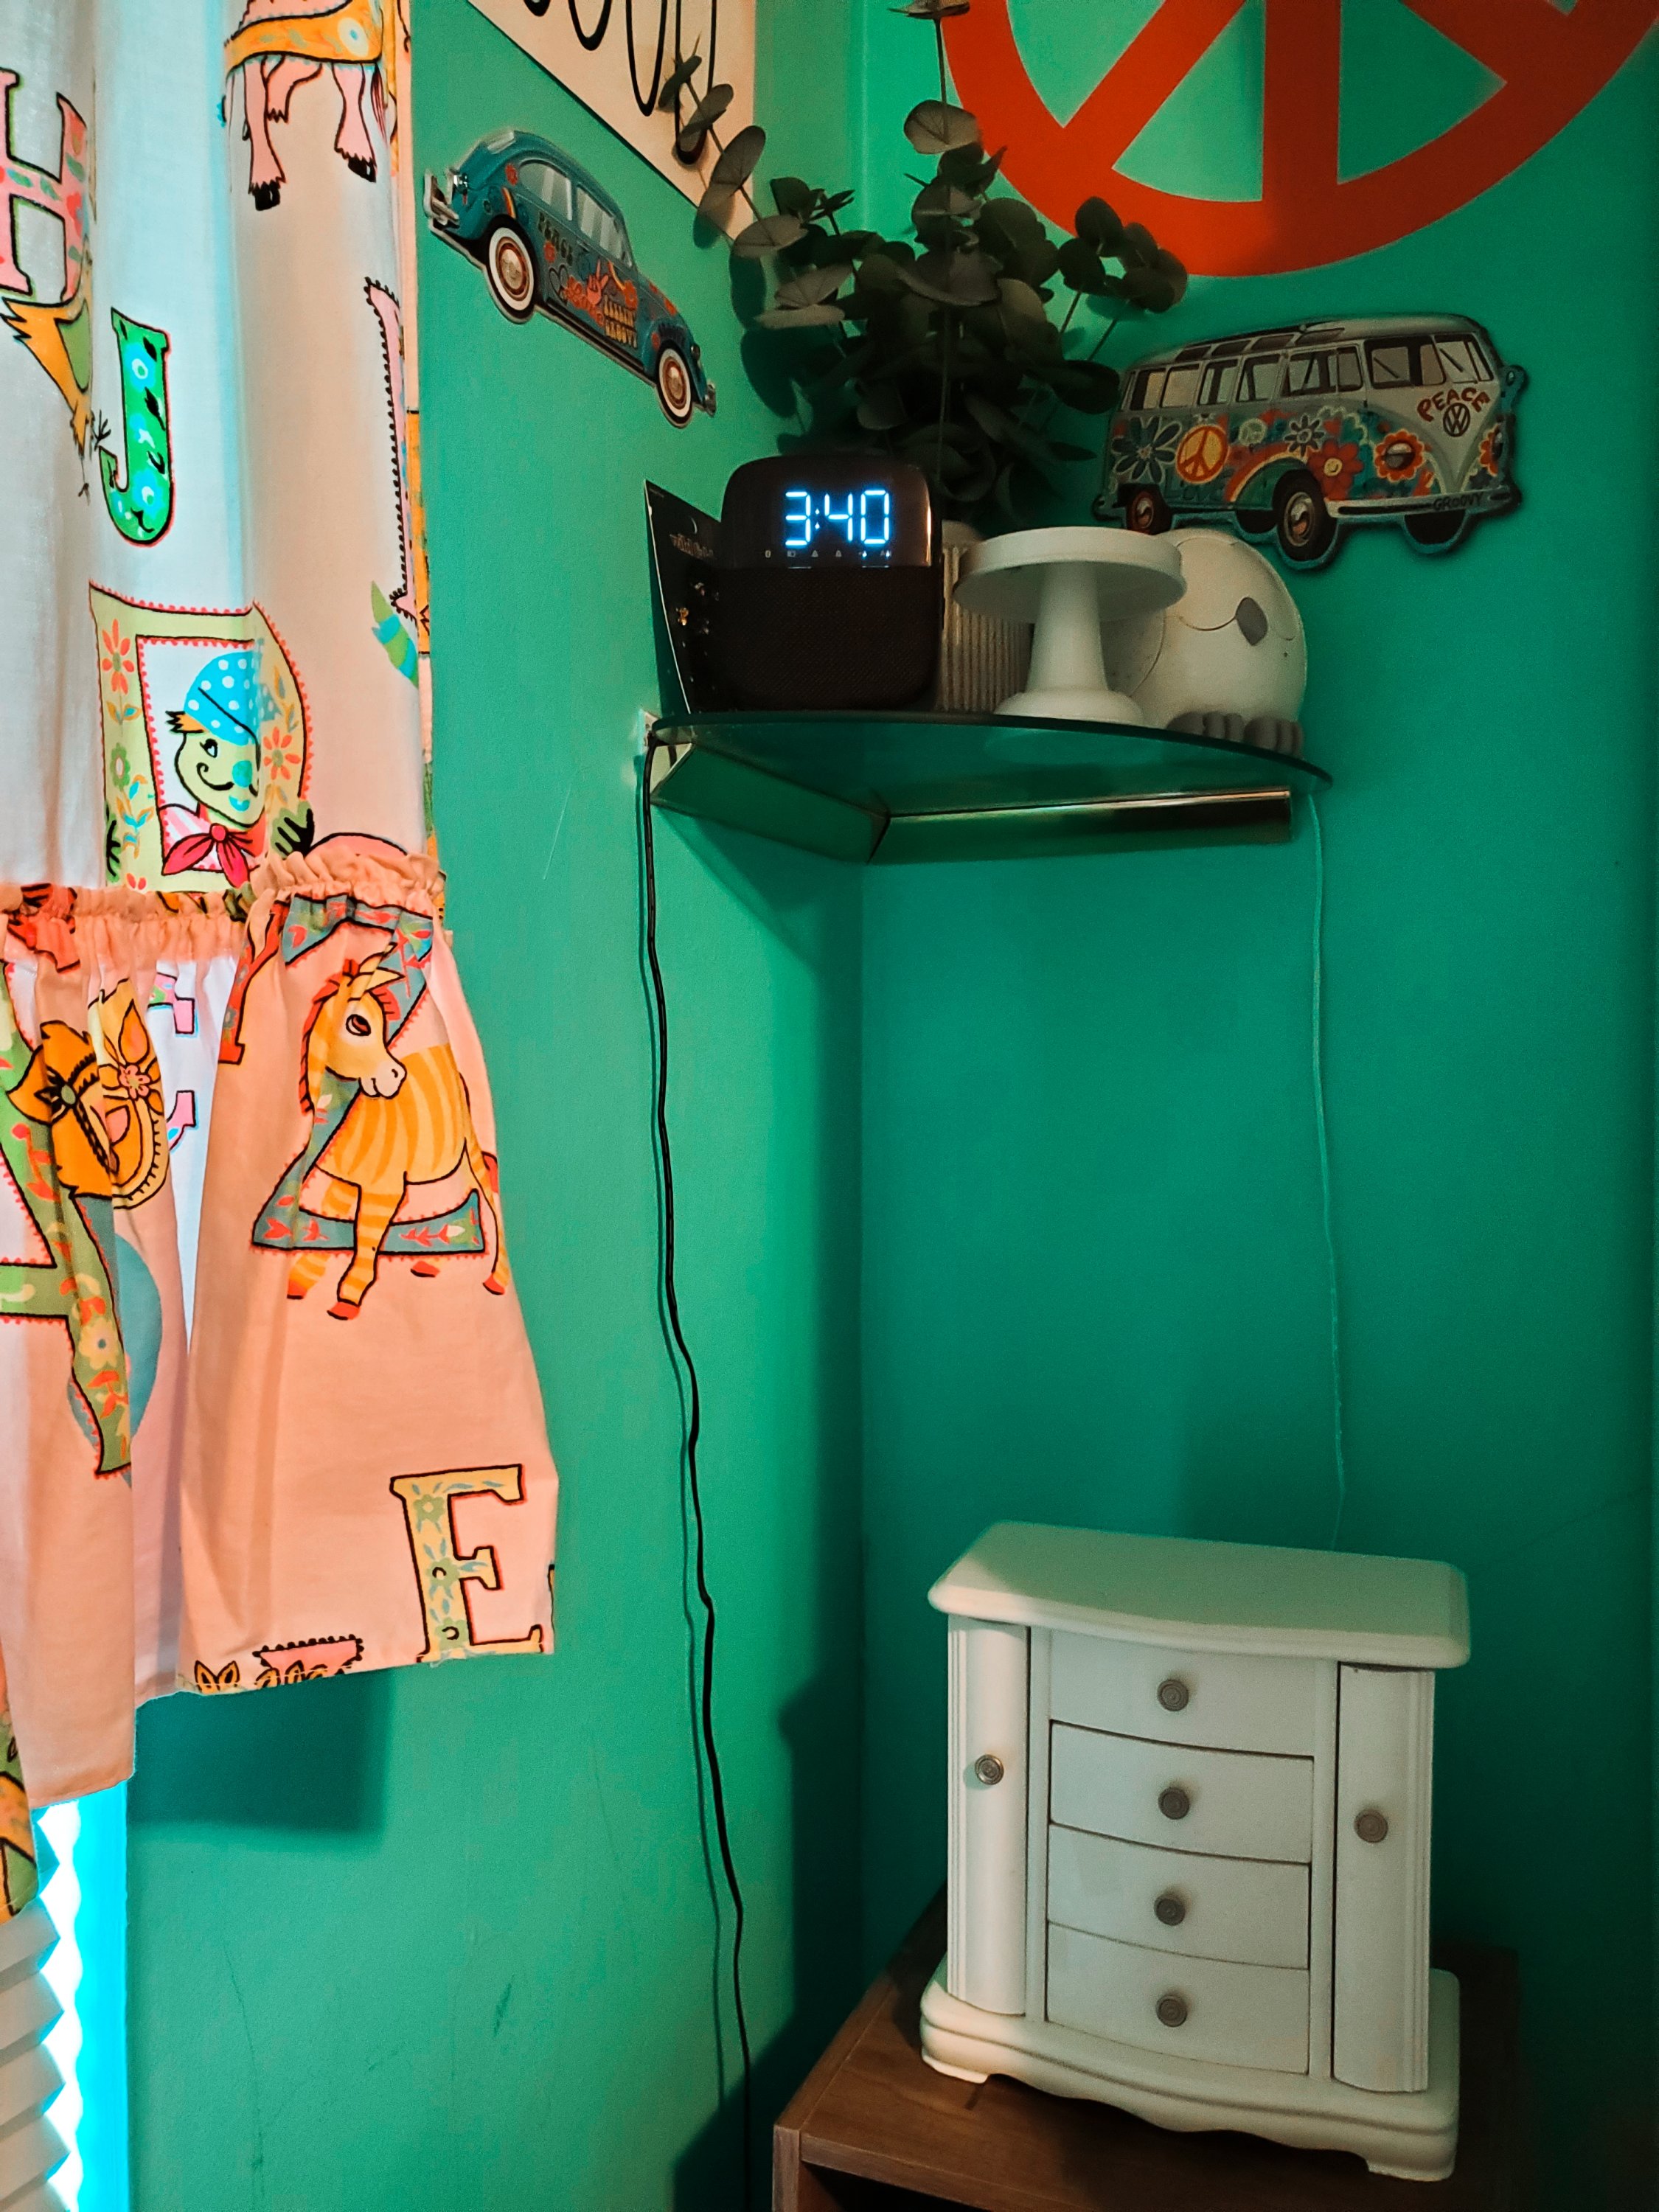
I love this little corner of their room. My first car was a VW Bug and my dream vehicle is a VW Bus. They are definite musts in a Hippie themed room.
I added a fake Eucalyptus plant in the back that I will sometimes add a few drops of Eucalyptus oil to the jar to add a natural scent to it.
Their Snowy the Owl diffuser is another MUST. It is kid-friendly, easy to use, changes colors, and has a sound machine.
I added a 3 cube shelf in the corner which I’m not crazy about, but it’s working for now. I added 3 baskets to it to store daily hats, winter hats, and other various accessories.
On top of the cube shelf is Ella’s jewelry box that she got for Christmas. It really looks cute in that space, although I will be changing this corner out soon enough because like I said, this is an ever-evolving room.
I hope you enjoyed my girls hippie room and found some inspiration for your own shared girls room! I will make sure to update with any new changes so don’t forget to subscribe!! 🙂
I’m a little late getting this post up, but I’ve been working around the clock making Christmas happen while taking care of a whole house of sick kiddos. After a week back at school, I’m finally finding my motivation again.
I used to be Team Halloween all the way growing up, but after having so many kids, I have to say: I think that Christmas may officially be my favorite holiday.
I love turning my home into a magical wintery Wonderland for the kids. I now dream of adding more and more to my collection over the years until my entire home is transformed for the holiday. I even considered getting rid of my other holiday decor (yes, even Halloween 😱) just to make more room for more Christmas decor storage! Maybe I’ll just go the Nightmare Before Christmas route and just live half way between the pumpkin door tree and Christmas tree door tree and be forever happy.
Decor
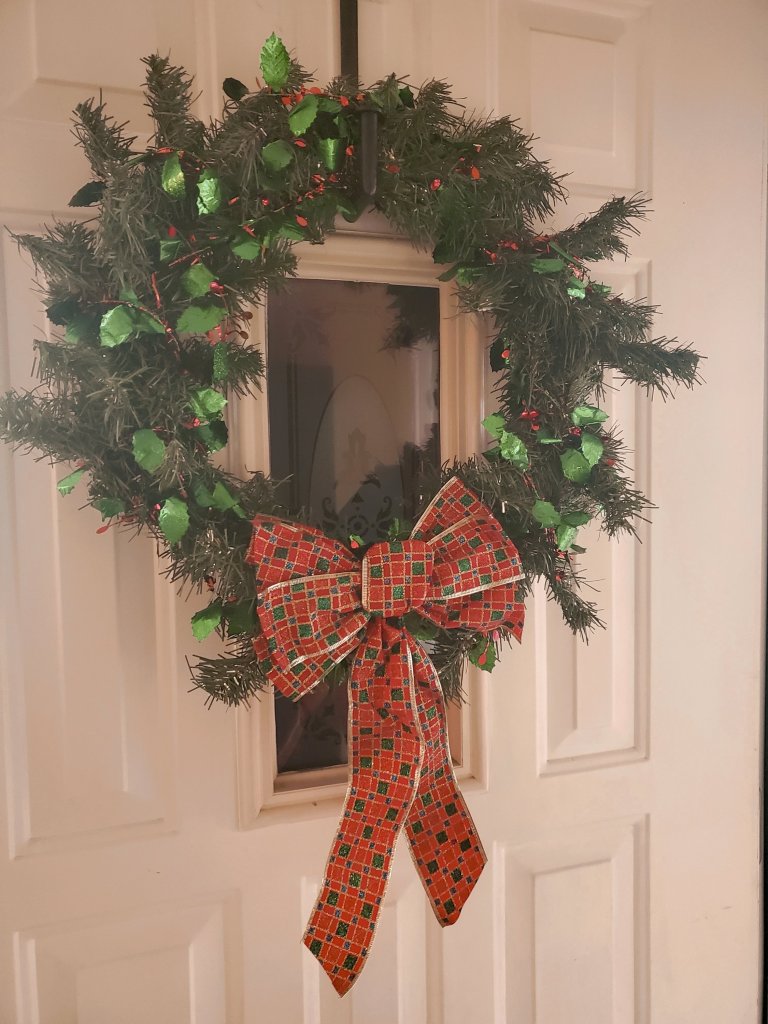
When you first pull up, this bow is the first thing you see on our lamp-post.
I wrapped a cute red, green, and “snow” garland that I found at Walmart around the railing then added this adorable woodsy-vibe bell from Hobby Lobby to the bottom.
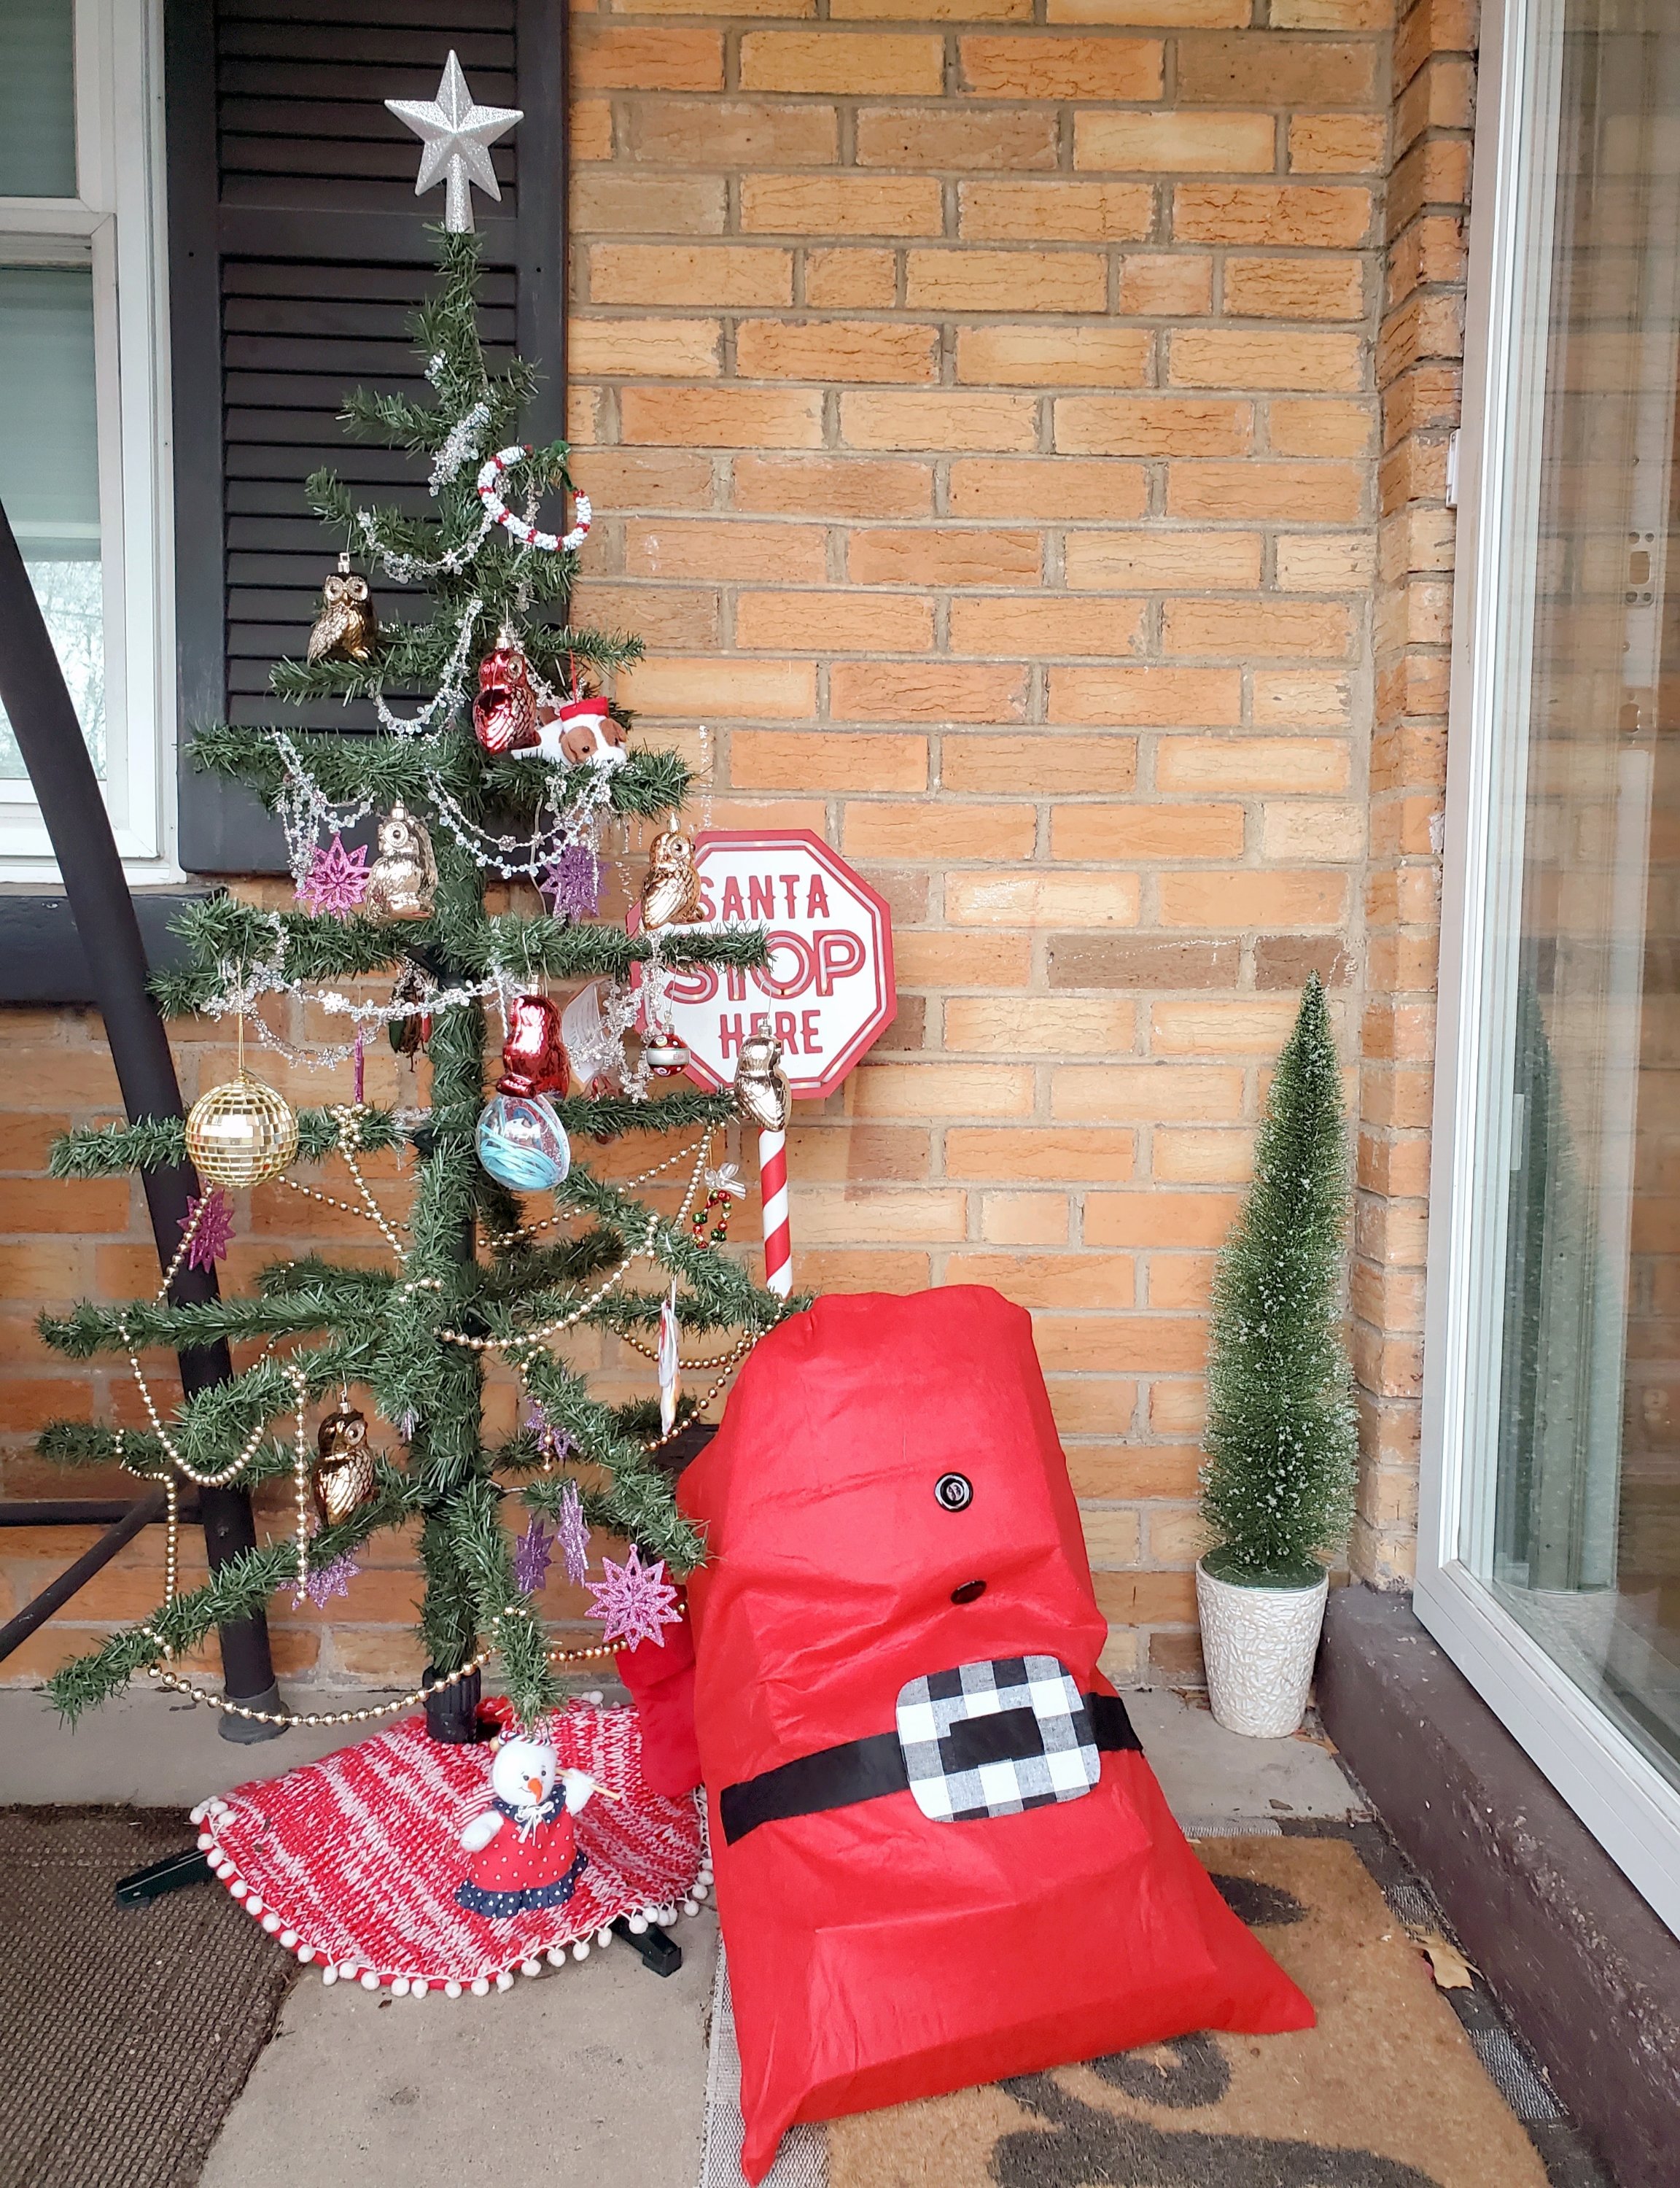
On our porch, I added our “Charlie Brown” Christmas tree for the kids to decorate. I hung mini stockings on a plant stand and put the light-up “Santa Stop Here” sign from Hobby Lobby on top for some height so that people driving/walking by could see it.
The garland on the plant hanger matches the garland going up the railing. I bought those two large bows at Dollar Tree a few years ago and they are still going strong. I filled the hanging baskets with ornaments, & hung giant, sparkley snowflakes from Walmart.
I switched out the Fall mums for these holiday arrangements.
Then I added just a small string of lights to really finish it off.
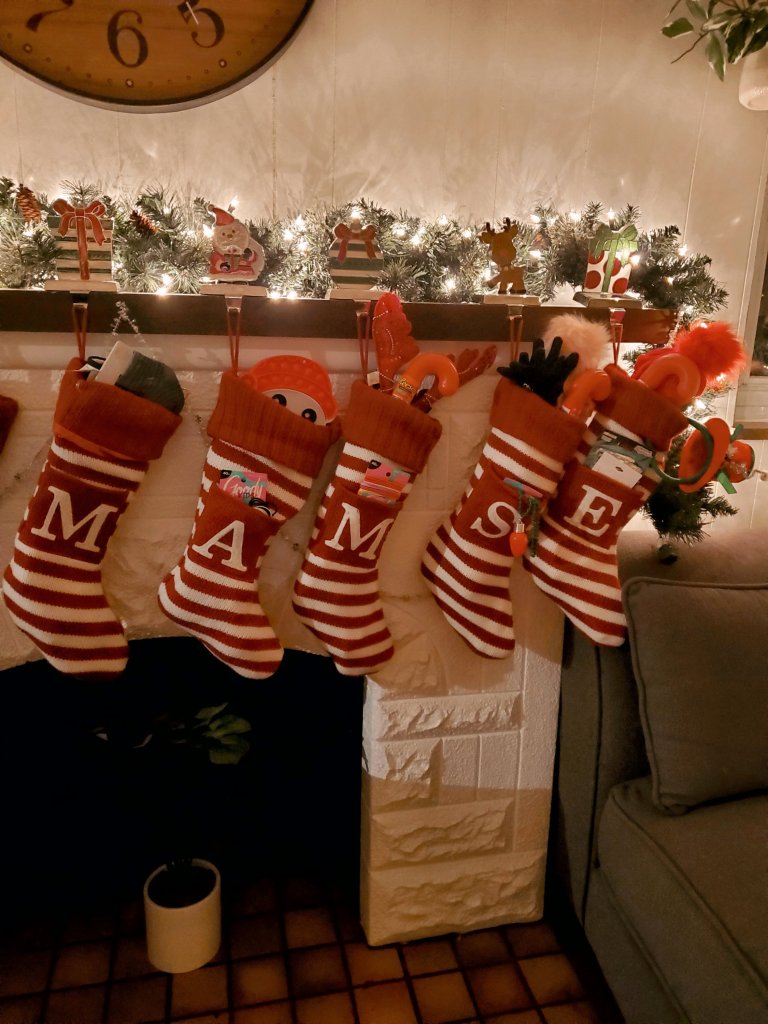
I bought these stockings for our family back in 2018. In 2019, I was able to add “A” to our collection for Athena. This year, this pattern was discontinued from Target. I was able to hunt down one more “M” for Moses on Mercari which was a total sign from the Christmas Gods- last baby, last M available in this print to complete our family of stockings.
I am sitting here just in awe. I can’t believe how beautiful it looks so far and it’s only my first night decorating the tree. I am so full of gratitude- to be able to turn our home into a magical winter Wonderland for the kids, for my husband who works his butt off so I can make it happen, for overall good health and a happy, loving family. I really have so many blessings to be so thankful for that I need to slow down and appreciate in the moment. That is my wish/goal for myself this Holiday season: slow down, live hygge with my family, and really appreciate all that I already have.
Sasha, Moses, and I took a trip out to find some new Christmas decorations. We picked out a lot of new ornaments together. We decided to go with a “Mrs. Clause” theme which I now plan to use for the rest of my Christmases.
Mia picked out this beautiful tree skirt that “reminds her of snow.” In person, it shimmers for miles; the picture does it no justice.
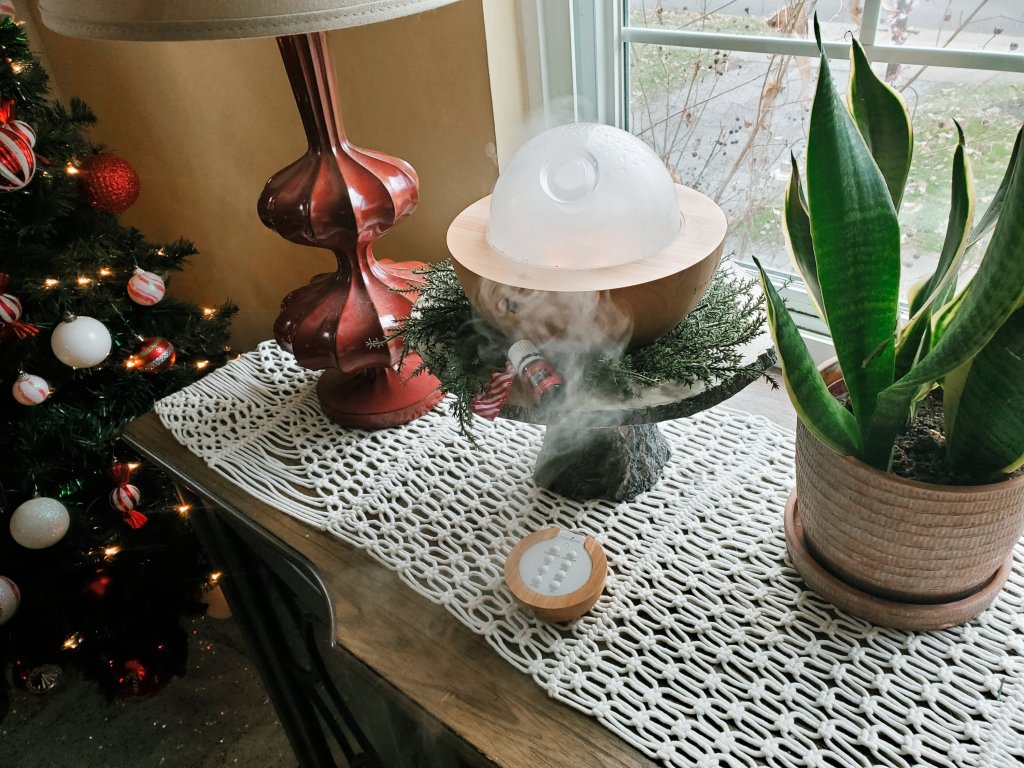
I found this adorable mini wreath in the Target “dollar” spot to put under my Aria diffuser. It made it look so fun & festive, especially with the tree trunk cake stand it is on.
Of course we have our Christmas Spirit essential oil by Young Living going all season long!
I hung this “Letters to Santa” mailbox for the kids to write their letters to Santa to send off to the North Pole.
The kids love to countdown the days to Christmas with this fun countdown calendar we found at Target a few years ago.
I kept the kids Christmas baking outfits at the table for an extra Christmassy feel.
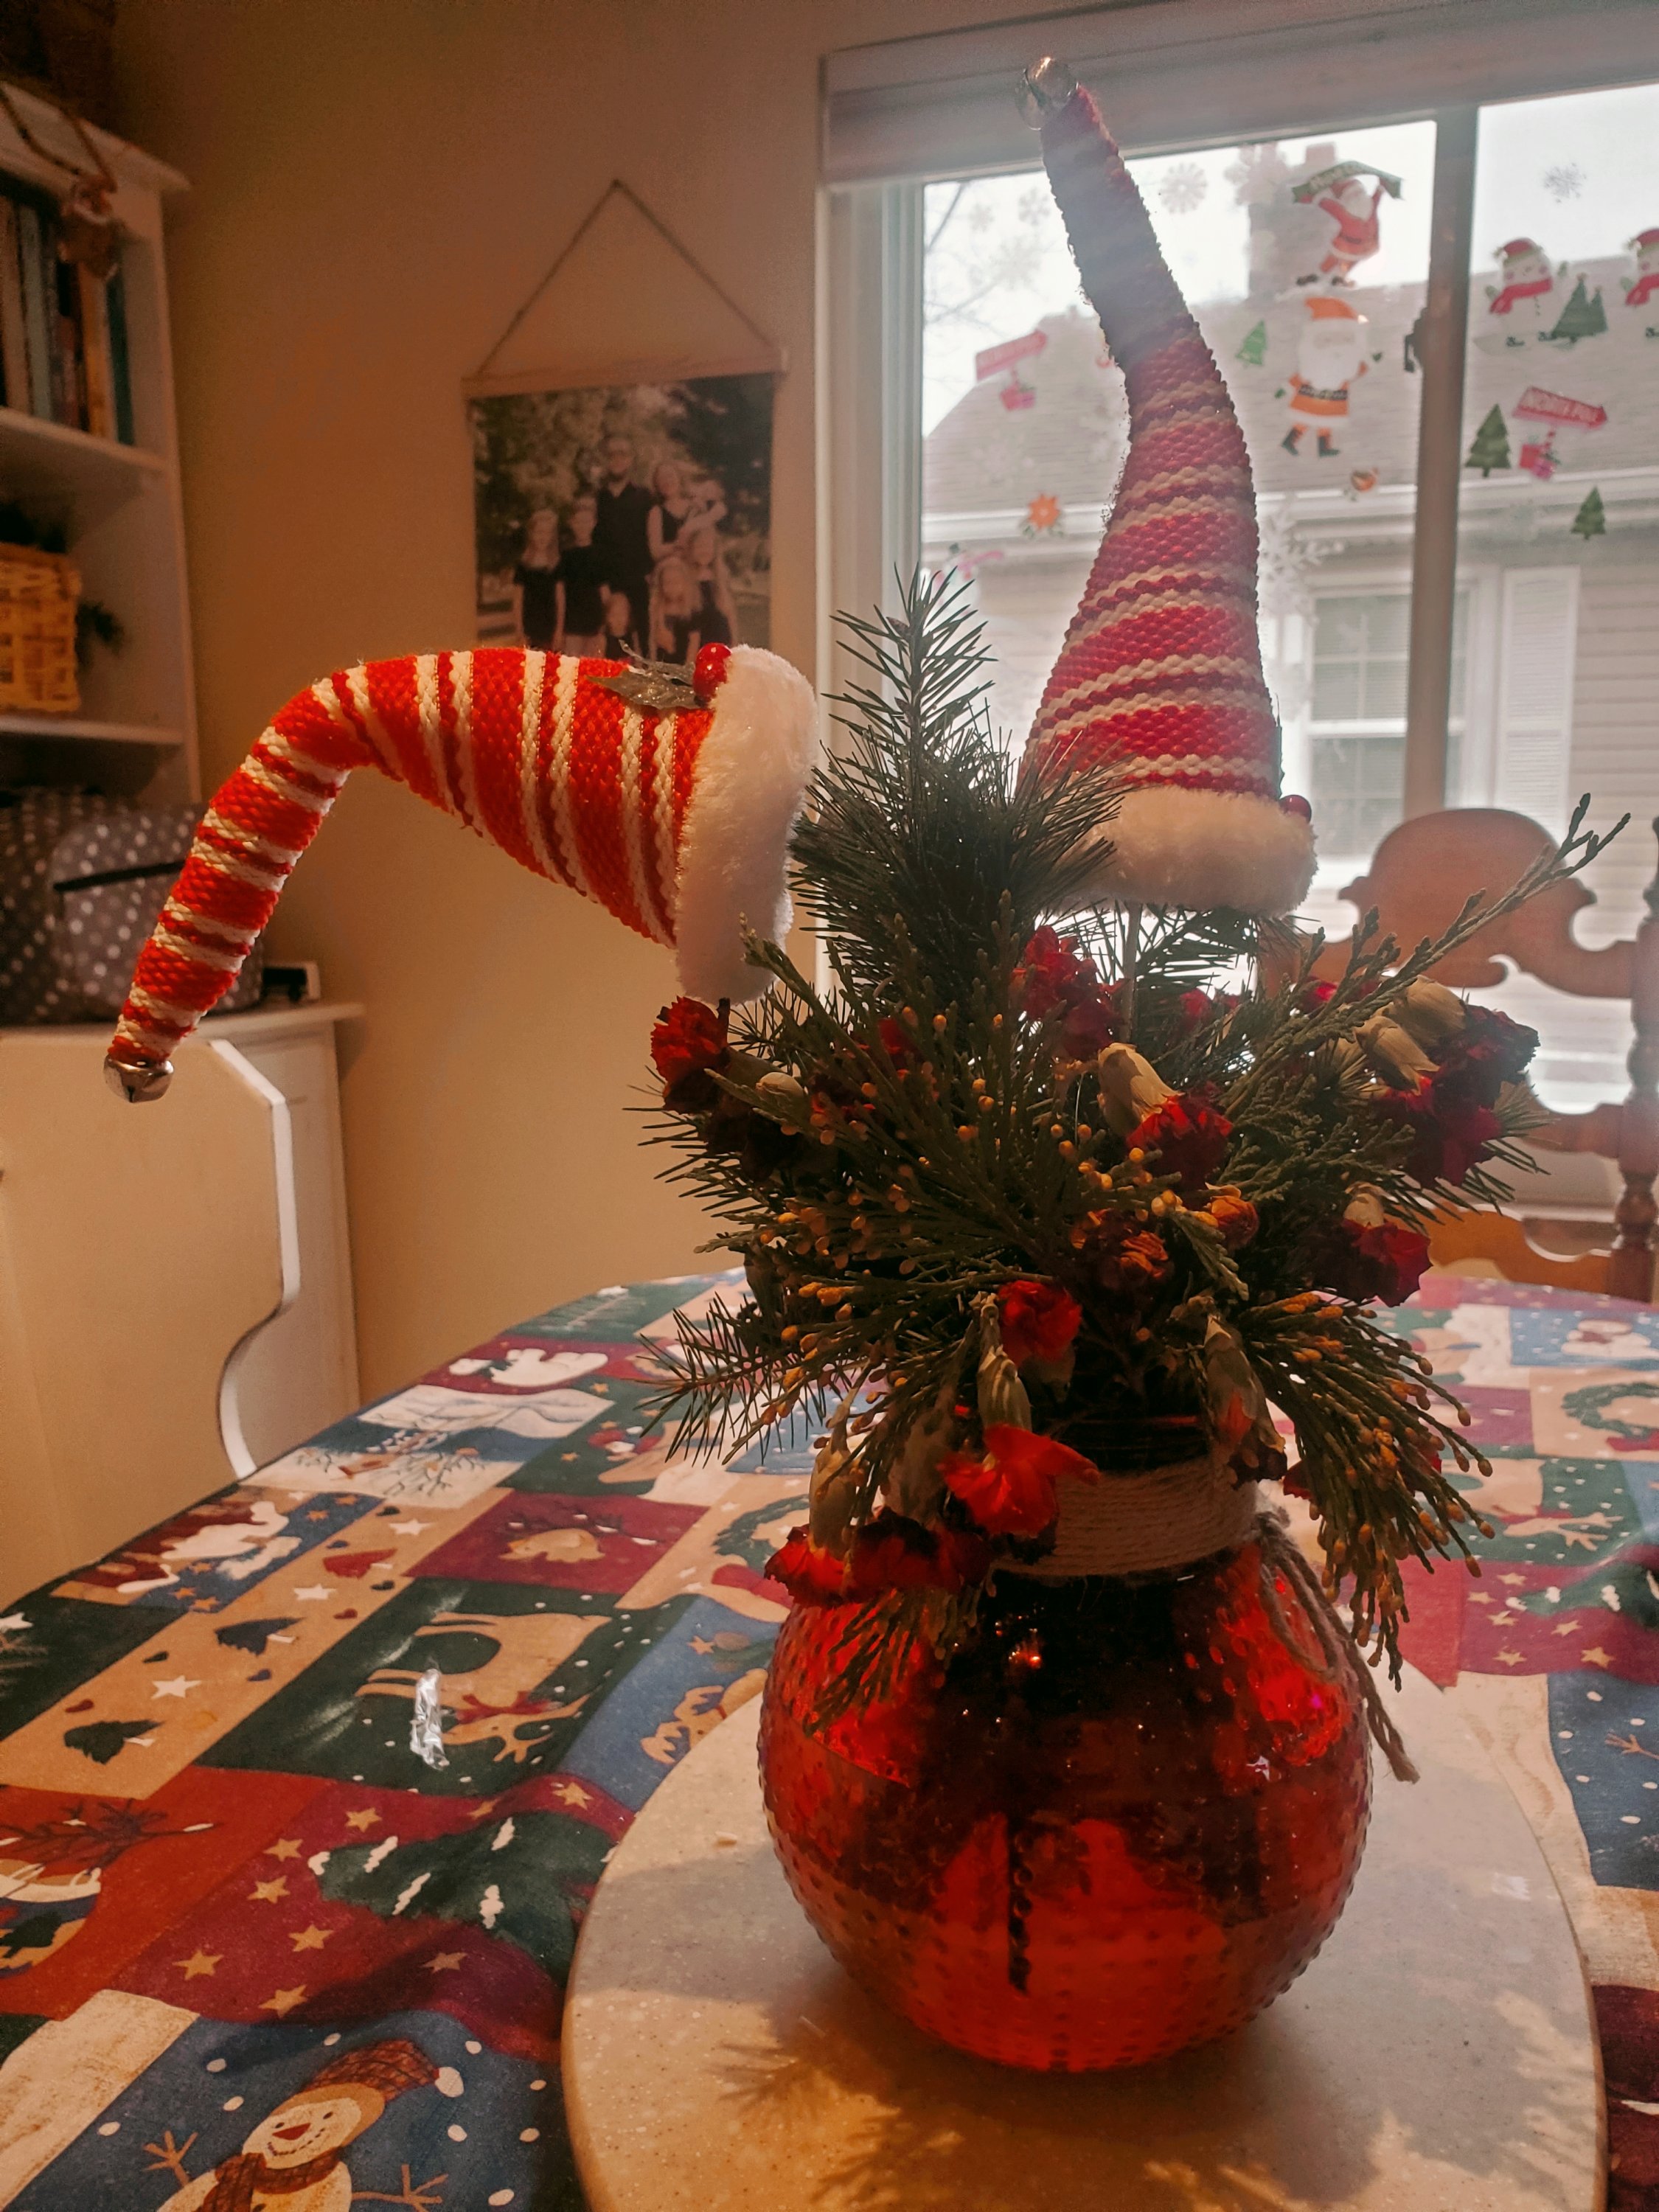
I found this cute floral display at Kroger that went along really well with the rest of my decor. It reminded me of the Wicked Witch of the West’s sister.
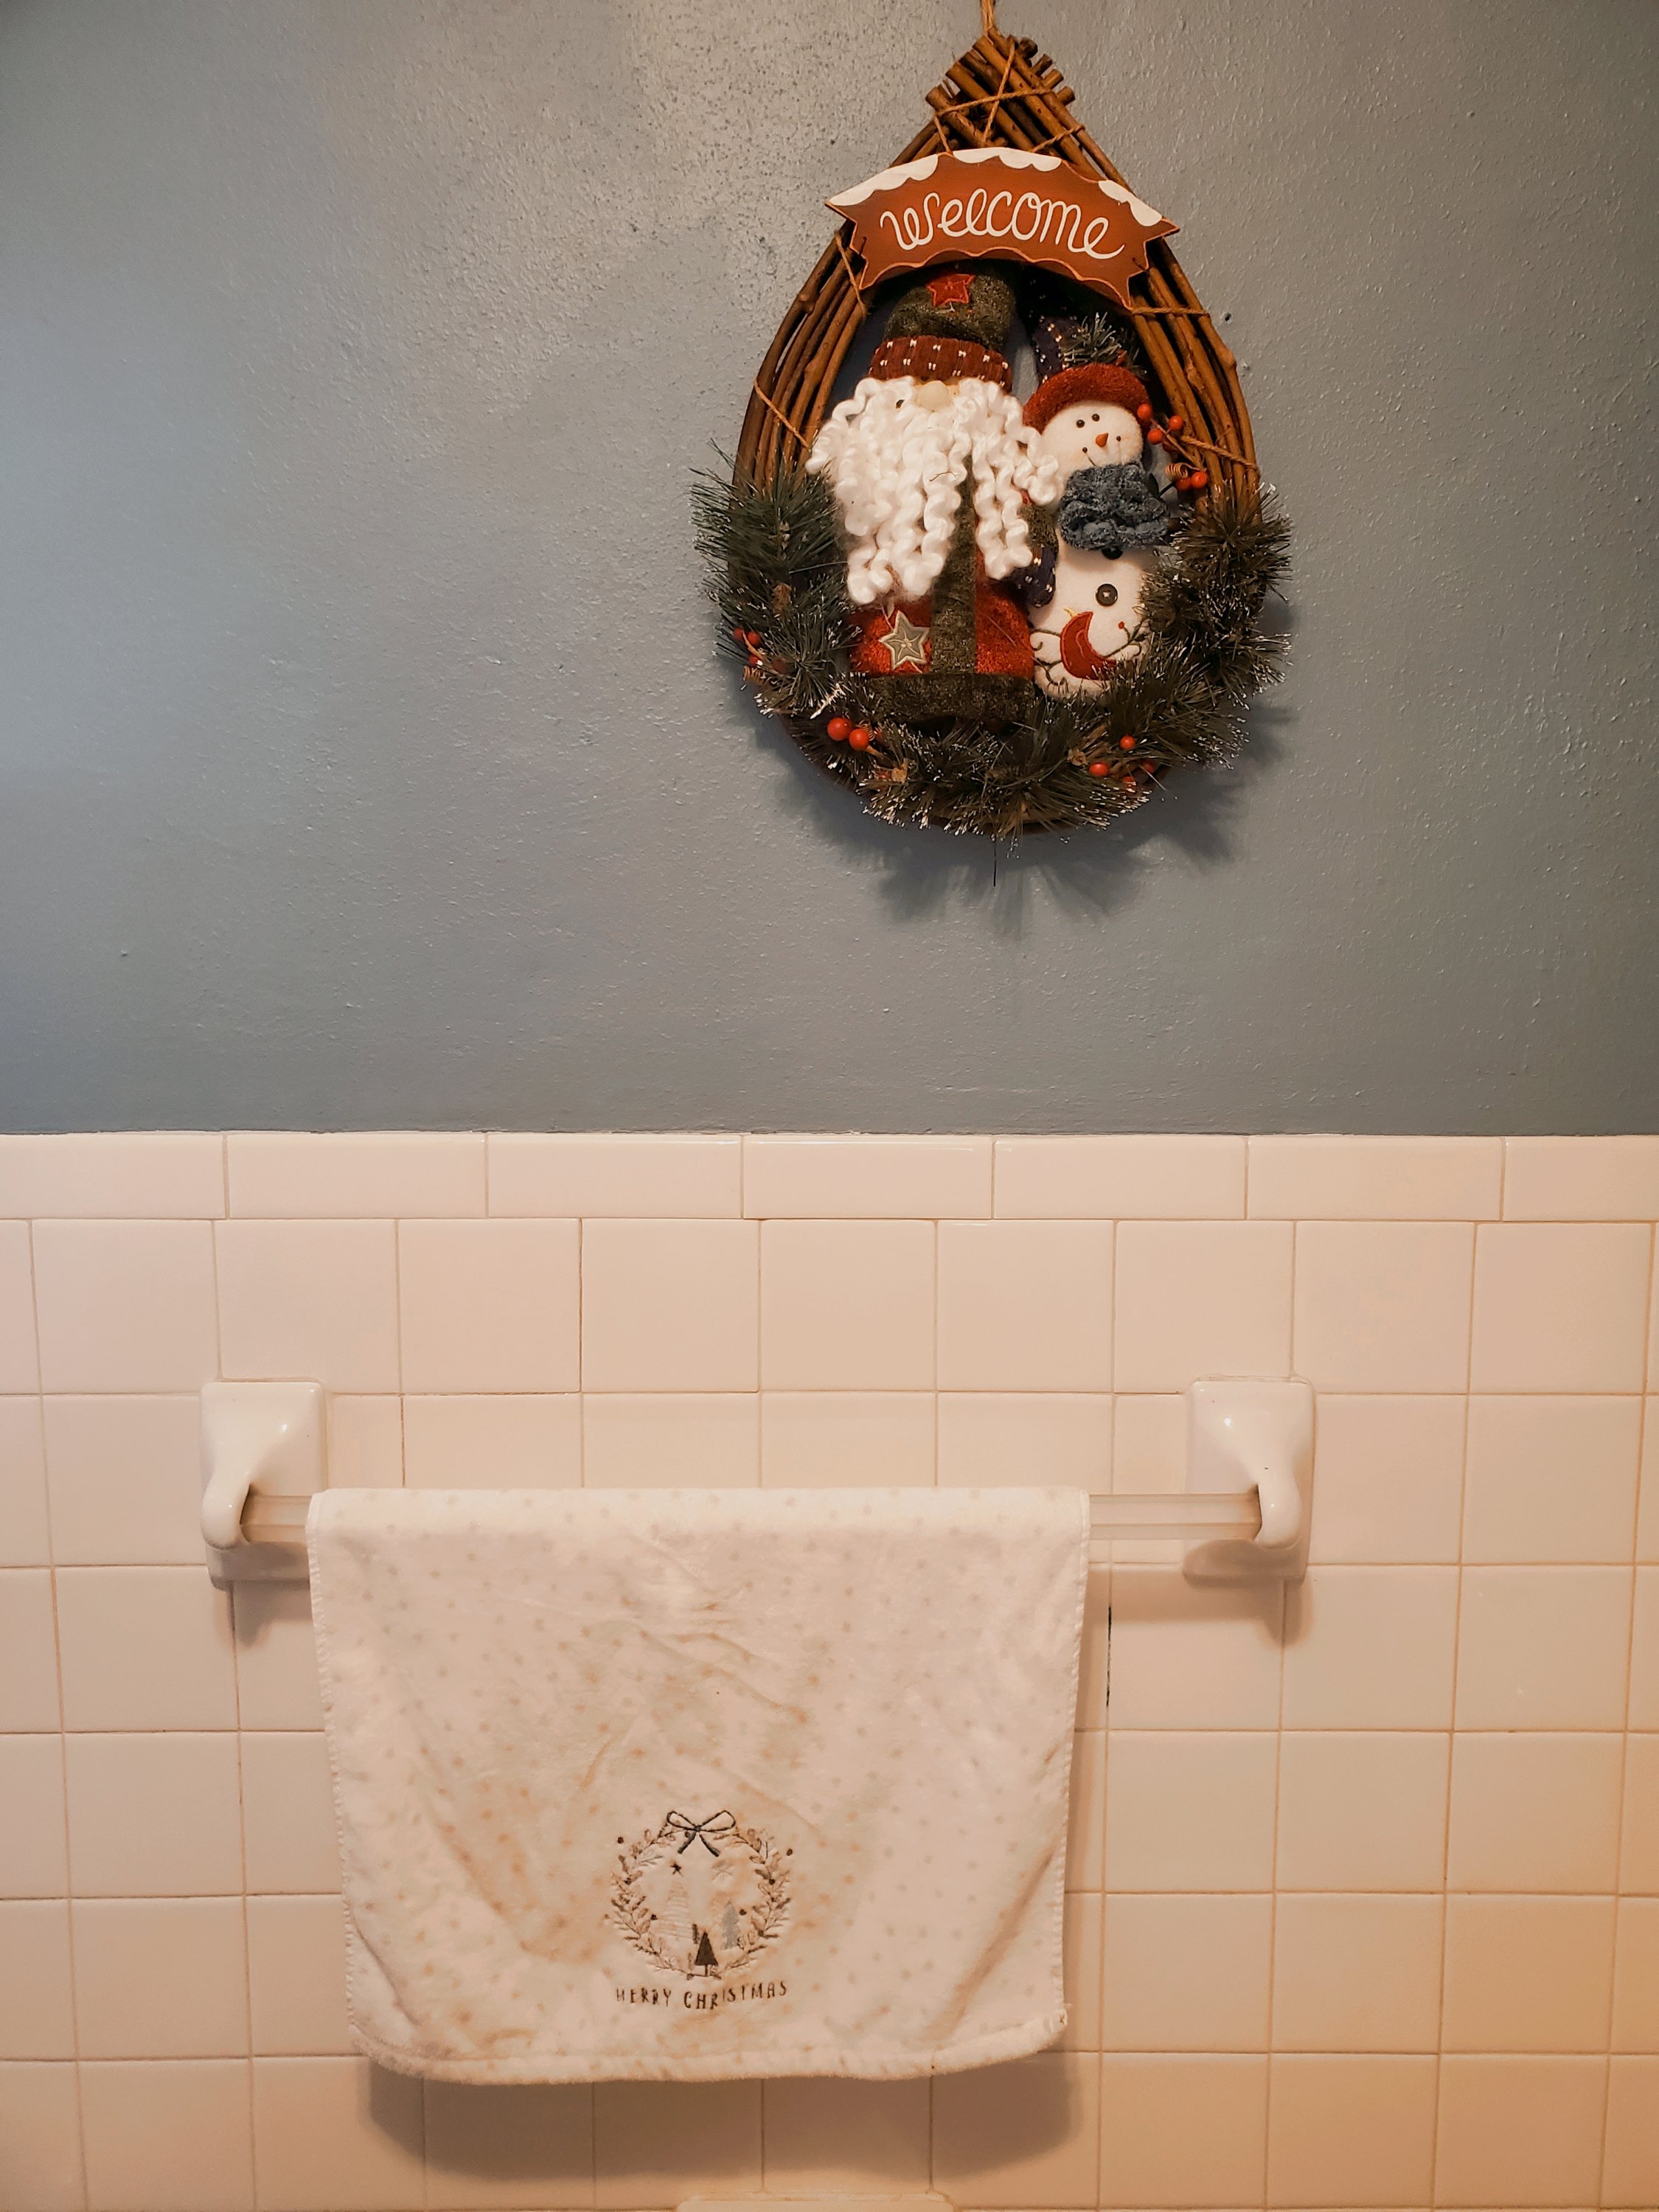
I didn’t do a whole lot to the bathroom but I did add a few small pieces for fun.
Activities
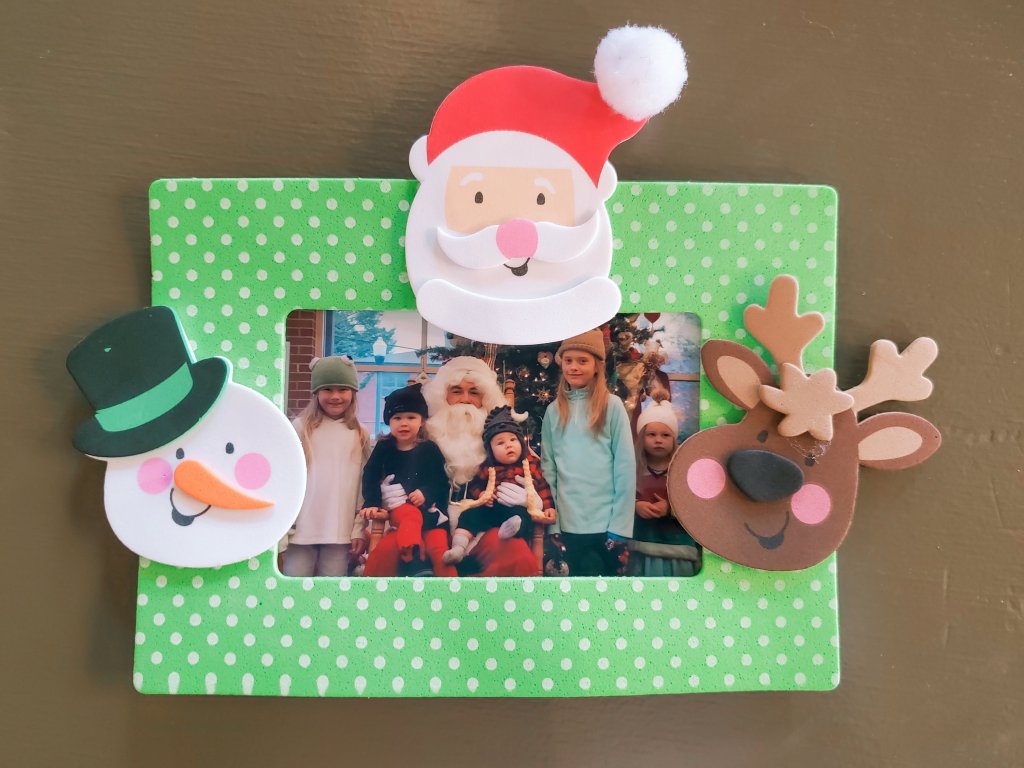
The kids went to get their photo taken with Santa. They got to pick out a cute frame to make to put their photo in.
I loved this mail box so much when we met Santa, I had to get a picture of it.
Ella, Mia, & I went to a Reggae Christmas show with my parents and Kaden.
It was a really fun night, except I got my first parking ticket which made me cry. I haven’t gotten in any trouble at all in almost 10 years now which is something I have been really, really proud of and I felt like I was a total failure.
We took the kids to The Christmas Ranch for the second year in a row. Last year we only were able to drive thru, but this year we walked around and rode the train. It is such a cool place! It was an absolutely freezing night though, and hope that next year we will be able to pick a night that is a little warmer so we are more comfortable walking around the village.
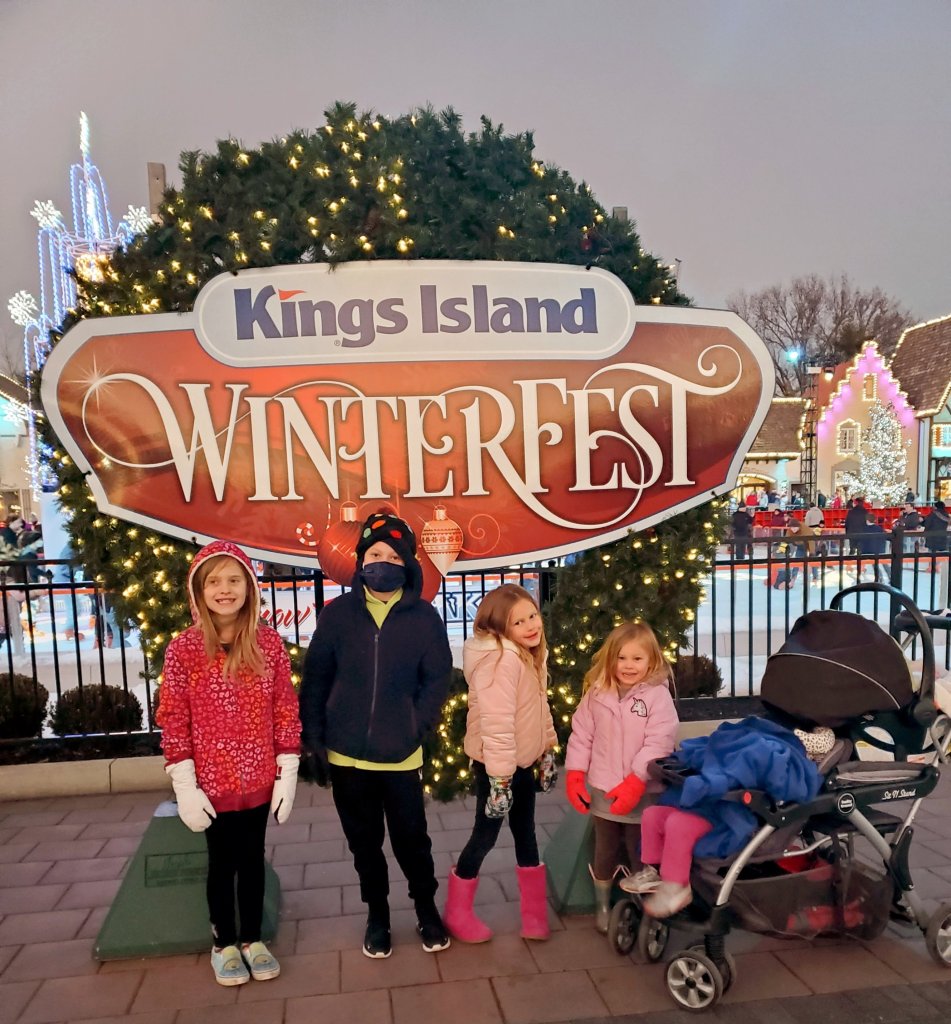
We went out for a night at Kings Island Winter Fest. We had a blast and enjoyed lots of hot chocolate! I always love seeing the park all lit up in Christmas lights & decor. The older kids got to walk around and ride some big coasters while the younger kids stayed in Planet Snoopy riding the kiddie rides and making Christmas crafts!
We found this cute scavenger hunt on Pinterest that we walked around our neighborhood as a family to cross the items off our list. I loved that the older kids were able to read the list, while the younger kids were still able to participate using the photos.
Treats
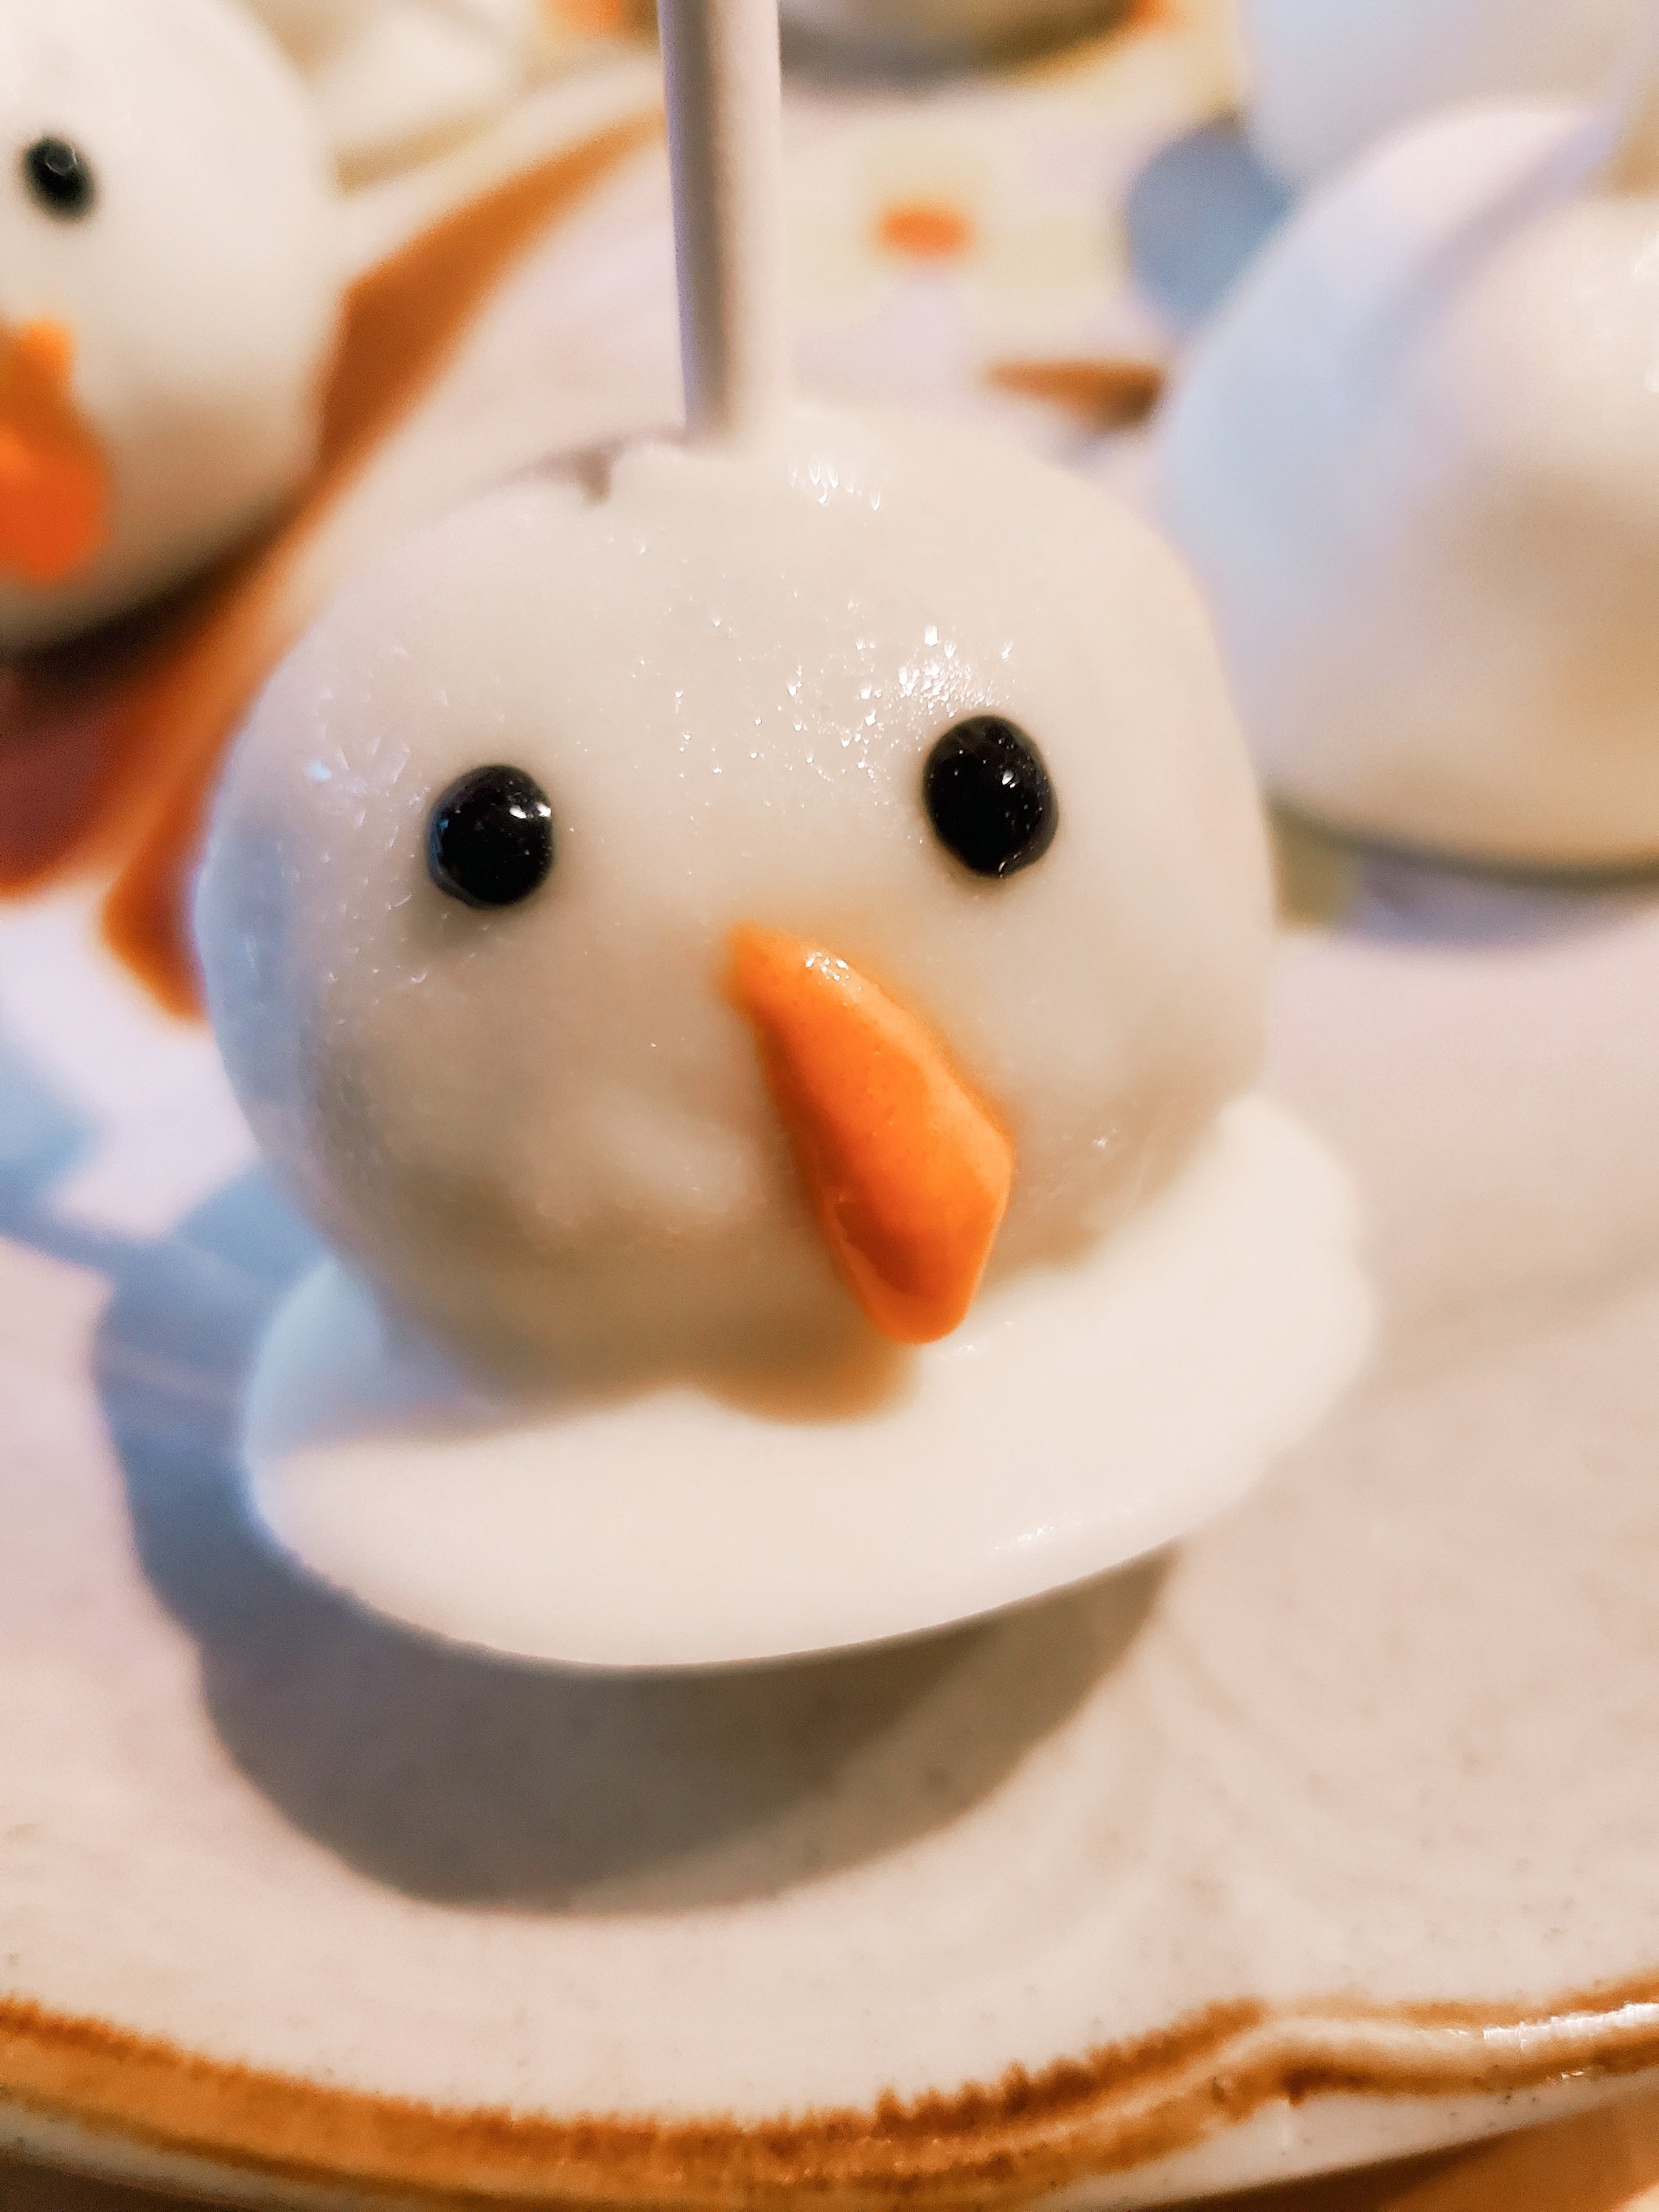
Snowmen Cake Pops ⛄
We made a “Copycat Starbucks cake pop recipe” that we found on Pinterest for the cake pops, but instead of pink chocolate, we kept it white and tried our best to draw snowmen on each one. They tasted pretty similar to the real Starbucks cake pops, but it was very time consuming and turned out looking more like a distant cousin of a penguin than a snowman, but the kids had fun so 🤷🏼♀️
The girls Christmas Baking Outfits came from Ikea a few winters ago.
Melted Snowmen Cookies ⛄
These were definitely more my speed when it comes to bakery item decorating. I found the idea on Pinterest, but used my go-to cookie + frosting recipe. They were a great beginner cookie design- very simple and literally impossible to mess up since the melted look is what we wanted. They ended up being really cute!
Reindeer Cake Pops 🦌
Sasha & Athena were excited to get these adorable reindeer cake pops from Starbucks on a morning coffee run with mom.
Veggie Santa 🎅
I found this idea on Pinterest. It was so cute and only took minutes to put together.
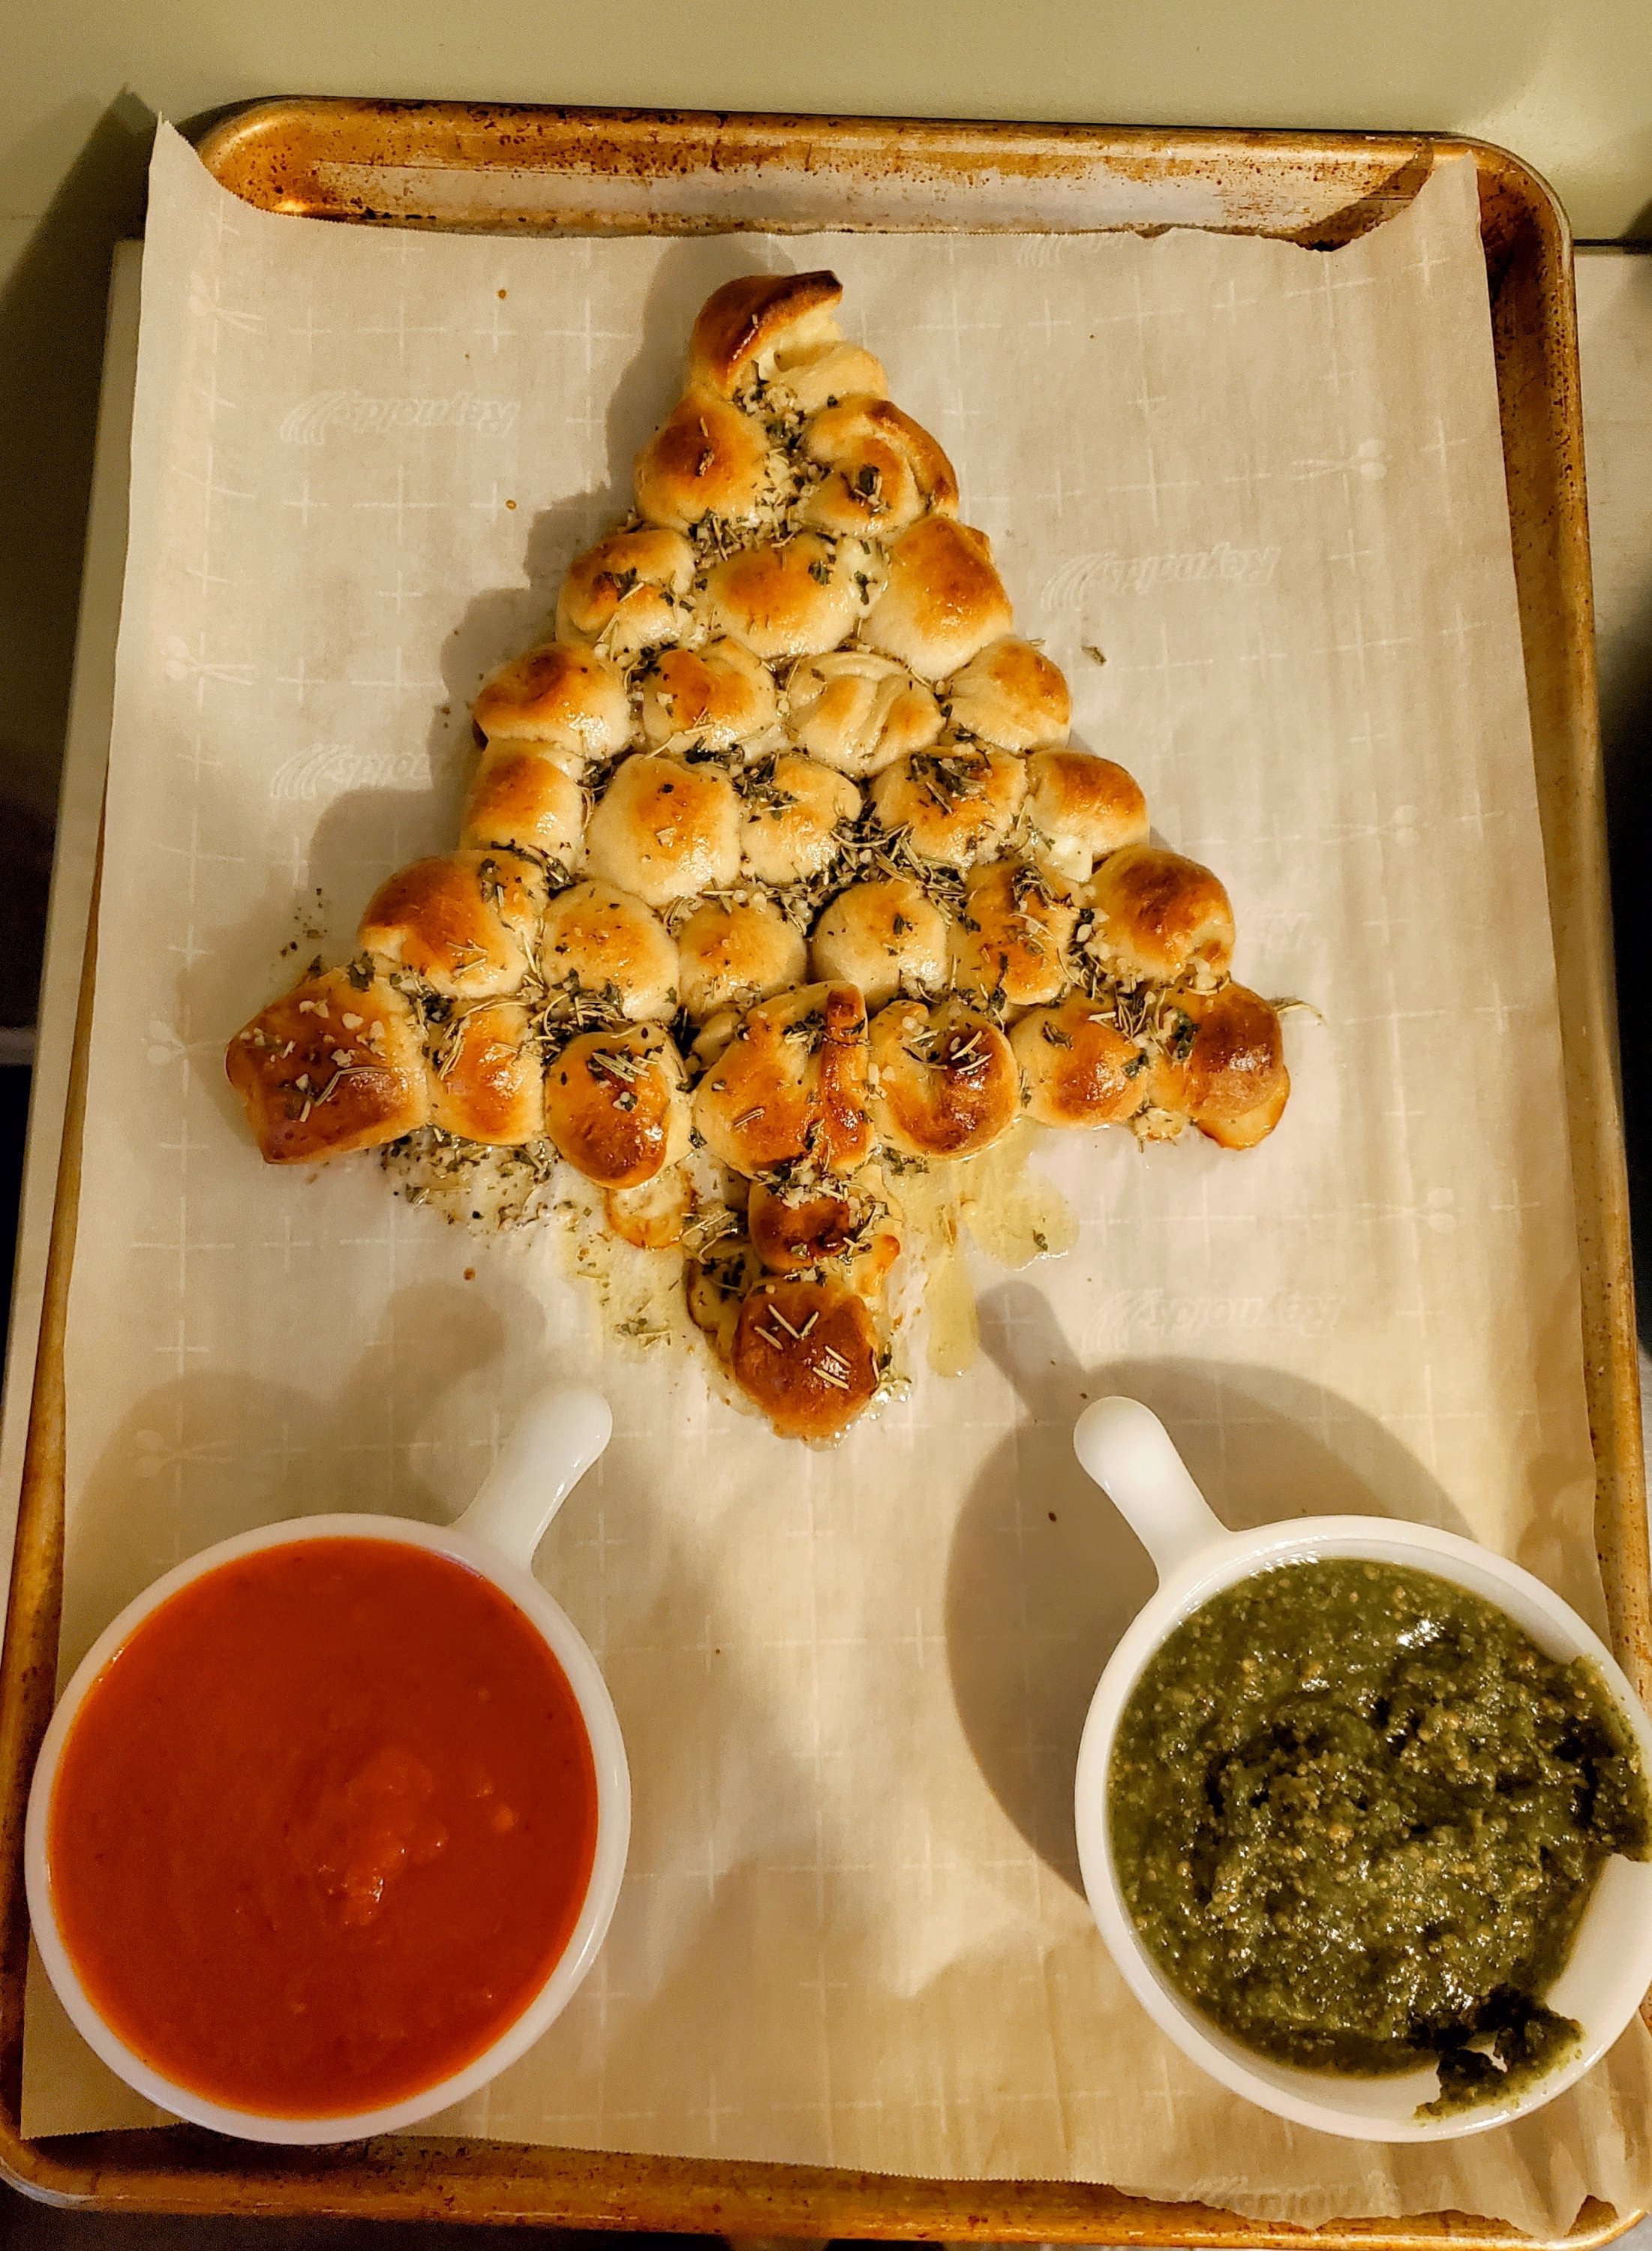
Christmas Tree Cheese bread 🎄
This was another Pinterest idea that was so simple to make and tasted amazing! I offered both pesto and marinara to dip.
Dessert Spread
I set up a dessert buffet for the kids. It consisted of a cookie tray, marshmallows, fruit, and a Christmas Cookie “Dunkaroo-style” dip. It was supposed to have pound cake bites as well, but since the kiddos were sick my Christmas party was a bust and I decided to save that for New Years since there was already plenty of treats.
I set out sprinkles for the kids to decorate the whip cream on their hot chocolate, but again… sick kids meant we didn’t get to do the hot cocoa bar either ☹.
Hot Cocoa Bombs
I got these Hot Cocoa Bombs from Hyde Park Baker. They were a white chocolate shell filled with cocoa powder and mini marshmallows. When you poured the boiling water on them, they exploded. The kids thought it was really fun and yummy!
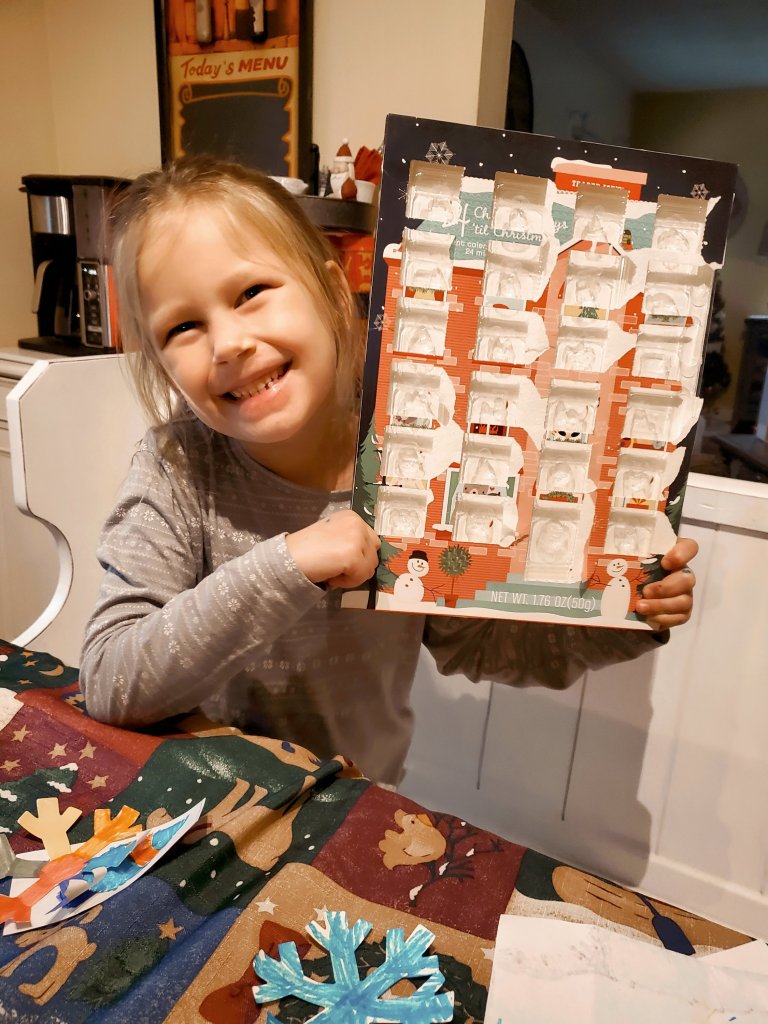
Advent Calendar
We LOVE our Trader Joe’s Advent Calendars. They have become one of our favorite Christmas traditions over the years. Papa George (the Candy Man) always brings them for us in the beginning of the winter season which really marks off the holiday for us as soon as he arrives with the big Trader Joe’s bag filled with them.
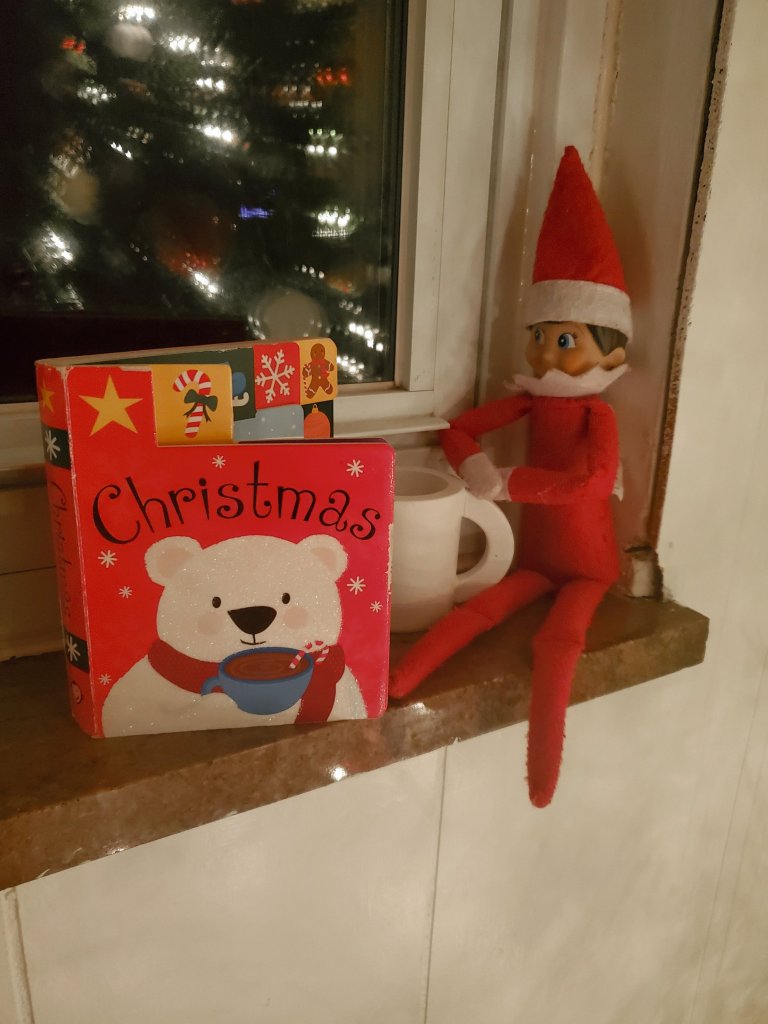
Elf on the Shelf
Some families go all out with their Elf on the Shelf ideas, but I take a more “done is better than perfect” approach to it. I enjoy watching the kids search for Elf in the morning, that’s all. We don’t tell our kids he is spying on them or that he judges their behavior in lieu of Santa or Jesus…. it’s just a fun hide and seek game for us.
I only documented my favorite times that Elf showed up, most nights were pretty lame to be honest. It was fun though.
Elf reading a baby Christmas book with his mug of Hot Cocoa by the Christmas Tree ☕❄ 🎄On our first snow of the season, Elf brought us in some donut “snowballs” for breakfast ☃️I thought this would be hilarious in the morning when the kids found him popping out of the toilet paper 🧻
The kids favorite one was when Elfie “pooped” chocolate chips in a jar. I wish I had gotten a photo of that one.
Gifts
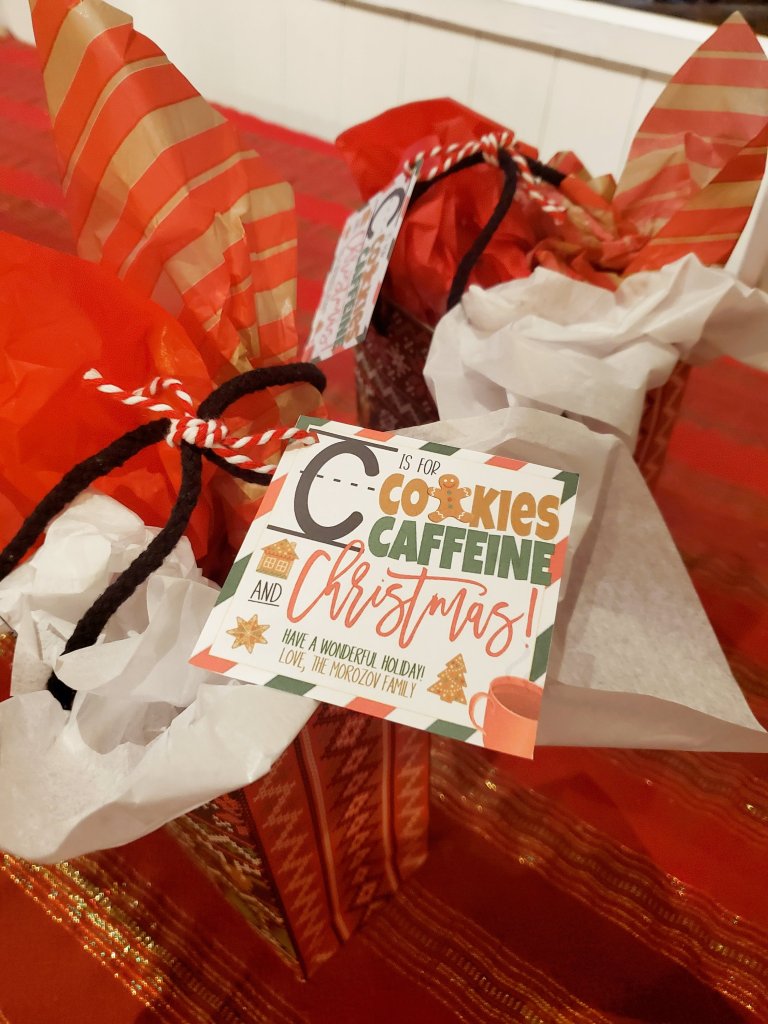
Teacher Gifts 👩🏼🏫
This was the gift tag which I thought turned out SO cute!
We got each teacher a holiday cookie from 3 Sweet Girls Bakery for the “C is for cookies”. Ella’s teacher got a cute little elf & Mia’s teacher got a sweet little snowman. We also got each teacher a Starbucks gift card for the “C is for caffeine,” then put it together in a small Christmas gift bag.
I had planned to get a photo of the teachers cookies, but only took one of the one I got to treat myself after the kiddos went to bed. They were all super cute though!
As a family, this has by far been our best Christmas yet. We were so blessed to be able to give the girls *almost* everything they asked for (why is my 8 year old asking for a phone anyway?! 🙄😂).
I have really been working on being more thoughtful with my gift giving and I loved seeing each of their faces really light up with each gift.
Gift giving really has an entire different experience for both the giver and receiver when you really take the time to think about what that person wants or needs rather than just picking whatever to cross it off the list. It makes it feel so much more special and meaningful.
This was the only photo I got of any of the kids on Christmas. Maybe next year we’ll be a “matching pajama” type of family 😂.
We even had a surprise sack that Santa left our family filled with a little gift for each of us. We thought that was so thoughtful and that kids were so surprised! They loved that Santa stopped at their sign!
Overall, this Christmas has been absolutely magical. It wasn’t everything I had planned for since the kiddos ended up sick, but it was still just as magical. I already have SO many ideas for next Christmas, but also very excited about all that 2022 has in store for us!
Although our Cheer Season *officially* ended the last weekend of October, we had our Lil Cats Award Ceremony tonight to wrap up this year’s season!
Mia LOVED cheer! It is exactly where she belongs. She just has the most beautiful spirit. She is just so happy to be alive and looks for the good in every situation. Everywhere she goes, she carries a big smile on her face and strives to be a good role model for both her siblings at home and other students at school. Cheer really is the perfect sport for her.
Mia looked so cute in her practice uniform. Practice was on Monday, Tuesday, and Thursdays. She had a practice uniform and a practice bow.
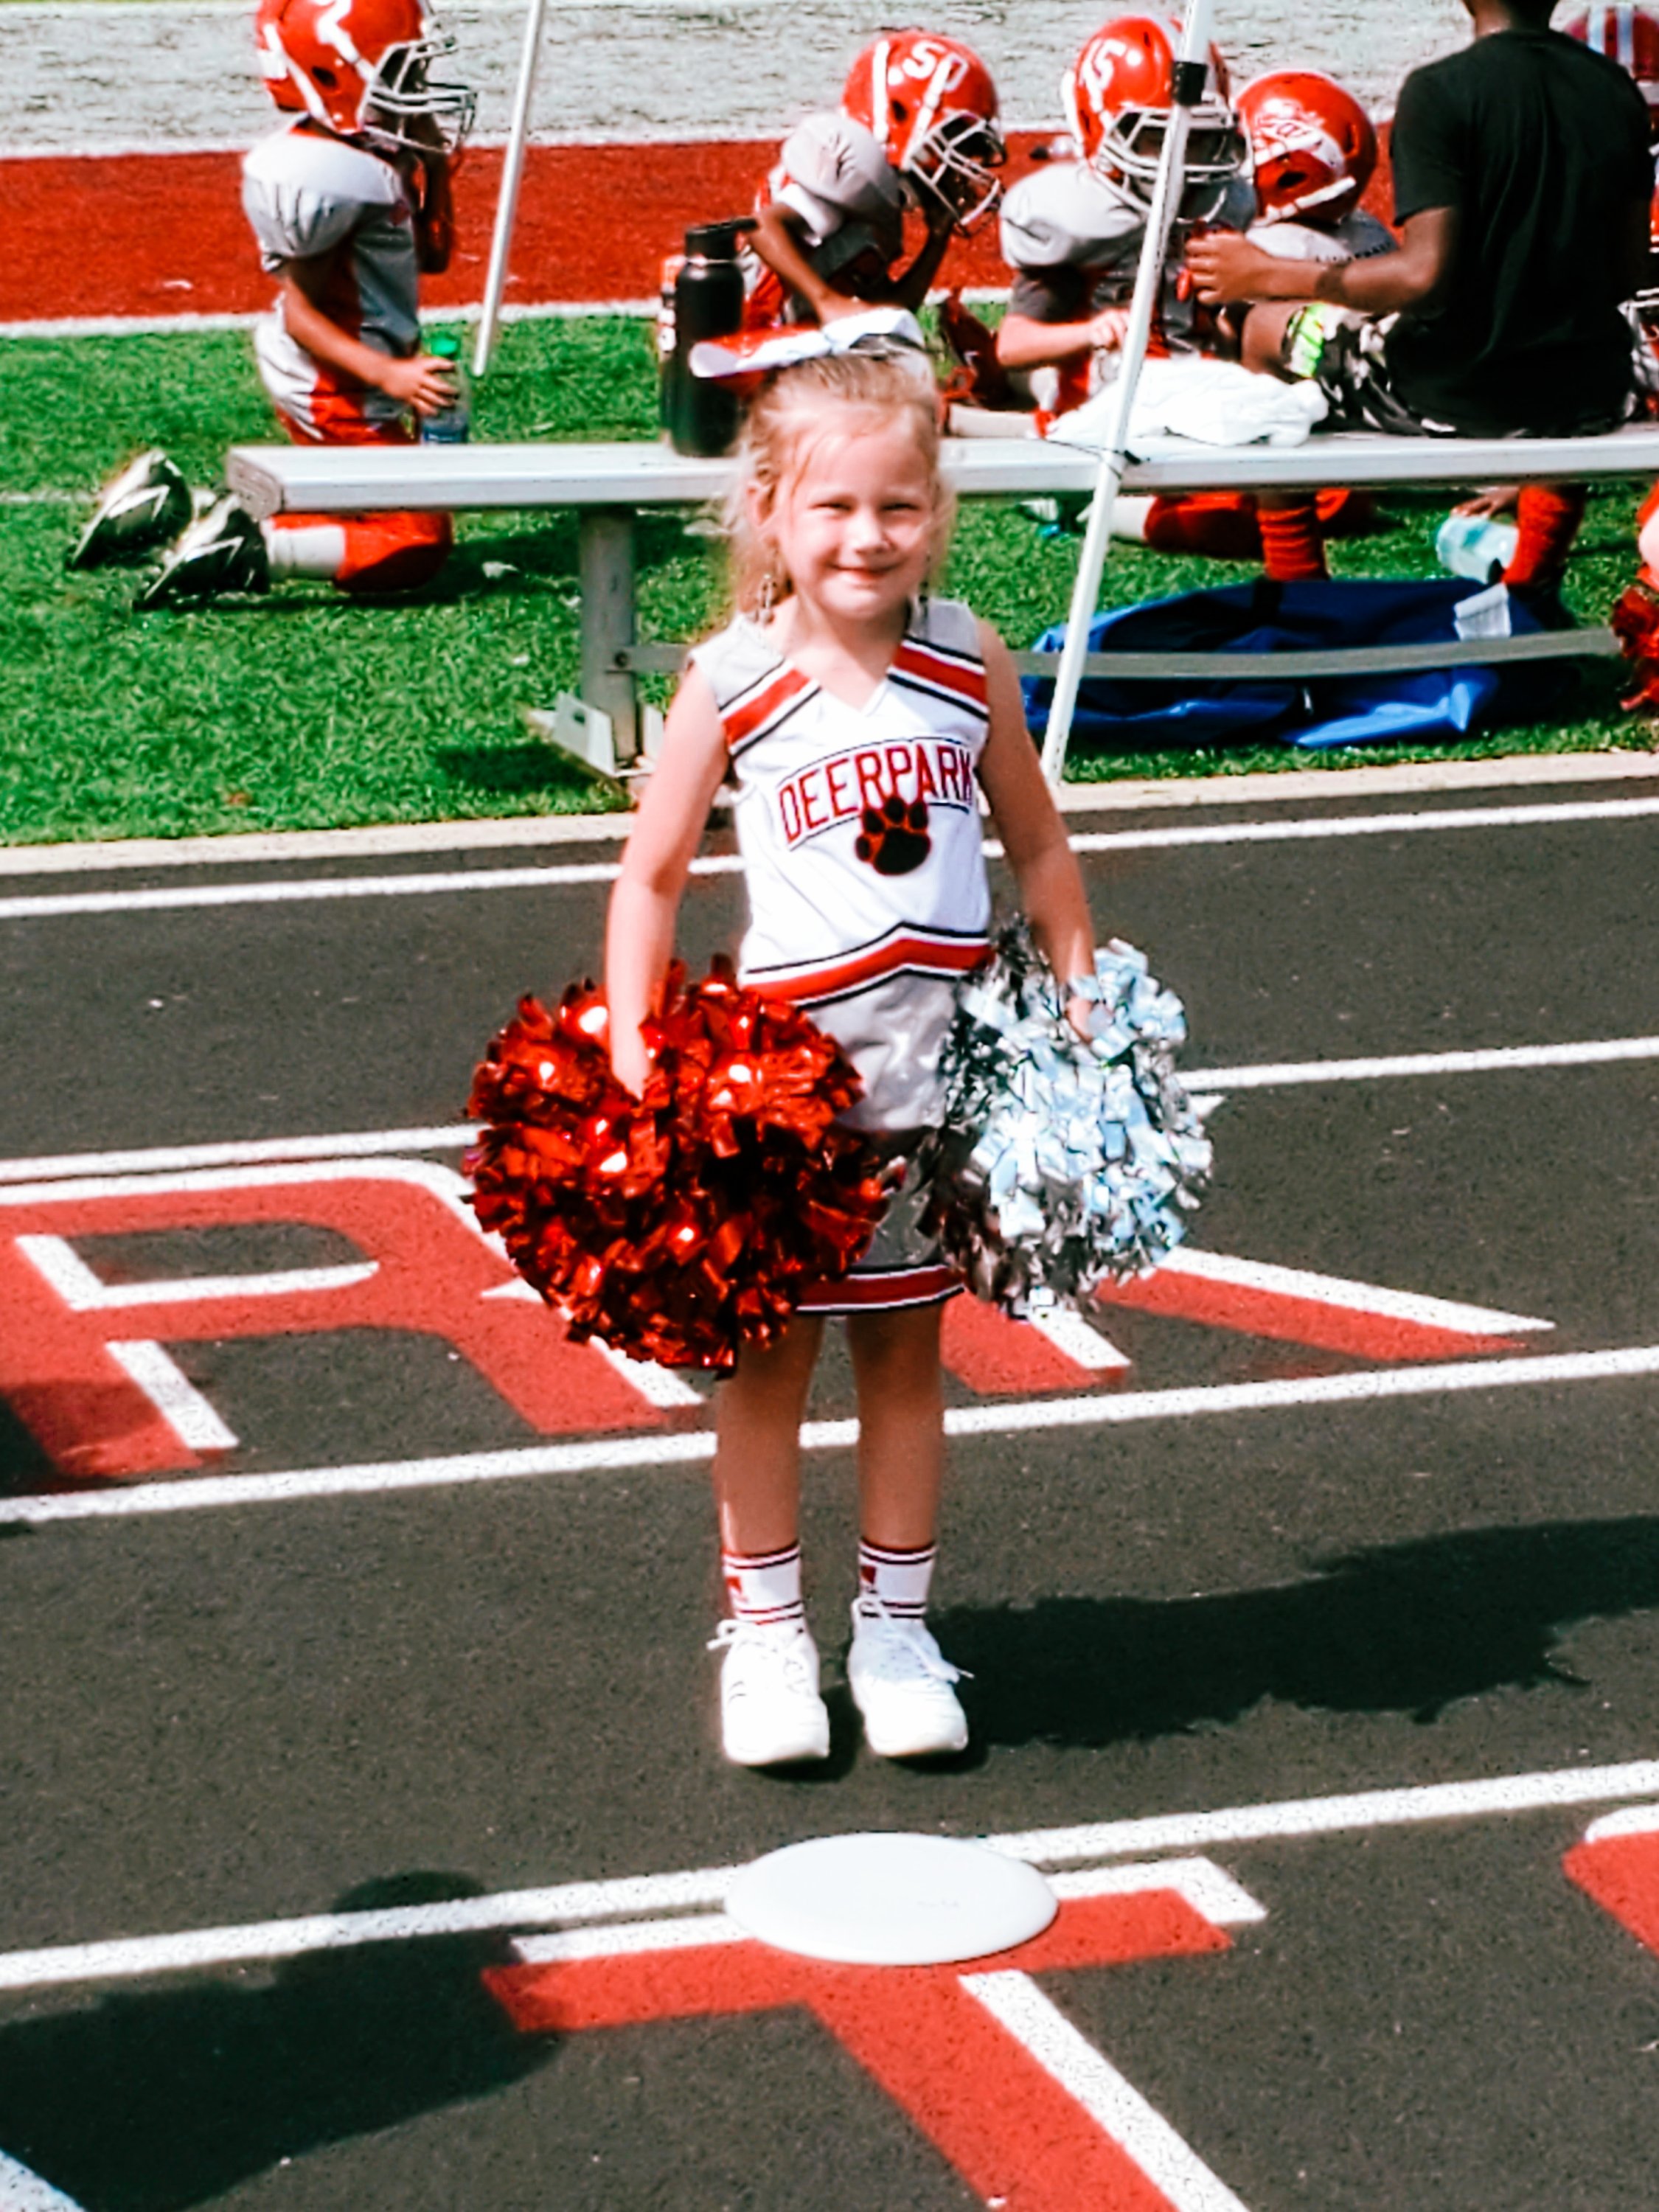
Her real uniform was even cuter, however we found out quickly at the first game that Mia’s uniform was a bit too small for her. Luckily, we were able to switch out her uniform for a larger size before the next game.
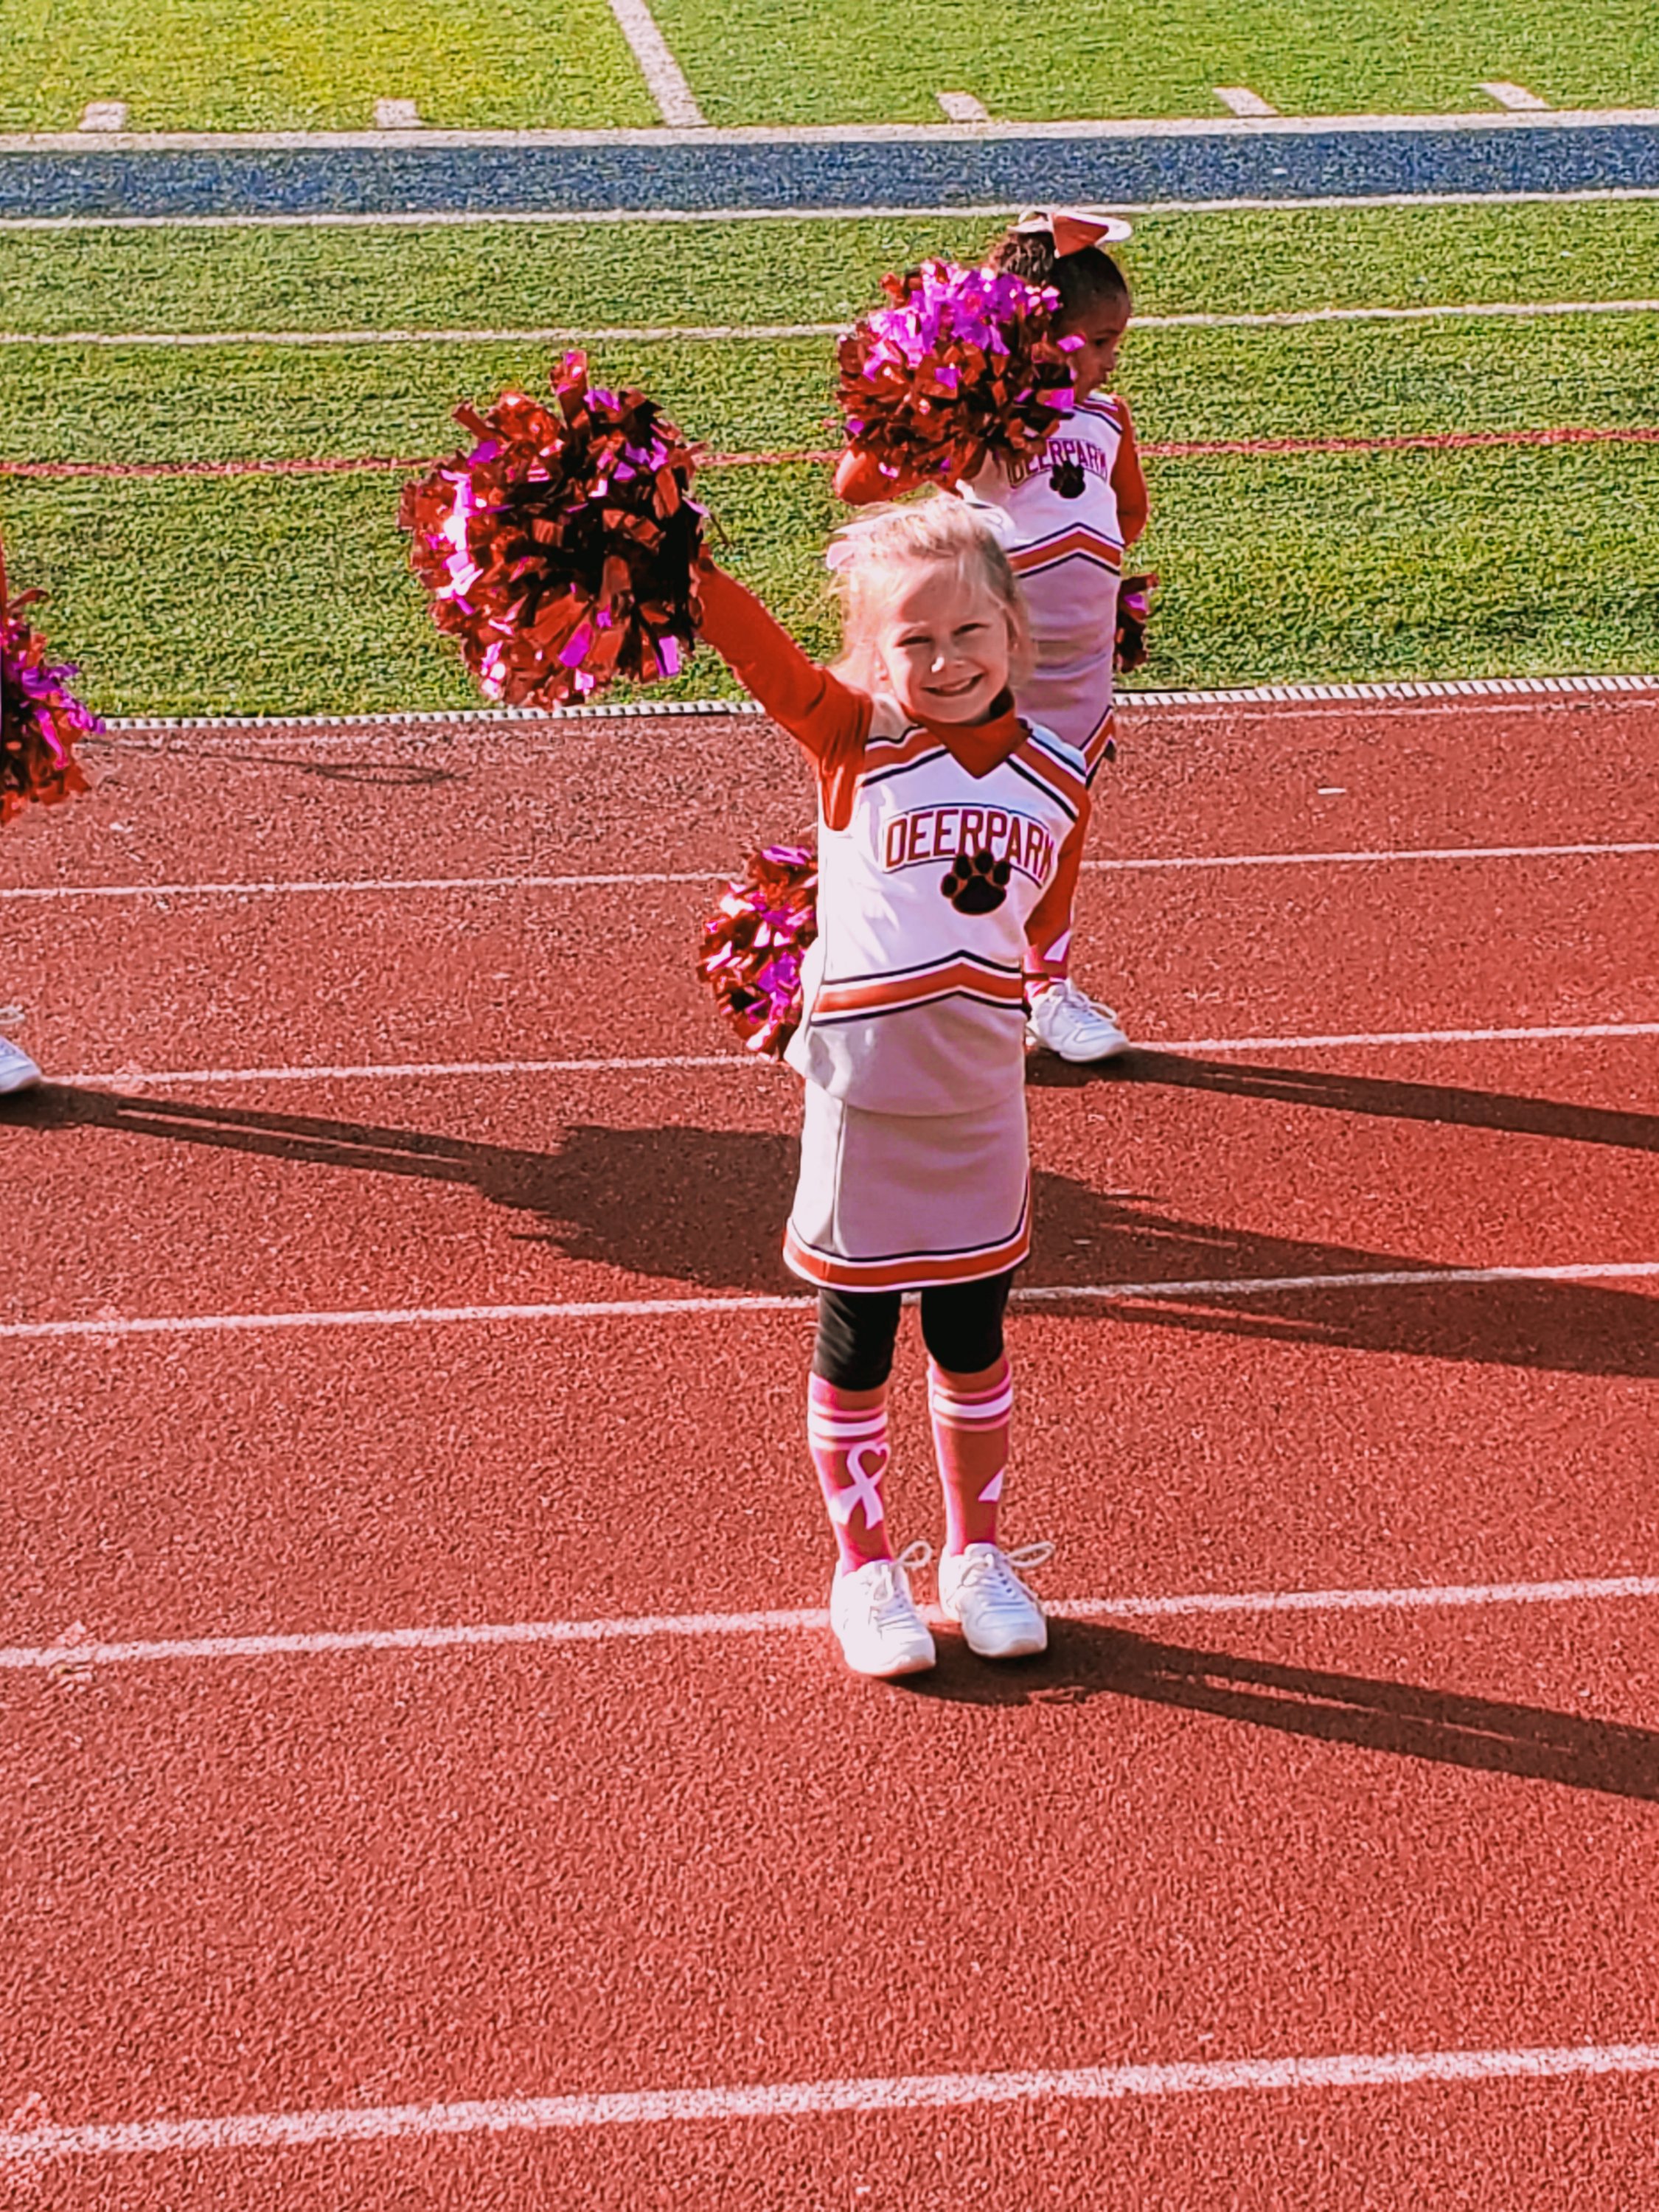
Her uniform bow was glittery Deer Park colors and had her name. In the warmer months, the uniform was sleeveless. In the colder months, she wore a long sleeve crop top and black leggings underneath. In October, we switched to Pink pom-poms and socks to show our support for Breast Cancer Awareness Month.
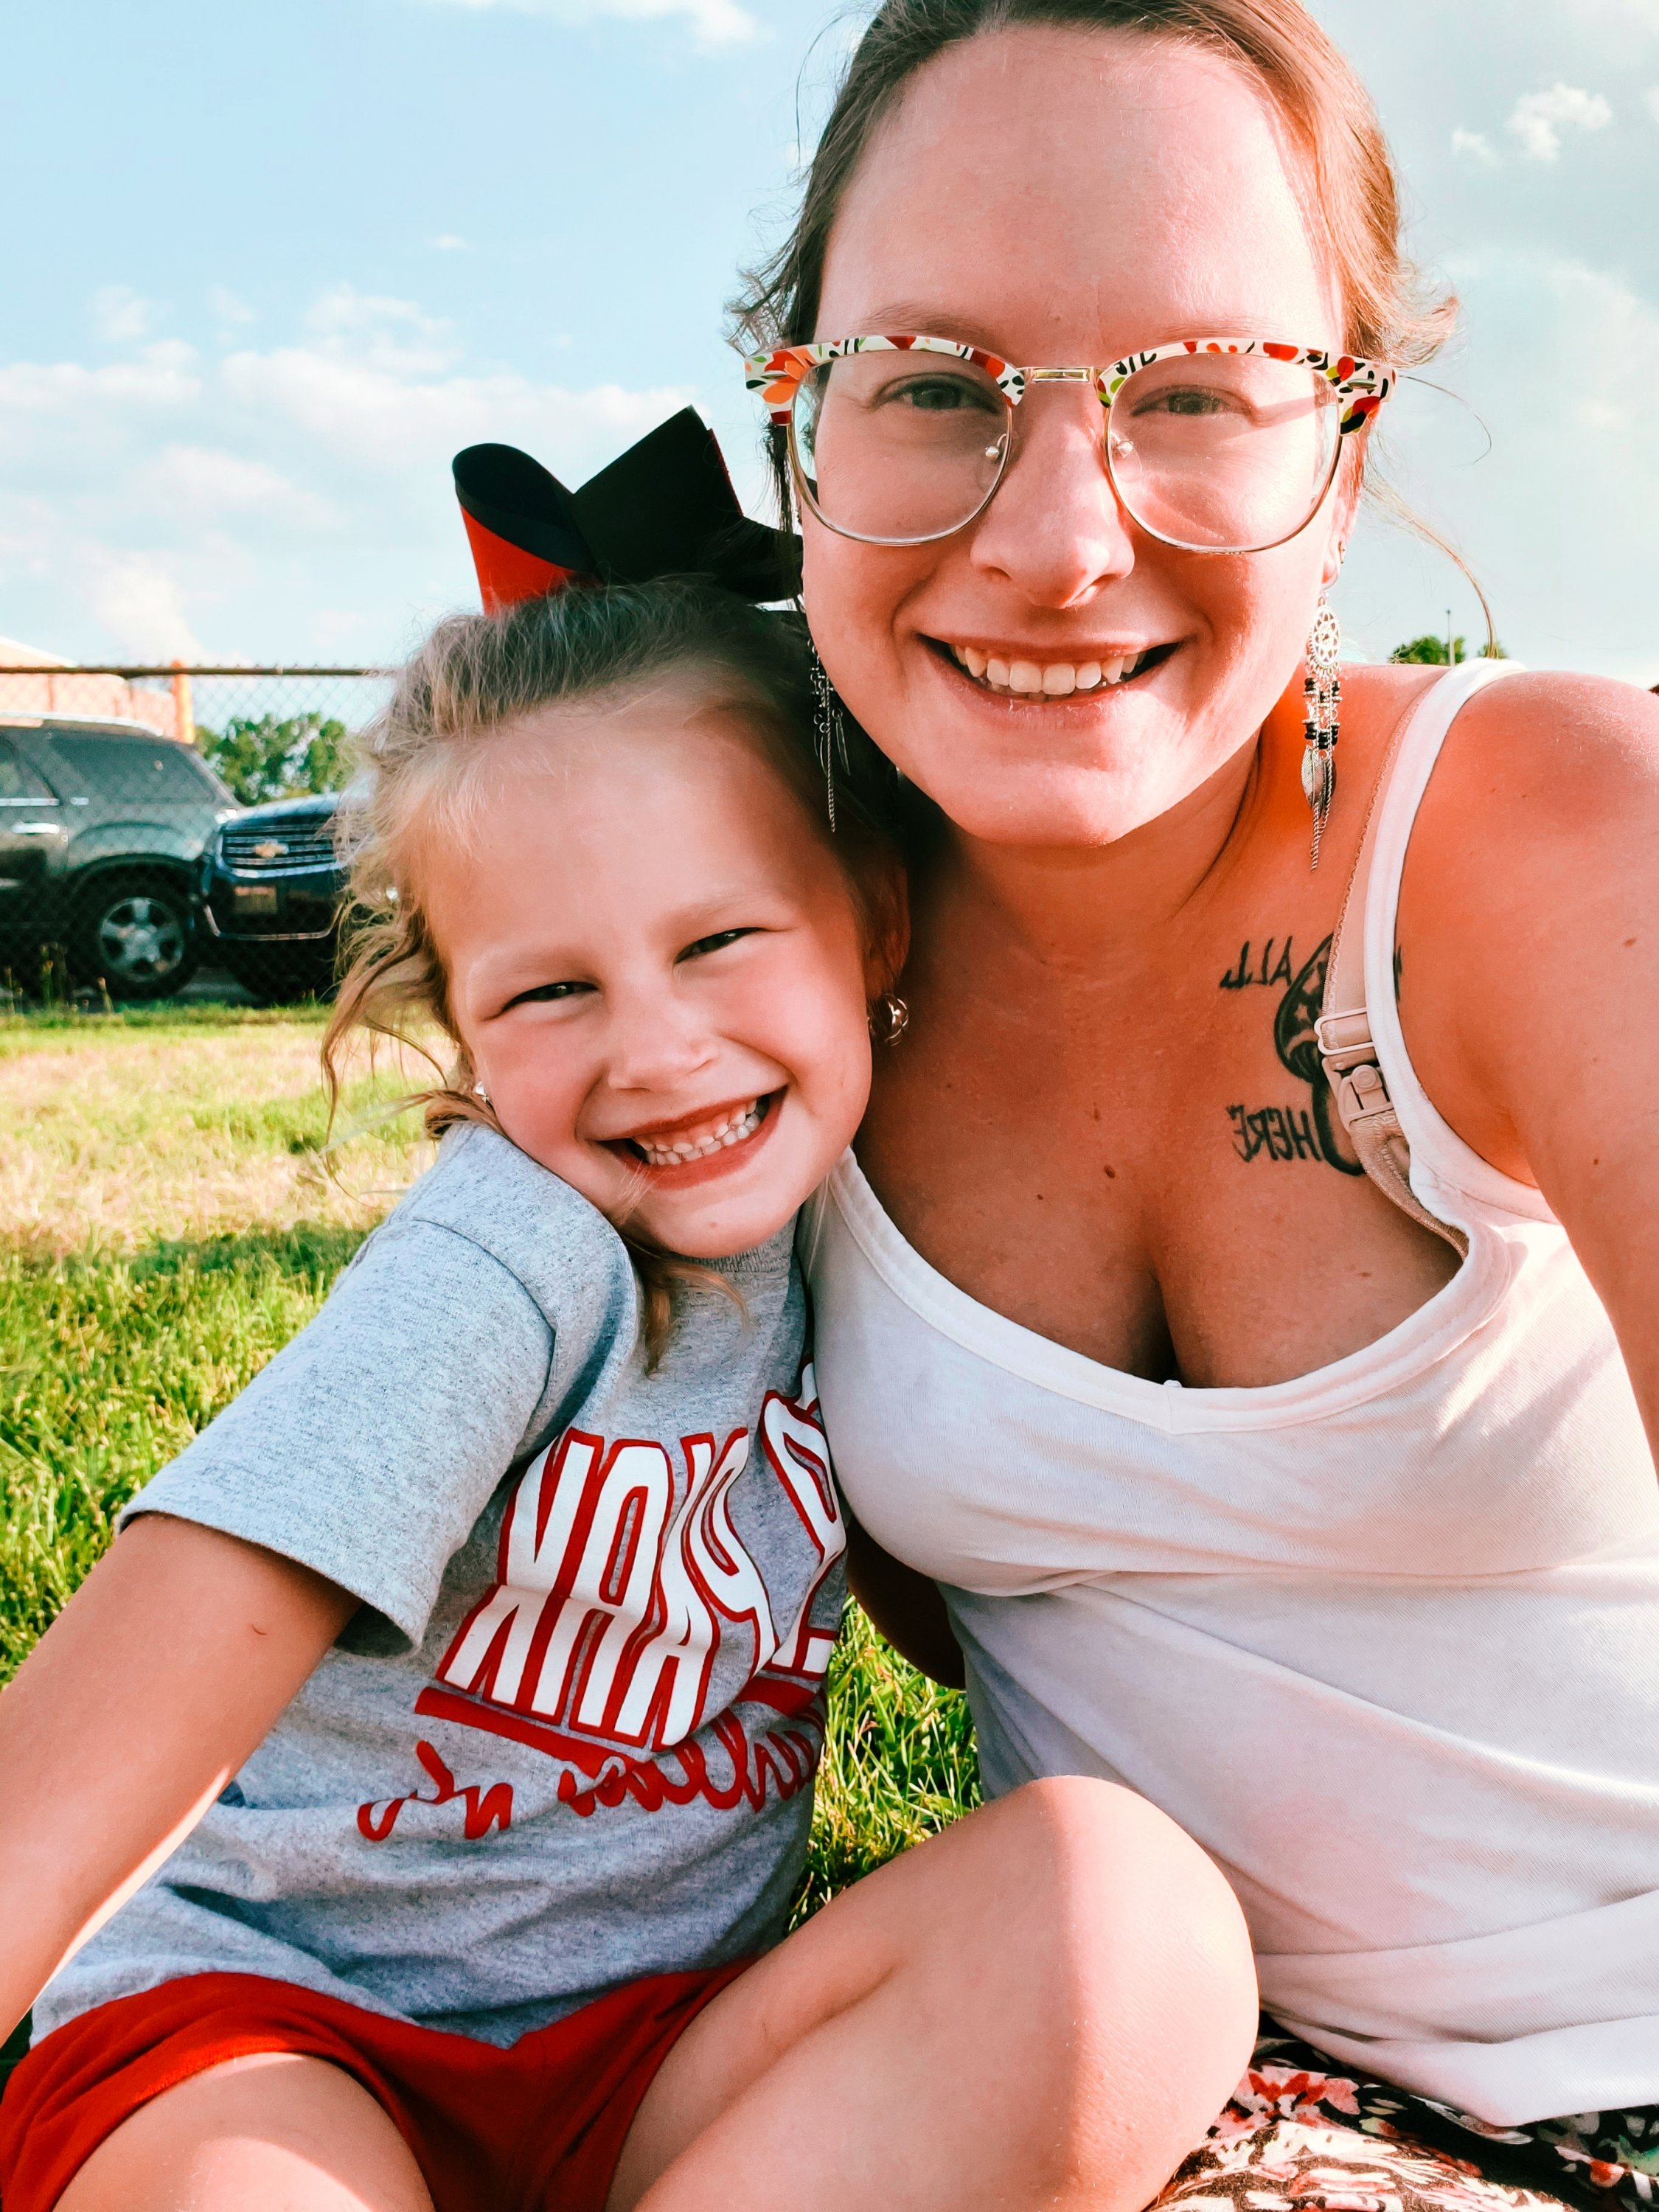
I even wore my own Cheer “uniform” to every one of Mia’s games, although I did alternate between jeans & black leggings depending on my mood (and if we’re being honest, what was clean 🤪).
She looked so cute in action down on the field.
Mia and the other Lil Cat Cheerleaders got to be in the Homecoming Parade. The younger cheerleaders rode on the trailer throwing out candy while the older cheerleaders walked behind performing cheers.
Our football team made it to the Super Bowl this year! We lost our first game to Clermont North Eastern, then went completely undefeated until the Superbowl where we unfortunately lost to CNE again. It was such a great season and it felt really good leaving each game winners!
Mia is front & center 😍
Our Lil Cats did a Trunk or Treat in the parking lot at the High School. Since Mia was Hermione Granger for Halloween, we decided to go with a Harry Potter trunk theme.
Don’t mind the dirty trunk 😂 #RealMomLife
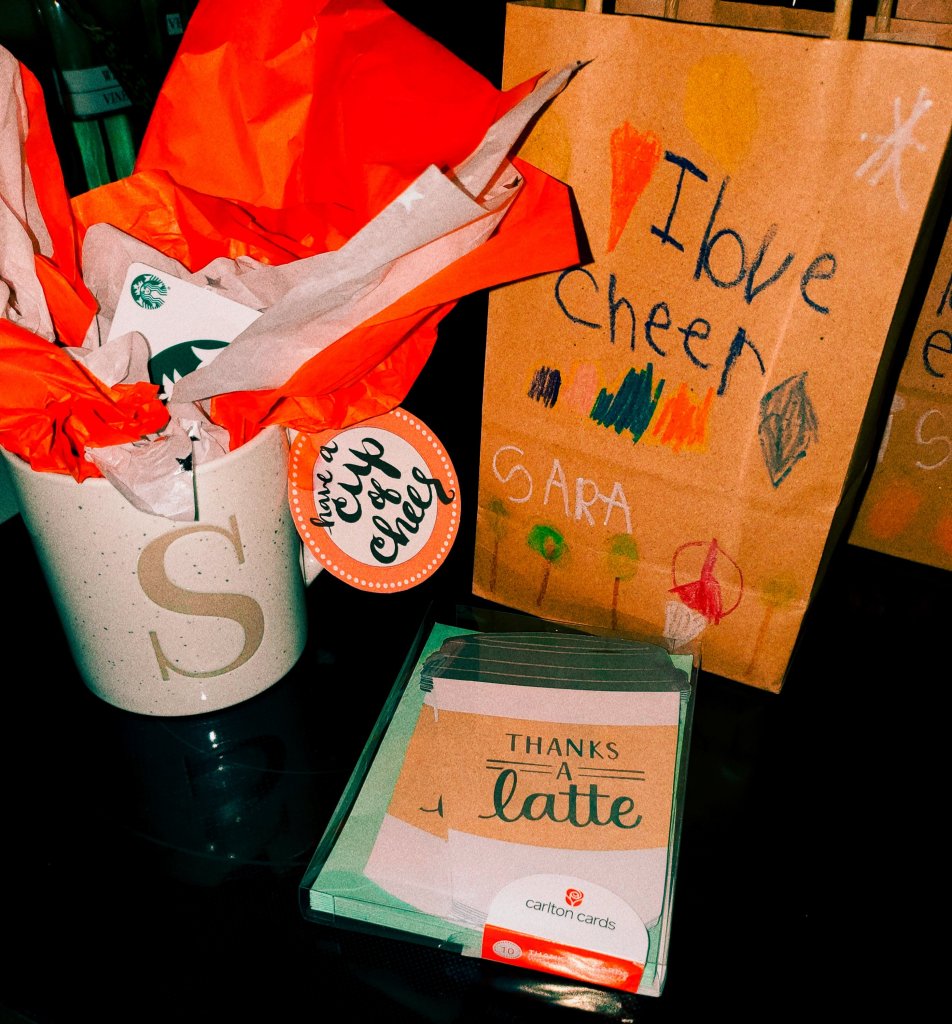
For end of season gifts for Mia’s coaches, we got each of them a super cute initial mug from Target, along with a $10 gift card to Starbucks.
Mia decorated each bag for her coaches and we found these adorable “Thanks a Latte” cards at Target that she wrote a special message inside and signed. We found the “Have a cup of Cheer” printables in Deer Park colors, and tied them to each mug to pull it all together.
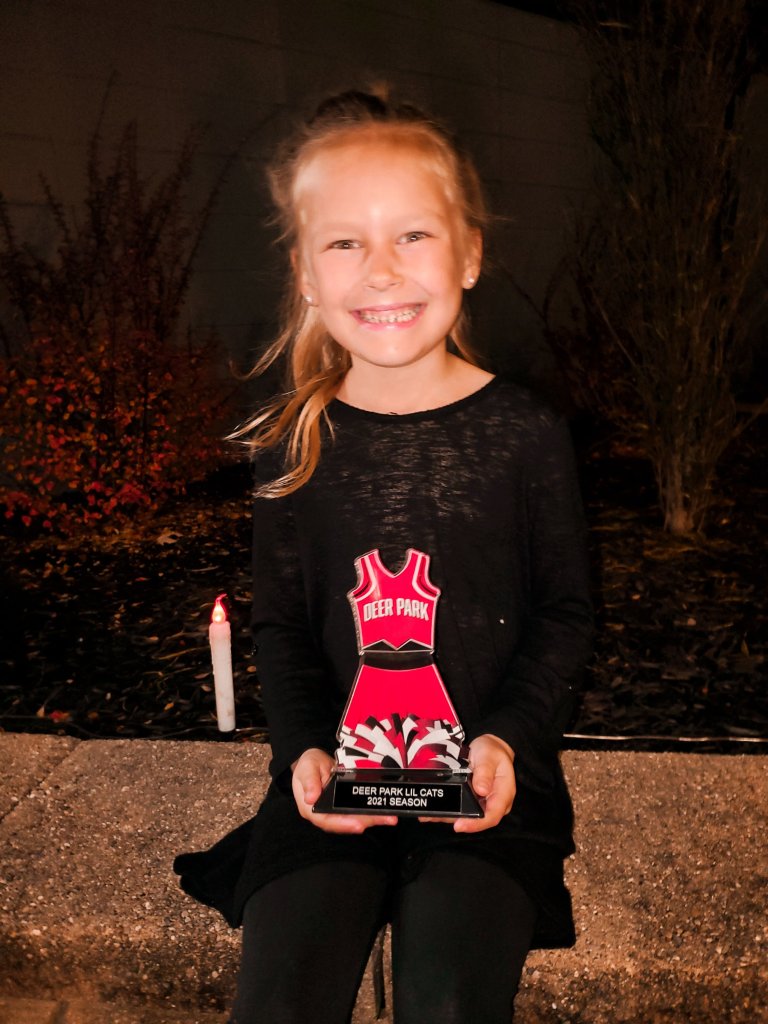
Mia showing off her Cheer Trophy!
This was such a great season and we cannot wait until next year! I would love to get her into Tumbling or Gymnastics in the off seasons to keep her motivation and interest going. I really think if she sticks with it, she could go really far in Cheer.
It’s time to hang up the poms until next Fall. Up next: Winter Roller Derby!