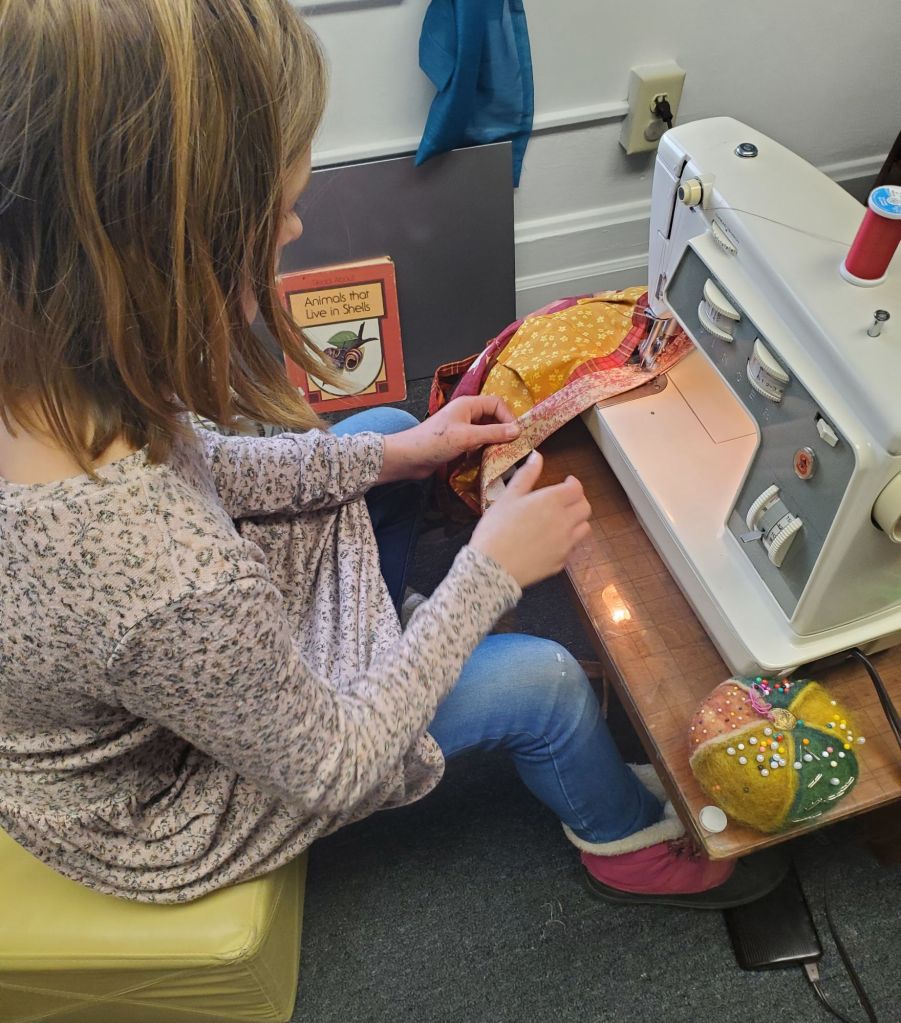
It’s been awhile since I last shared one of Ella’s sewing projects! Today is my birthday & Ella sewed me the BEST present ever! I literally could not love it anymore!!
I have been wanting a harvesting apron for the longest time! She sewed me one for collecting eggs for when we get our chickens very soon! I can also use it in the garden to collect fruits & veggies, and it is reversible to double as a kitchen apron too so that I don’t have to switch back and forth!
She picked out all of the fabric herself which I love! It means so much more to me than if someone just went out and bought me an apron. It is made entirely with love and creativity!
I am obsessed with it! We are getting our chicken coop in a couple weeks as an early family Christmas gift! Getting prepared for our new adventure has me SO excited! I cannot wait to fill these adorable little pockets with all the eggs!
She’s planning to make child size ones also for her siblings so they can help collect eggs too. Plus it is just so cute, all the girls immediately begged her to make them one! I love having a girl who sews!
I’m seriously so excited! It feels really great to have something to look forward to. While I wait for these few weeks to pass, I’ll be reading up & learning all the things I need to know! I can’t wait to share our adventure with you here!
I’m officially obsessed with making my own Ice Cream! It’s so fun & easy. There are SO many flavor combinations to try!
If you don’t know this about me – one of my dreams is to start an ice cream 🍦 shop called Morozovo’s because the Ukrainian word for Ice cream is морозиво, which is pronounced in English like our last name just with an extra “o” on the end! I really (like.. really, really) love ice cream & feel like it’s a calling for our family!
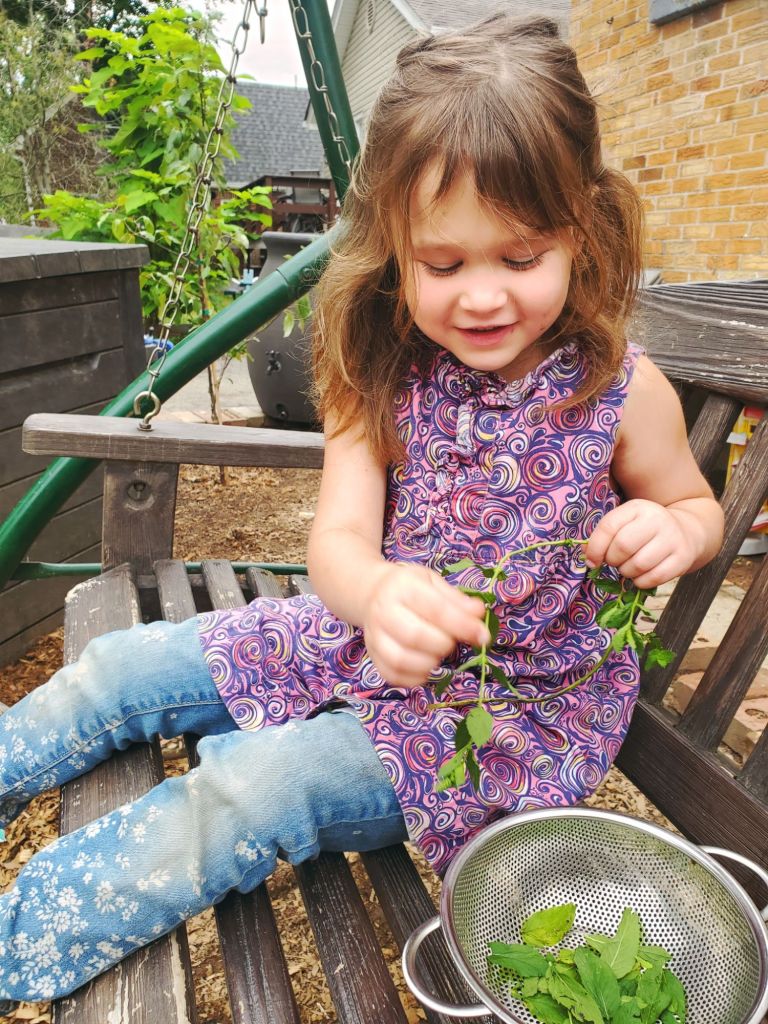
Our first step was to go out into the garden and collect some fresh mint. Athena was my big helper in this step & had a lot of fun with it. She said she felt like she was in a wedding carrying the “bouquet” of mint.
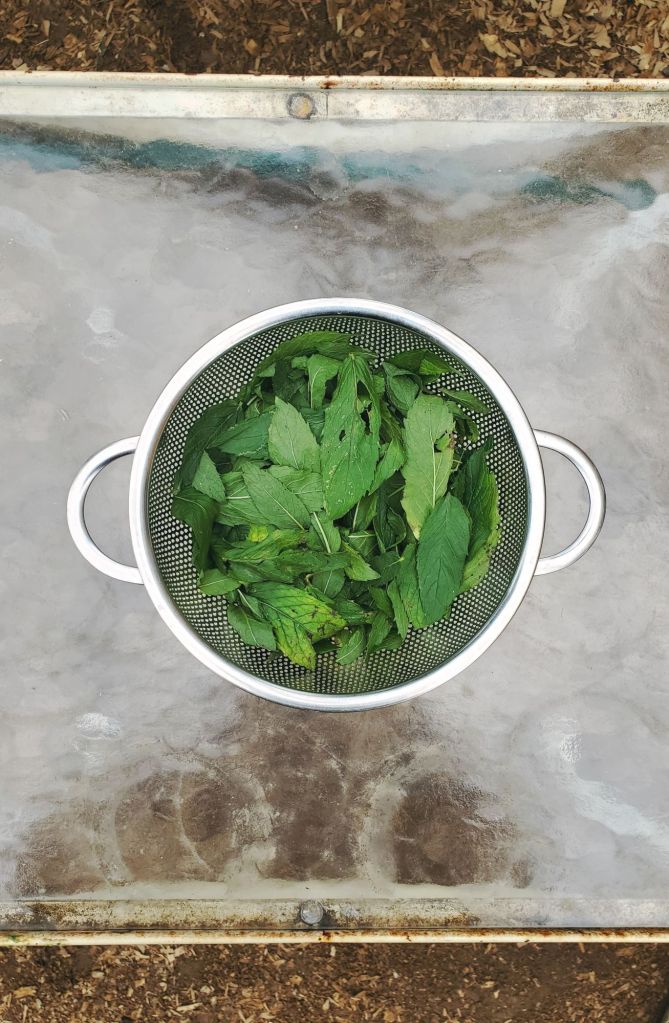
After we collected enough mint, we sat down together on the swing and picked off all of the leaves and placed them in this mini colander to be cleaned once we were back in the kitchen.
We collected and picked a good amount, then took our colander inside to clean & roughly cut the mint. I find using kitchen scissors easiest for this.
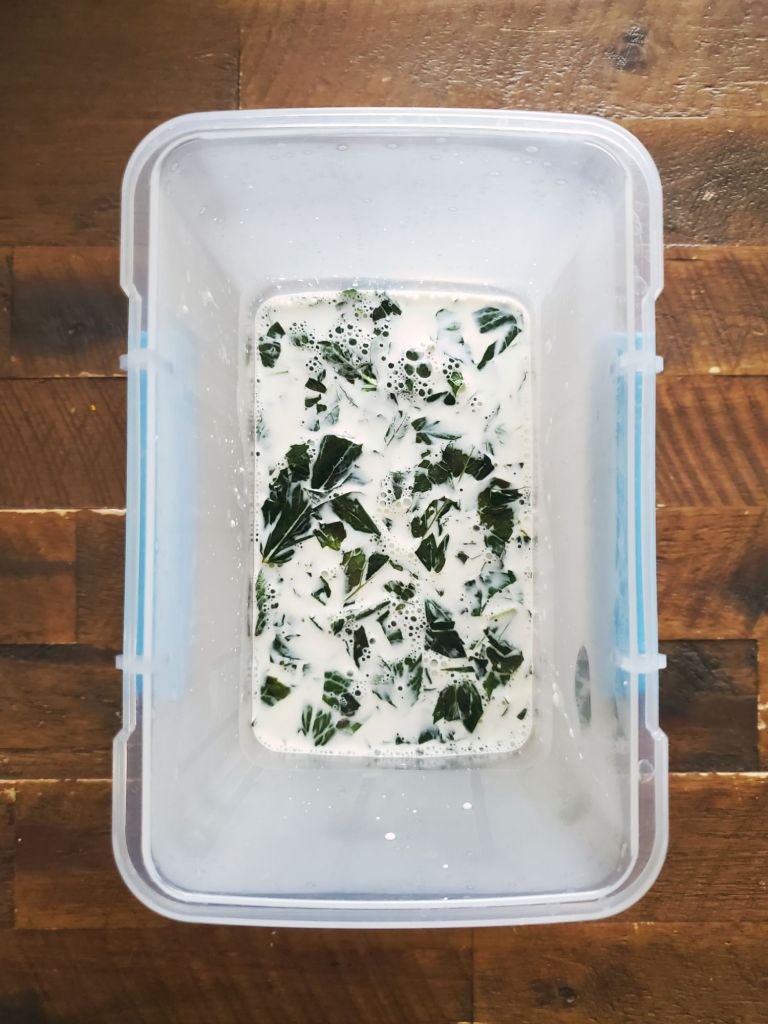
We then poured our pint of heavy whipping cream into the Dutch oven pot on the stove, threw in the chopped mint, and heated just until hot to let that flavor really begin to release into the cream. Do not overheat, or it will not whip as well for you. Remove from heat, let cool to room temperature, pour into container with lid, and let cold steep in the refrigerator for at the very least 12 hours.
After cold steeping in the refrigerator for at least 12 hours (the longer it steeps, the stronger the mint flavor will be), strain mint leaves by using cheese cloth over your Kitchen Aid Mixing Bowl.
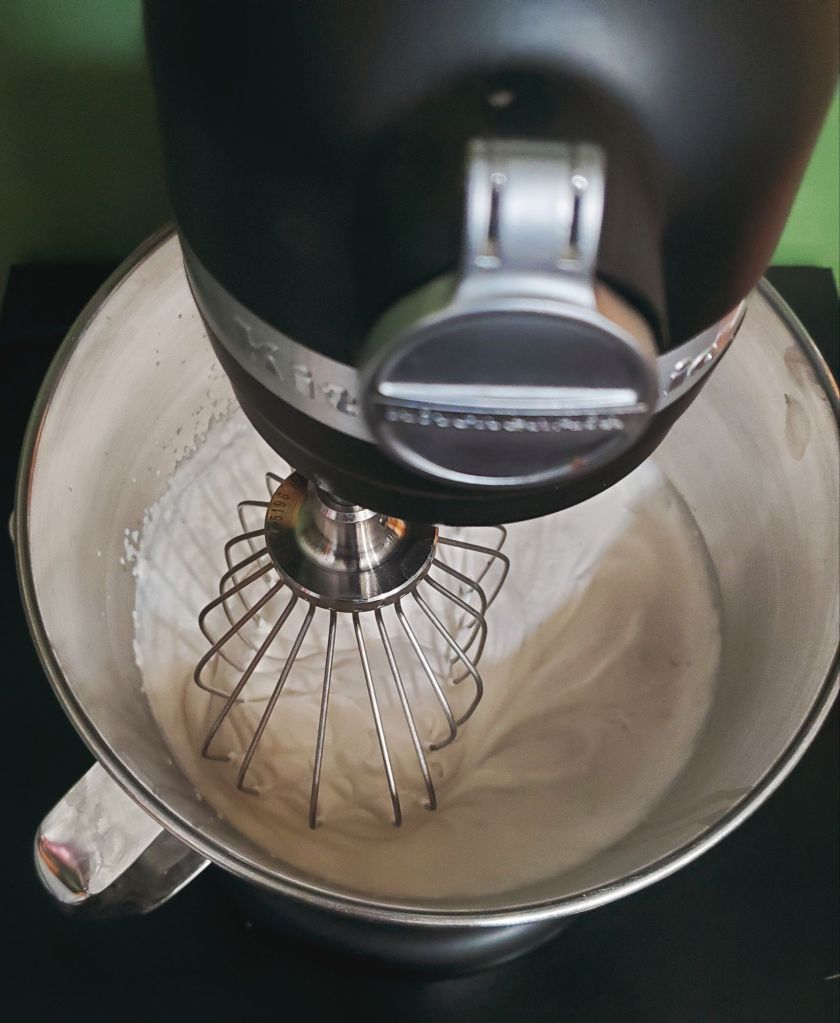
Whip the cream with the whisk attachment until you have a Whipped cream consistency. Hand mixers would probably work even better, if you have those.
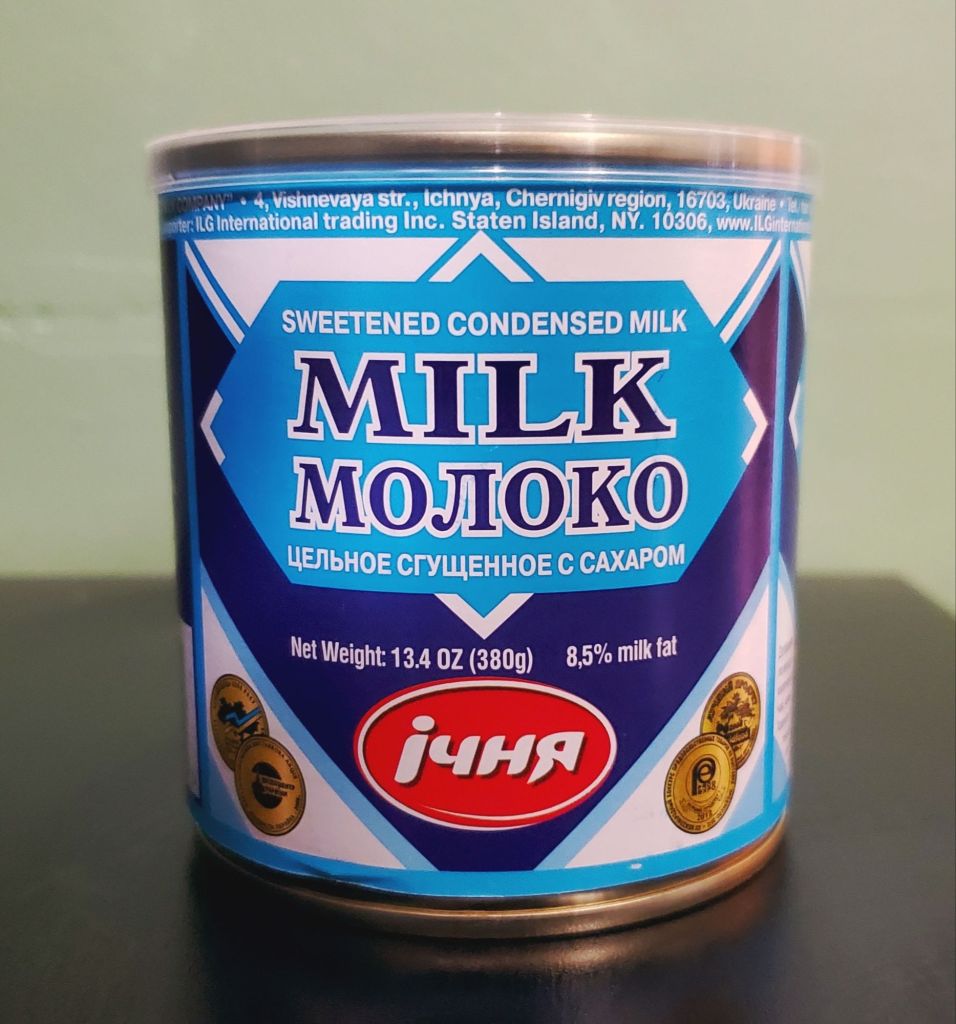
Once Whipped, add in 1 can of Ukrainian Sweetened Condensed Milk & whip again. I imagine American Condensed Milk will work if you don’t have access to a European market, but the Ukrainian one just tastes SO much better {see note}!!! Finally, add 1 tablespoon of vanilla extract & whip again one final time.
{NOTE: after comparing Ukrainian to American Condensed Milk with my тато, we found that Ukrainian Condensed Milk has at least double the amount of sugar as American, which is why it noticeably tastes better than American Condensed Milk. With this difference, you will have different results if using American Condensed Milk. You may have to add in sugar, but since I have not done it this way, I am unsure of when or how much sugar to add.}
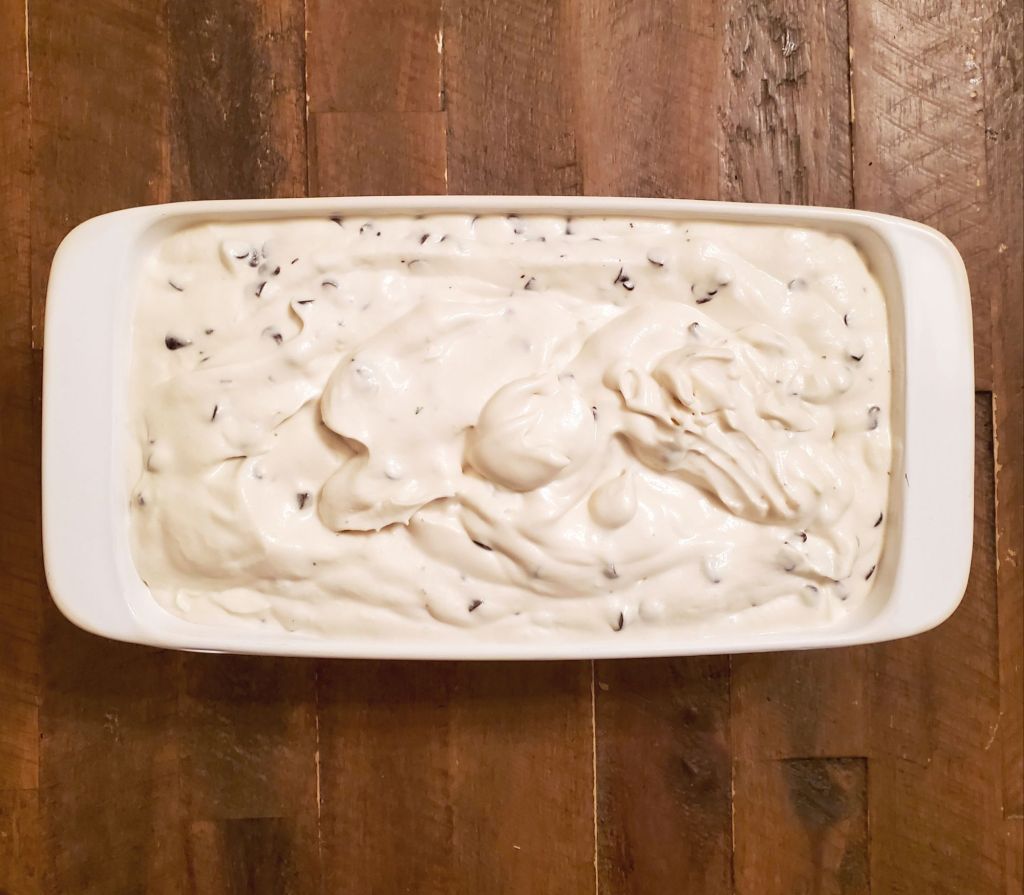
Gently fold in mini chocolate chips until all mixed together really evenly. I used semi-sweet because that was all that was available in mini, but feel free to use whatever you like here. Milk, dark, mini, chunk – it’s your ice cream, make it exactly your way!
Once all blended together, pour into a Loaf pan & place into freezer. The first day is good, but the second day is even better so if you have enough self-control, let it freeze overnight for best results. However if you need to try it right away, same. Just make sure to save enough to try the next day too!
Once it freezes & you are ready to eat, let it sit on the counter for a few minutes to let it soften up a tiny bit to make scooping easier. Scoop into bowl or cone & enjoy!
The flavor of the fresh mint in the ice cream is SO good! Plus I was super happy to use up some more of my mint in my garden! All of the kids agreed that the homemade Mint Chocolate Chip ice cream was way better than store bought – even Sasha who has never liked a store-bought mint chocolate chip before. She was the first to ask for seconds!
I hope you like it as much as us!
Ingredients
1 pint Heavy Whipping Cream
Fresh mint (I used probably 75-100 leaves)
1 can Ukrainian Sweetened Condensed Milk
1 tablespoon Vanilla Extract
1 bag mini semi-sweet chocolate chips
Directions
1 – MINT: Gather, wash, & cut mint.
2 – HEAT: Pour Heavy Whipping Cream into pot on stove, using medium low heat. Add mint leaves. Stir constantly until just hot, then pour into container & let cool to room temperature. Once cool, refrigerate 12+ hours.
3 – STRAIN mint leaves from cream using cheese cloth over your mixing bowl. Discard leaves.
4 – WHIP the cream into a Whipped cream consistency. Add in 1 can Ukrainian Condensed Milk, whip again. Add in 1 tablespoon Vanilla Extract, whip again. {🍦Begin at this step if NOT using mint🍦}.
5 – FOLD in chocolate chips gently & evenly throughout the cream mixture.
6 – POUR mixture into Loaf pan & freeze overnight.
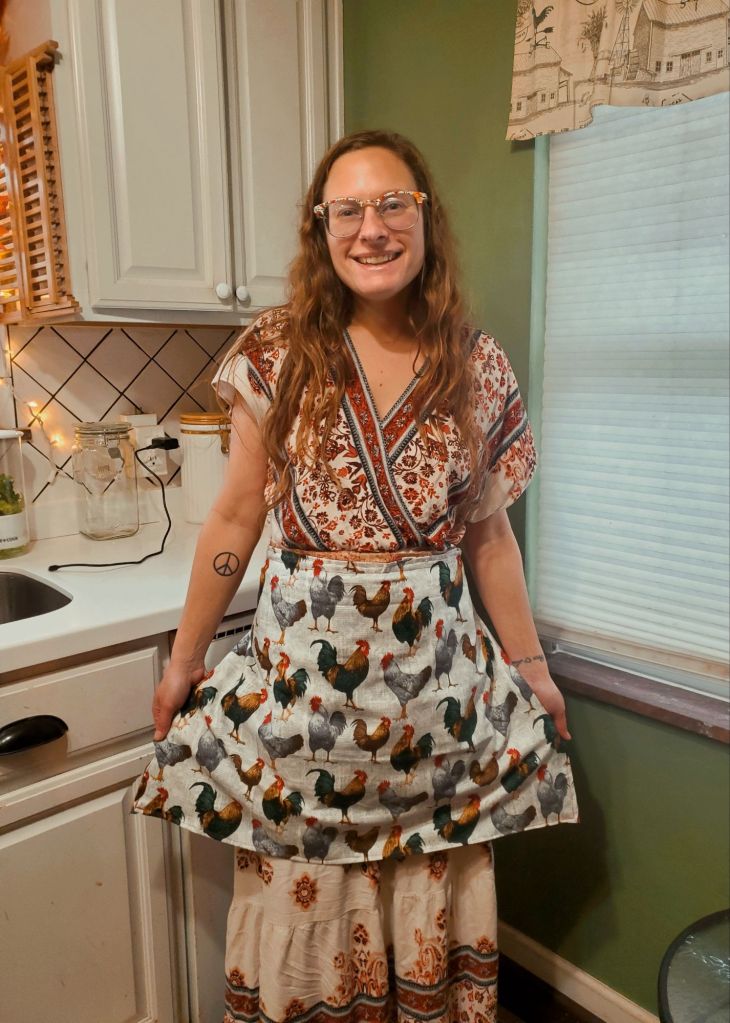
I went out into the garden this morning to see the first tomatoes ready for picking!!!! I am going to have to ask Ella to sew me one of those adorable harvesting aprons that homesteaders wear to carry in their eggs & such in!!
The red ones are Cherry Tomatoes.
The orange ones are Sun Gold Cherry Tomatoes.
It doesn’t look like a lot yet, but I’m still so excited about them! I’m also excited about how many green ones of different varieties there still are growing! The plants are HUGE now!
I really love how much of a sense of gratitude comes from gardening. There is something so magical about it! I find myself just staring at it all, taking everything in: the watermelons we grew from seed, the tomatoes that are towering over the younger kids, our Veggie scraps we propagated & regrew from our kitchen, the fruit trees that will provide not only food but many memories for my children, all of the edible plant starts I accumulated for free from friends & other kind gardeners that have really filled up my beds this year (that is a huge blessing), the pumpkin patch that is growing up the walls of our greenhouse making it feel like a fairy tale, the flower gardens in the front yard filled with busy pollinators & beautiful smells. Nothing compares to that first harvest, and getting to bring something in to eat that YOU grew – it’s so rewarding.
My mini homestead has really taken off this year! I am really proud of how far it’s come and what all I added this year. We don’t have a huge lot of land we are working with, but we have a decent size yard & we are planning to use every inch we can to live off of. Eventually, we’d love to own our own big farm with our own water source, but for now we are fulfilling our mini homestead dreams + getting knowledge & practice for the real deal!
As a vegetarian, I really want my kids to know where their food comes from + how to grow their own food from seed. I want them to know how to be self-relient & self-sufficient. Part of that is learning how to stretch food as far as you can take it & waste as little as possible.
I am Ukrainian, so naturally it’s in my DNA to love beets. I thought that would be a great vegetable to start with! Today I am going to teach you how to use the entirety of the Beet to make not just one meal, but an entire days’ worth of meals from just a few beets so that absolutely no part will be wasted & you stretch your produce as far as it can go.
We will then compost the scraps & propagate our Beets to re-grow in our garden, so that even the used up & unusable parts still get re-used too and leaves you with 100% zero waste.
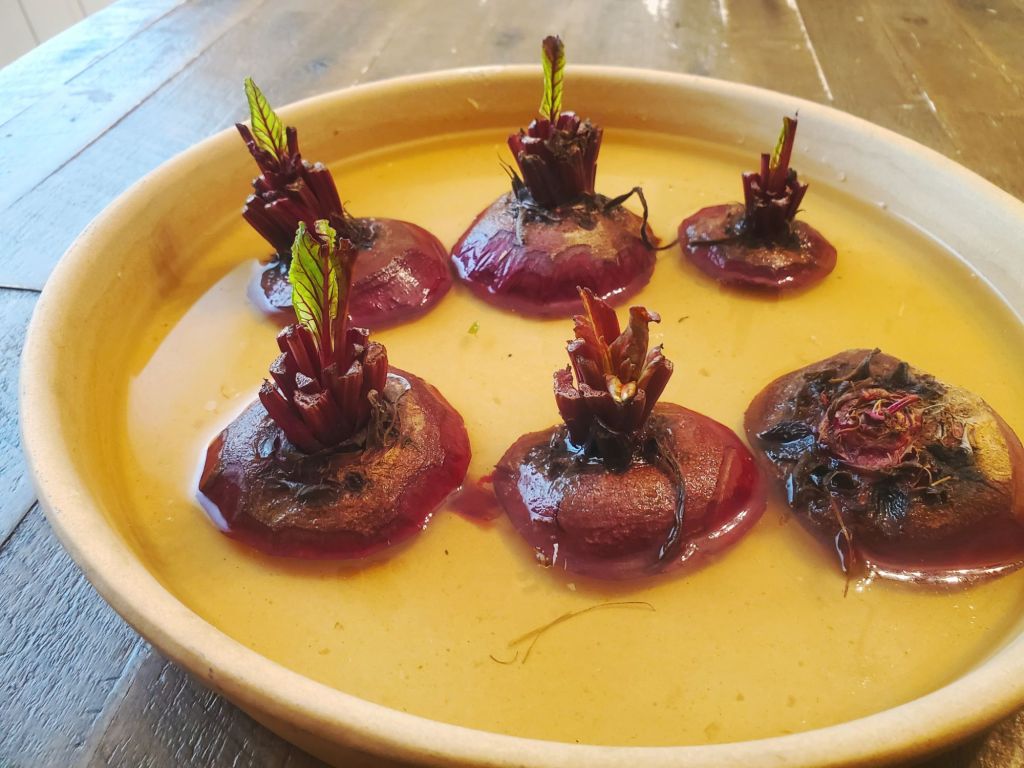
The first step is going to be peeling, slicing, and then washing your 6-8 Beets. Make sure to SAVE your beet tops (the part that looks like lettuce.) You will want to cut this off, wash, rinse well, and set aside to use.
To cook your Beets:
Place sliced Beets, 1/2 cup white vinegar, 2 bay leaves, 6 teaspoons Minced garlic, 2 teaspoons sea salt into a pot, then cover with water.
Cook for 30 minutes, drain, rinse, & let cool. Now they are ready to use!
Breakfast: Raspberry Banana & Beet Smoothie
Smoothies are such a great way to start the day! This one was really yummy! In most beet drinks I’ve had, there is an overwhelming beet flavor. This one has a much more subtle beet taste too it, but you can definitely still taste it. The color was so beautiful!! Just throw all of the ingredients together in the blender & enjoy!
1 cup ice
Raspberries
Beets
1 banana
1/2 cup vanilla Greek Yogurt
1 tablespoon chia seeds
2 tablespoons Oatmeal
1/2 teaspoon tumeric
1 1/2 cups Almond milk
Drizzle of honey
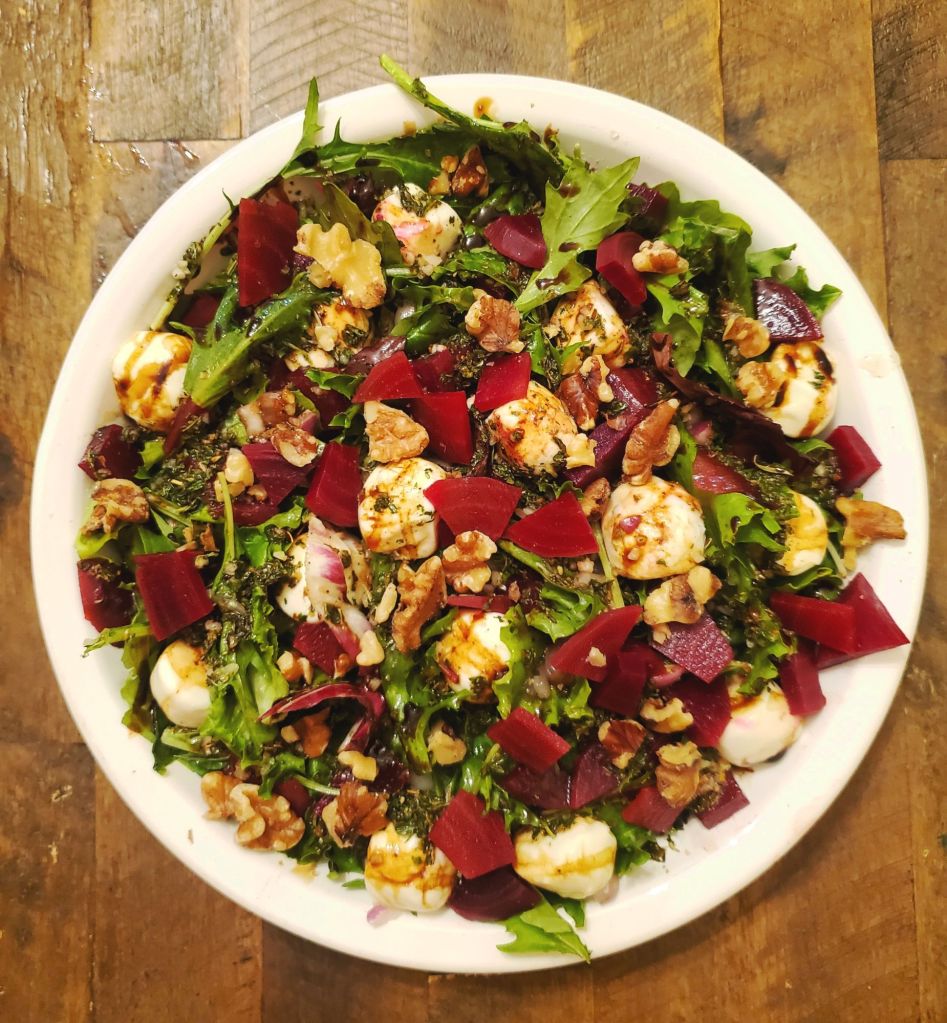
Lunch: Beet Salad with Balsamic Drizzle
I used a spring + arugula lettuce mix as the base of this salad. I dressed the salad with homemade dressing {listed below}. Then I topped it with Mozzarella Cheese balls, chopped up Beets, walnuts, salt & pepper, & my favorite: Nonna Pia’s Balsamic Glaze.
Dressing:
2 tablespoons sunflower oil
2 tablespoons Almond oil
Juice from 1 lemon
1 tablespoon parsley
1 tablespoon oregano
1 tablespoon Green Harvest Seasoning
1 teaspoon salt
1 teaspoon Minced garlic
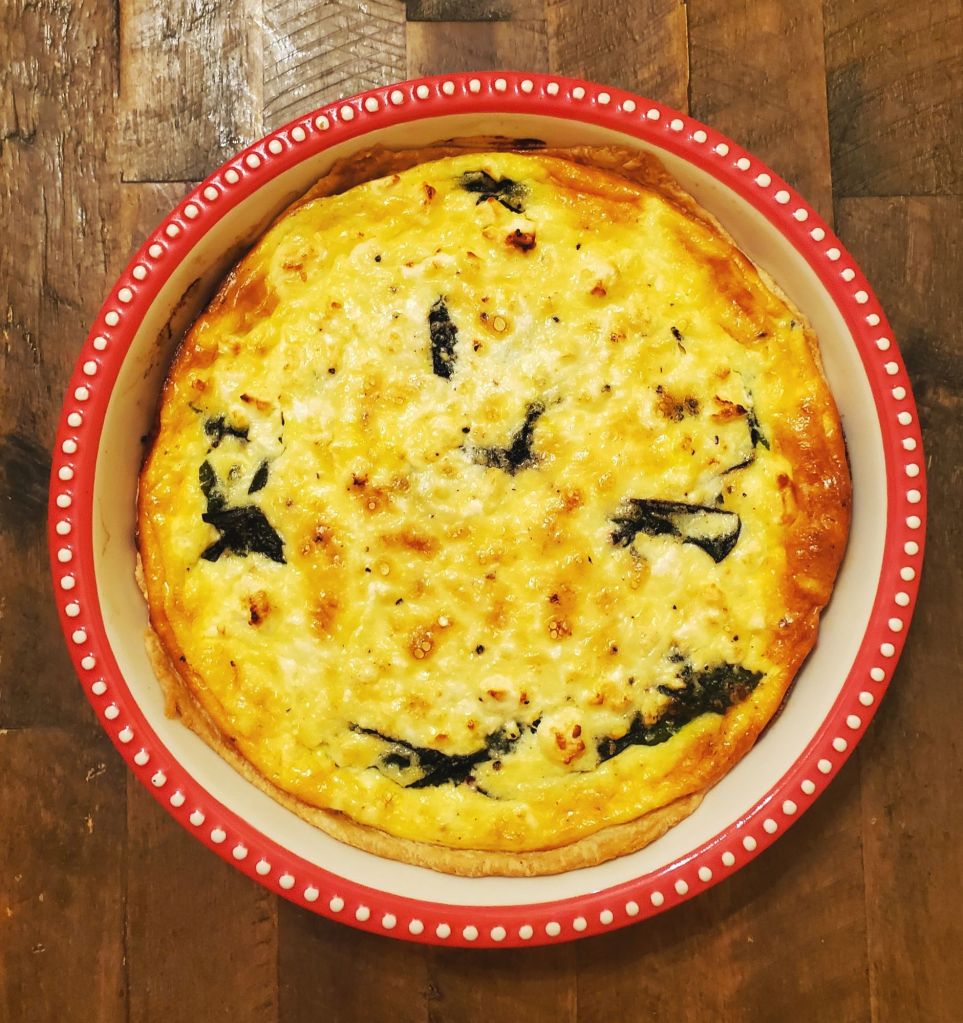
Dinner: Beet Top & Feta Bake
Ella has been asking for quiche lately, but this Tart is even better! It is just like quiche, but much creamier & uses a lot less eggs. It’s SO tasty, I could honestly eat the entire thing to myself in a day or so.
Place beet tops in a large pot & cover with water & salt. Cook until wilted, drain, set aside to cool. While beet tops are cooking, Preheat oven to 350° & roll out your pie crust over your pie pan, then set aside to cool.
Once beet tops are cool enough to touch, fill bottom of pie crust. Next, evenly spread Feta cheese to create a layer over the beet tops.
In a mixing bowl, mix together milk, eggs, & Creme fraiche until blended. Salt & pepper to taste, mix again. Pour mixture over Feta cheese layer. Cook for 50 minutes. Let cool for at least 10-15 minutes to set.
1 pie crust
Beet tops (from 6-8 beets)
Feta cheese (6 oz)
1 container Creme Fraiche
4 eggs
1/2 cup milk
Salt & Pepper to taste
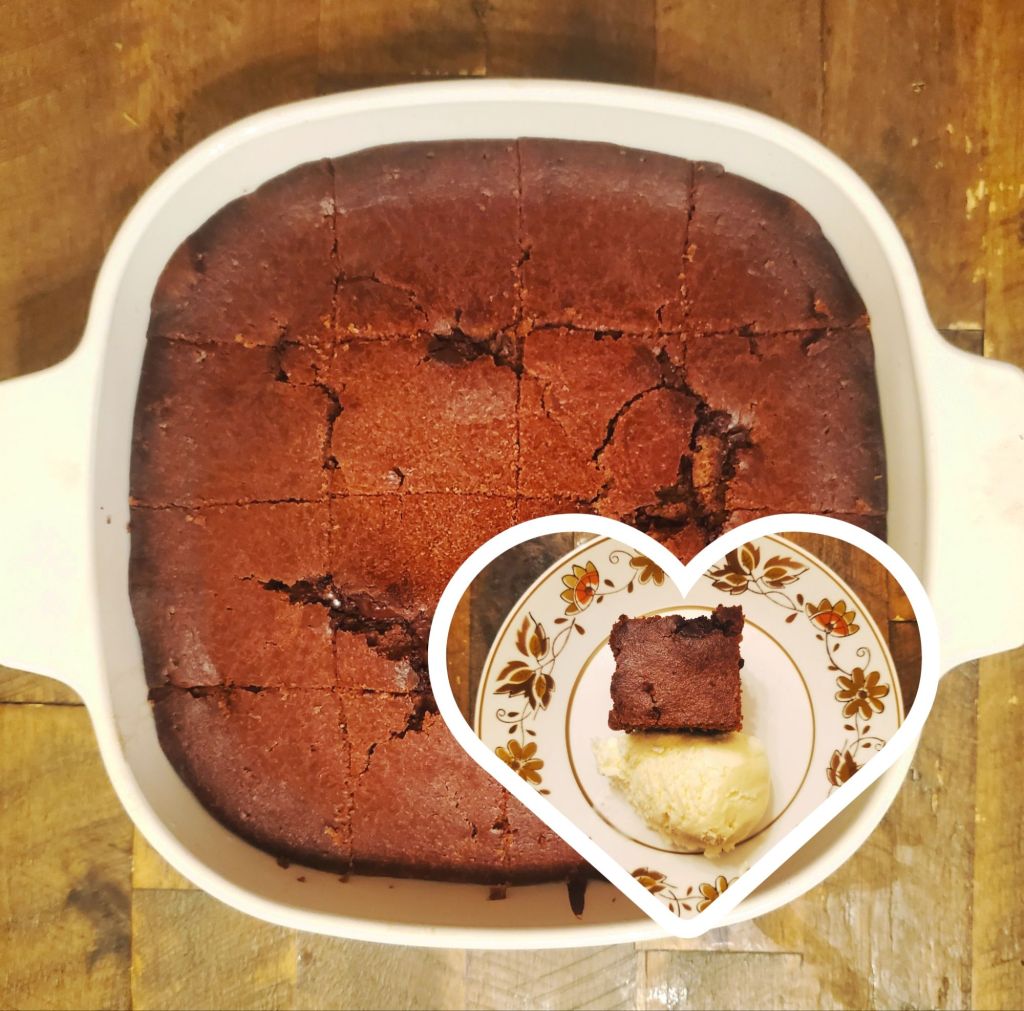
Dessert: Chocolate Beet Cake
This was good, but definitely would have been better with chocolate Frosting. I thought that the ice cream would have been enough, but it was still more dry than traditional chocolate cake. That didn’t stop it from being gobbled up though!
Large beet
2 tsp vanilla extract
4 eggs
1/2 cup milk
1 1/2 cups all purpose flour
1 cup cocoa powder
1 tablespoon baking powder
1 cup powdered sugar
3/4 cup sunflower oil
Half a bag of dark chocolate chunks
Beet Propagatation
• Day One •
Place the rest of the unused beets in a shallow bowl with water. I used this pie plate because it was big enough to fit all of mine.
Day Five
New leaves have began growing on our Beets over the last few days, which means they will be ready to plant in the soil soon! I’m planning to let these continue to grow their leaves in this dish for another week or so, then move them to their permanent locations in the garden.
I had a lot of fun with this no-waste challenge & hope that you were able to get some inspiration from it! I am definitely inspired to continue learning how to run a no-waste mini homestead & excited to figure out what vegetable I’ll use for the next challenge!
I went to the Oakley Kroger the other night with Moses. That place is HUGE! As we were walking (aka me walking & wearing all 23+ pounds of him) inside we decided to check out the outside floral section and I ended up buying a cherry tomato starter plant & a strawberry starter plant.
When we got home it was too late to start a gardening project, so I set them aside for the next morning.
When I went to plant them, I came to the conclusion that I really didn’t want to plant food that we plan to eat near our trash cans, even with a fence separating them. So I figured out a new solution!
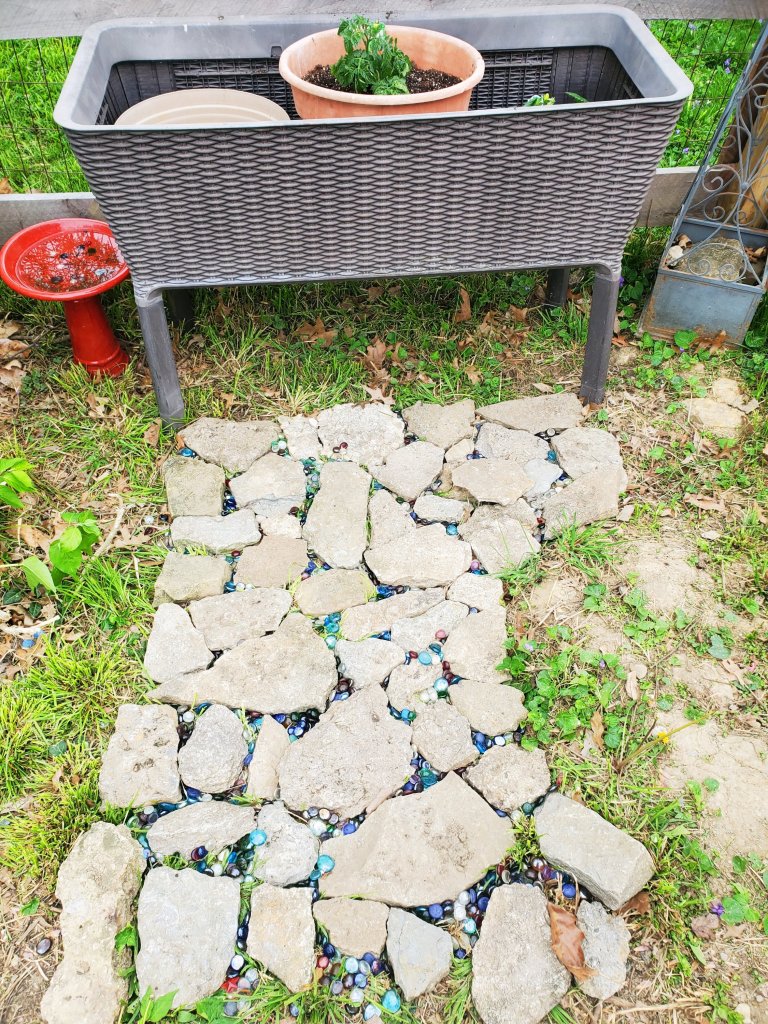
I moved the raised bed into this space along the fence.
I thought that it looked a little out of place by itself, so I built a little rock pathway with rocks out of the stockpile I already had.
Once I had all the rock placement laid out, I began collecting these mosaic tiles around my back yard. I had originally had them in the gravel patio area, but I think that they will be much more appreciated over here.
I’ve got a pretty good start going, but I definitely need to continue picking more out to make sure the spaces in between are really full.
I also moved this little red bird bath from a different garden space in my yard. It makes more sense over here since the hose can reach here, but not where it was previously.
I planted the cherry tomatoes in the middle container and strawberries to the right. I am going to plant lettuce in the container to the left when it isn’t raining.
To be completed:
• Finish filling in mosaic pieces between rock spaces.
• Plant a creeping flower in the tower growing up the sides.
• Weed and prepare the right side near the fence to sculpt out a garden bed + plant some flowers.
• Trim bush to the left side and sculpt out garden bed + plant some flowers.
• Create fun garden stakes with the kids for each container.
• Find and/or make more garden decor to personalize it more!
Just a small, spur of the moment project I wanted to document on here. I hope you like it and it Inspires you to do some gardening yourself! Gardening can be really, really therapeutic as well as a great work out & way to connect with nature.
Are you big into gardening, or a beginner? Have you tried raised garden beds or container gardens? What kind of things do you like to grow?
When Ella was a baby, we went through ALL of the brands of baby wipes available on the market. No matter what brand we tried, her “diaper rashes” got worse and worse. Huggies were by far the most harmful brand to her skin.
We eventually learned that diaper rashes are NOT normal, and are in fact chemical burns caused by the wipes. So I began making my own baby wipes, which completely stopped the rashes. The only time new rashes appeared were when she went to family members houses that still used store-bought wipes.
I have been making my own baby wipes ever since for all of my babies born after her, and have since switched to cloth diapering after learning how dangerous disposable diapers are for babies health as well.
Making your own wipes is inexpensive, easy to do, and SAFE for your babies.
Phenoxyethanol – harmful to children’s health including adverse effects to the central and peripheral nervous system, skin irritation, lung irritation, toxic to kidneys and liver,
Benzyl Alcohol – causes irritations and rashes and inflammation on the skin of young children including: irritation, severe itching, reddening of skin, loss of sensation, eye irritations, vision problems, pain, peeling skin, heat burn.
Formaldehyde – carcinogenic to humans. Causes cancer and contact dermatitis including blisters, scales, thickening of skin, leathery skin, asthma, respiratory problems, eye, nose, and throat irritations, conjunctival irritation, allergies, low blood pressure, headaches, irregular breathing, abnormalities of heart rhythm, unconsciousness, restlessness, loss of red blood cells.
Polypropylene – can cause dizziness, drowsiness, low blood pressure, nausea, vomiting, lung disease.
Viscose – Derived from wood pulp, the process to make viscose involves many harsh chemicals. Those chemicals cause coronary heart failure, birth defects, skin conditions, and cancer. Viscose is highly pollutable to our planet and has a devastating impact on forests, people, and animals.
Polyester – Polyester is absolutely detrimental to our environment. More than 70 million barrels of oil are used to make polyester each year. It is the biggest source of microplastic pollution in the oceans. Each time you wash polyester, up to 1900 fibres are washed off back into our water systems and oceans. It takes up to 200 ywars to biodegrade- that is more than 2 lifetimes. The production of polyester uses very harsh chemicals including carcinogens. Carcinogens generate skin problems and lung and heart cancer. Polyester causes chronic and severe respiratory infections. Causes rashes, itching, redness, eczema, and dermatitis. Causes allergies, chemical sensitivity, and other serious health problems. Lowers sperm count in men. Toxic to babies immune systems. Not breathable material.
Petrochemicals – Ethylene Oxide, 1,4-Dioxane, Polysorbate 20, Bis-PEG/PPG-16/16 PEG/PPG-16/16 Dimethicone, Potassium Laureth Phosphate, PEG-75 Lanolin, Ceteareth-20. These cause cancer, birth defects, headaches, respiratory irritation, and both female and male reproductive harm. They cause leukemia, lung cancer, nose, throat, and sinus cancer, blood and lymphatic cancer. Affect development of children including brain development, learning and behavioral problems. Using while pregnant will affect both you and your unborn baby.
Phthalates – usually found under the name “fragrance,” “perfume,” or “perfum.” This causes allergies, hormone disruptions, infertility, dermatitis, and respiratory distress. Causes damage to liver, kidneys, lungs, and reproductive system. Lowers sperm count and quality and lowers testosterone levels. Has a lasting impact on neurodevelopment including lower IQ, problems with attention and hyperactivity as well as poor social communication, depression, and aggression. Changes hormone levels, alters development of genitals. Causes breast cancer, obesity, thyroid problems, asthma, and metabolic issues.
These are just a few of the chemicals that are found in store-bought baby wipes including the brands you have put your trust into. As you can see, these are NOT safe for anyone, especially babies, yet they are marketed for mothers to use on their babies. The FDA is a scam, and should NEVER be trusted. Always do your own research before using anything, especially on the tiny humans you are responsible to take care of and keep safe.
Note: The “natural” wipes do not mean they are safe. There are few rules, regulations, or guidelines when it comes to a “natural” product. “Natural” does not make a product vegan, organic, non-toxic, cruelty or chemical free. Remember, crude oil is natural.
Water wipes would SEEM safe, but they contain grapefruit seed extract which may contain harmful contaminants meant to act as preservatives. Grapefruit seed extract is a general lable to hide: Benzetheonium Chloride, Methylparaben, and Triclosan. Water without a broad-spectrum preservation system cannot prevent the growth of mold and bacteria which can cause seriously infections. No cleansing agents, means that when babies poop it does not properly disinfect babies genitals. The poop residue left behind can cause skin irritation and leaves bacteria behind which can cause urinary tract infections, meningitis, septicaemia, and purulent conjunctivitis. Meningitis and septicaemia have been known to cause death in infants.
The ONLY way to know that the wipes that you are using on your baby are safe is to make them yourself. It sounds hard, but it is not at all!
How to Make Baby Wipes (Step by Step)
● Start by putting your dry wipes into your wipes container. You can also make reusable cloth ones which is a better option for our environmental waste and I hope to get to that point, however I currently use disposable wipes.
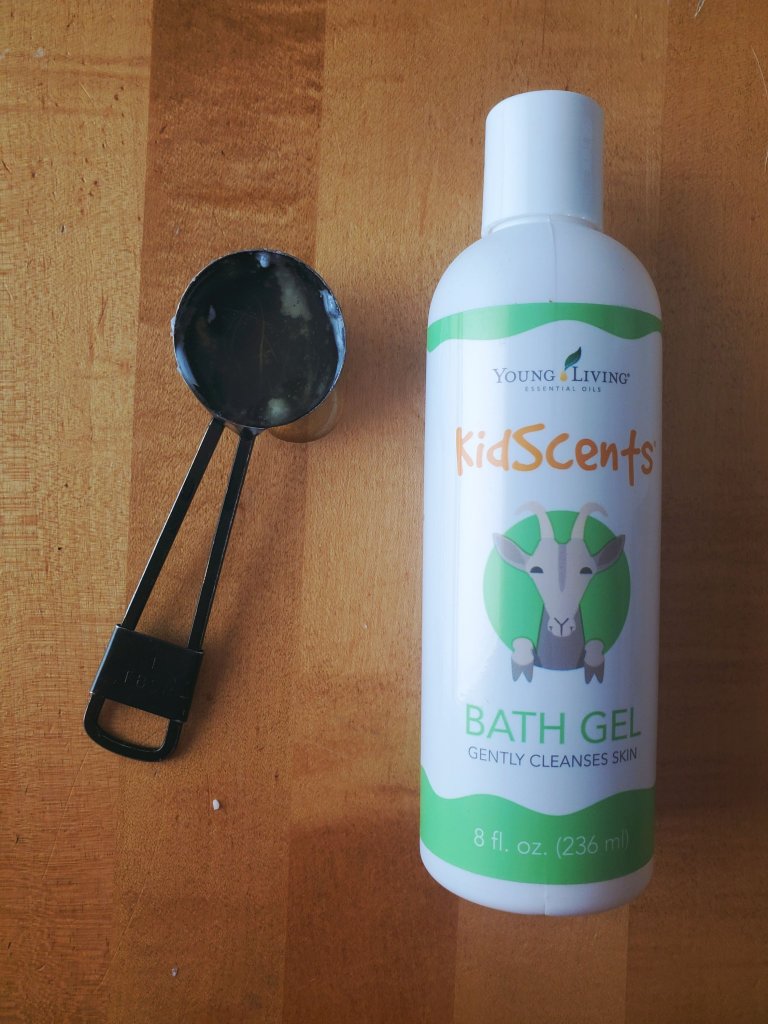
● Measure 2 cups of warm to hot water.
● Add 2 Tablespoons of Organic Coconut Oil.
● Add 1 Tablespoon of a non-toxic soap such as Young Living’s KidScents like I use, or Dr. Bronners Castile soap.
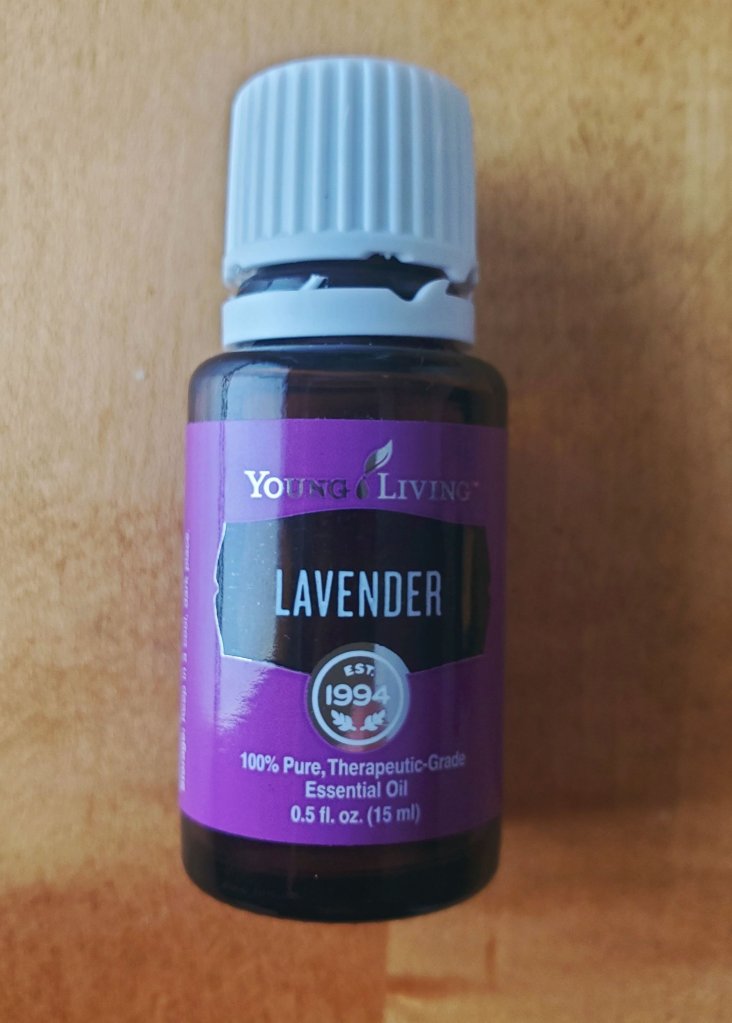
● Add 5 drops of Young Living’s Lavender Essential Oil (or any of their Seedling oils specifically for babies). Do NOT, I repeat DO NOT, use grocery store essential oils including those purchased on Amazon, Target, or Walmart- they are NOT pure and NOT safe to use especially on an infant or child.
Young Living is the ONLY essential oil company in the WORLD that has a Seed to Seal promise and conducts intensive testing to ensure that they are 100% safe to use.
● Mix together using your tablespoon to make sure you get all of the residue from the coconut oil and soap and don’t waste any.
● Pour mixture evenly over wipes container and leave upright for 20 minutes. After 20 minutes, flip container over to sit for another 20 minutes. This spreads the mixture to absorb evenly.
It looks soapy when first poured, but it soaks into the wipes as it disperses over the setting time.
It is as easy as that! Takes a minute to mix up and pour, and a total of 40 minutes to settle. I suggest making them during nap times, or at night once baby has fallen asleep so you don’t find yourself needing wipes before they have set.
I want to start by saying I did not cloth diaper all of my babies, but I wish I did. If I had any advice for a first time mom, it would definitely be to consider using modern cloth diapers.
Yes, you save money in the long run (and we’ll get to that), but that isn’t what motivated me to switch. Although, it is a nice added benefit 😉. These are my top reasons why I decided to ditch the disposables.
Our Earth
About 20 BILLION disposable diapers go into landfills each year. That is more than 3.5 million tons of waste. If that wasn’t already bad enough, it then takes 500 years for disposable diapers to break down! When I think about how many disposable diapers I have used on how many children, that makes me sick to my stomach. I was stealing from my own children and grandchildren’s futures without even knowing it. As soon as I learned this fact, I immediately decided this was a no-disposable using home and began my journey to cloth diapers.
Our health
Something I noticed as a #girlmom vs. #boymom was that my girls had diaper rashes that my son did not experience. These were NOT normal diaper rashes. They were chemical burns. I had tried different brands of diapers, different brands of wipes, had medical ointment prescribed from our pediatrician, began making my own wipes, got rid of any white diaper rash cream (these trapped the infection and led to yeast infections), tried anything and everything I could think of, but the bad rashes still came. Athena has been cloth diapered since birth, and she has never had one of these rashes. The box of diapers and wipes may claim to be “all natural,” but if you can’t pronounce the ingredients, they aren’t really natural at all.
Our money & convenience
This is the part that the dad’s like to hear: you WILL save money. Up front, it seems like what you are doing is spending a bunch of money on the diapers that you were told would save you money, and it feels a bit like you were misinformed. Cloth diapers are sort of like business, you have to spend money to save money. BUT once you realize that you are no longer spending $80+ a month on diapers, you start to see the money being saved.
I know that there are such cute patterns for any gender, and it’s very hard to resist buying all of the cute patterns! But to save EVEN more money, I suggest buying only or mostly (because seriously, there are some CUTE patterns) unisex diapers so they can be passed down to their future siblings, or even resold if you really are done having children. The diaper resale market is BIG!
The convenience. Have you ever had that horrible moment when you go to change your baby’s diaper and suddenly find out it is your very last one? I have! 🙋♀️ I still don’t know what happened, I could have sworn I still had a back up sleeve of them in the closet? 🤷♀️ It happens to even the most organized of us. Mom brain is real!!! Cloth diapers grow with your baby from infant to potty training. No more frantically searching for an old disposable diaper that one of your kids outgrew when you have cloth diapers. No more buying an entire box of diapers just to open it and have your child grow overnight into a new size. More saved money!
Getting started
There are SO many different kinds out there, and when first starting out it seems incredibly overwhelming. I didn’t know where to even begin. Luckily, I knew another mom that cloth diapered – Rachel! •(She is such an awesome and inspiring mama!Connect with her on YouTube: Boy Moy Beta or Instagram: @racheljones13)• So I messaged her and I asked her for some advice. It felt so much less scary having a friend in the journey, and that is what I want to be for you: a friend on your cloth diapering journey.
I personally use Mama Koala and Nora’s Nursery pocket diapers. They each come with an insert, but you may want to buy an extra pack of inserts for overnights. They are very easy to use and the process is very similar to disposable diapers. They are easy for dads/caregivers to learn how to work with because they have easy snaps instead of having to work with a pin. I have had zero issues with staining with either of these brands. I also love how the lining is very soft. Athena has a hemangioma on her stomach, and some diaper covers made me a nervous wreck worrying if they would scrape against it and cause it to bleed. I do not have to worry about that with either of these brands. Plus they are both extremely soft, and both offer beautiful patterns.
Every baby is different. The best cloth diaper is the one that works best for you and your baby. Some moms swear by prefolds, but I’m not one of those moms. I will say they do make excellent extra inserts if you make the same mistake as I did and buy a bunch before trying 🤦♀️ but hey, they also make the perfect burp cloths so even though I wasn’t a prefold loving mama, they weren’t a waste of money.
I love being a cloth diapering mama. I didn’t use them with all of my babies, but I wish I did. I am very glad I made the switch, and I wish you the best of luck on your own cloth diapering journey.
• 💬 If you are already a cloth-diapering mama, what are YOUR favorite reasons for why you cloth diaper? Let me know in the comments!
• 🙏 If you know any moms-to-be, please do me a small favor and share this article with them!
Disclaimer:
I am not a professional, and this article should not be viewed as such. I am simply a mother, sharing my personal opinion with others. These statements and opinions are my own and not that of any organizations that I am affiliated with. This is an informational article and is accurate and true to the best of my knowledge. As stated, I am not a professional. Please consult a professional regarding any health or financial concerns.