Hey there! It’s been awhile since I last wrote here! I’ve been busy as a bee, but lately it has been on my heart to begin writing again.
My husband began working at his new job around the time of my last post! He delivers medical supplies to hospitals for surgeries. It has truly been the biggest blessing for our family in so many ways after a long season of financial struggles – God is so good. However, like most families we are still feeling the burden of inflation & any chance of having “extra” money has been replaced with double the price of Energy Bills each month. That money had to come from somewhere and, unfortunately, that meant we had to put our girls piano lessons on pause.
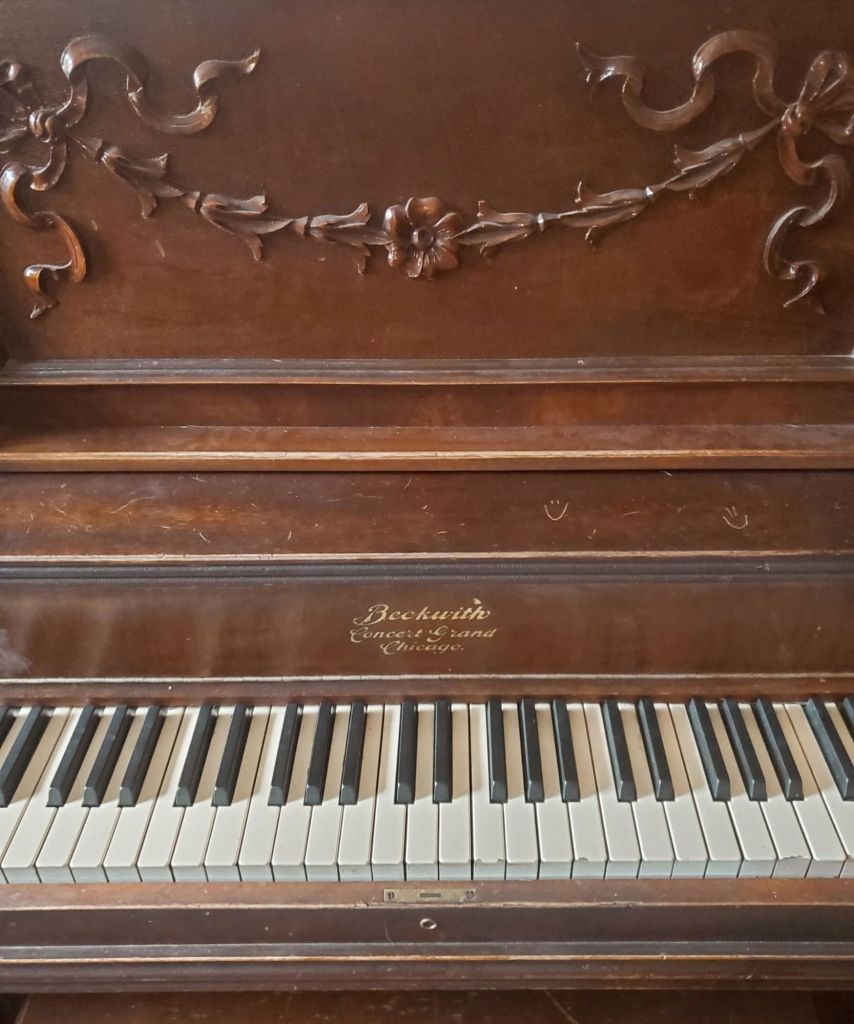
Luckily, it didn’t take long before I found Hoffman Academy – a FREE, online piano school providing a complete musical education that is put together with short, easy-to-follow videos. Each of my girls have their own profile that keeps track of their progress & where they are in their learning process, which makes all of our lives easier than if we had to constantly remember who left off on which video.
The girls put the video on the computer and play along on our piano. Each day, I have them each complete one video lesson which are typically around 10-15 minutes long. If they are enjoying themselves and would like to complete more than one lesson, they are welcome to do that. It ensures they get their practice time on the piano each day & keeps us on a good rhythm, filling our time wisely.
It is a really great resource for both children and adults alike – anyone who wishes to learn the piano. If you’re a homeschooling mama like I am, there is even a FREE complete curriculum already put together for us with printables and interactive games to make learning music fun.
Hoffman Academy does offer a paid premium option that includes additional lessons and access to their entire library. We currently are using the free option which works just fine for our family. Don’t let money (or lack thereof) be an excuse to hold you back from living your best life & accomplishing all you want. Where there is a will, there is always a way. Happy learning!
This year, we are really excited to announce that we will be selling our homegrown flower bouquets! The girls have signed up for the Children’s Entrepreneur Market through our homeschool program!
Through this program, the girls will be running Morozov Mini Market entirely on their own. From decorating to sales and everything in-between!
They will be selling:
Homegrown Flower Bouquets
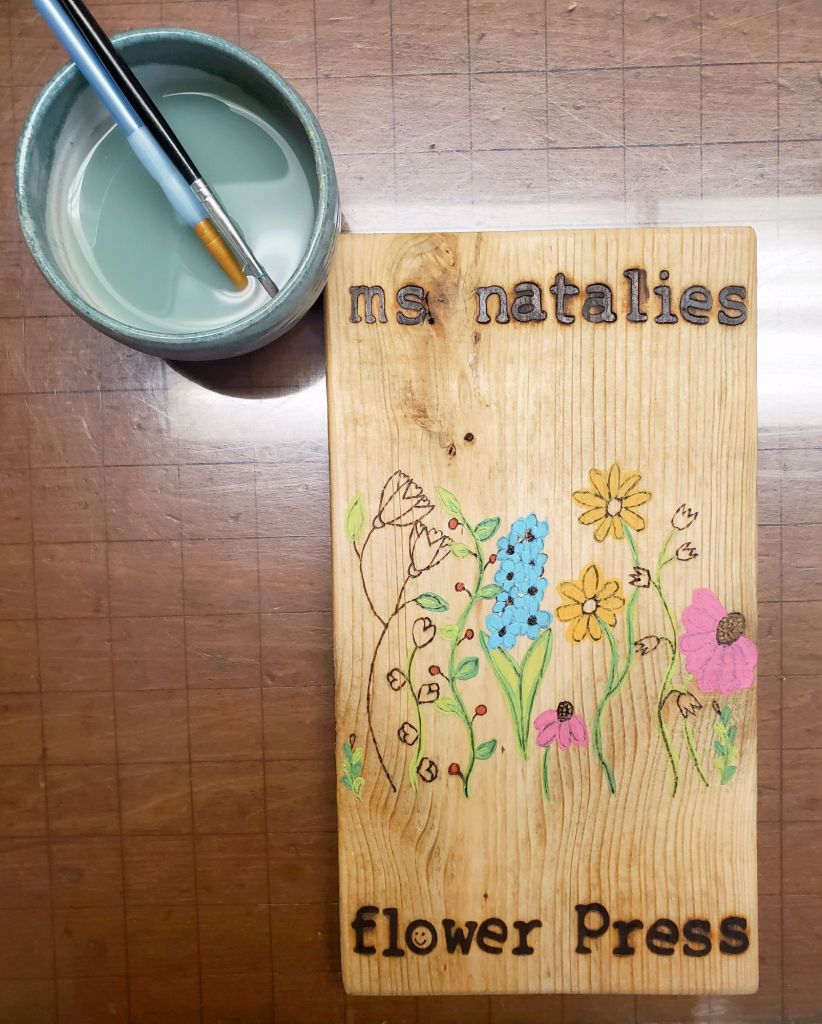
Handmade Flower Presses
Sewn items (Ella)
Homegrown Flower Bouquets
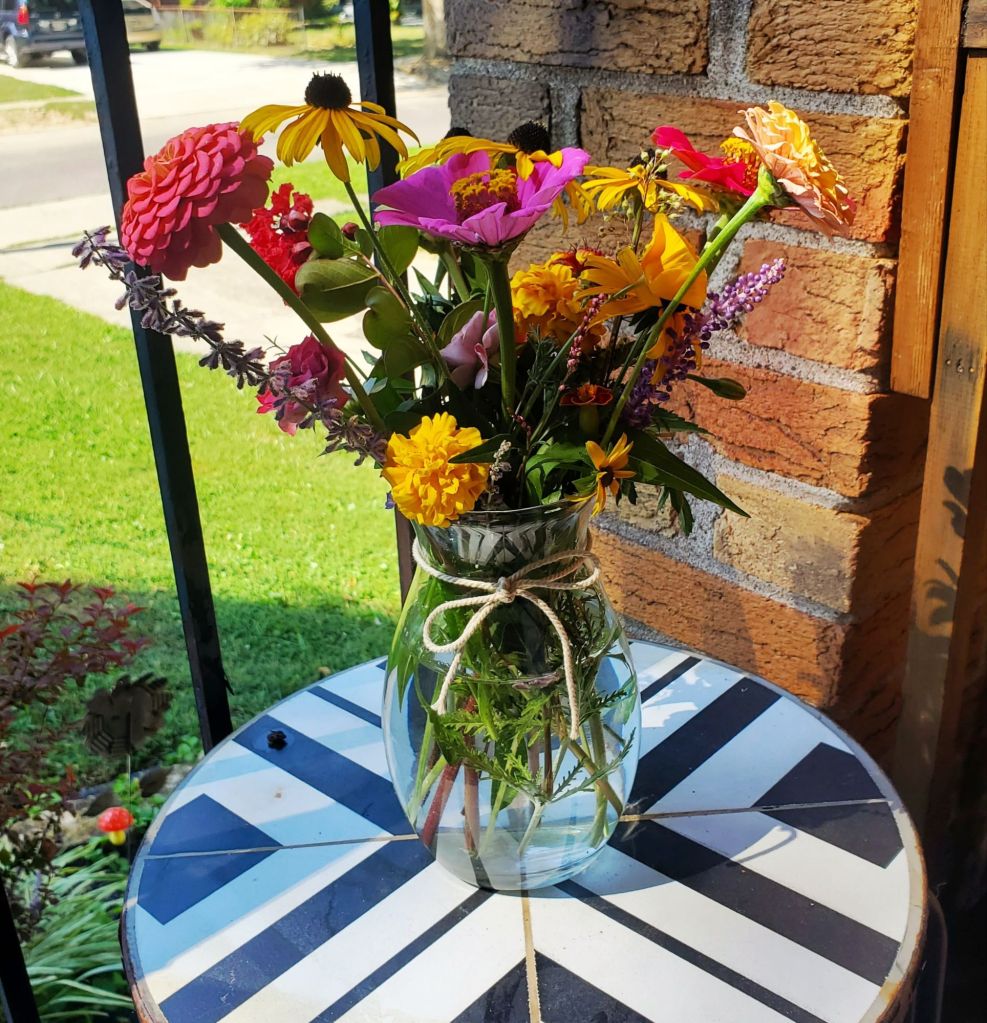
These are examples of a few of our bouquets we created last year – I wish I had taken photos of every one we made. This year we have expanded our gardens and have already added much more variety of flowers. We will continue to add to our gardens throughout the season.
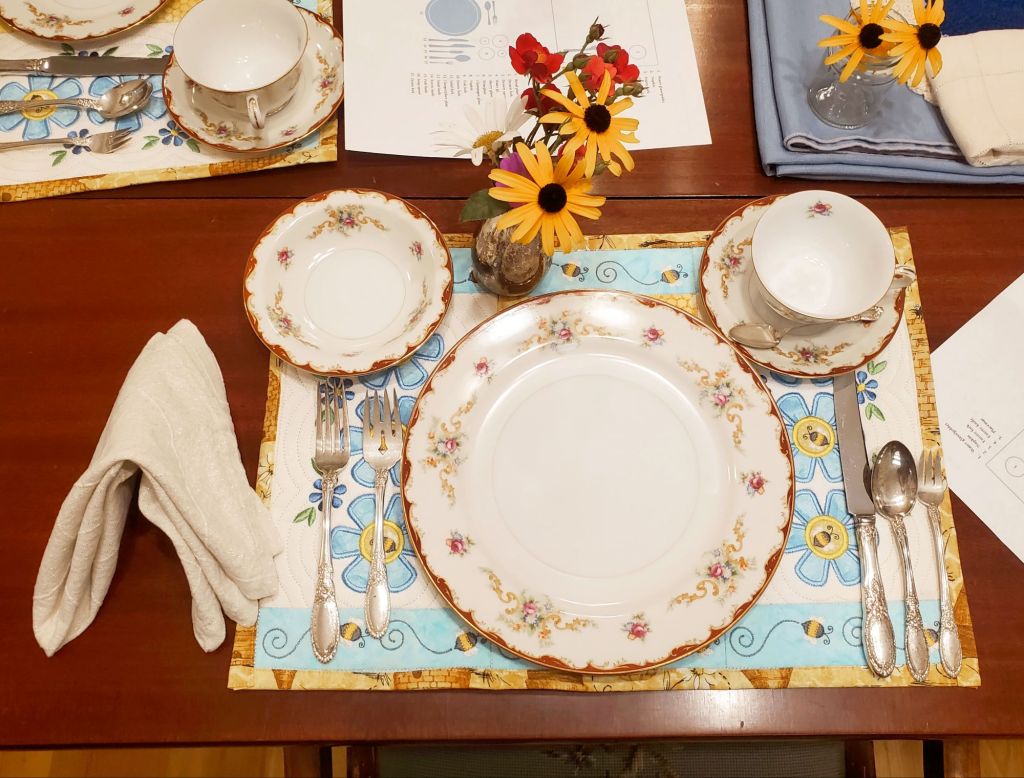
The girls will be selling different size bouquets including adorable mini size ones! Mini size are best for personal place-settings, but also perfect for little hands who loves flowers like their moms!
We took a class on floral arrangements through another one of our homeschool programs, Grace Girls. We are really excited to use the skills we learned to better arrange our bouquets this year.
Flower Presses
These flowers presses were designed by me, but are still good examples of what the girls will offer. They will only use the straps for their presses since they are a much more kid-friendly option. They will design and paint each press themselves, but any wood burning will be assisted by their dad for safety purposes.
Sewn items
Ella is currently working on sewing our Morozov Mini Market banner for their booths. It is already turning out so cute!
These are a few examples of her past creations. She has specific kids-would-love items in mind that she’ll be making for sale.
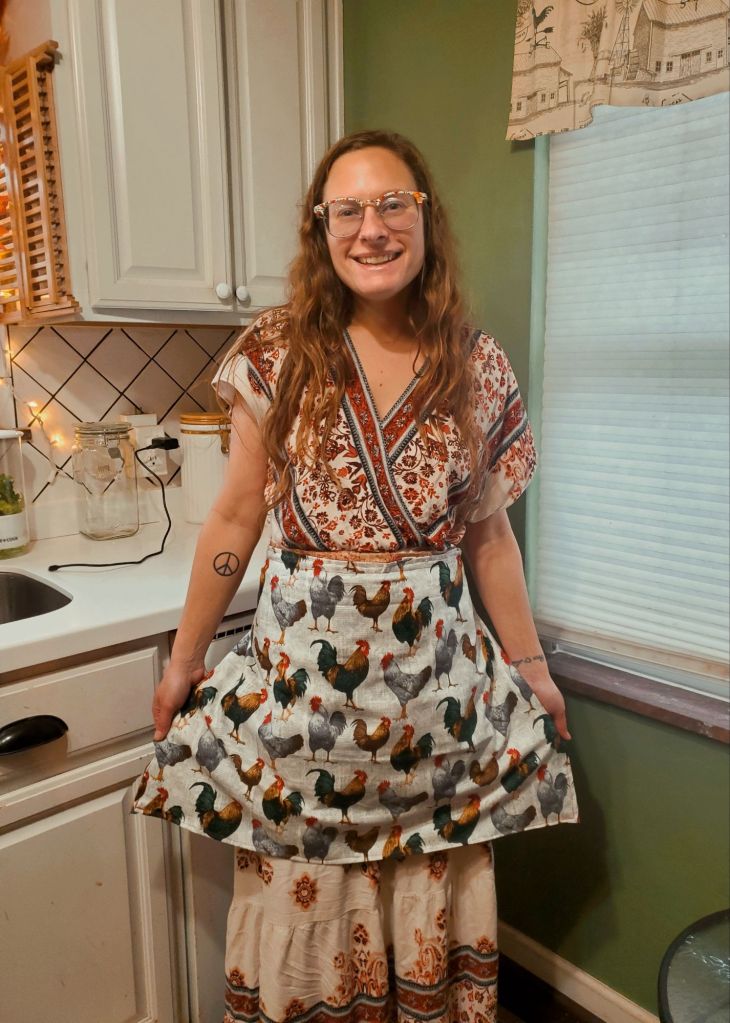
For my birthday she made me an apron to collect our chicken’s eggs in. It is reversible, doubling as a kitchen apron as well. She picked all of the fabric herself and I absolutely love it! The plan is for Ella to sew a few child-size ones to sell at their market. With the major influx of both homeschooling families and backyard chickens, I think this will be a “hot” item. We may not have time to achieve this by our June market, but we will definitely have them for our Fall market – which is actually perfect with the timing of laying for the majority of people who began their chicken journey after the 2025 Bird Flu began.
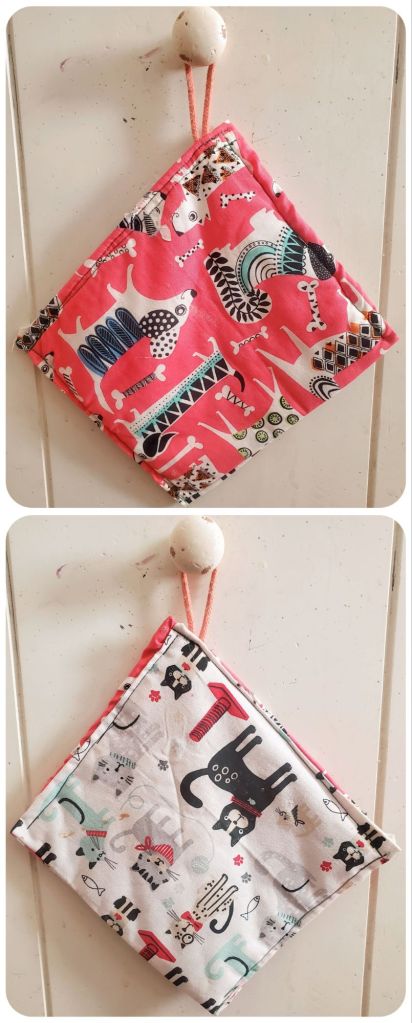
She also made this adorable reversible pot holder. One side has a fun dog fabric while the other side has cute cats.
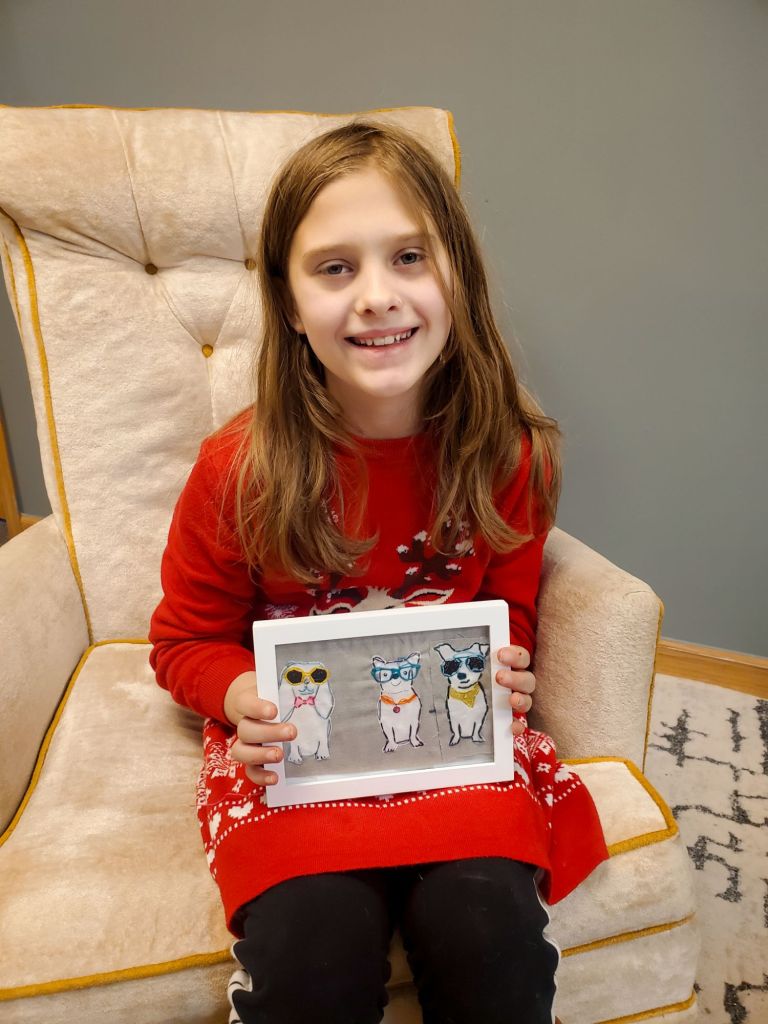
This “Peekable Picture Frame” has always been one of my favorite sewing projects she’s created. When closed, it resembles a quilt square, but when open, it has a beautiful photo that Ella picked out to put in it.
We do take custom orders if our booth dates don’t work for your schedule or you would like something sooner or later! We may be adding more dates this market season🤞🏼.
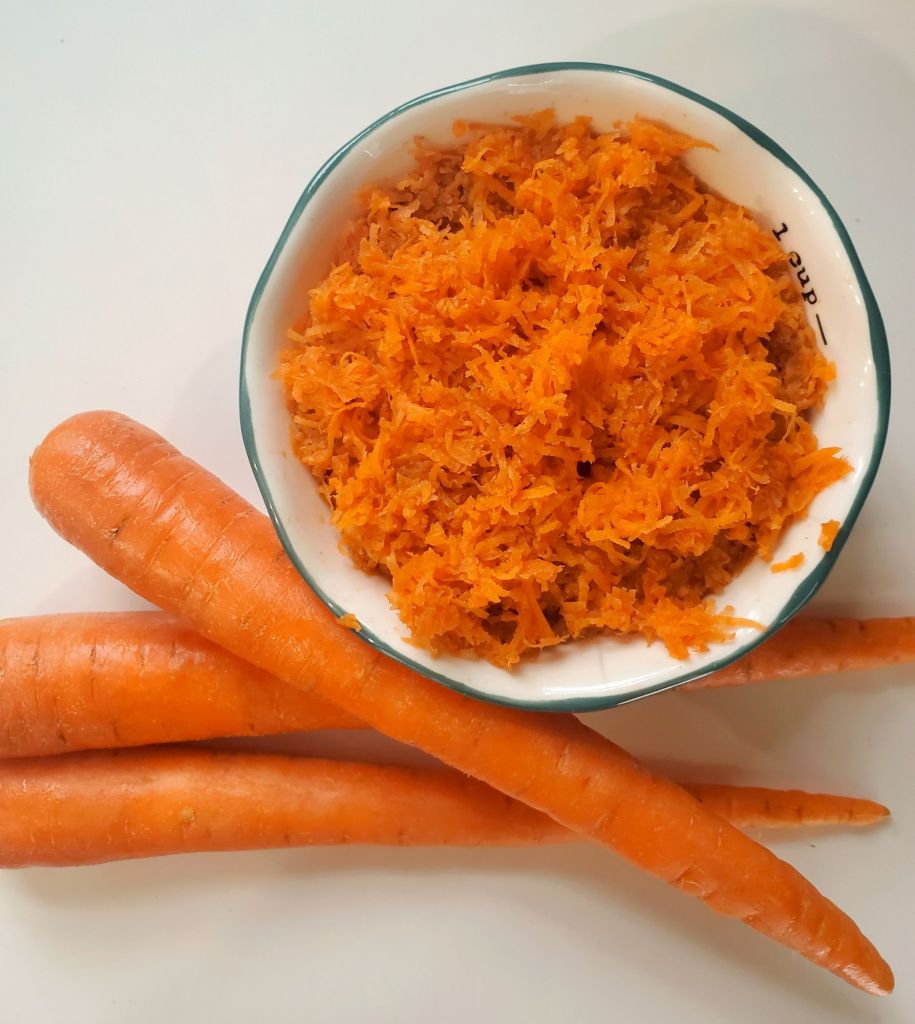
I’m loving this Harvest of the Month campaign! It’s been so fun having a specific produce item to focus on for the month! The month of February was focused around Carrots!
We are a very Holistic Health-oriented family. We believe food and movement are medicine. We also believe you are what you eat (if you eat garbage, you’re going to feel like garbage.) I am hopeful that by sharing these Harvest of the Month unit studies we put together in our homeschool this year will help educate others in the importance of eating healthy & inspire others to intentionally eat healthier too.
Health Benefits
Let’s start out with the health benefits that you will gain by simply eating carrots:
Improves Eyesight, Reduces Macular Degeneration
Anti-aging
Prevents Cancer
Prevents Heart Disease
Strengthens Bones
Promotes Healthier Skin & Hair Growth
Improves Kidney Functions
Prevents Infection
Cleanses Body of Toxins
Improves Liver Functions
Prevents Strokes
Protects Teeth & Gums, Better Breath
Aid Digestion & Weight Loss
Maintain Cholesterol Levels
Minimizes Inflammation
Blood Pressure Regulation
Regulates Blood Sugar Levels
Improves Brain Health & Cognitive Function
Boosts Immunity
Anti-fungal
Antioxidant
Rich in Potassium + Vitamins A & K
High in Fiber, Combats Constipation, Cures Diarrhea
Naturally Boosts Energy
Prevents Diabetes
Increases Sperm Count in Men
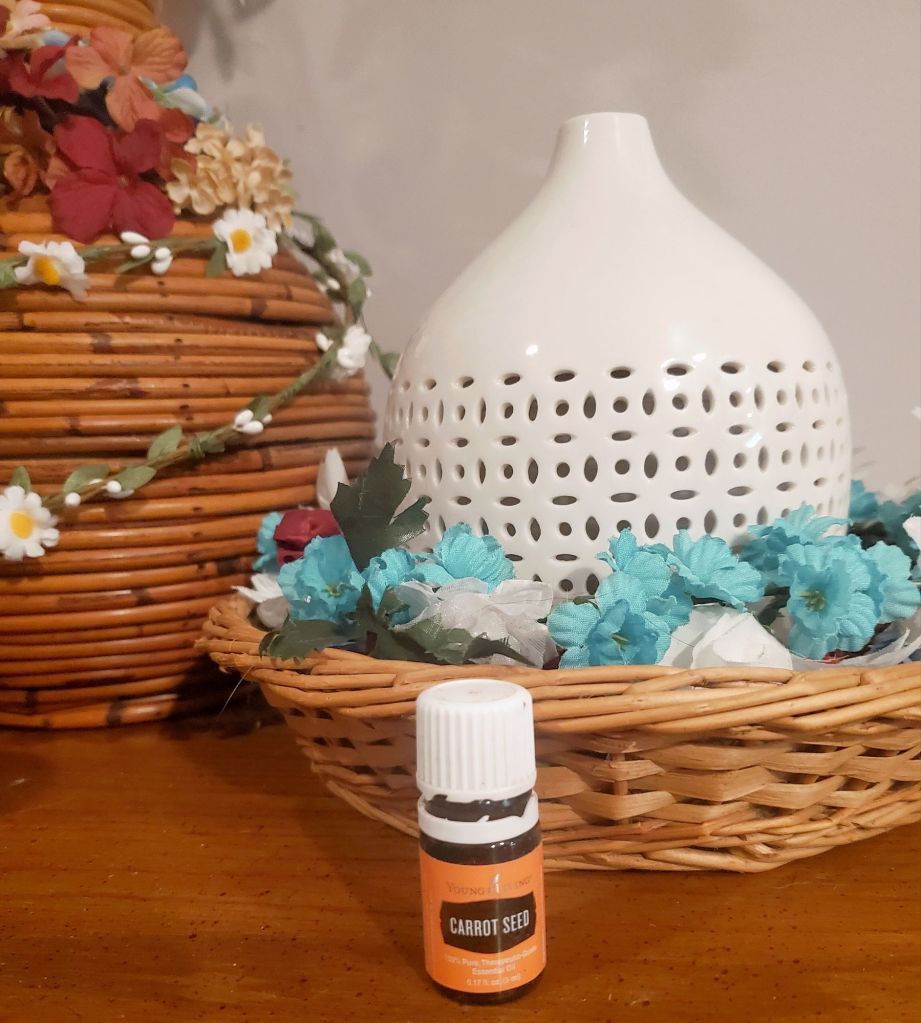
Carrot Seed Essential Oil also has many health benefits, but it is strongly urged to avoid during all stages of pregnancy, as well as by individuals who suffer from epilepsy. As always with Essential oils, make sure you are using a pure & reputable brand (I use Young Living and DoTerra) to get the best results.
Treats Kidney Stones
Treats Jaundice
Aids in digestion, gas, and bloating
Improves breast milk production
Stimulates lymphatic system
Relives menstruation pain
Relieves muscle pain
Stimulates appetite
Healthy Skin and hair
Antioxidant
Heals abscesses, wounds, and other skin disorders
Treats ulcers
Improves liver and gall bladder disorder
Relieves stress & anxiety
Improves respiratory function
Recipes
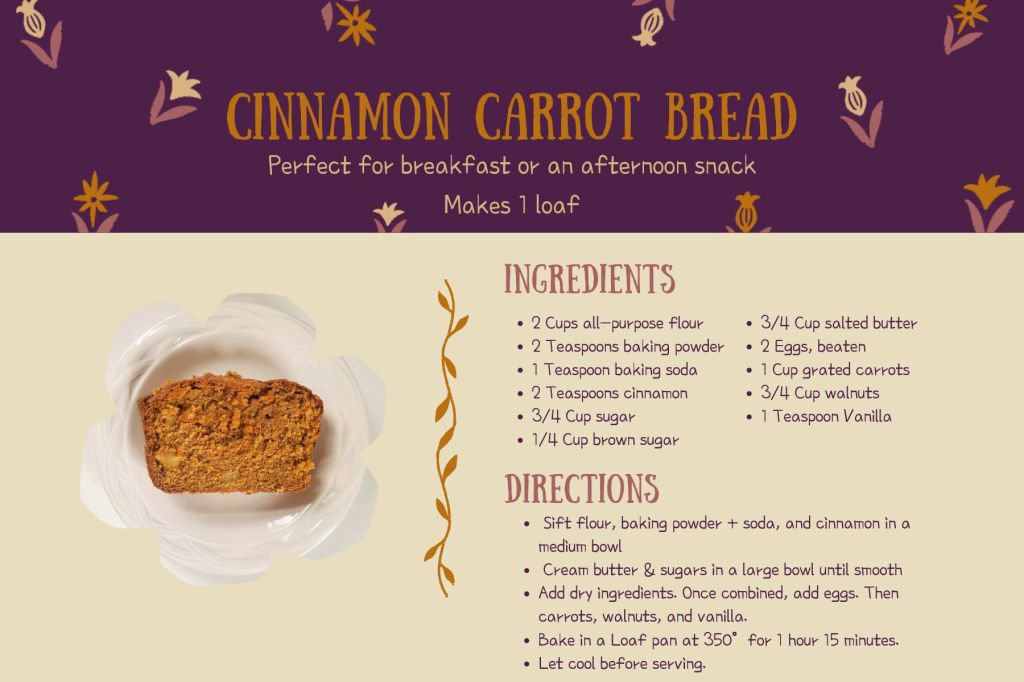
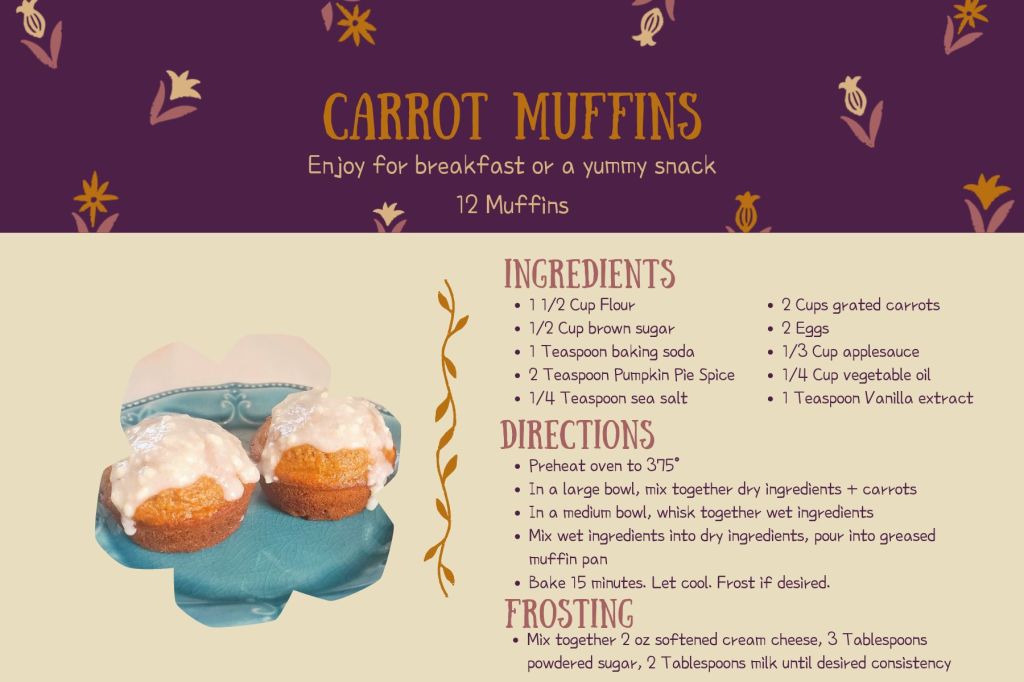
I made cute little recipe cards of the Carrot recipes we made this month so you could print & put together your own Harvest of the Month Cookbook as I continue to post each month!
🥕 Cinnamon + Carrot Bread 🥕
🥕 Carrot Muffins 🥕
🥕 Ukrainian Carrot Sandwiches 🥕
These were hands down my favorite of all the Carrot foods we made. They were SO good! I’ll definitely be making this again soon for Easter and many more meals after that! We really liked these a lot.
🥕 Baked Carrot Fries 🥕
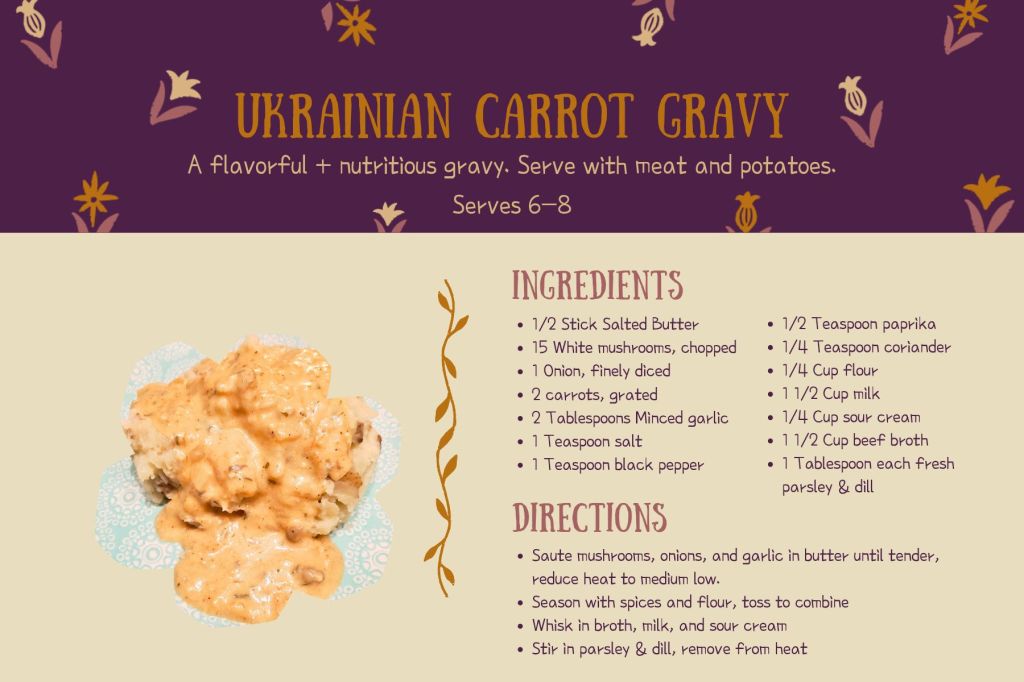
🥕 Ukrainian Carrot Gravy 🥕
We all really loved this gravy and have officially made it our “house gravy.” My husband and I agreed that it was better than any form of gravy we have ever tried before!
🥕 Carrot Pudding 🥕
🥕 Carrot Cake 🥕
I prefer my carrot cake to be packed with thickly shredded carrot pieces, nuts, & Golden raisins, but kids don’t particularly feel the same, especially if they haven’t already been introduced to these textures in cake before so I made a kid-friendly & sensory-friendly carrot cake with no nuts, no raisins, and carrots grated so thinly they resemble more of a carrot “pulp” than a carrot, so that you would never know carrots were included. It’s lovely, but come Easter, I’ll be making it the way we love it – full of texture.
Educational Resources
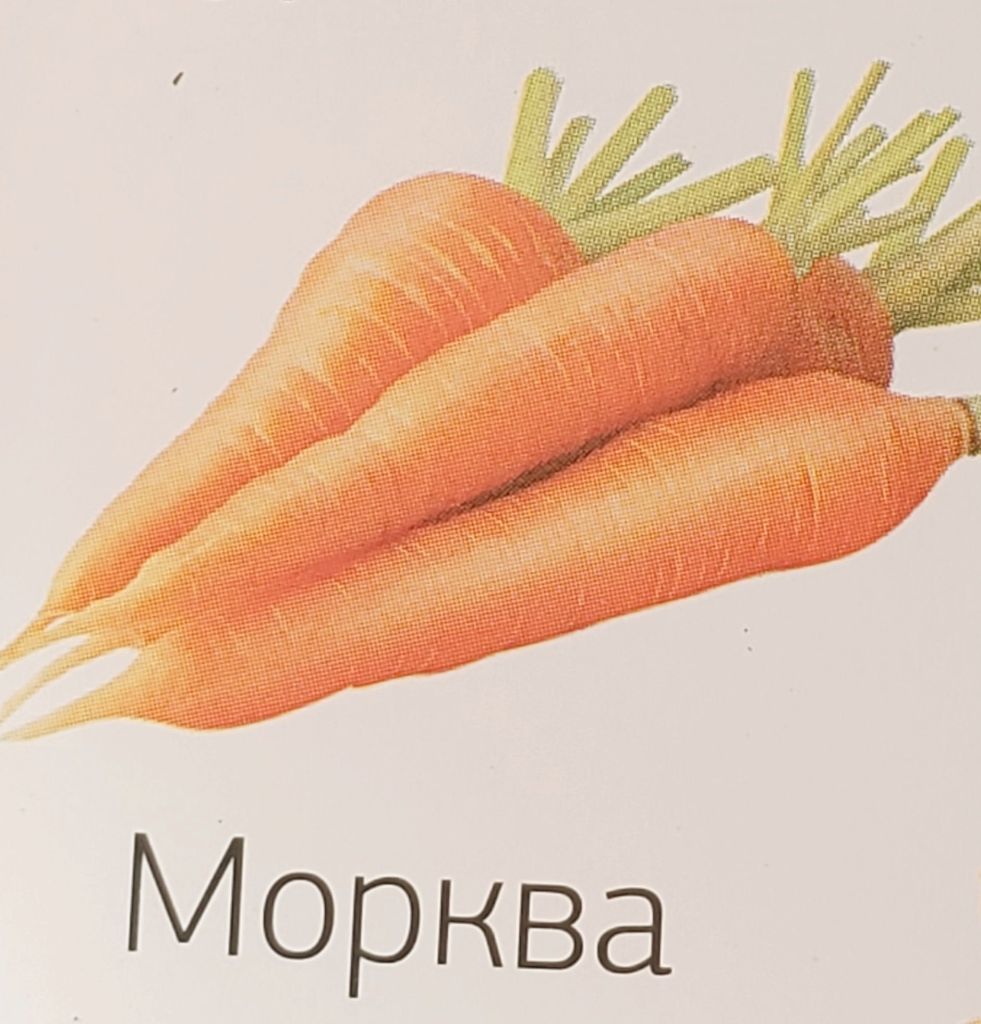
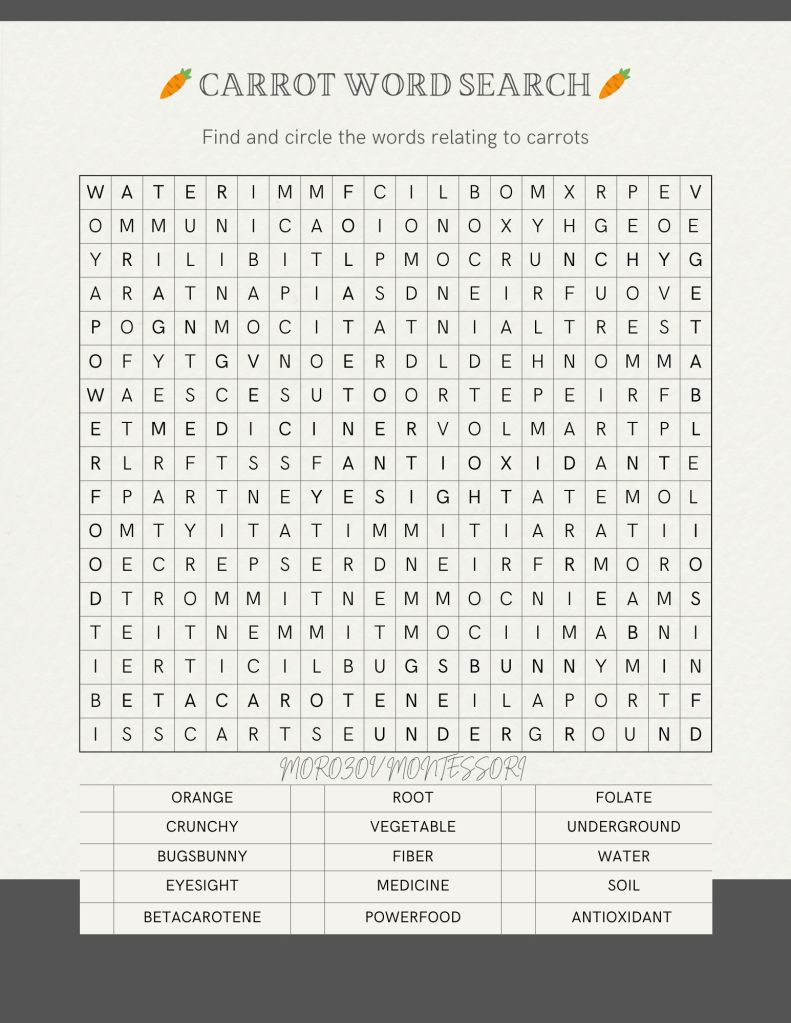
I had a lot of fun creating this Facts About Carrots printable! I feel like we learned a lot about carrots that we didn’t previously know!
These were a few of our books that we used to learn new information about carrots:
Activities
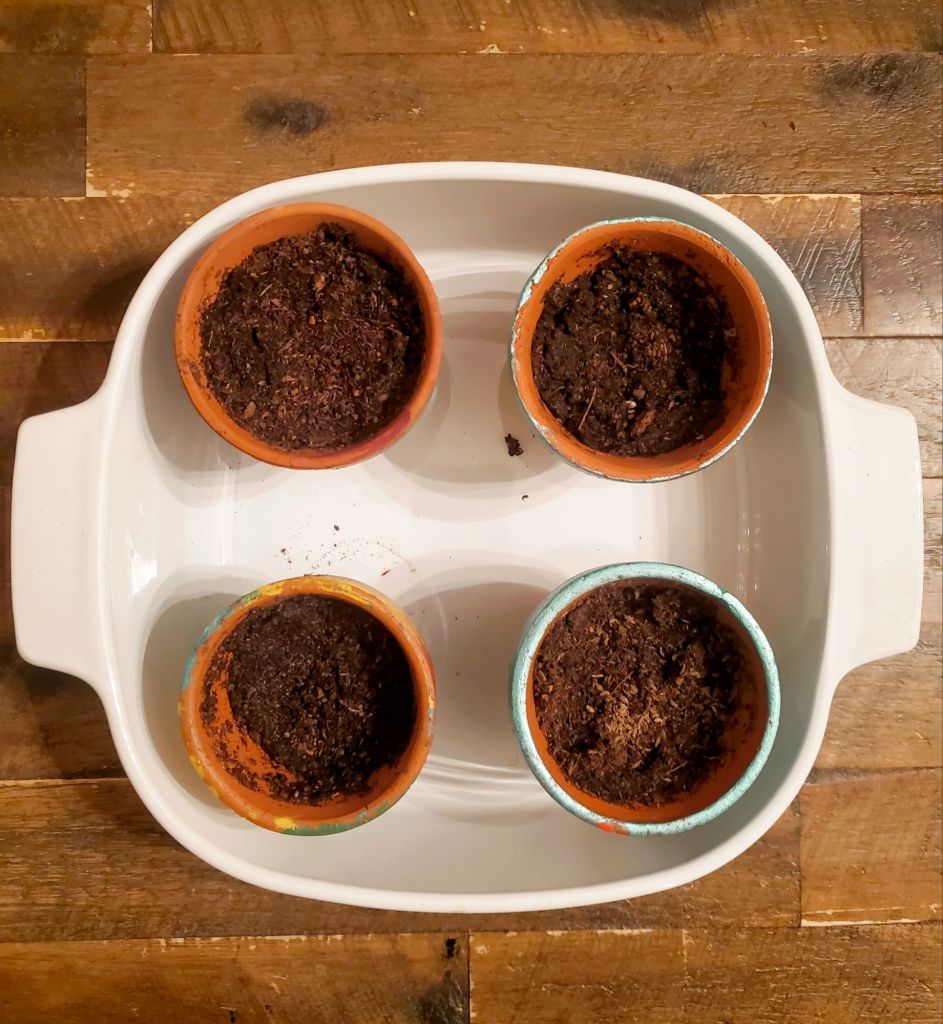
🥕 Planting Carrots For Our Garden.
We painted mini terracotta pots and planted carrot seeds inside.
We learned that carrot plants have roots, stems, leaves, and flowers. We eat the root part of the plant which grows underground. The seeds are planted underground, but can also be started inside 4-6 weeks before spring. Once the carrots are fully grown, flowers form on the carrot plant. The seeds fall down and replant themselves. It takes about 100 days for a carrot to grow.
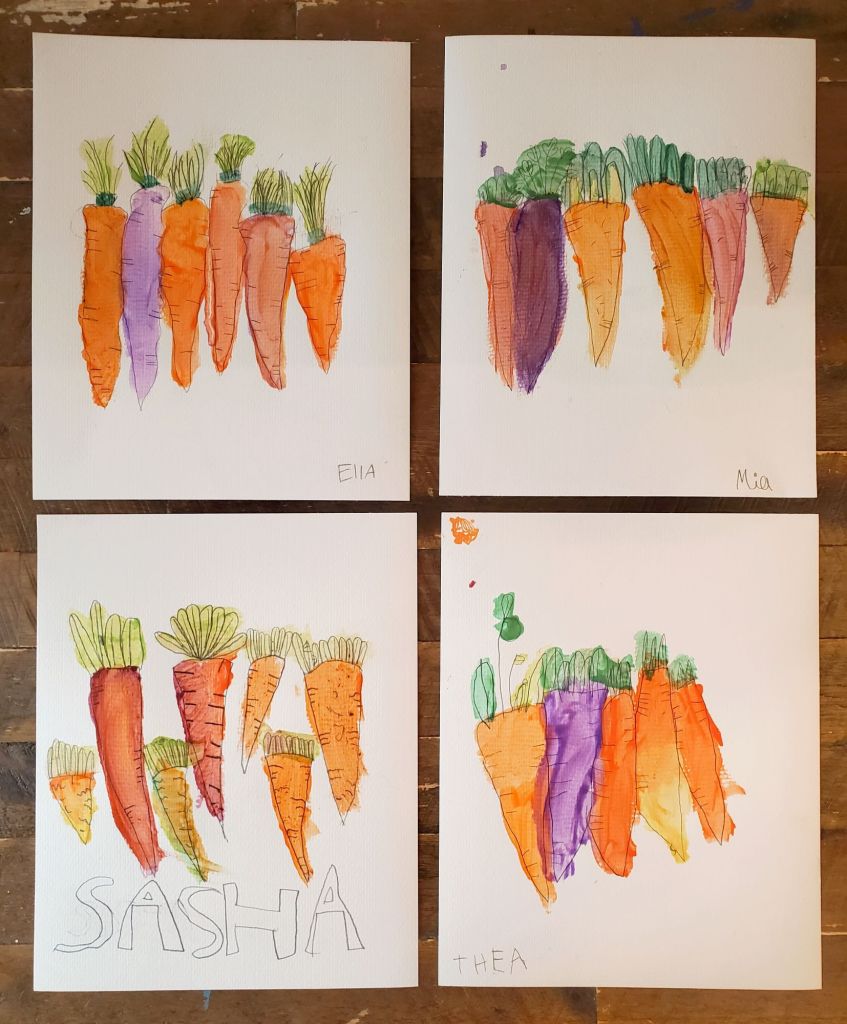
🥕 Watercolor Painting Carrots.
Each of the girls painted carrots using watercolor paints. I asked them to draw their carrots first and then paint them. I think they turned out really good! I asked Moses to participate in this activity, but he chose not to.
🥕 Scrap Fabric Carrots
We used fabric and ribbon scraps to make carrots on canvas banner pieces. Each person got their own banner piece to work on. Moses, again, chose not to participate. I am in love with the way it turned out and it will be hung for at least through Easter.
DaytimeNighttime
I’m honestly really proud of our first Harvest of the Month unit. We learned a lot about carrots that we didn’t previously know and fell in love with recipes we may not have tried. We are excited to work on our March Harvest plans!
We started off our week with a homeschool field trip at Civic Garden Center for their Lil Sprouts program.
This is a FREE group that meets every 2nd and 4th Monday of the month from 9 – 10:30 am, designed for children ages 3-8. Each meeting includes different themes and activities. This week’s theme was birds.
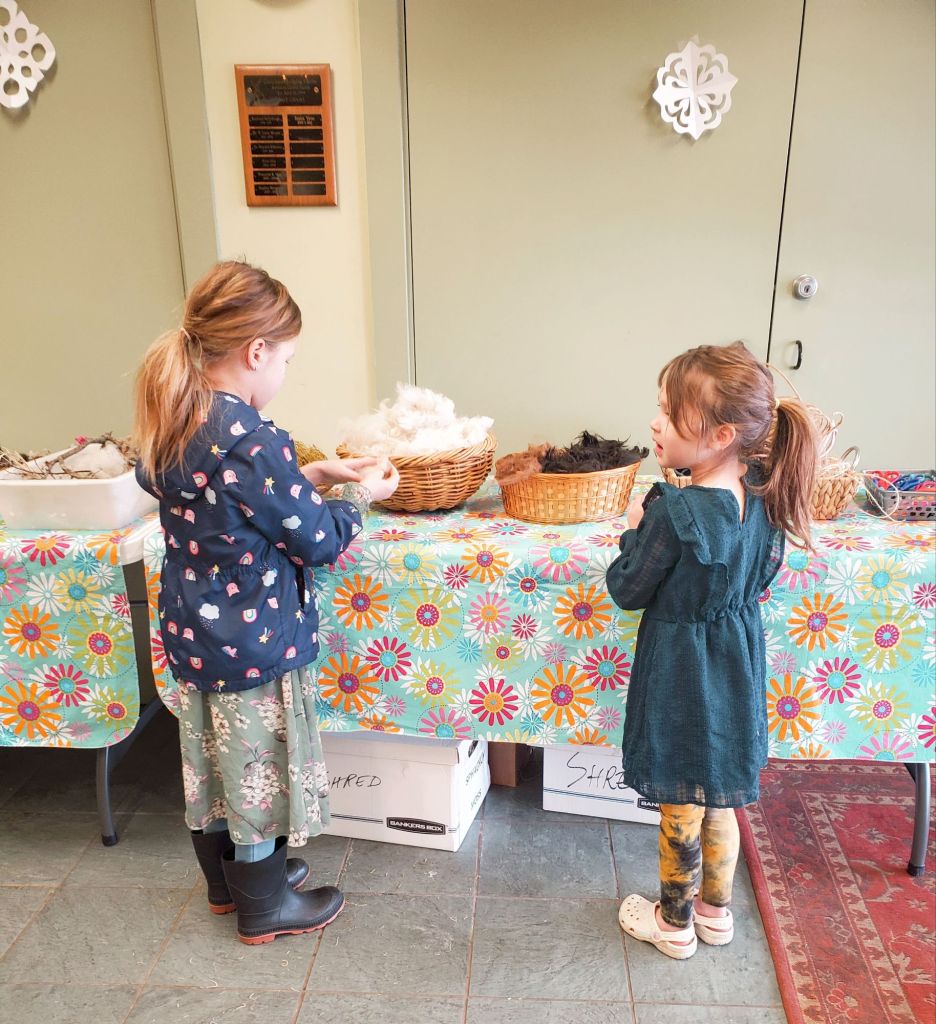
First, we made Nesting Balls for the birds who are beginning to return from their winter migration as the seasons are preparing to swift. These balls are meant to be hung outside for birds to use the organic materials to build their nest.
There was a table set up with the materials we could use to make our balls. All material were organic and safe for the birds. The girls used a lot of moss, alpaca fur, and twigs.
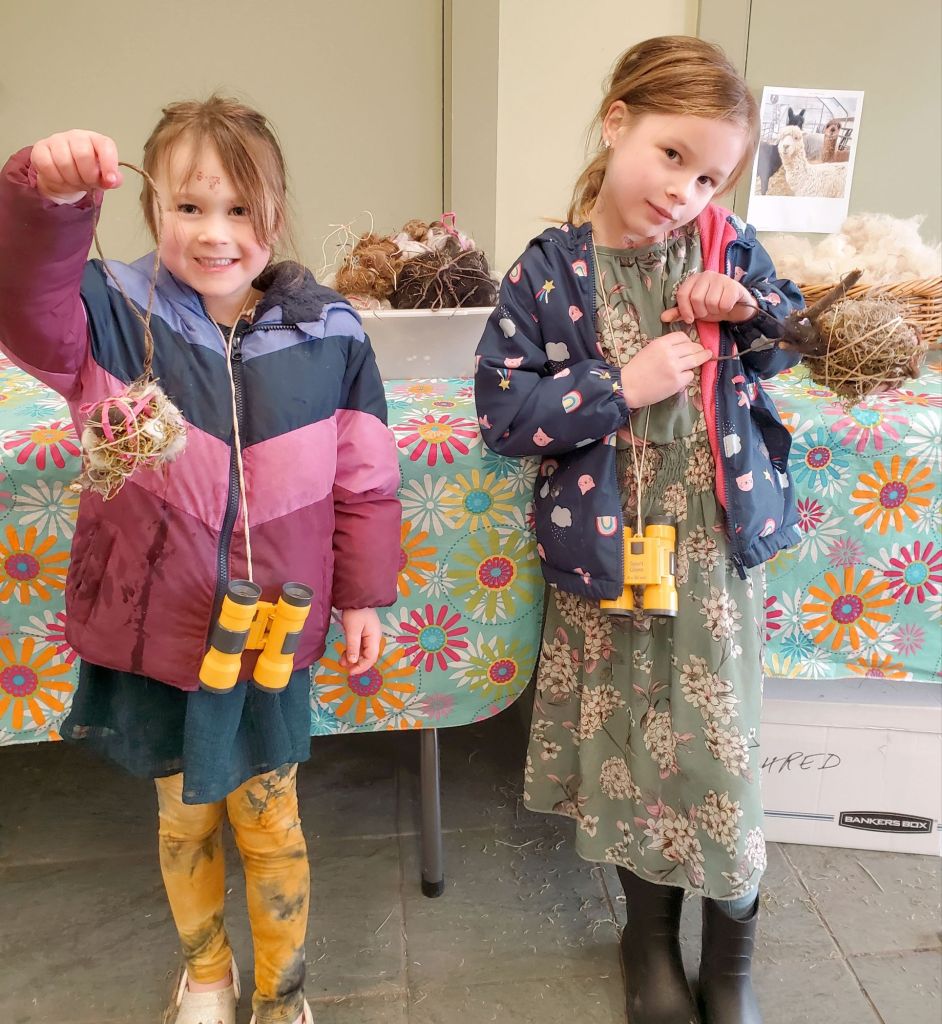
Don’t mind the “temporary” tattoos that just won’t wash off 😅
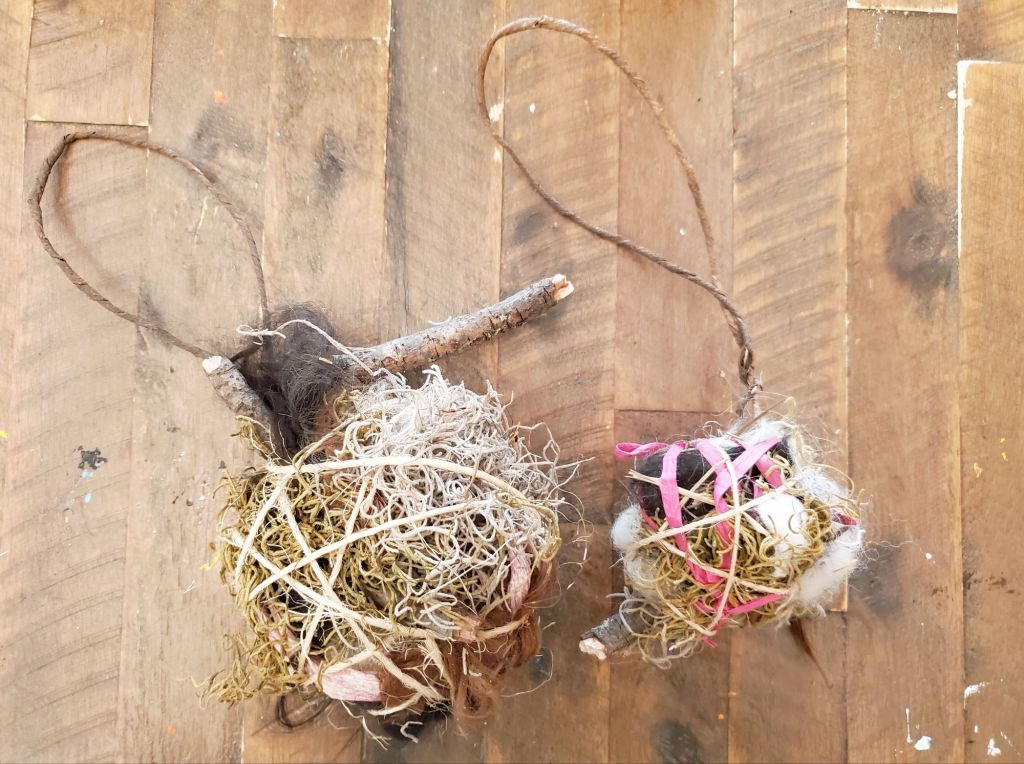
We took the materials back to our table and made our balls. I love how they turned out! And they will be perfect to hang near the birdhouses the girls have all been working on over the winter. We hope that the birds love them too!
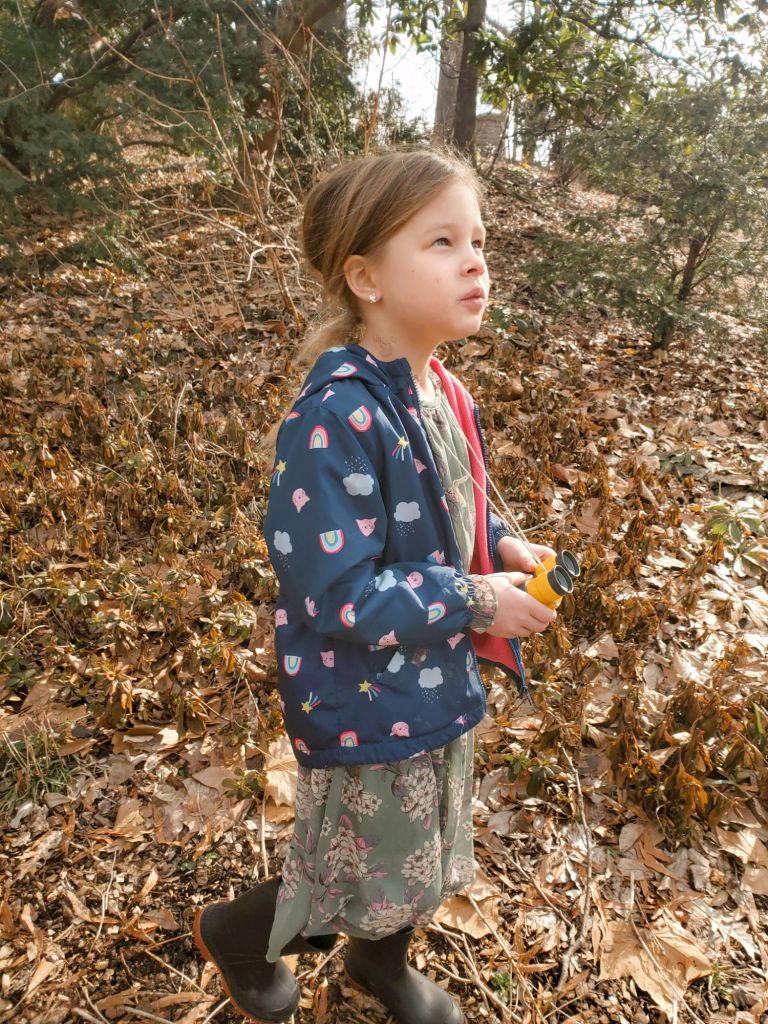
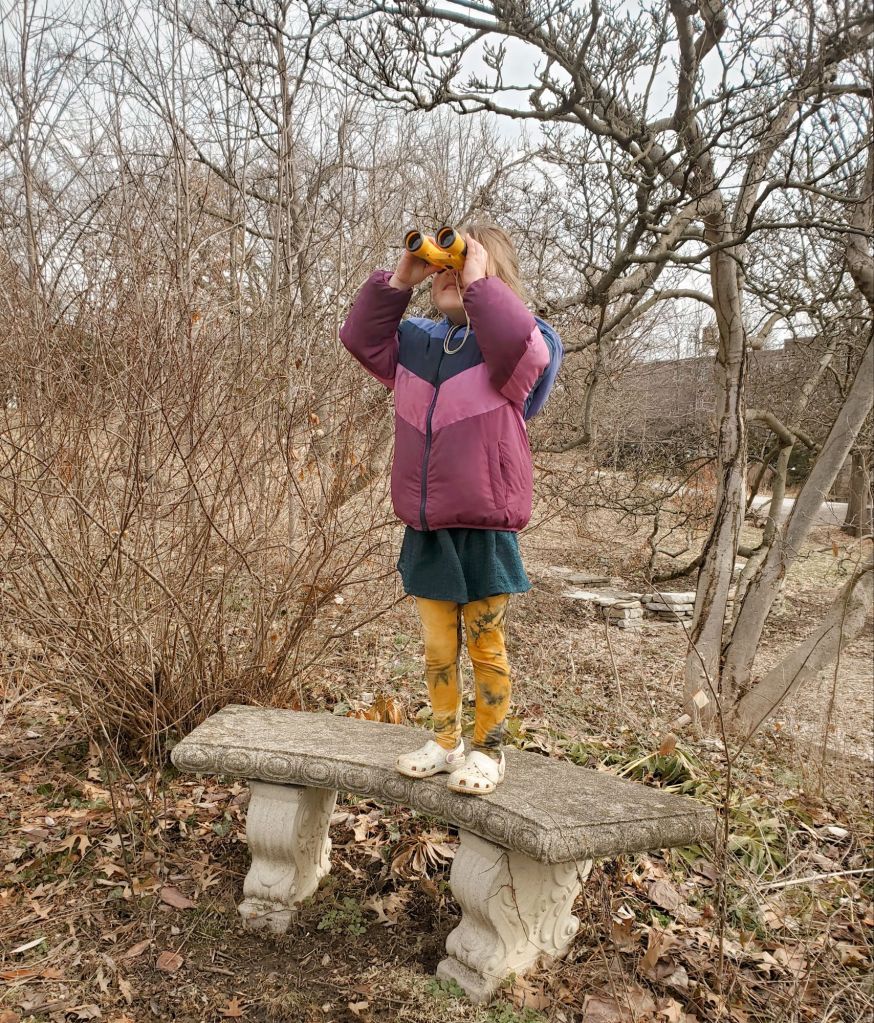
After we made our Nesting Balls, we listened to the story The Tiny Seed by Eric Carle. Then we went outside for a group Nature Hike to listen & watch for birds with binoculars. We used the Merlin App on our phones which luckily all participating families already had downloaded!
Sasha had the great idea of looking on the cable wires near the main road to see birds. She said she thought of that because that is where all the birds always are. We were able to spot an American Robin because of her idea! We also heard a Cardinal – our state bird – but we didn’t see it.
We were really excited to see flowers beginning to bloom. We named different flowers that we saw – at least 4 different kinds! We were particularly excited about the abundance of Crocus! We also checked on the tree sap collected in buckets through a tap that they set up in a past Lil Sprouts meeting. We got the taste the fresh sap which surprisingly had very little flavor prior to being boiled.
We finished our hike and headed back to the classroom to close out our meeting. I am so glad that we found this place! Sasha has already asked to begin regularly attending the Lil Sprouts classes and Moses said he wanted to come to our next meeting as well. I’m excited to find out what the next theme will be!
The Civic Garden Center also offers a variety of really neat & useful classes for both adults and families. There is also a super cute gift shop with all kinds of items for your gardening needs! I’m really glad that we found this place & am excited to incorporate it into our regular homeschool schedule!
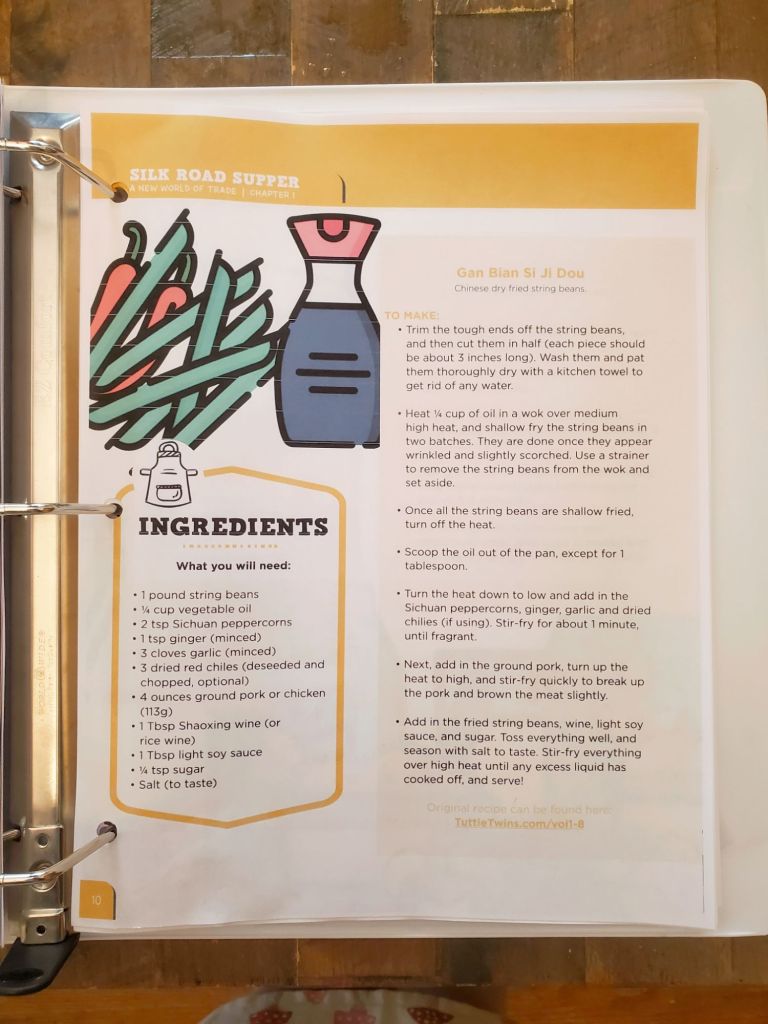
In our History course, we are currently learning about The Silk Road. This week’s assignment is making a Silk Road Supper.
We were given 4 courses (appetizer, main dish, side item, and dessert), Ella & Mia each chose two courses that they were going to be responsible for. I also chose 2 of my own to contribute to our feast. Ella chose a main & side, Mia chose the appetizer & dessert. They prepared their grocery lists by writing down the ingredients from each recipe that we needed to buy, leaving out the items that we already have.
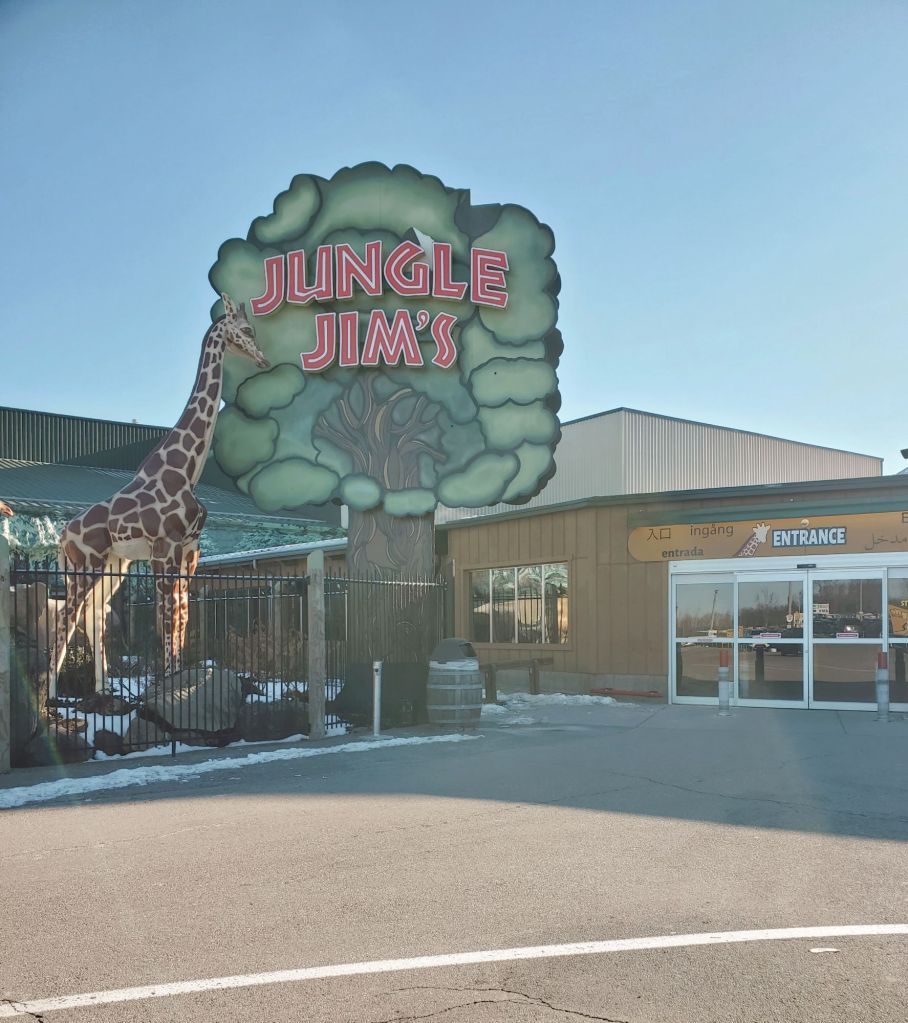
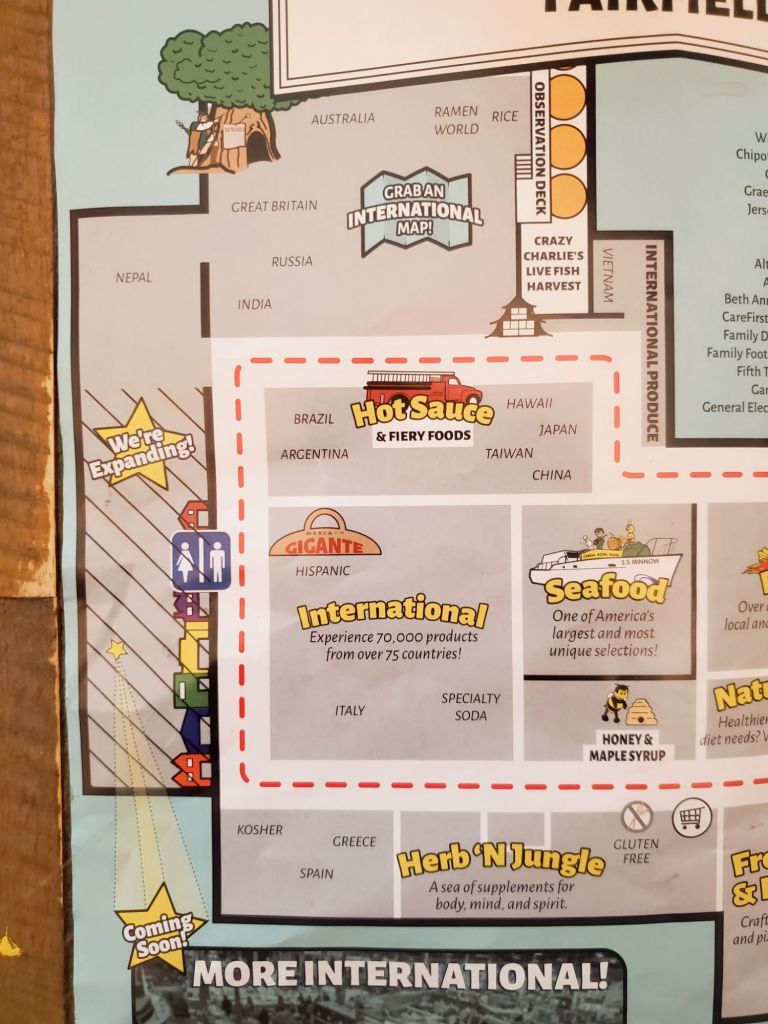
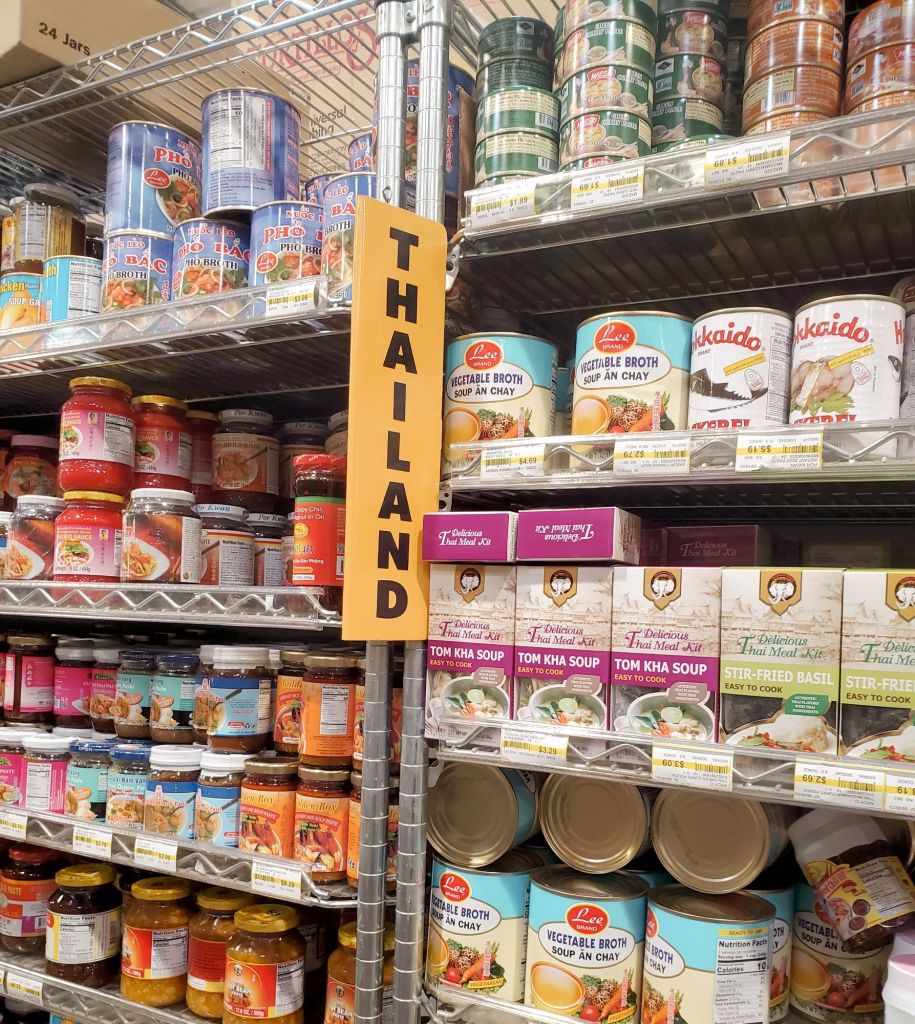
Our next step was to go on a field trip to the grocery store and learn where the ingredients that we needed were sourced from, then buy the items that we need for our supper. We are fortunate to live where there is not only one Jungle Jims, but two, and either one a 20 minute drive for us. We decided that was the perfect store for this assignment.
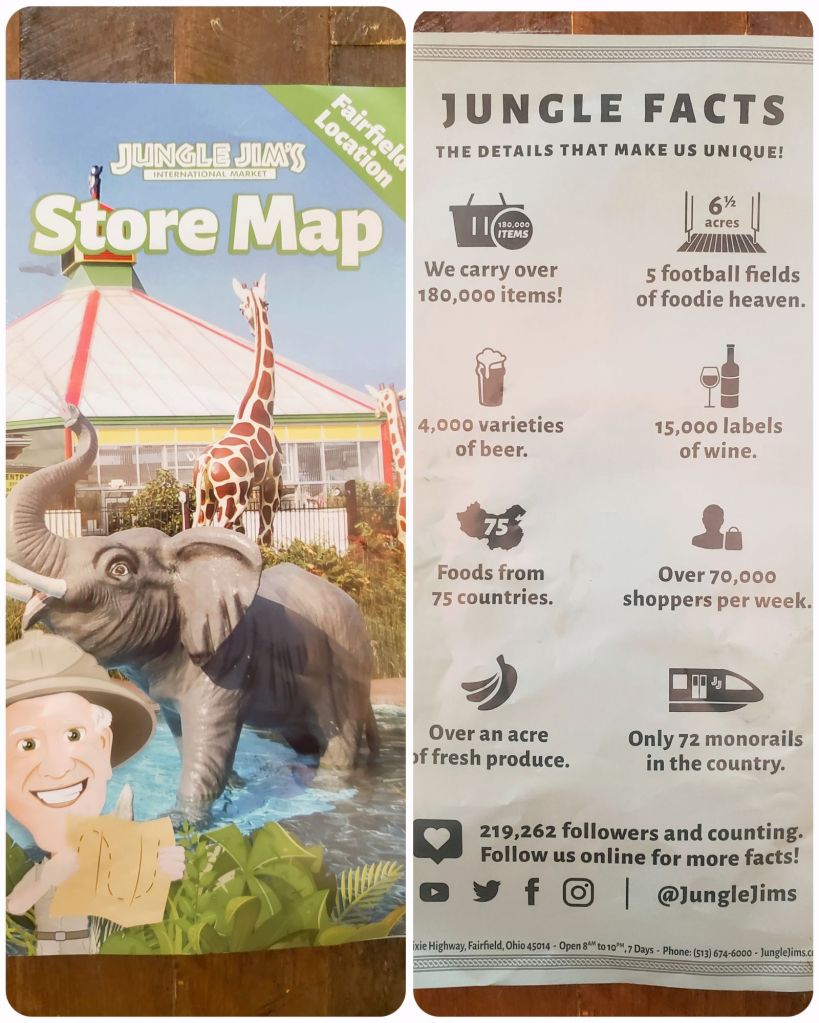
For my friends outside Ohio, Jungle Jims is an International Grocery Supermarket. It’s sort of like an amusement park, but for foodies. It’s currently listed as the largest grocery store in the world. People travel from all over the country to visit this market.
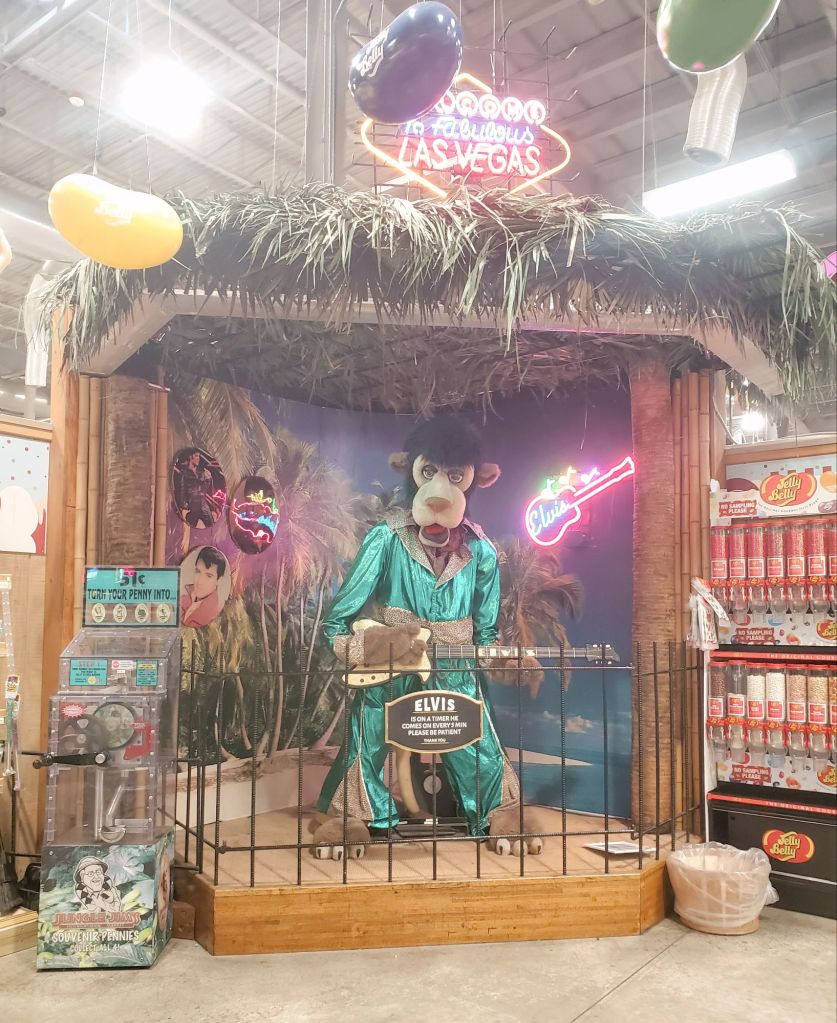
You can shop international products by country. You can watch old-time animatronics perform or join eating contests. You can hang out at the lounge for beer & wine testing, or check out a cooking class at The Cooking School. Visit their Award Winning Restrooms. Watch the Jungle Jims Story in the theater or take a guided tour.
There is nearly every type of food you can think of from all over the world. It’s really fun to find new things to try that you otherwise would never know even existed.
It really is such an interesting place. If it’s your first time going, plan on spending at least half of your day there, if not more. It’s very easy to overspend though, so we try not to spend too much time browsing when we go. There’s a huge shopping area for kitchen tools & accessories, and a giant old school toy section filled with toys from my childhood & collectors items.
The surrounding Plaza around Jungle Jims has plenty of food options if you’ve made yourself hungry while shopping and want to grab a bite to eat on your way home. Don’t leave without checking out the renovated Monorail that once upon a time in Cincinnati history rode guests through King’s Island’s now-retired Lion Country Safari exhibit.
They are currently expanding the jungle, and I’m sure, surrounding Plaza as well. I’m so excited to see what all is added!
A Silk Road Supper
• APPETIZER: Bruschetta al Pomodoro • (Mia)
I feel like this was a strange dish to be included in a Silk Road Supper, considering tomatoes are native to the Americas & did not reach Italy until the mid-1500s… after the Silk Road had already closed nearly 100 years prior… but we’re all about celebrating other cultures so we kept it on the menu 🤷🏼♀️. It was delicious though, so we’re glad we did!
• MAIN DISH: Middle Eastern Market Chicken • (Ella)
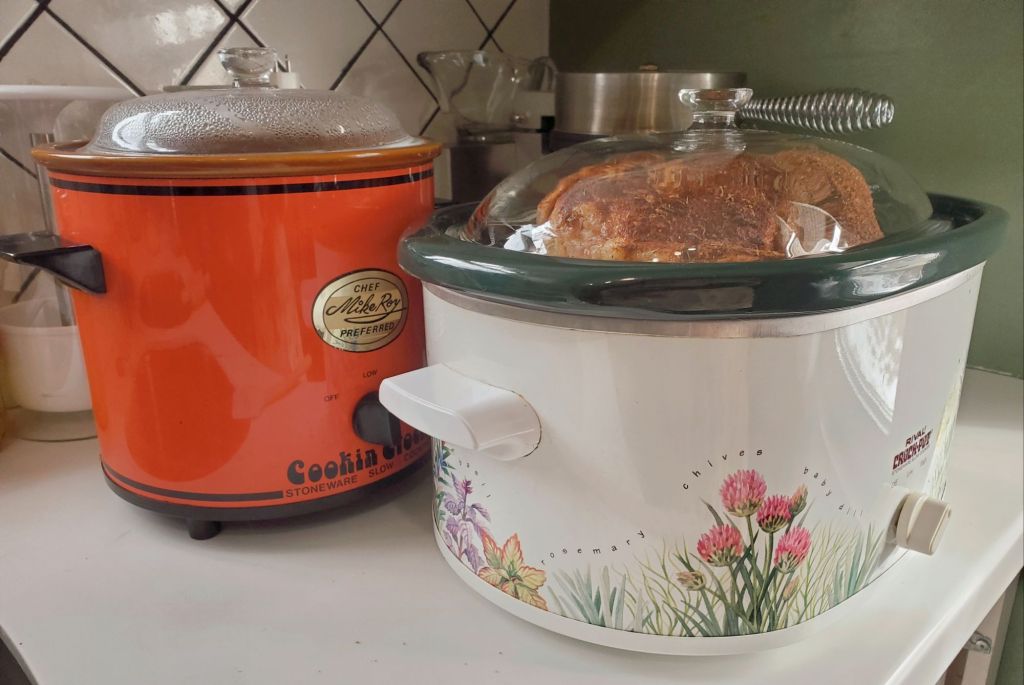
I forgot to get a picture of the finished dish, or of what it looked like packed inside a pita wrap – we were all so hungry by the time dinner was served. Ella made a rotisserie chicken in the crockpot. She’s getting really comfortable working with meat.
I made a Ready to Cook vegetarian legume “chicken” for myself. I don’t usually buy these products, but I wanted to try to get as close to the menu as possible for myself and I’m glad I did. It was so delicious.
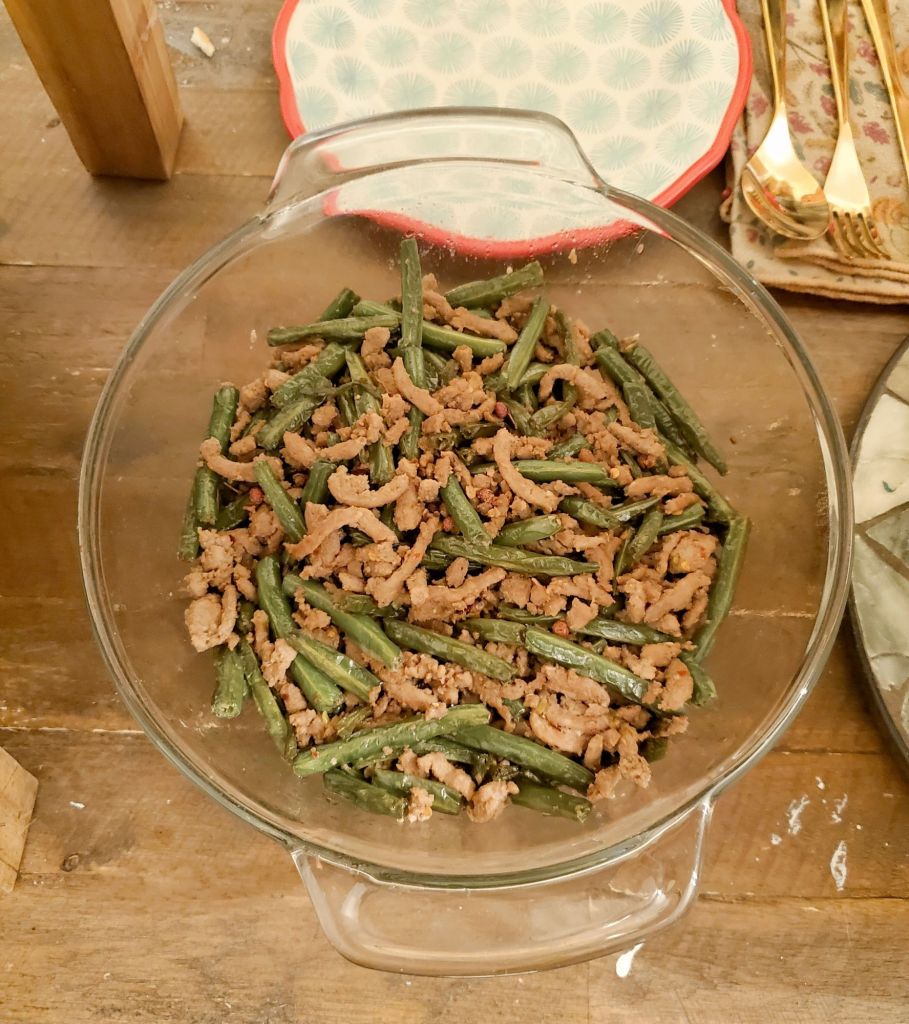
• SIDE ITEM #1: Gan Bian Si Ji Dou • (Ella)
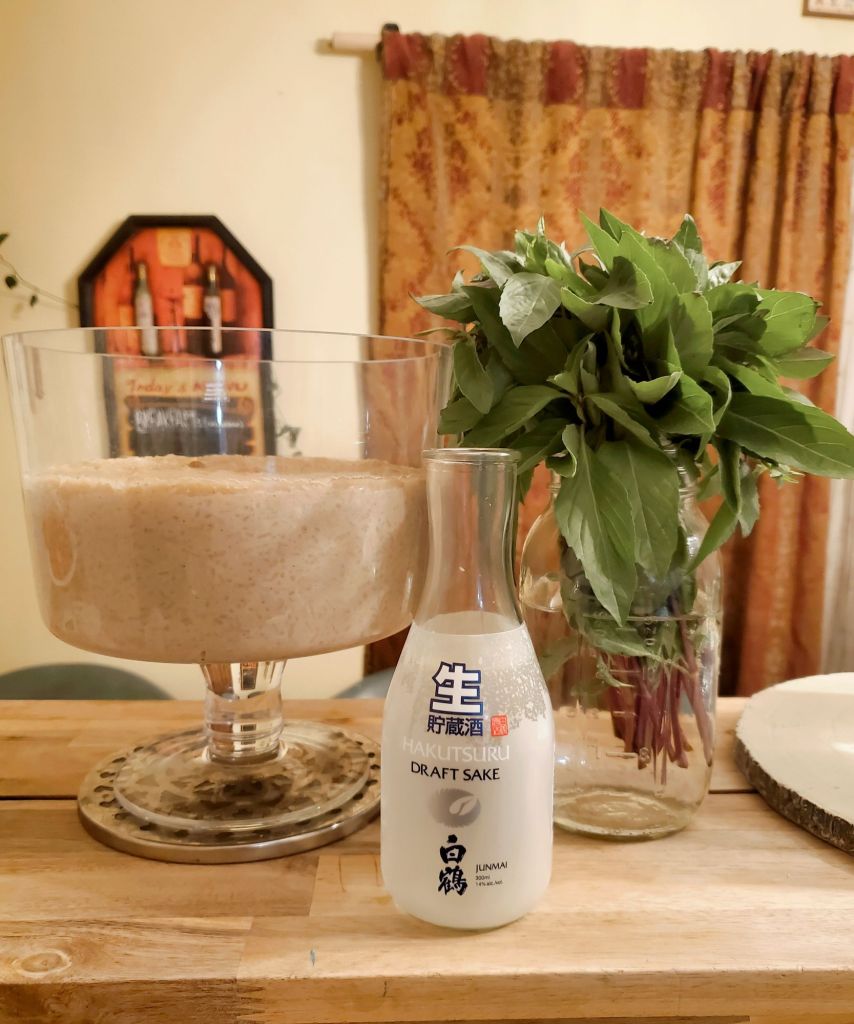
Ella chose to use ground turkey for this recipe. I think we would remake, omitting the meat all together. We substituted regular rice wine because I could get it at my work with my discount. Dad got to drink the rest. He said it tastes like if vodka & wine had a baby.
• SIDE ITEM #2: Biryani Rice • (Mom)
This ended up being Sasha’s Favorite dish. I’ve never had it so I have nothing to compare to. My husband said it tasted “Middle Eastern.” I think that means it turned out right? It was what I was aiming for. I thought it was good, and had the most pleasant aroma. I caramelized the onions all day (10 hours) in a crockpot and I feel that they still never got very caramelized. They smelled amazing while they cooked, though.
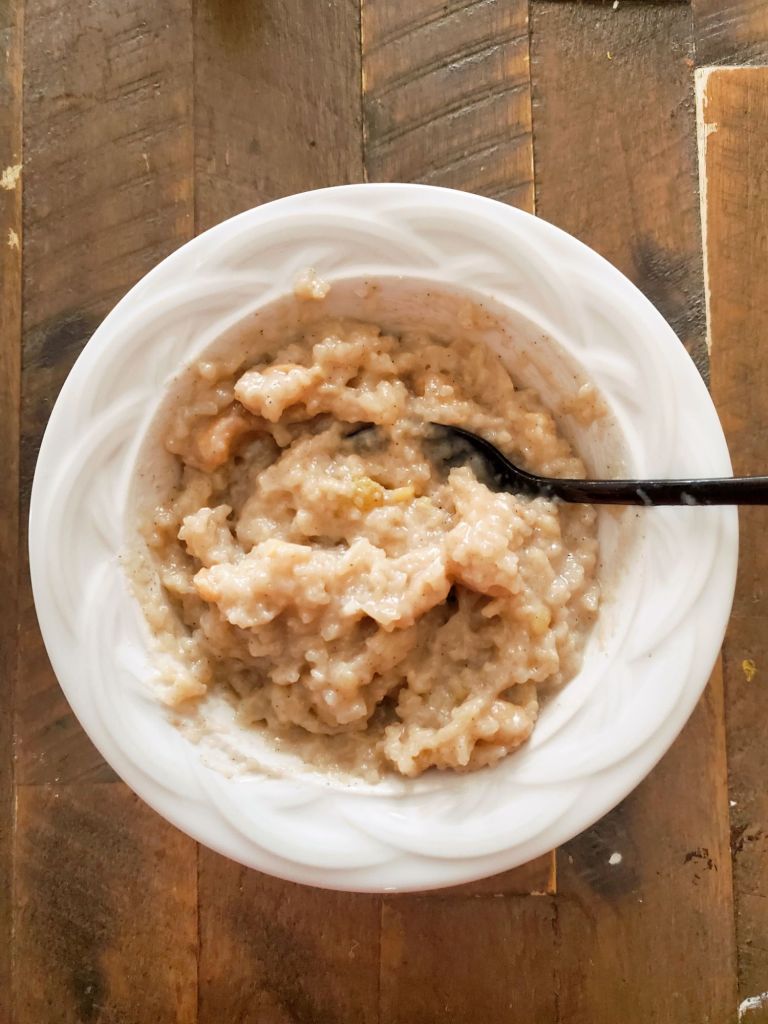
• DESSERT: Sakkarai Pongal • (Mia)
I liked this a lot. It sort of reminded me of Ukrainian Kutya, but thinner. The kids were disappointed, they thought it tasted more like Oatmeal than pudding and saw this as more of a breakfast option than a dessert option. I could see that. I did have some with breakfast the next morning and can confirm, it’s awesome for breakfast.
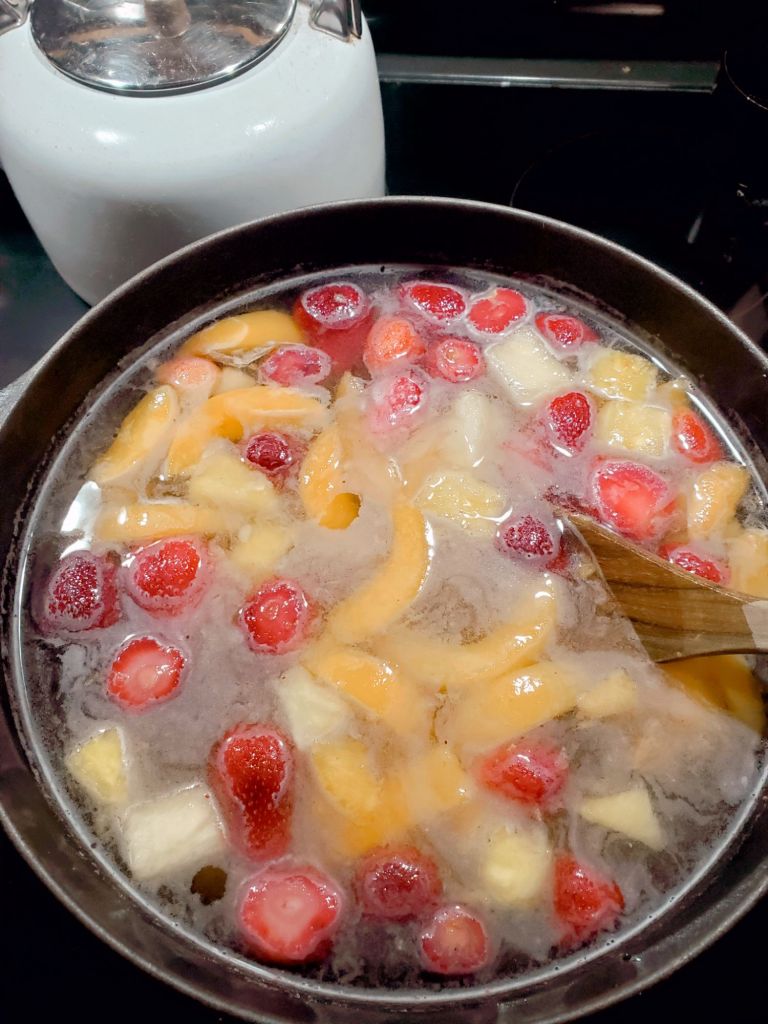
• BEVERAGE: • Ukrainian Kompot (Mom)
My reason for choosing this (besides that it is so delicious) is that the Silk Road branched off to the Black Sea, off the coast of Ukraine, which has always been a vital trading route, even today. China has been working on re-opening the Modern Silk Road that Ukraine aims to be a destination on for trade. Ukraine’s land is known to be the most furtile in the world and is known to be The Bread Basket of The World from their major exportation of wheat, soy, barley, maize, and sunflowers. Plus, we’re Ukrainian and I’ll use anything as an excuse to celebrate our culture!
Kompot is so great because in the summer you can serve it cold, then in these cold, winter months you can serve it warm like tea. It’s a great way to use up fruit that is turning mushy, but not yet moldy. Instead of throwing those away, place them in a gallon-size ziplock bag in your freezer. Once you fill a bag, use it for making Kompot to cut down on food waste & enjoy a delicious fruit drink.
I hope you enjoyed our Silk Road experience as much as we did. We thought it was a lot of fun and very hands on & family-oriented which we love. I am really grateful that we were able to take a field trip to such a large international market for this project. I’m also grateful for being presented with new foods to try and having children with an adventurous & open eating palate who are always willing to try new foods with me.
Our friend, Mrs. Mary, invited us out to her beautiful property in Indiana today to go on a Homeschool Nature Hike. They are also into the Charlotte Mason lifestyle.
Her property is that of my actual dreams. She has a beautiful farmhouse filled with all vintage and handmade items. It is so cozy, especially this time of year with her fire burning in their fireplace in the living room. It has the sweetest laundry/mud room with beautiful natural sunlight and vintage & natural decor that would make doing laundry feel so peaceful and joyous.
Out back is a huge nature trail through the woods, a barn, a pond with a beautifully crafted gazebo, large garden spaces, so much room for kids to run around and play endlessly outside. Best of all, her son’s family lives next door. That’s exactly what we dream of!!!!
Before our hike, she fed us all lunch and shared her personal Nature Journal with us, then gifted us each our own new nature journal to get started with! That was so sweet & thoughtful of her to do for us. We peaked through the book that she uses as inspiration for how to create a Nature Journal.
She has been doing this for many years and has fond memories recorded from trips she’s taken where she was able to experience the wonders that the Creator has freely given us. I love the idea of looking back years from now with special memories brought flooding back by pages recorded in our Nature Journal. She’ll jot down notes or places she made an entry. She adds poems & words of wisdom in her journal. I love that.
Afterwards, we took a lovely hike through the woods, then came back and let the kids play outside for awhile. They have a great fairy garden that the kids loved. I’ll have to put a lot more work into ours. They have such cool Nature in their own backyard! That is exactly what I long for in our forever home. We left in time to miss the dreaded Friday late afternoon traffic, came home and the girls took time working on their first Nature Journal pages.
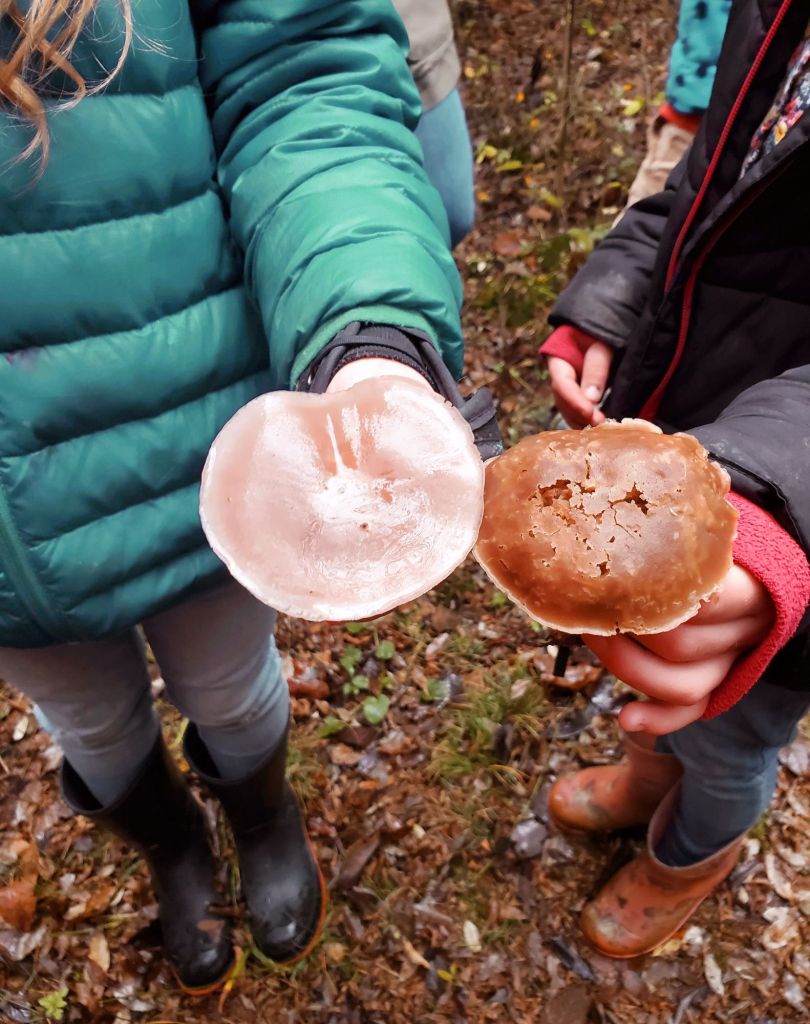
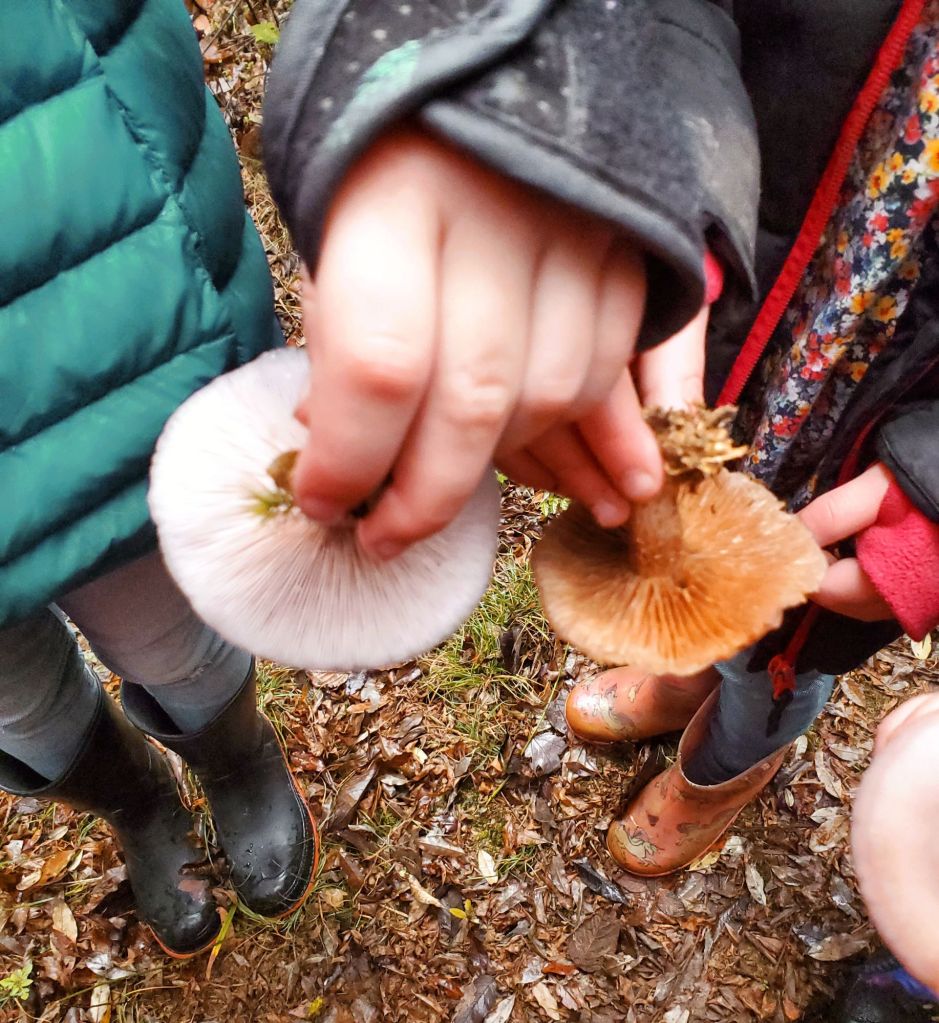
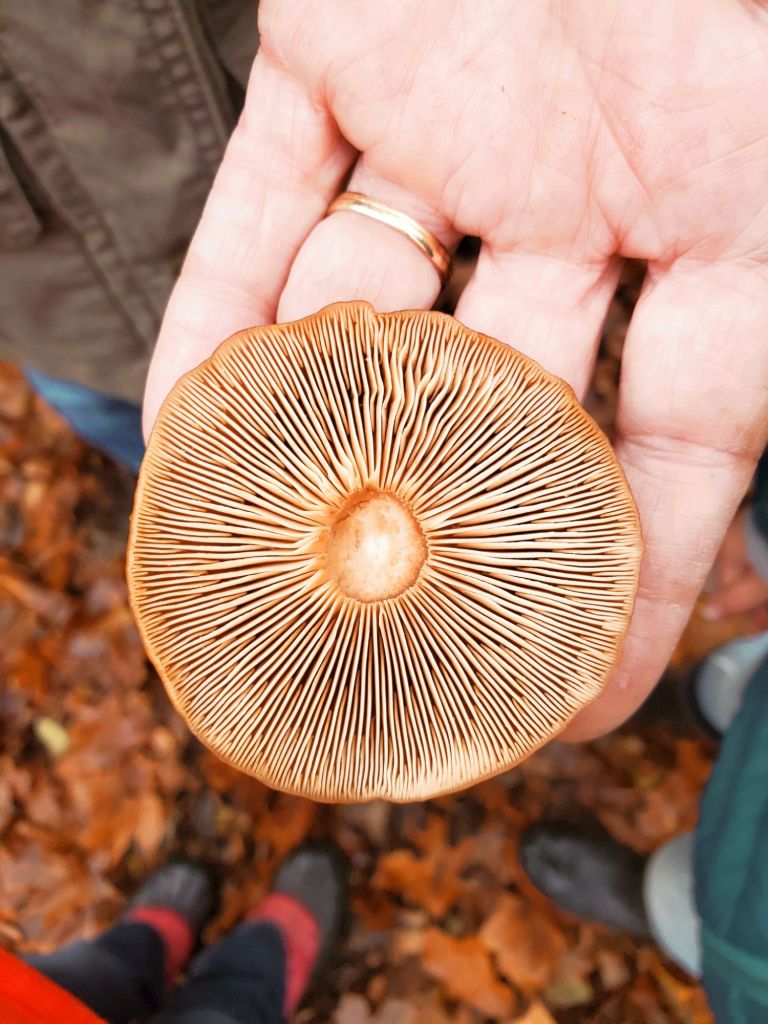
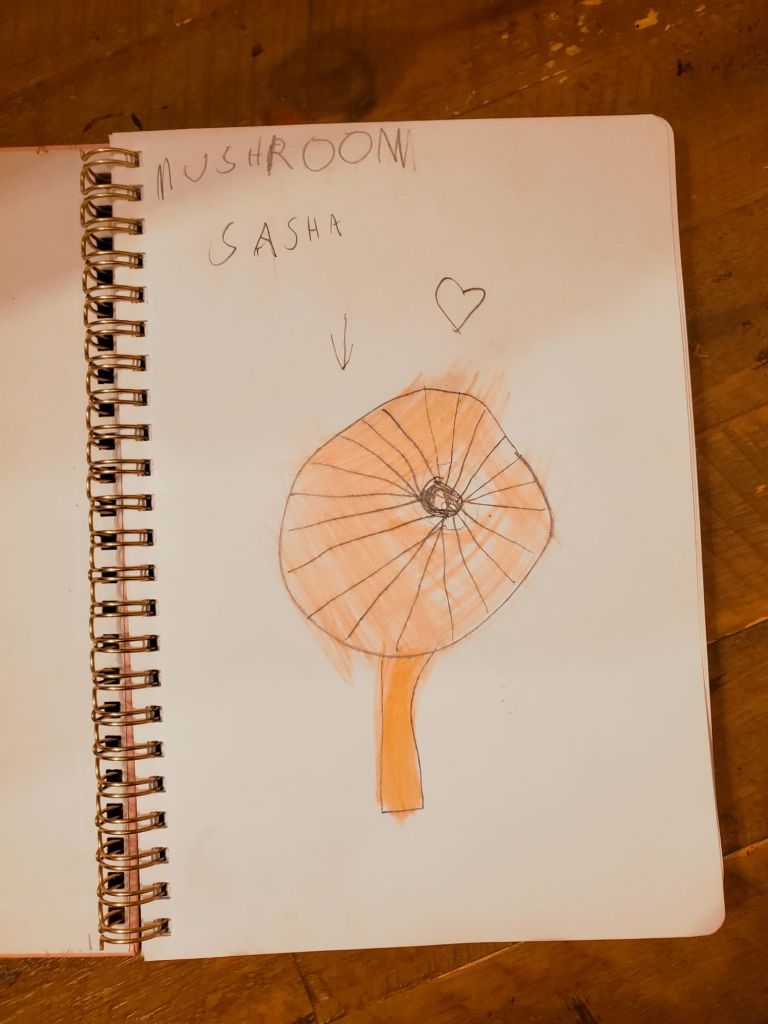
All of us really enjoyed finding mushrooms. We spotted several different types while we were out on the trail. I love them so much! There were really big ones & really small ones and the ones we see the most often: Turkey Tails. It’s fascinating how many different varieties there are in just her forest alone!
The mushrooms definitely made it into the Nature Journals. Mrs. Mary told me that she keeps another book of Spore Prints that she makes. I’m really excited to check that out next time we are invited. She also has a Nature Wall like us too!
We tasted Rosehip. It’s very sweet! I liked the way they looked. We learned that Rosehip is often used in tea. I had heard of it before, but had no idea what it looked like or what it was a berry.
Rosehip has a lot of medicinal purposes, which is why it is popular in teas. Rosehip can help with joint pain & inflammation, lower blood pressure & cholesterol, and aid in digestion. They help improve eyesight & skin. They are also used to treat bronchitis, coughs, & colds and have a ton of Vitamin A and E so they help strengthen your immune system. They also protect your vascular system. I’m definitely going to have to start incorporating this into our diets more.
Besides tea, they are also used to make jams & jellies, syrup, soup, or a sauce. I’m interested to try those!
There was also so much moss on the trail! I really, really love moss. I loved the way this shaggy type looked growing off of the trees.
Athena also liked the tress with moss & the whispy, twirly branches hanging from some of them.
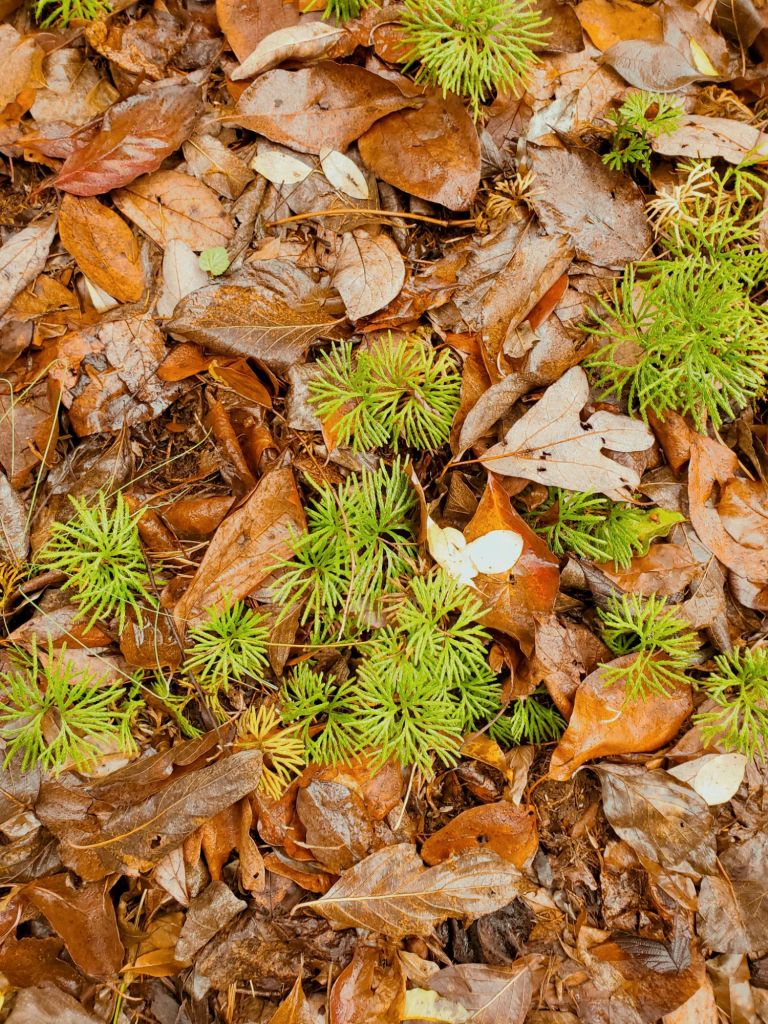
This cool stuff is called Fan Clubmoss. It was popping up all over the trail! I had never heard of it before, but when I got home I looked it up and found they also have so many medicinal purposes! They treat rashes & wounds, skin infections & chafing, urinary Tract infections, kidney infections, and bladder infections. It can also be used to naturally dye cloths & fabrics. It is so amazing what all Nature is capable of & I absolutely love the way it looks!
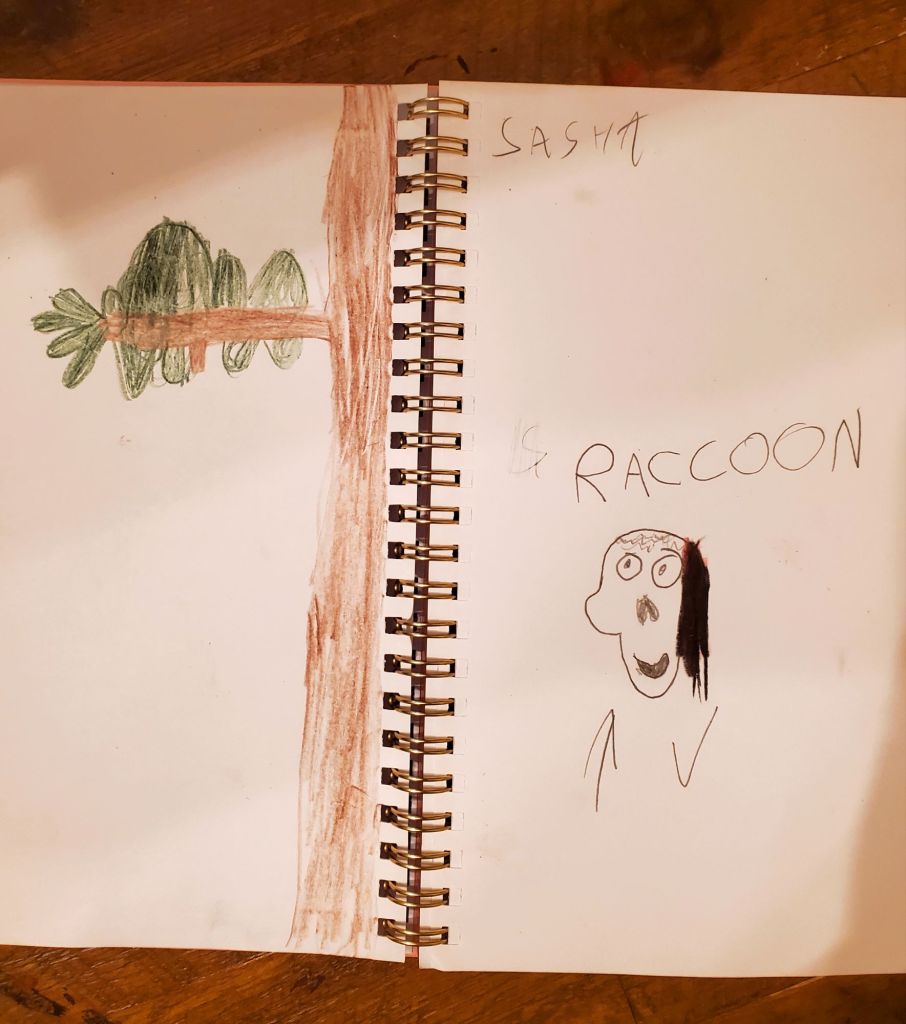
Another fascination was the animal skulls along the trail. This was a raccoon. There was a second decomposing raccoon later down the trail that still had some of its furry meat-suit attached (Athena thought it was a monkey) and a teeny tiny bird skull that was so cute!
It will be really neat to watch as their journals become more detailed the more they get into it. I am so excited to begin working in mine. This is something that we will definitely be doing for the rest of our homeschool journey & I’m sure even longer as we will then pass it on to their children when that season of life comes around.
I really love Nature so much & am so happy to be raising children who also love and appreciate Nature as much as I do. Ella really gets so into it each time we go on a Nature Hike. She loves using the PictureThis App to find out the names of different plants she wants to learn more about. I’m happy they would rather be outside exploring Nature & the world around them than choosing to plop down in front of a screen wasting their lives away. There is such a big, beautiful world out there and now we have a new way to document the wonders we come across. So grateful for Mrs. Mary sharing this with us.
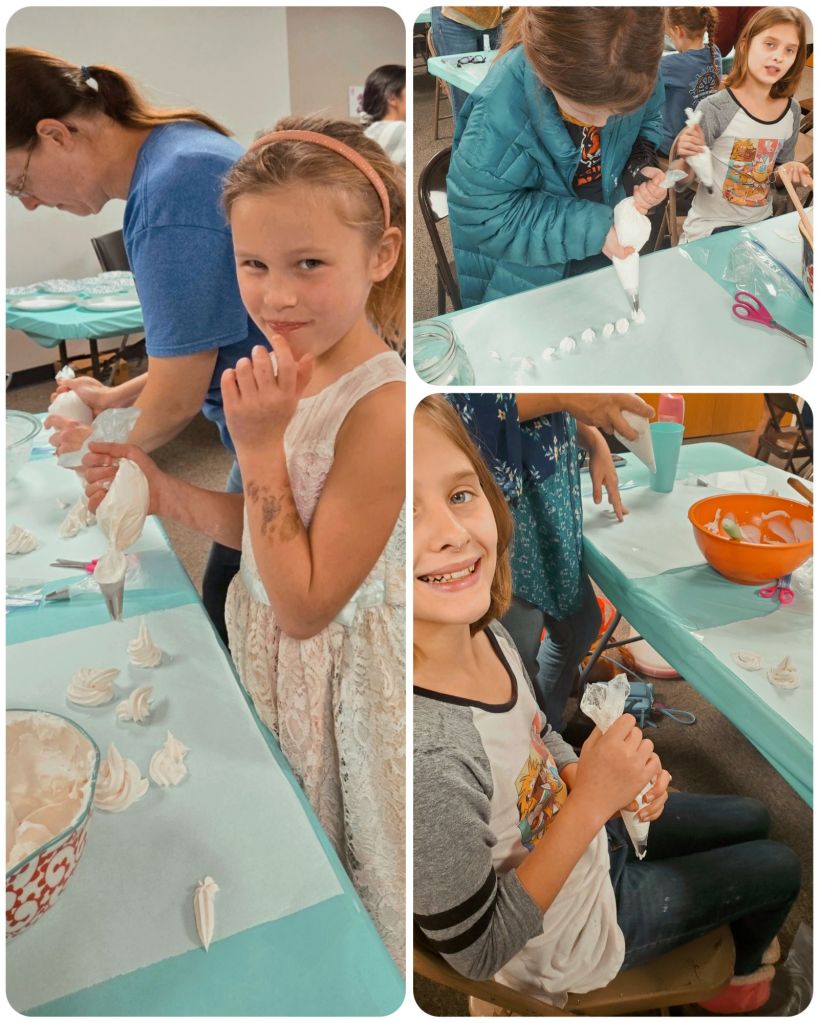
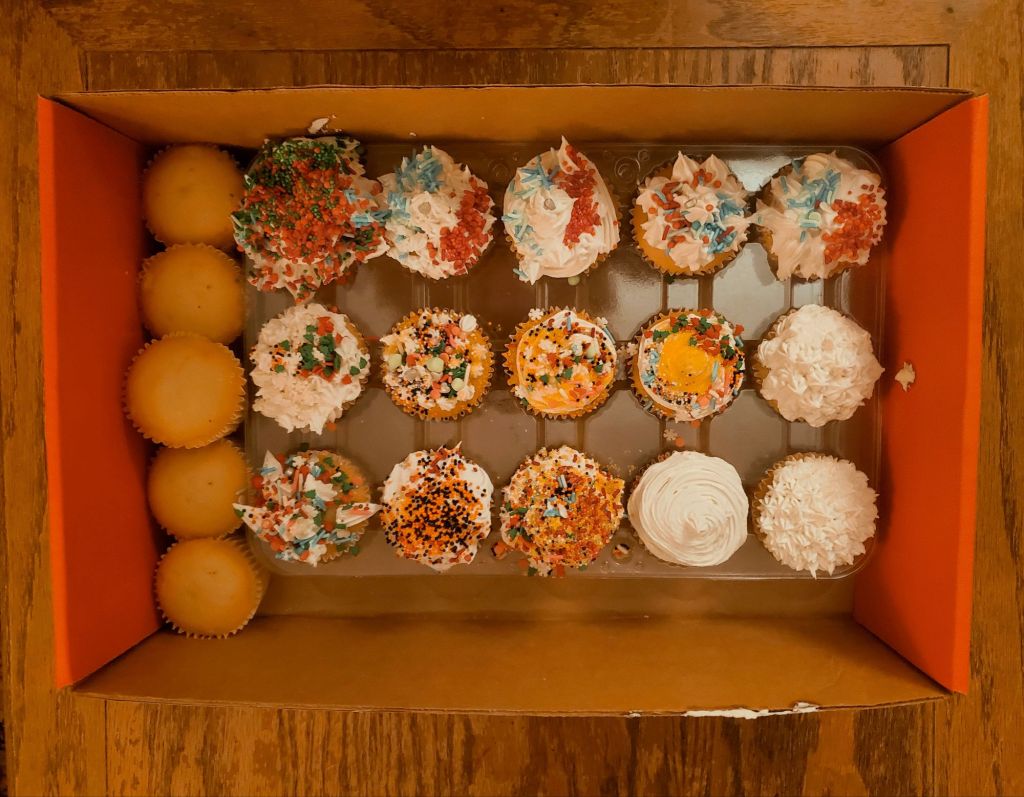
This week’s Grace Girls class was on the basics of cupcake decorating. We learned about frosting, how to make & fill piping bags, and how to use the piping bags to frost cupcakes or other desserts.
Our class was led by Mrs. Mandee. She did such a great job teaching the girls (and some of us moms) how to properly frost cupcakes. She prepared a little cupcake tray ahead of time showing different designs you can make using your piping bags.
Everyone was told to bring: a small mixing bowl, a rubber spatula, and a large Mason jar. My wide-mouths are currently being used, so we brought standard size. In the future, I will be using wide-mouth for this.
Mrs. Mandee taught us how to make our piping bags. We take one bag and one tip and place it inside as far as it will go without disrupting the bag. Make a mark using your scissors halfway up your piping tip to indicate where you will be cutting. Push your tip back a little bit, cut at the mark you made, then push tip back down to the end so it is snug in the bag.
The piping bags should look like this when they are ready to be used:
Once they are made, place your piping bag inside the Mason Jar with the ends open around the jar to prepare for filling your piping bag.
This tip to me was a game-changer! I have typically avoided using piping bags in the past because of the mess I would make filling the bag. This prevents a mess! It makes it seriously SO easy!!!
Next, Mrs. Mandee scooped out her Buttercream icing into her mixing bowl and explained that you must whip the frosting really well before placing into your piping bags to make sure you do not get any air bubbles into it.
She shared that at home this is her favorite recipe to make homemade frosting, but because there was a large number of participants, she purchased bulk frosting from Sam’s Club. We went through 80% of the bucket in the class!
To fill our bags we:
1. Stir, stir, stir until as smooth as possible. Add a color, if using.
2. Using a rubber spatula, scoop smooth frosting into the prepared piping bag in your jar.
3. Shake your frosting to the bottom.
4. Twist your bag from the top of the frosting to the end to close it.
When making designs, we want to twist not squeeze the piping bag. We will continue to twist like this all the way down the bag until it is finished.
Finally, Mrs. Mandee demonstrated how to make various designs before it was time to work independently. Then continued to show us new ones throughout our practice time.
We stirred our frosting, filled our piping bags, and practiced getting used to working with our piping bags and making designs on parchment paper.
When we were finished practicing with both size piping tips, we scooped our frosting back into the bowl with our rubber spatula and started the process over. We stirred & refilled our piping bags to get ready to frost our own cupcakes.
I loved seeing the different designs being practiced. Over at Sasha’s table, a mom made an adorable butterfly! She shared that she had previous employment experience at a bakery years ago.
After a lot of practice, it was finally time to frost our own cupcakes! Everyone was given 4 to decorate.
Ella made American flag cupcakes to celebrate America, Veterans, and her birthday (Veteran’s Day).
It was the perfect time for this lesson with her birthday next week. I will definitely be using my new frosting skills on her birthday cake this year! So thankful to learn this lifelong skill!!
I chose to leave mine un-sprinkled, but one of my girls (Mia) decided to practice her sprinkling once we got home. I gotta say, she did a really great job! She used tweezers to line them perfectly around. I think she may have found her new life passion.
Athena had to miss out on this night unfortunately, but we brought her home a piping kit & un-frosted cupcakes so she didn’t have to completely miss out on the activity. I also gave Moses one of mine to decorate too.
We will be doing a second part to this class though, which will be “advanced” cupcake decorating beyond simple frosting. That is a class that we are all really looking forward to!
Our next meeting is our annual potluck Thanksgiving Feast! This is one of our favorite traditions now. We will be spending the next 2 weeks planning & then preparing our dishes. Ella, of course, signed up to bring the turkey again for the second year in a row! It was the biggest hit last year and she was SO proud of herself! That girl will be a pro at cooking up a turkey feast before she even has a family to fix it for!
Any suggestions for what we should bring to our potluck Thanksgiving Feast?! I’d love to hear them!
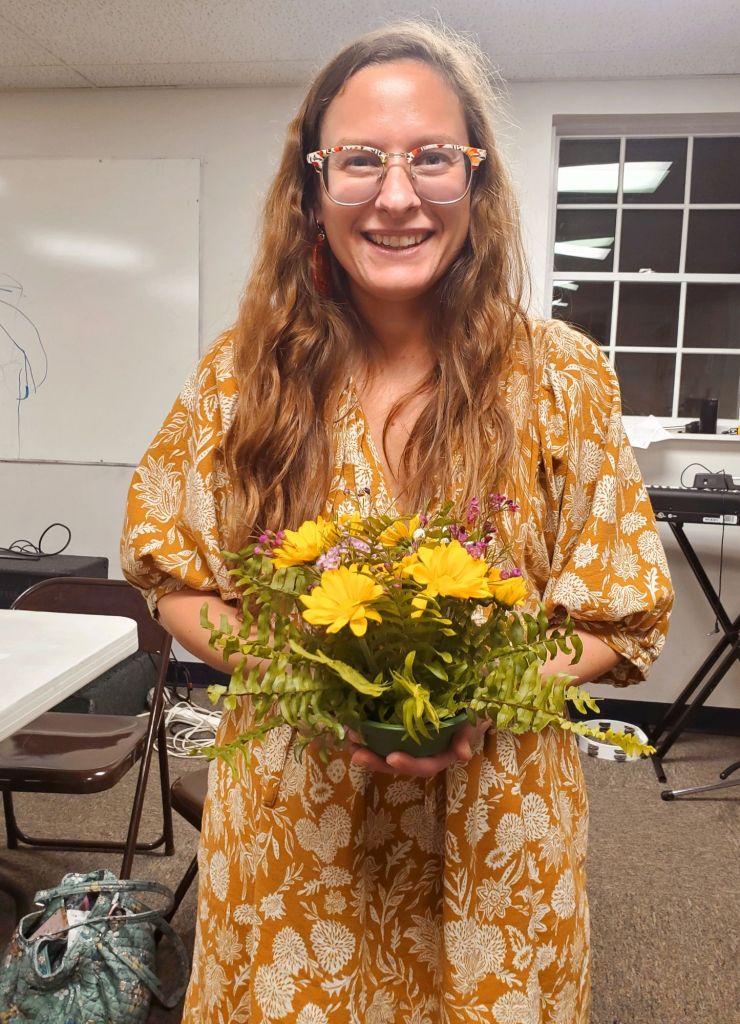
Our Grace Girls meeting this week was learning about floral arrangements, how to create one, and when it would be useful.
This was a really great topic for us! In fact, I have felt like all of the classes we have attended lately have been aligning perfectly with our new venture to open our general store – Morozov Mini Market. Flower Presses, Soap Making, Arranging Flowers. The universe is sending very clear messages to me right now, preparing us for our new journey.
When we arrived, the room was set up with a large table in front for the flowers to be visibly arranged on so everyone could see what we were working with.
The first thing we did was soak our “oasis” foams in buckets while we went over our lesson. Our teacher tonight, Ms. Kathy, had grown up creating floral arrangements with her grandmother for their church & has taken 3 professional floral arrangement classes. During the lesson we discussed when people use flowers:
Weddings, funerals, welcome home celebrations, sick/in hospital, new baby, holidays, house warming/thanks for inviting me gift, birthdays, etc.
We also went over tips such as:
💐 Removing the lower flowers so they don’t rot.
💐 The little packets that come packaged in store-bought flower bouquets aren’t meant to be dumped at once, they are meant to be used throughout water changes as well to keep the flowers alive longer.
💐 Always trim the stems, when you get the flowers and when you change the water.
💐 You can check a flowers freshness by pinching the stem gently under the base of the flower. The more tough it is, the more fresh the flower.
💐 Don’t bend the stems
💐 Always use a lot of greenery to fill in the vase or arrangement. The more the better.
Once we finished our lesson, we collected our oasis from the buckets of water and received our flowers that we were to work with.
I love these little reusable “buckets” they come in. The buckets are re-useable, but the standard oasis foam is not, due to bacterial growth. The unused foam rounds should be stored in a dark & dry place so they don’t get damaged from sunlight or dampness. After some research I did find that oasis recently designed a more eco-friendly reuseable option, Terrabrick.
I had no idea that these were able to be used with real flowers. I only ever see then at stores like Michael’s or Hobby Lobby next to the fake flowers. I thought they were only for fake ones, but now that I know they are for real flowers too, it’s a total game changer for me! My options are endless!
We began grouping into small piles of greenery & different types of flowers.
Everyone was given greenery, yellow flowers, and purple flowers. There was light and dark purple to chose from, or you could do a little of both. There were a few different yellows to work with. There was a very small amount of white to work with also.
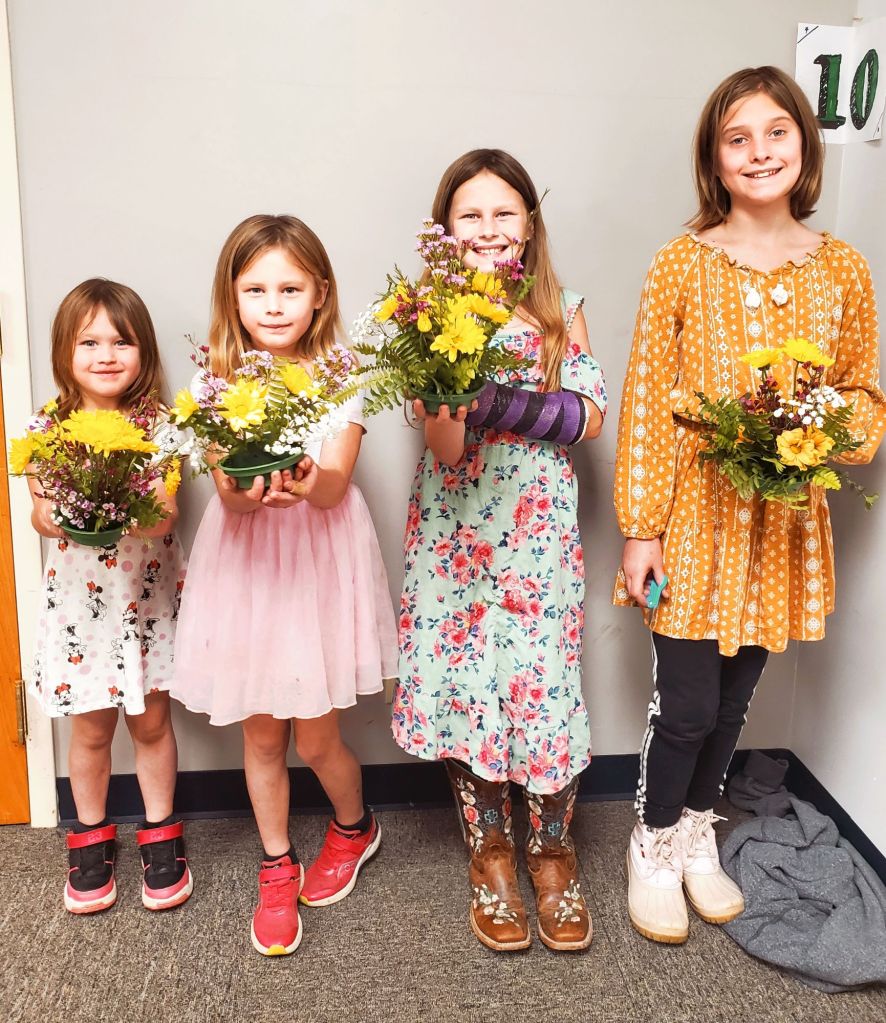
At the end of the night, each girl got to choose a special flower from the vase arrangement display to bring home. We already have ours set up in the propagation station hoping to get some roots growing and new flower varieties to add to our gardens next Spring for free.
Once we were ready, we began filling in our oasis with greenery. You need to remove about 2 inches of the lowest leaves to be able to stick the stem into the oasis. Make sure to have your compost bin ready!
You’ll want to stick them in all over the sides of the oasis, the outer ring of the top of the oasis, and put some aside for filling in the center. For those center pieces of greenery, try to find the pieces that stick out to you the most: maybe the size, the way the leaves are shaped, maybe they are more fun looking or bend in an interesting way. Just let the greenery work it’s magic.
For real, the more greenery, the more beautiful & full-looking it will be. Even if it looks like it’s going to be too much, it’s not.
After adding greenery, we filled in the center with our flowers.
🌿 Start by placing one flower directly in the center then the rest of the flowers surrounding the center flower, spread out as evenly as possible, working with one color at a time.
🌿 Add smaller flowers or accent pieces.
🌿 Then fill in the remaining spaces with the remaining greenery you set aside.
I love that each girls arrangement looked so different even though we all used the same flowers, with slight variations in color. It showed their creativity.
Athena did not follow directions on this lesson, but that’s kind of who she is in general. She lives outside the box and does not any want limitations in art. She has her own visions, and will see that they are carried out. She is a true artist & free-spirit.
Out of all the girls, Mia holds the most love and appreciation for flowers & nature. At home she loves putting together bouquets for her favorite people & loves pointing out beautiful flowers wherever we go. She loudly exclaims “this one is BEAUTIFUL!!!” anytime she finds out she adores. She’s already asked for her own flower press for all of the flowers she falls in love with.
I was really happy that the moms were also able to participate in creating floral arrangements. A lot of the activities so far have been for only the girls, or mom supervision required (learning knife skills or building/cooking over a fire). I had SO much fun! It was really exciting for me to get to make my own rather than help the girls build theirs. It also gave them much more creative freedom with focusing on my own arrangement instead of how theirs is turning out.
I absolutely adore how it looks & I am SO happy to learn how to perfect my bouquets & now, arrangements.
This was such a great class, I feel like we learned so much. Ms. Kathy did such a great & thoughful job putting this lesson together for us and it was truly a blessing. This is a skill that our family will definitely be using for the rest of our lives & I am so happy that we are learning these skills together as a family – that makes it even more special.
The arrangements look beautiful on our table & I love that they are created with love by us.
I was offered one of the ferns to take home to continue creating more arrangements with. Ms. Kathy said they were at the end of their cycle, but I plan to keep it inside through the winter, hopefully giving it a much longer life span and many more beautiful arrangements.
We welcomed the shifting of seasons into Fall yesterday with a Mabon Celebration. If you do not know what Mabon is, it is the official day of Autumn’s beginning and a day that we are supposed to give thanks to Mother Earth for all that she gave us over this last season of summer.
It is a time to reflect and relax after working hard all summer. Let go of what is no longer serving you or your soul. Let go of toxic relationships that are holding you back, as well let go of bad habits & self-destructive thoughts in yourself. Finish up the tasks you started, but have not yet completed. Reflect on goals you’ve accomplished, focus on the goals you have set for yourself that you still need to work towards, or set new ones all together.
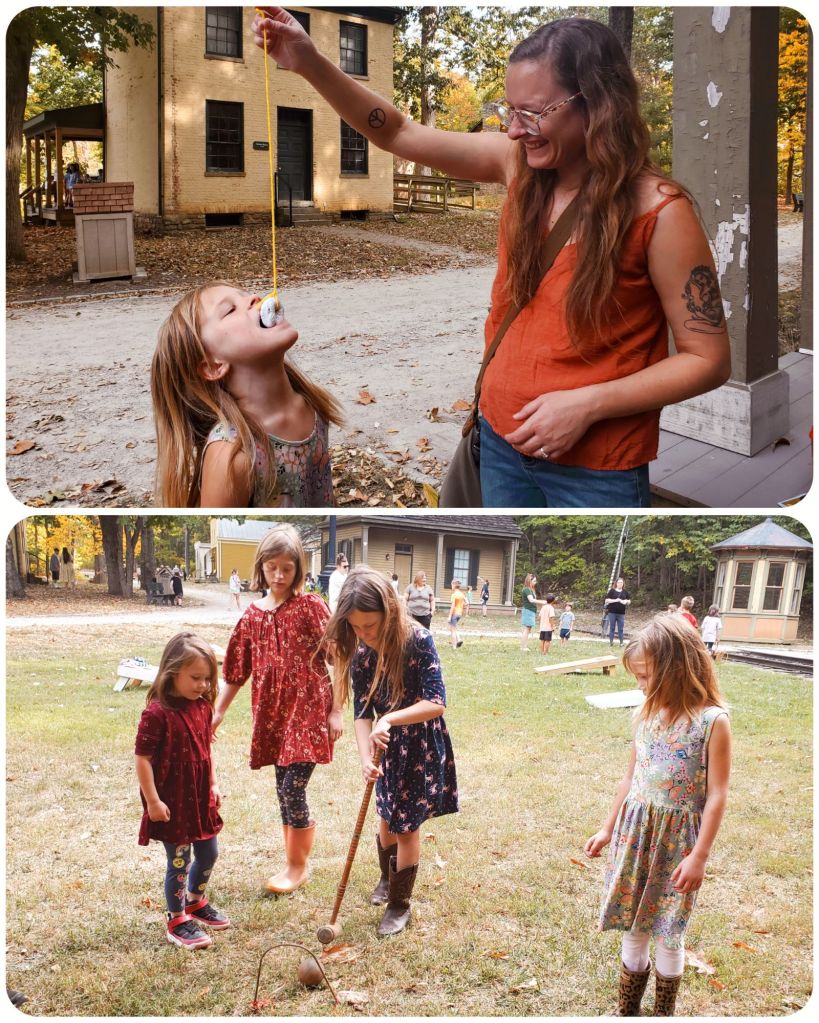
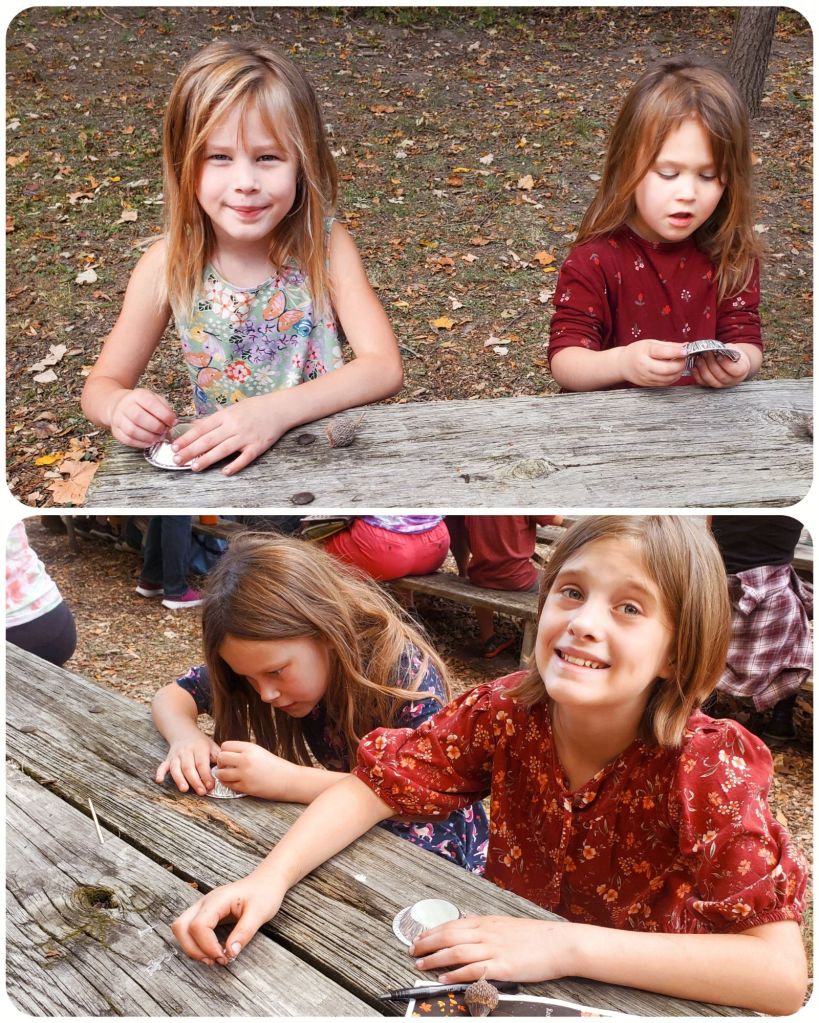
We began our Fall festivities with a field trip attending the Homeschool Harvest Festival in Heritage Village.
We played old-fashioned games like Bobbing For Donuts. Bobbing For Apples would be a more historically accurate game, but for sanitary purposes donuts was the modern chosen object. It was still really cute, and was actually in one of my books that I use as inspiration for celebrating each season. I think that Bobbing For Apples for would still be a fun fall activity to try together – maybe as a family game night.
I loved the old time vibes mixed with all of the nature. The leaves were as big as the younger girls heads! There were so many different kinds of acorns. We collected a few of our favorite things for our Fall dinner table for our Autumn Feast.
We learned about pickling foods; why we do it and what different types of foods that people would pickle to preserve. My girls are already pros at this, and they were the only children who knew what Beets were.
We learned about using a meat smoker to smoke meat and that back then it would take 2-3 days before it was finished smoking. That would have been my husband’s favorite part of the festival.
We also learned how to make bread in the brick bread oven and Cornbread over a hearth stove. It reminded us of our latest Grace Girls meeting where we learned to make pizza over a fire. Making bread was an entire day of work from early in the morning until the sun was down, making Loaf after Loaf for a weeks worth of bread. The family who lived in that home {before it was a museum} had 15 children, so they needed a lot of bread!
It made me really grateful that today I can spread my bread baking out more than one day and that I don’t have to wear full length, full sleeve dresses with bonnets while I bake. I’d be baking myself in that attire.
During question time, one child asked how they are supposed to microwave their food.
We learned about trains and different ways of transportation since cars did not exist.
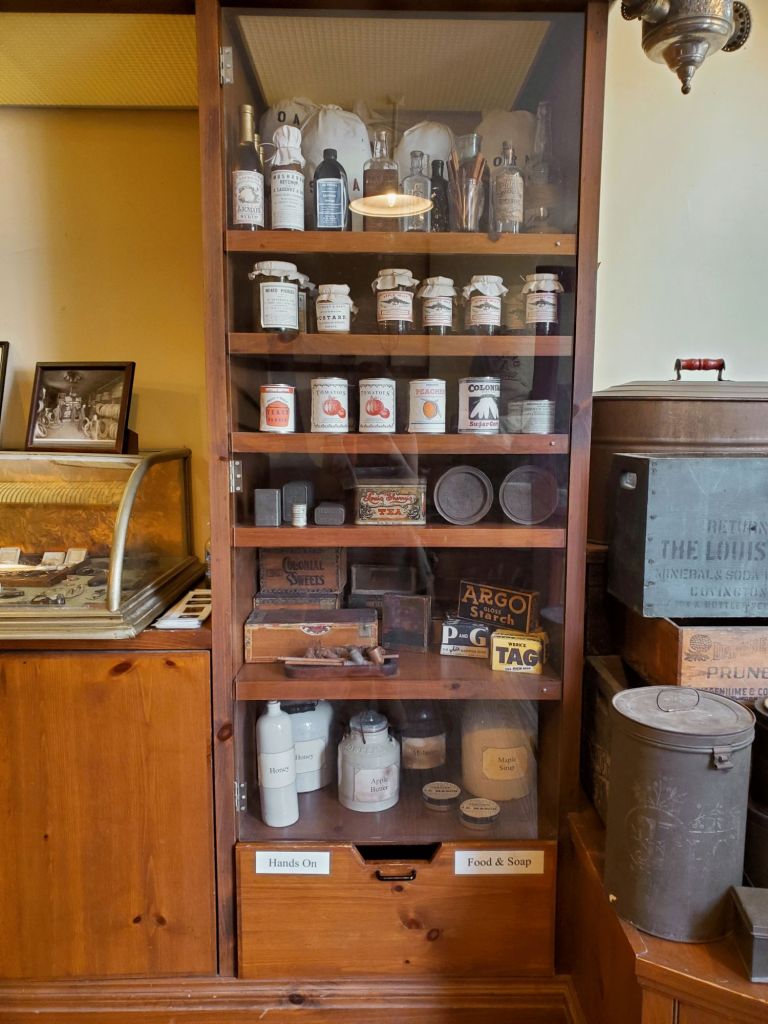
We learned about old fashioned tools, made a pumpkin on the printing press, and explored the General Store. We all really enjoyed looking at all of the antique items. They were things we’d still want today!
Their pumpkins were so cute. I think I’m going to laminate them and find a way to use them for decor. Another possibility would be to use them in our Fall Sale.
We learned about how doctors used leeches as medicine to suck the bad blood out of a patient. Each of the girls got a gummy leech.
I really loved The General Store and this Pantry. I love vintage things so much amd honestly prefer them over any of the cheaply made things today. The things back then were meant to last. You’d buy once and it would last multiple lifetimes, passed down through generations, still working. In fact, everything in the museum was still in perfect condition. The things today are meant to last one to a couple uses then either breaks or you must soon replace with a newer model to keep up. I can’t stand this way of life.
I loved how the store is set up. All of the bottom rows and anything out are meant for children to play with, and everything behind the glass is meant only for looking at. They had so much fun playing with everything and doing the scavenger hunt.
The girls learned about how electricity was not available, so people had to make their own metal lanterns to keep a candle in once the sun went down. They would push holes in the metal in pretty designs for the light to shine through. They made tin ornaments to represent the candles.
The girls didn’t want to stay for the Yarn Dolls. The line was ridiculously long. They saw some children holding theirs, and made a statement that the Corn Husk Dolls that they made in Grace Girls was a lot better to make than the Yarn. I think Yarn was a lot cheaper, faster, and easier though so for a big event like this, that would make more sense.
A cute throwback from 2022
We also didn’t get to do candle dipping which is one I was looking forward to. We were under a heat advisory by the Park Rangers and weren’t allowed to do an outdoor fire. They prepared take-home kits for 400 children, but ran out much quicker than expected. Even though we didn’t get a kit, that makes me really happy that so many more families have decided to join the homeschool world this year.
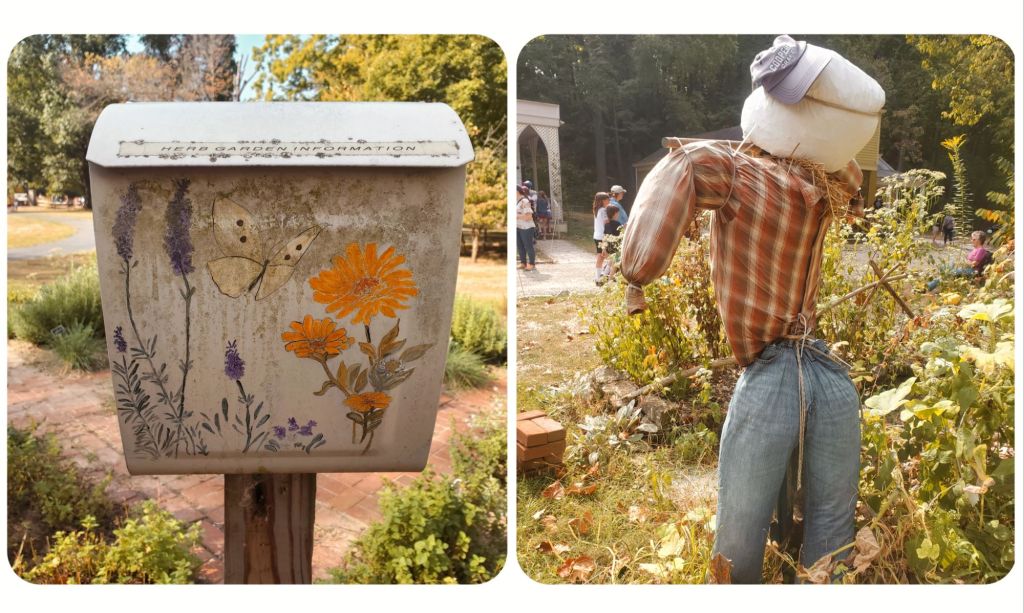
I really want to add a scarecrow to our garden next year. I think they are so fun. I also really loved this box that was supposed to contain Herb Garden Information, but instead it contained spiderwebs. It was still really cute and would be fun to add something similiar somewhere in my front yard as maybe a Seed Sharing Box.
We enjoyed ourselves and are glad we went. It was a nice way to begin this new Fall season together. After going, I realized that I give my kids a really good blend of both the old world, and the more modern one as far as homemaking goes.
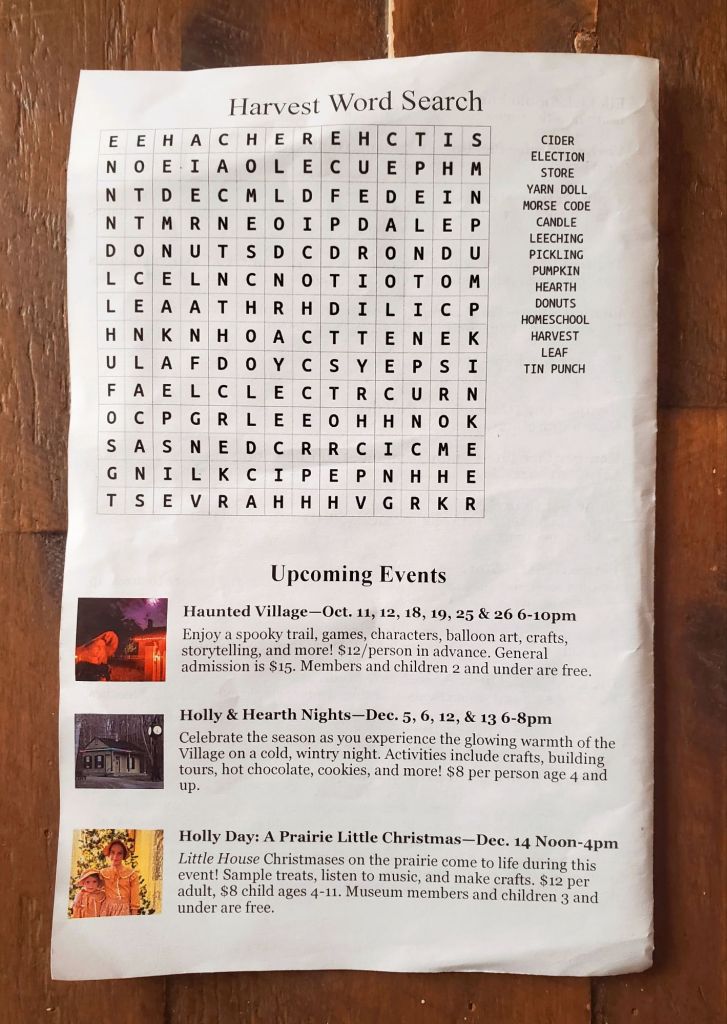
The upcoming events all sound really fun. I’m hoping for us to be able to attend at least one of them.
I also took the time to put our Fall poem we are memorizing in Ukrainian School in a beautiful layout so that I was able to print it out and hang it up for us to read daily with our Sing a Song of Seasons poem. It helps me a lot to read along to what I am listening to in Ukrainian language. Without the words, I can get a bit lost.
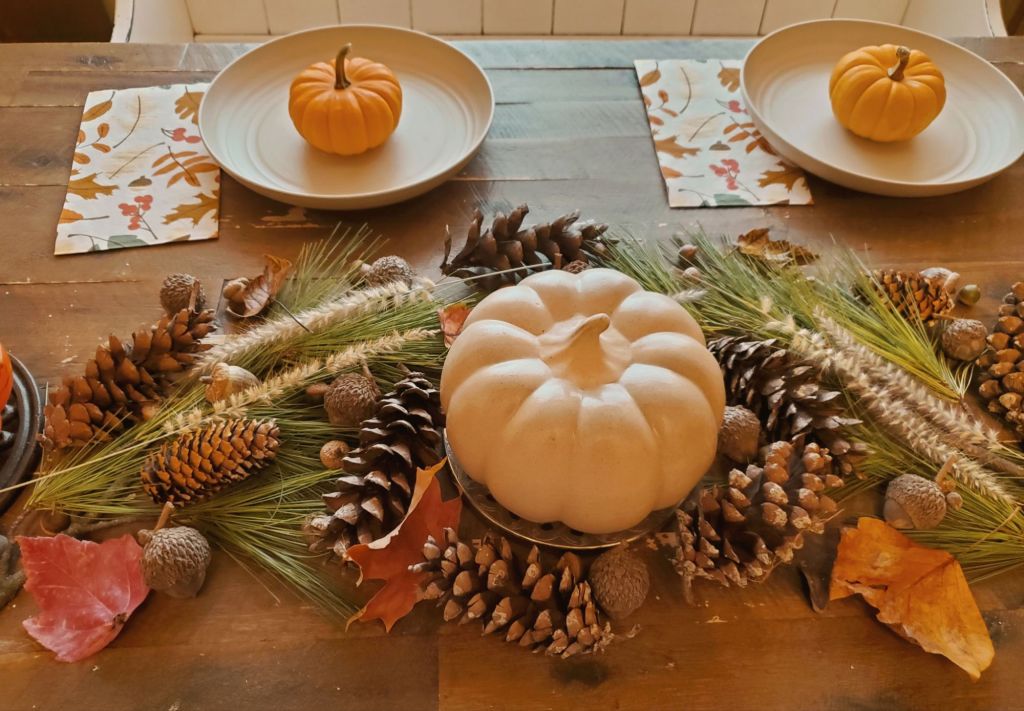
The Decor
We collected nature to create our tablescape. I really wanted to decorate without buying new items & show that you really don’t need to spend any money at all and still have a beautiful Fall home.
I decluttered most of my holiday stuff last year. As much as I love decorating, it bothers me that we only use these items for a very small fraction of the year while they sit in a bin in storage taking up a lot of valuable space for the rest of the year. This is a really great way to still decorate and not have to store the items once we are finished with them. Instead, we can just move some to our Nature Walls & the rest right into our compost to move on to its next life phase in our garden.
I think it ended up looking really beautiful and it meant more that we collected the nature together as a family than just bought at a store. It is just way more us.
The Menu:
The rest of the family had Pork Chops with apples, onions, and cornbread stuffing; I made Vegetarian Apple & Sage Sausage (Field Roast brand) for myself with the same side of stuffing mixture. It was my first time having apples in my stuffing and it was seriously a game changer!!!
The sides were Sweet Potato Casserole, Harvest Salad, & Sourdough Discard Sweet Rolls.
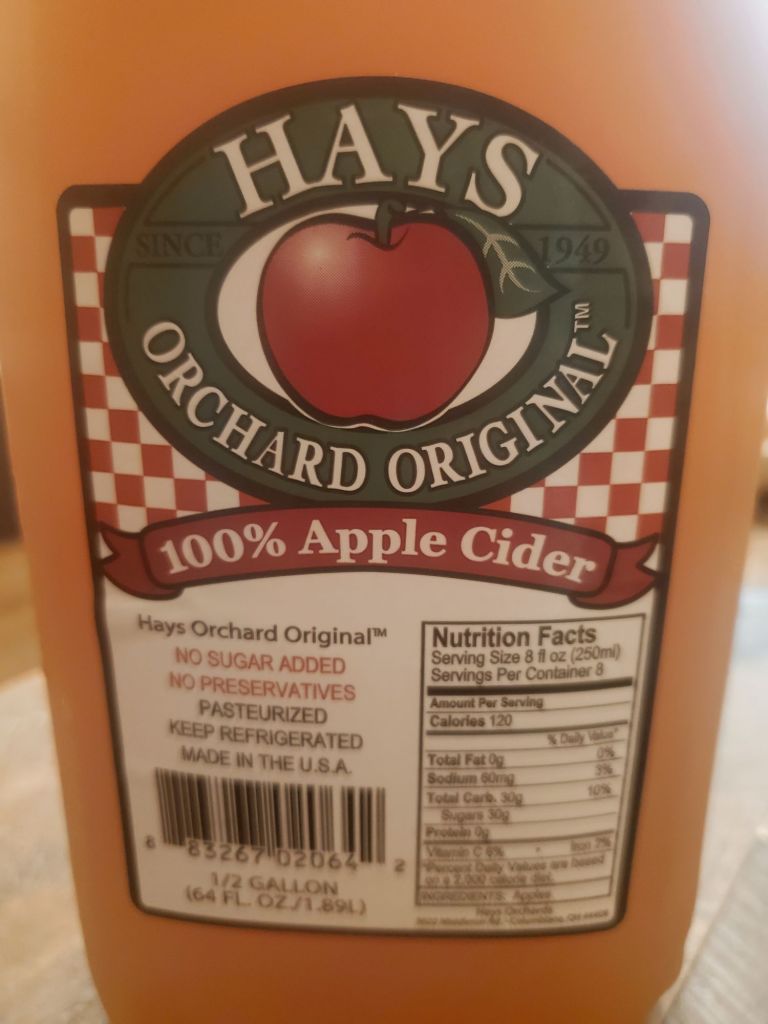
To drink, we had Apple Cider.
All of the different Fall flavors came together SOO deliciously! I’m definitely going to be remaking a couple of these dishes again at Thanksgiving!!!
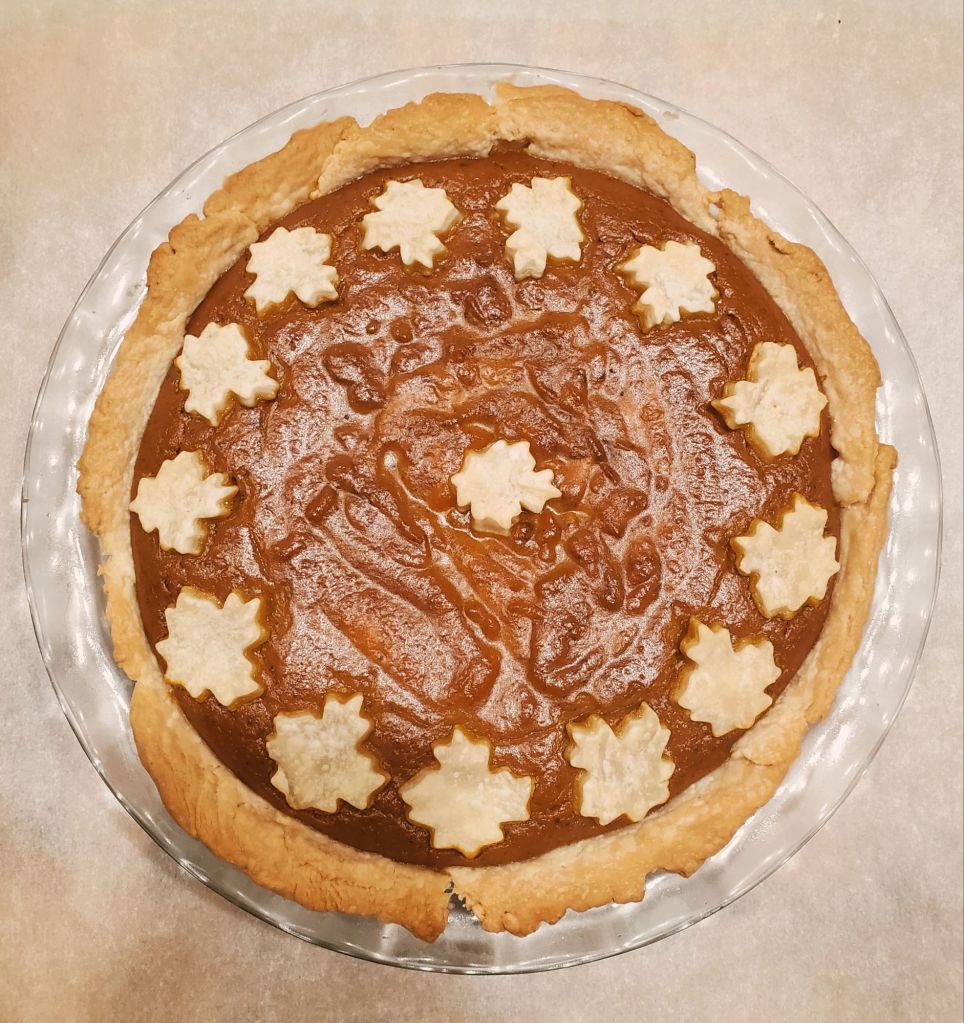
For dessert, I made a Pumpkin Pie with homemade whipped cream to go with it. I loved making the little leaves for the crust and will definitely be doing that again, but with way more leaves next time. I loved the flavor of this pie, but not the texture so I’ll be re-working that in the coming weeks to prepare for Thanksgiving.
We have so many more fun Fall activities planned this year. I really want to take in each day of this season and make it extra special for our family. The last year has really been a struggle for us financially & instead of continuing to live in constant worry, I really want to slow down, live in gratitude, and begin appreciating what this last year has blessed us with instead of money, because it’s been so much. We may not have any money, but we are so very rich in all the right ways.
This week we had our second Grace Girls meeting of the new school year. Our last meeting was learning how to properly set a table.
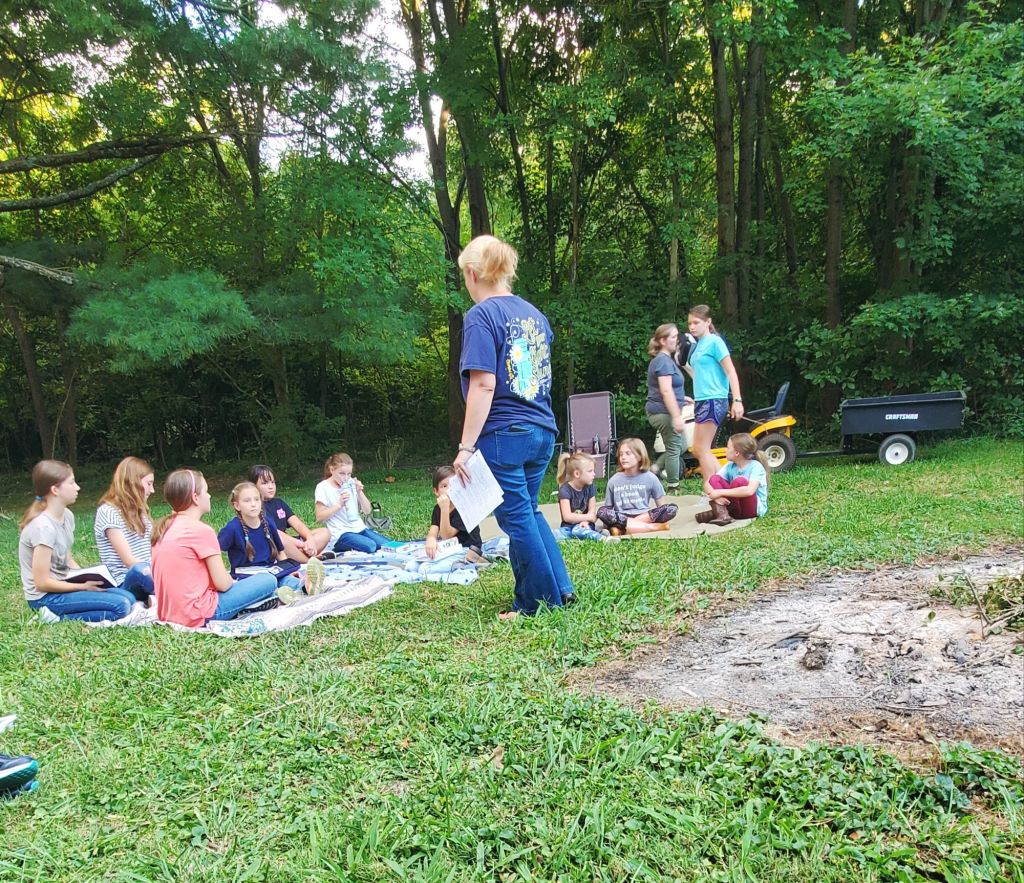
We started our night out with the devotion reading and a light discussion about what we read in our Bright Lights curriculum.
The meeting was hosted again by Ms. Darla and she taught the girls a lot about Fire Safety.
We learned what to wear and not wear around a fire. You want to wear jeans and short sleeves preferably. No flowy tops, dresses, or skirts. Hair must be secured back safely away from your face or cut short so it doesn’t catch on fire.
The most important question to always ask before building a fire is if it is legal to for a fire to be built there. Certain states have different regulations & seasons when fires are permitted, while other states ban fires all together due to high risk of forest fires.
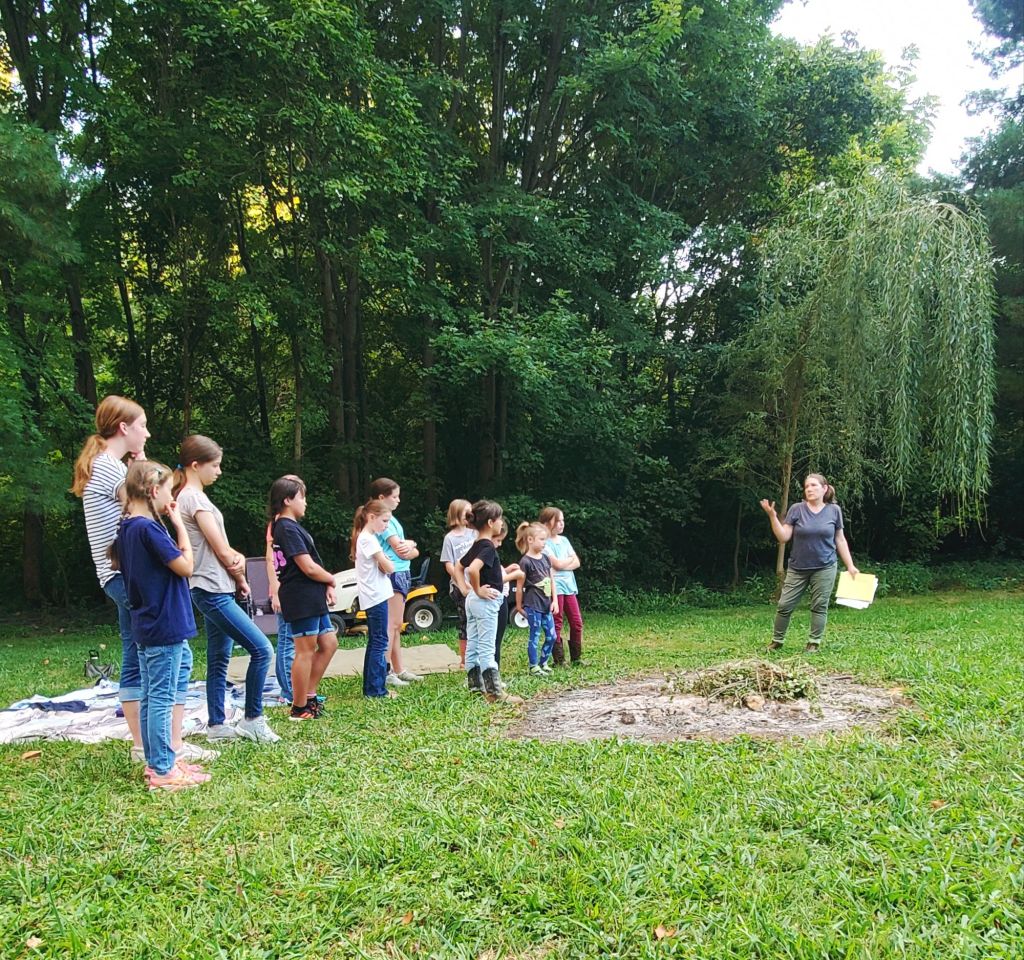
When choosing a location to build your fire you want to look for:
No overhanging branches
Nothing flammable within 10 feet
The amount of wind the location gets
Is a pit provided? If not, dig one before building a fire to keep it safely secured in one location. It is best to line your pit with rocks.
Next Ms. Darla explained that we only burn wood for fuel. However for tinder & kindling you can use small branches or twigs, pinecone, evergreen branches and needles, pet fur, dryer lint, sawdust, or paper.
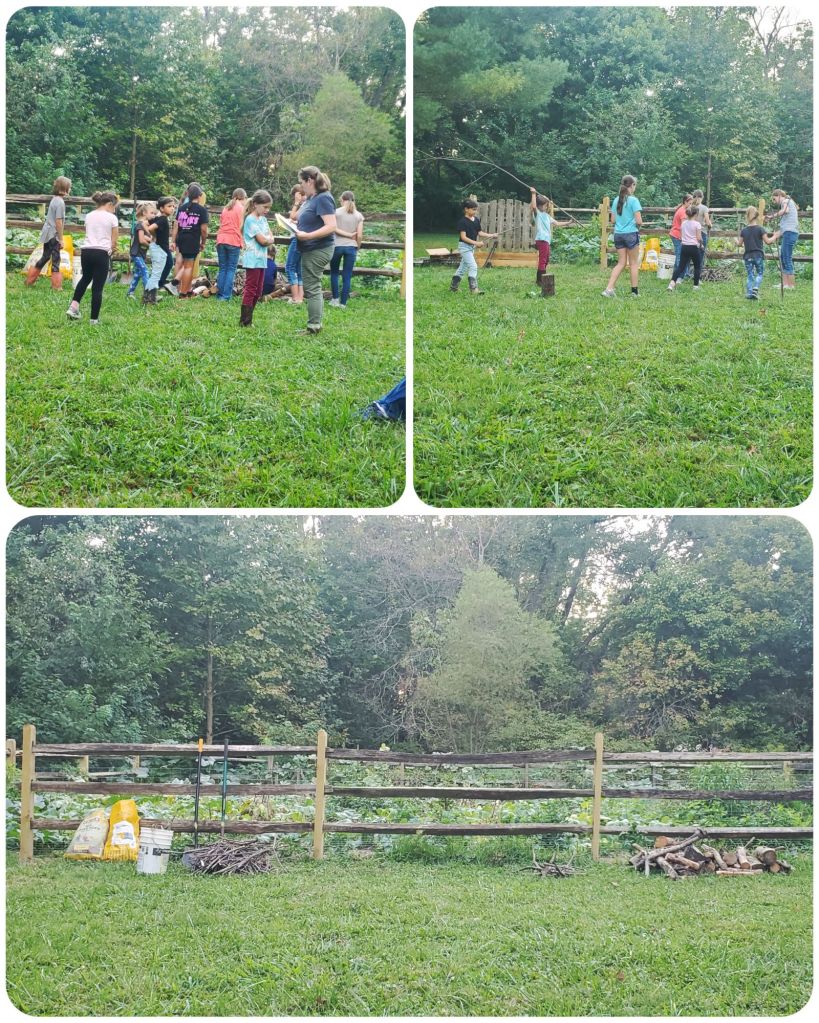
The girls worked together to group the wood in piles of large & small, and tinder/kindling in a bucket. She had bags of pinecone she had already collected over time.
Ms. Darla taught the girls different ways to build a fire, and what each kind is called. I had absolutely no idea there were so many different ways to make a fire. I thought it was just one way: build it 😂. The visual designs were really neat & helpful.
The girls then got into groups to pick a type of fire to build. Each group did a really good job!
We then went back around the fire to learn a bit more fire safety before we could get started.
We learned that you NEVER leave a fire unattended, and that you NEVER build a fire without adult permission & supervision.
If you do need to leave your fire for any reason: put it out first using water, covering with dirt or sand, or by spreading it out to reduce the heat.
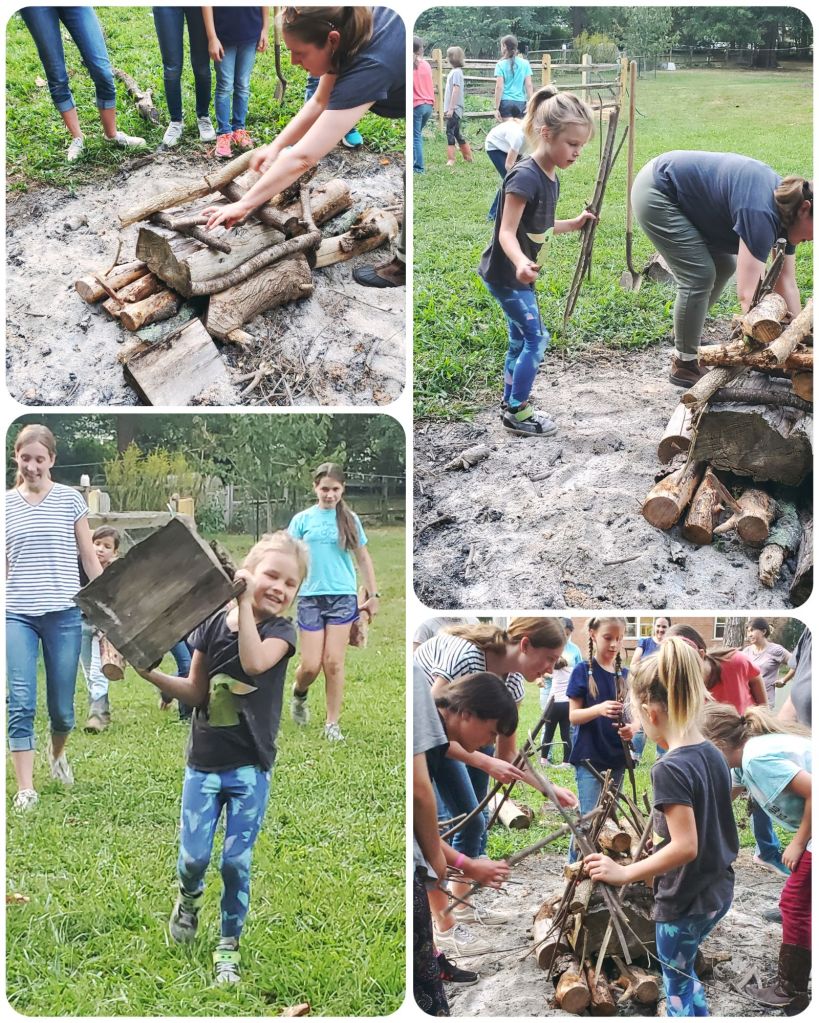
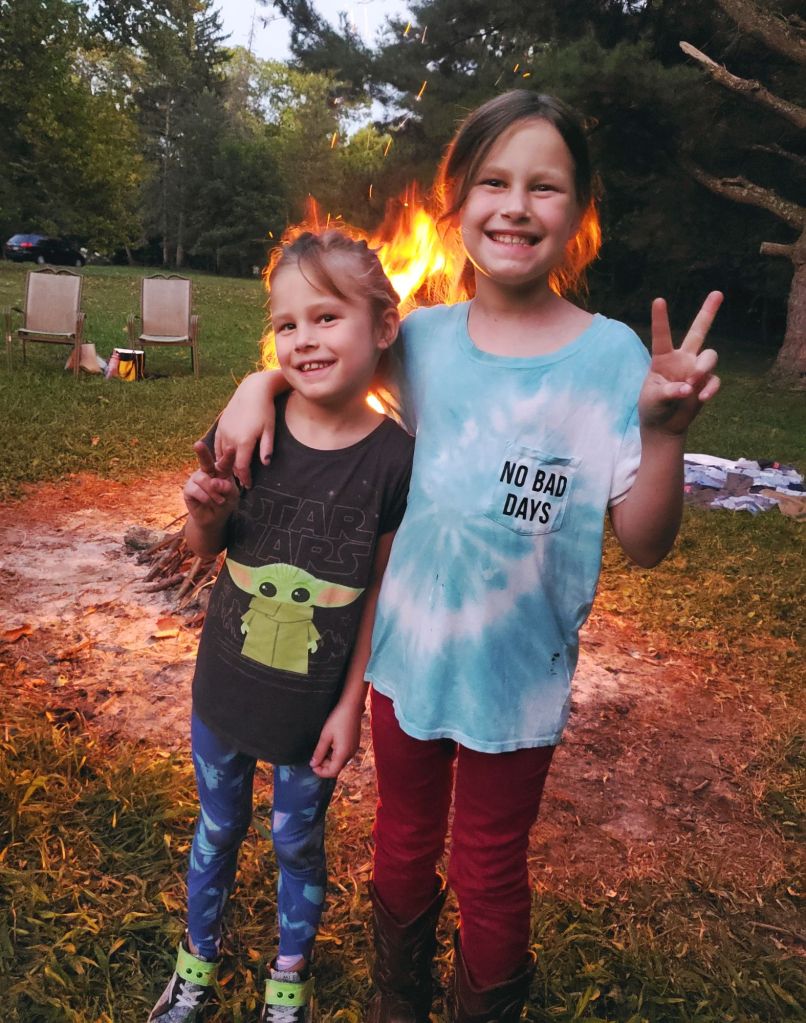
Next, it was time to build the fire. Sasha really enjoyed this part. She was so adorable carrying the biggest log she could hold over for fuel.
The girls did a really good job building the fire. They even decorated it with pinecone and evergreen, draping kindling along the top and sides to make it pretty. It definitely was the prettiest fire I’ve ever seen!
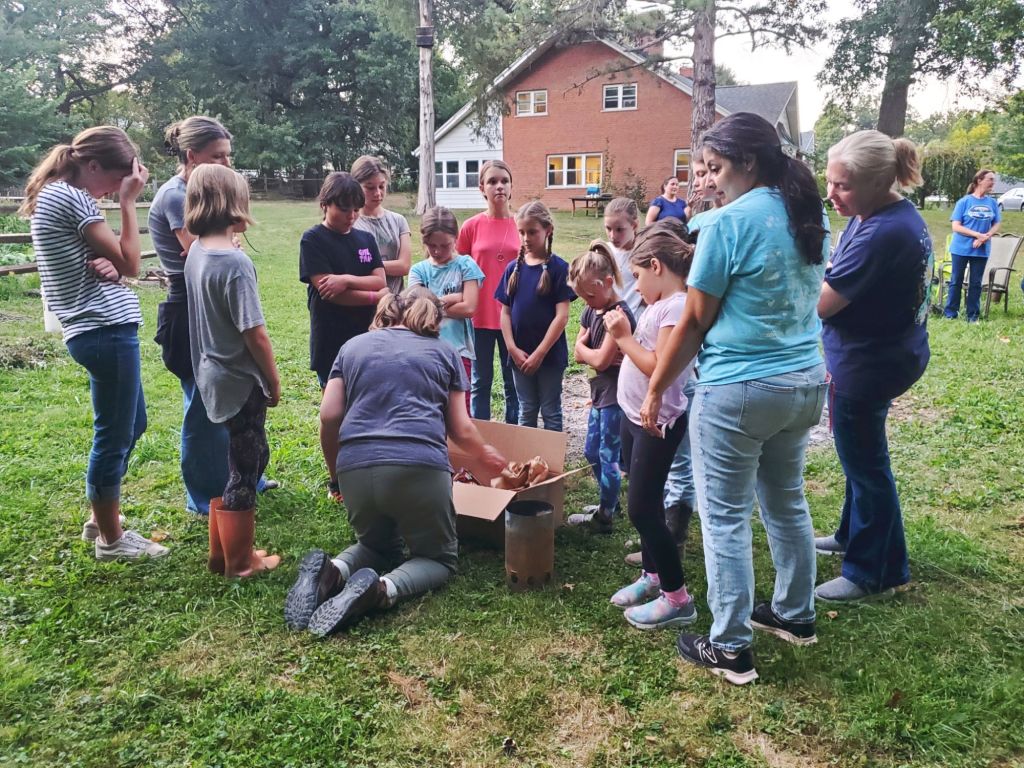
Ms. Darla taught the girls about different tools needed to start a fire. She taught them about using fire starters and how they are important tools to pack when camping. She also taught things we could use if we don’t have Firestarter handy. She taught about the different size lighters and what each is good for. She also taught that when handling fire, we always use leather gloves to protect our hands.
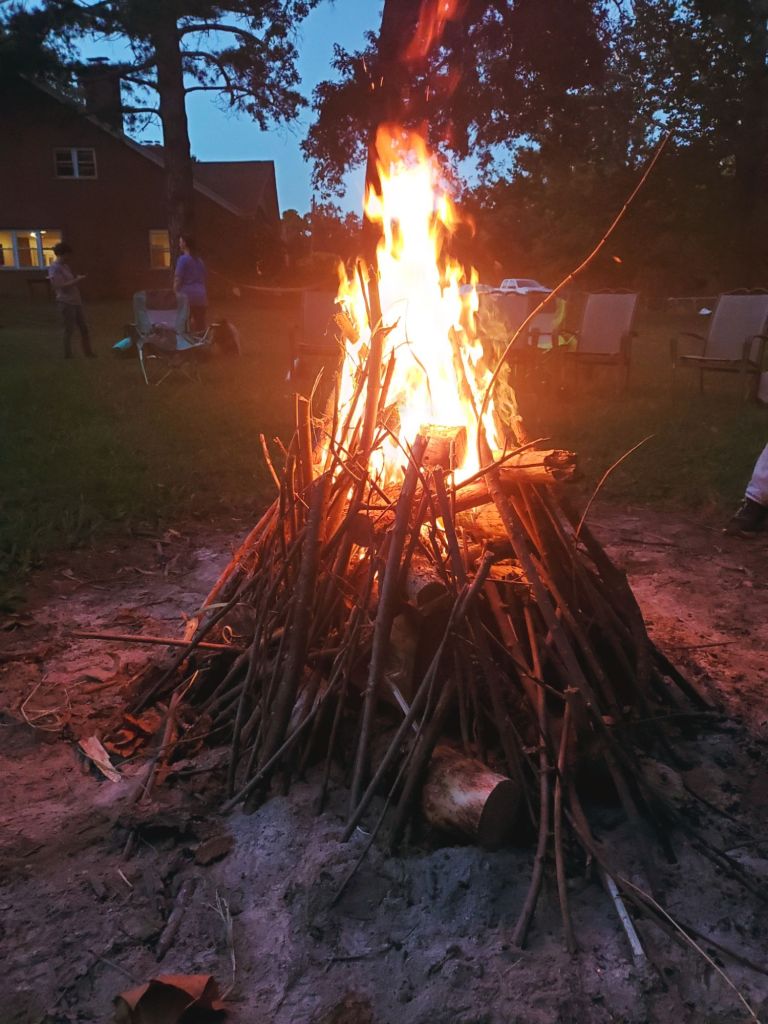
For liability reasons, Ms. Darla lit the fire for the girls. They did such a great job building it! It burned really, really well and evenly. It was so beautiful and cozy – a perfect way to welcome in the start of cold nights here in Ohio.
The girls hung out for awhile, running around playing Ghost in the Graveyard together – another fun & spooky way to welcome in the season changing to Fall. They swung in the tree-swing and caught up with friends, while Mom’s got a chance to catch up with each other too.
Once the embers were hot enough, Ms. Darla began getting the fire ready for cooking while the girls went to the table under the light to start making their campfire Pizzas.
Once they were finished assembling their campfire Pizzas, Ms. Darla put them carefully on her makeshift oven set up.
She used fire grates, with racks on top of those. She then placed a baking sheet on top of the racks, and used a disposable baking pan lid as a cover to trap heat. Once the lid was on, she placed a smaller secondary disposable lid on top and filled it with hot embers to add heat coming from under, around, and above.
Once the Pizzas were finished cooking, she carefully removed them from heat and transferred to each girls paper plate. Ella said it was the best pizza she’d ever had, and that’s a big compliment coming from someone who doesn’t typically enjoy pizza.
This was such an awesome experience for the girls! I really wish I had a group like this when I was little – it really would have set me up for homemaking success later in life and taught me really necessary skills for living as an adult. I’m grateful to have it now with my own girls though – it’s even better together than it would have been on my own as a child. I’m grateful for the strong mother & daughter relationship foundation we are building. I really appreciate these classes and feel like I learn so much with them! The girls are always very excited to go.


