My oldest, Kaden, was on Spring Break this week so we decided to go out for some Mom & Son time together! We started our morning at the Original Pancake House for brunch. I got Strawberry Crepes and he got Chocolate Chip Pancakes (that he said weren’t as good as his Grandma makes which I thought was cute).
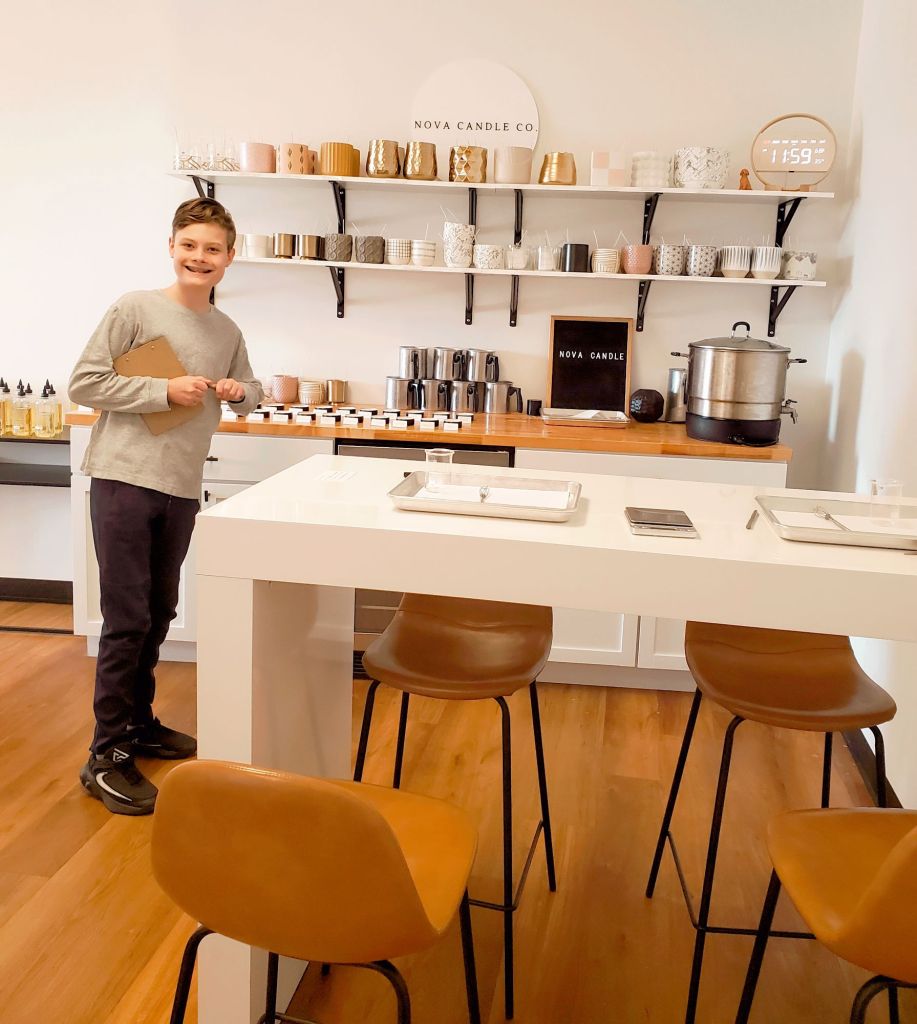
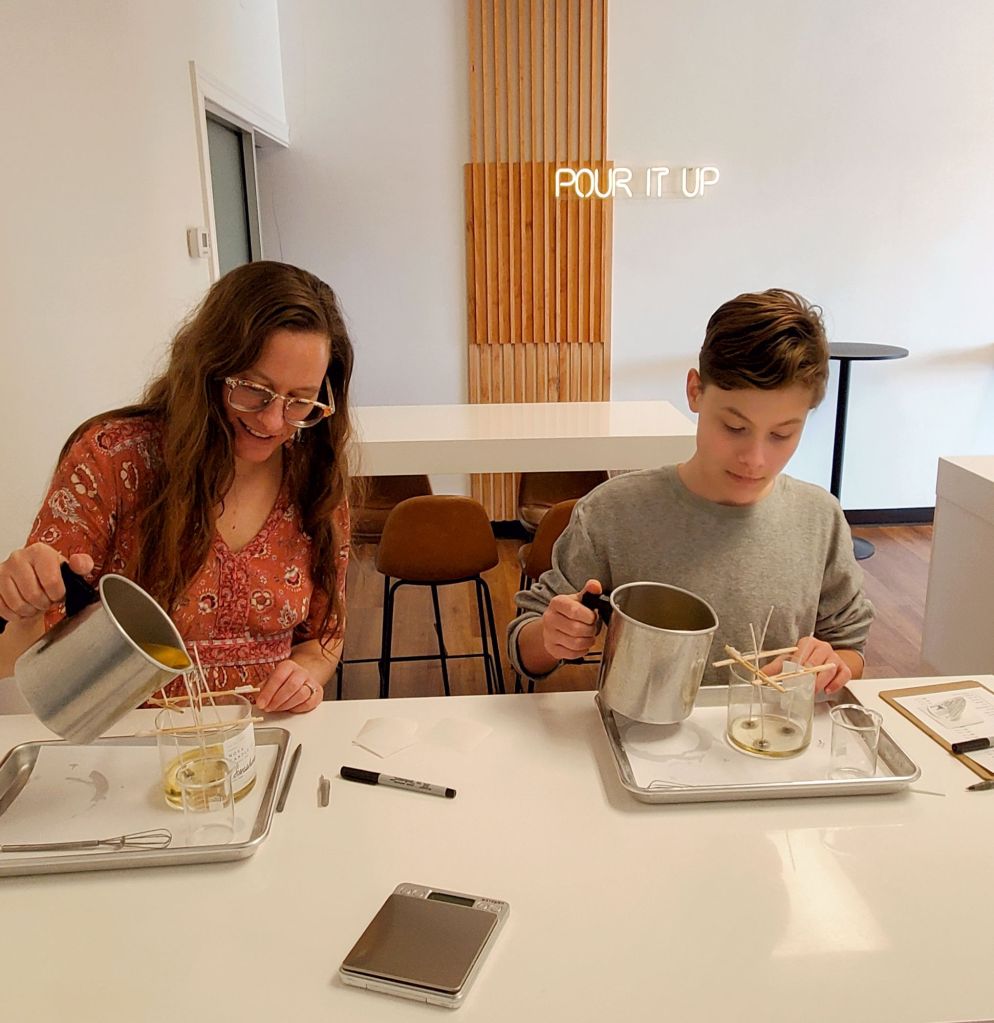
After brunch we headed down the plaza to Nova Candle Co. where we poured our own soy wax candles!
When we arrived, we each had two little trays waiting for us at our spots. We had one scale to share between us to measure our fragrance.
The first step was to pick which vessel we wanted to pour into. We both went with the classic 3 wick.
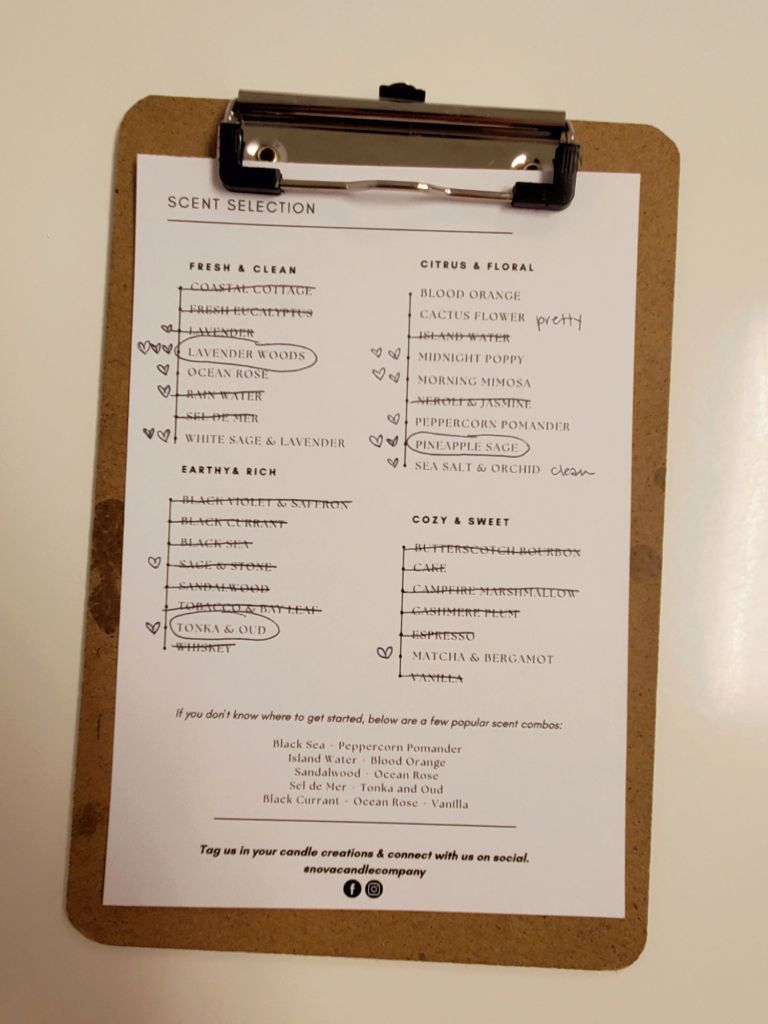
The next step was to decide which fragrances we wanted to use for our candles. We were each given a chart to bring to the smelling station with us that listed the names of all available fragrances and was told to make notes of which ones we liked or didn’t like. I used the process of elimination, landing on the ones that I loved best. I tried to maintain balance by using one from each category, with the exception of Cozy, because I’m not a cozy person. I enjoy those scents for about a month when Fall is first upon us, and the rest of the year they make me sick to my stomach.
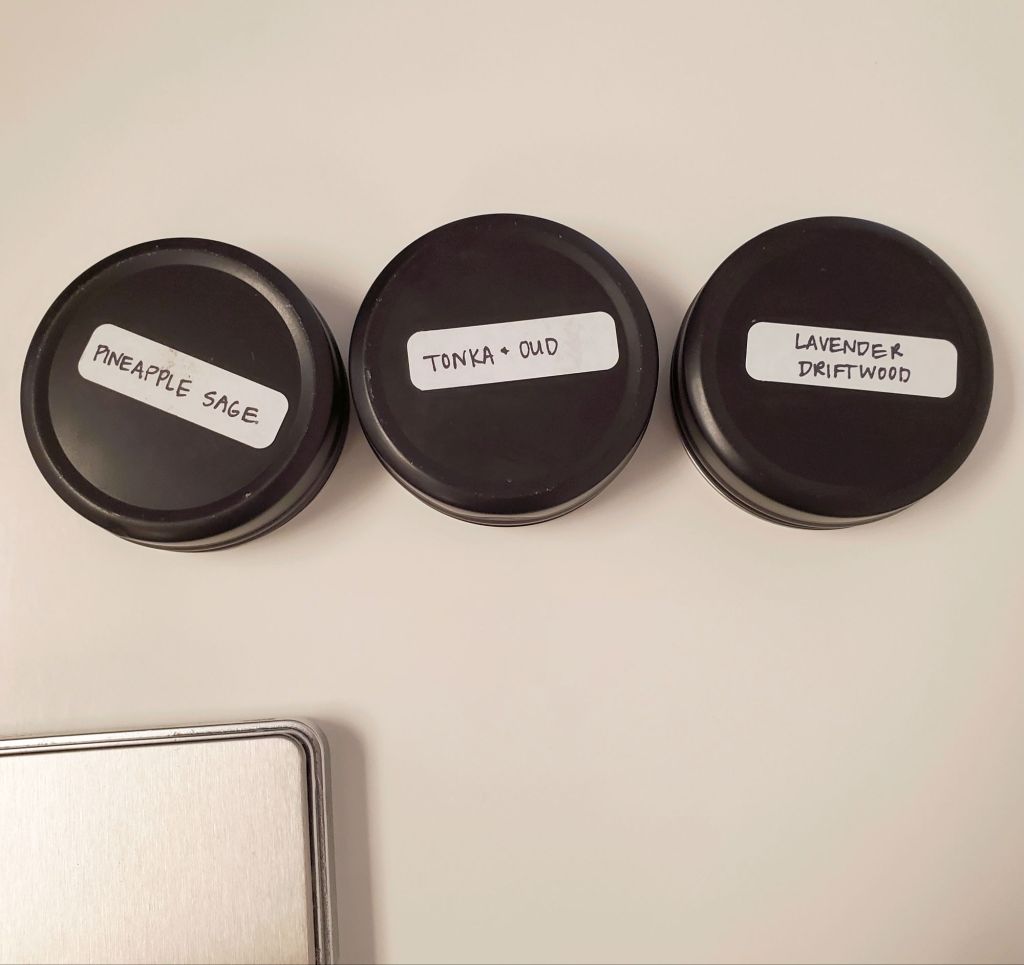
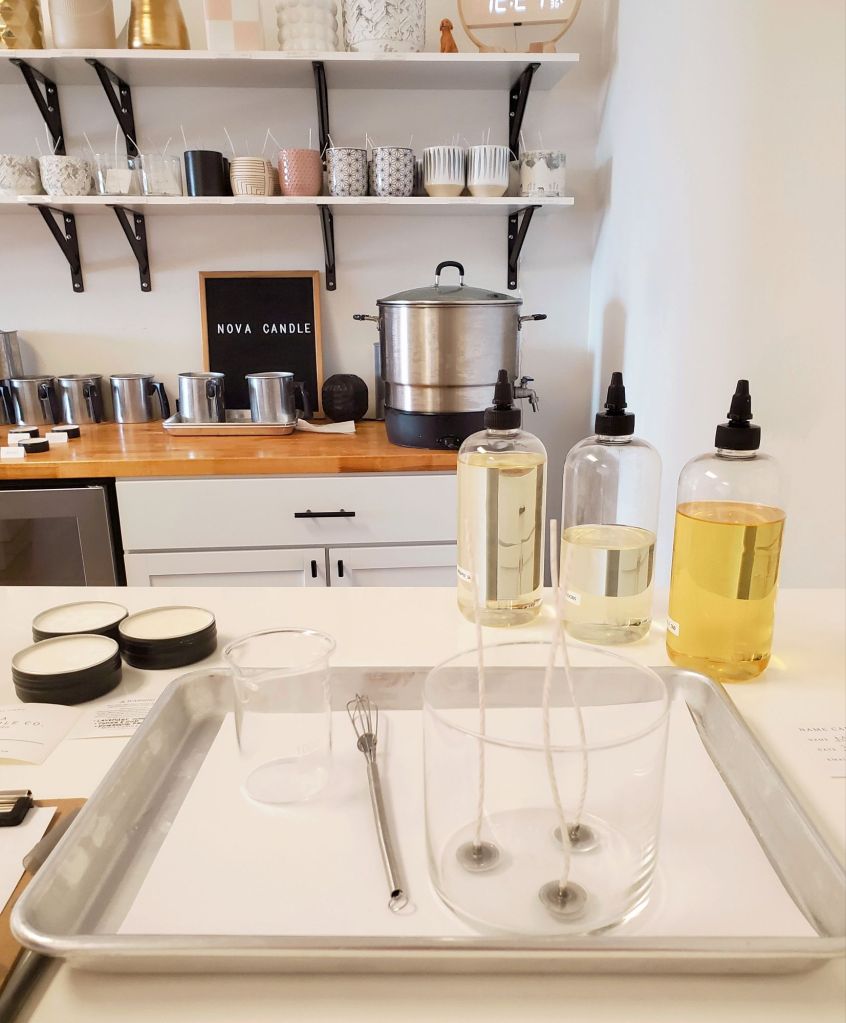
Once our selections were matched with our fragrance bottles, we were ready to begin pouring. Since we both had the same candle, we took turns measuring out 1.2 oz to pour into the bottom of the vessel.
Once that was poured, we began pouring our soy wax on top. We then whisked really well, making sure the fragrance was evenly distributed within the wax.
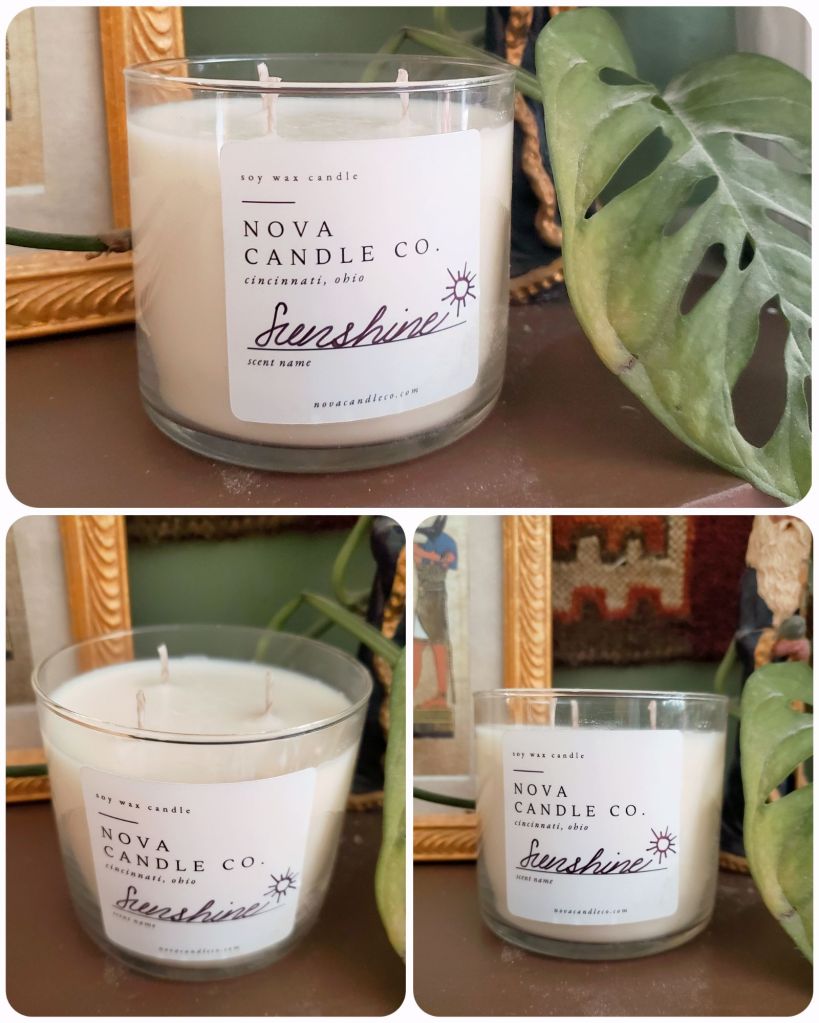
After the wax was poured and well whisked, we set our wicks. Kaden named his “Coastal Breeze” and I named mine “Sunshine” after the song “Sunshine” by Atmosphere. In it, there is a line that says “if I could, I would keep this feeling in a plastic jar, bust it out whenever someone’s acting hard.” I wanted my candle to be my own Little personal glass jar of Sunshine so that I can bust it out anytime I need it.
His handwriting is so beautiful that I asked him to write both of ours on the labels. I drew a little sun on mine that makes me smile when I see it.
Once we were finished, we had to let them set overnight. The next morning, I went back to pick up our candles. They smelled even better after they had set than they did before we left. I’m absolutely in love with mine. Kaden’s was also very lovely – it gave me “Summers on Block Island” vibes.
We both had a really great experience and I’m really glad we chose this for our Day Out. I will definitely be returning! Mia has already asked if we could include this as part of her 10th birthday celebration which I think would be perfect! This is an experience that she would absolutely adore! Of course, it wouldn’t be a proper birthday celebration without stopping nextdoor at Aglamesis for a delicious treat after!
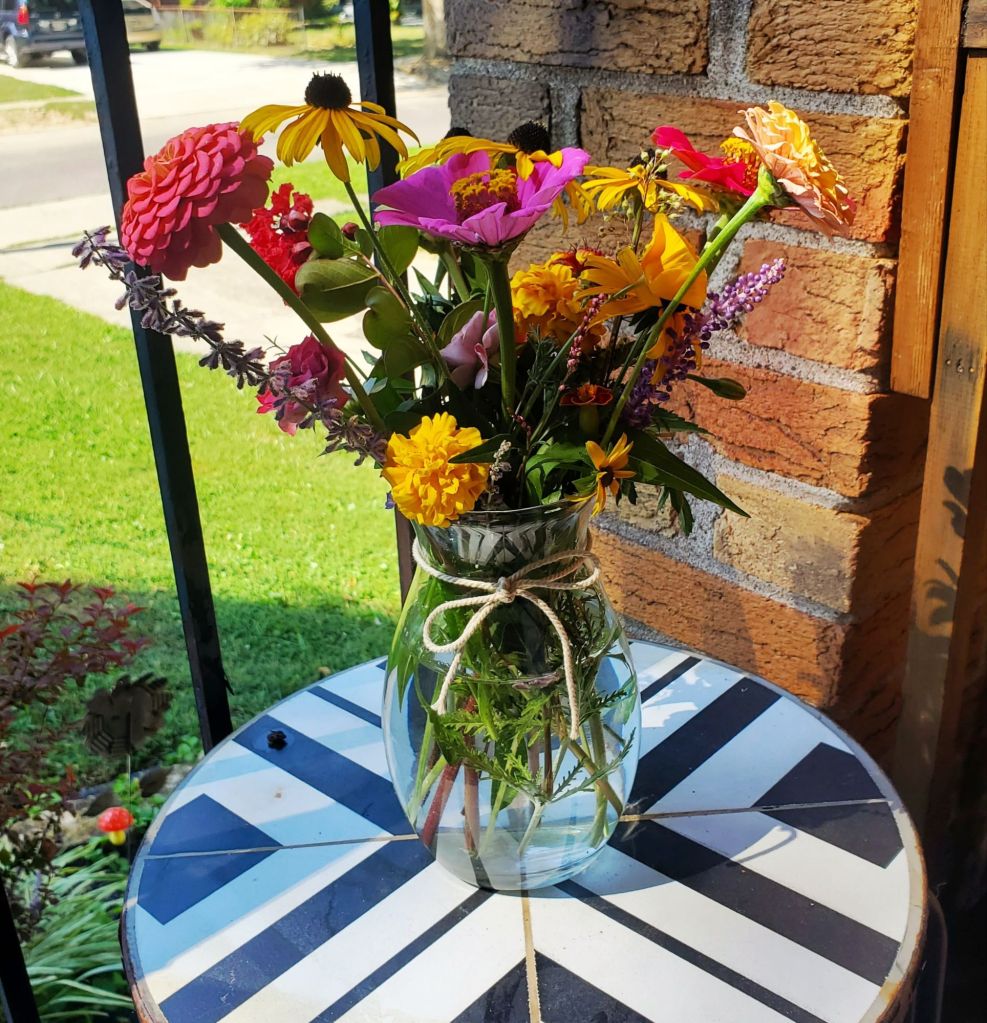
This year, we are really excited to announce that we will be selling our homegrown flower bouquets! The girls have signed up for the Children’s Entrepreneur Market through our homeschool program!
Through this program, the girls will be running Morozov Mini Market entirely on their own. From decorating to sales and everything in-between!
They will be selling:
Homegrown Flower Bouquets
Handmade Flower Presses
Sewn items (Ella)
Homegrown Flower Bouquets
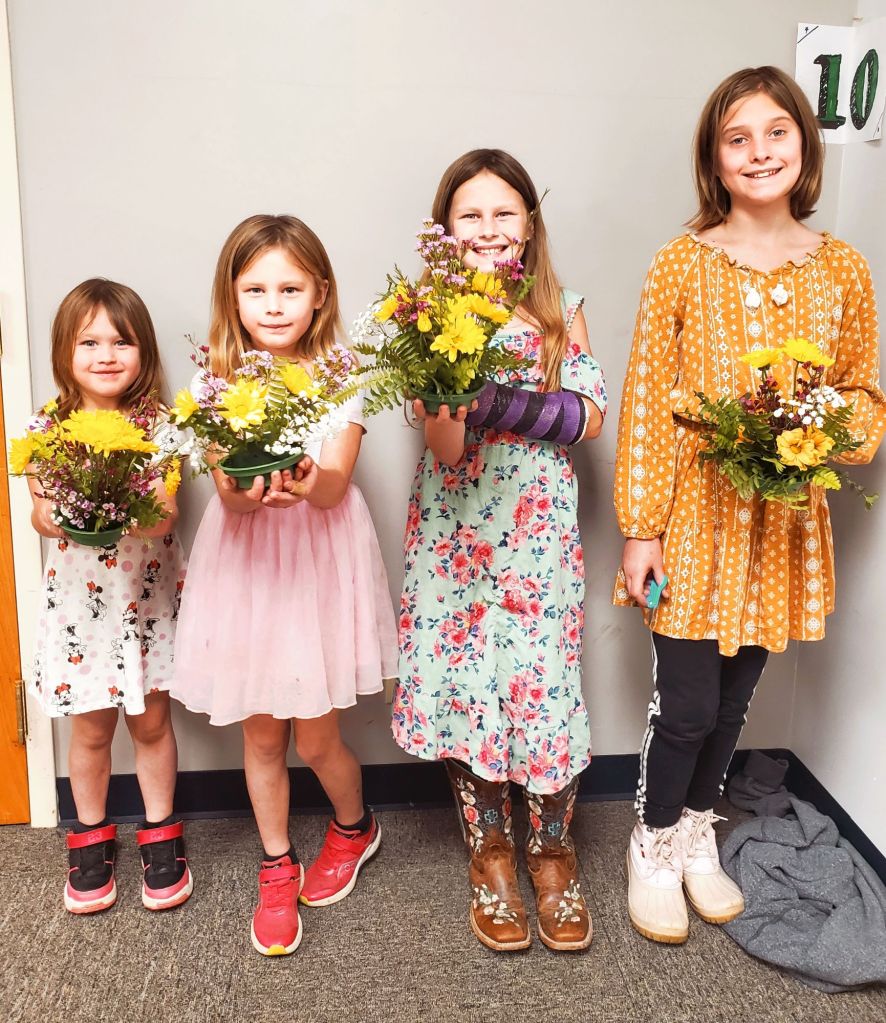
These are examples of a few of our bouquets we created last year – I wish I had taken photos of every one we made. This year we have expanded our gardens and have already added much more variety of flowers. We will continue to add to our gardens throughout the season.
The girls will be selling different size bouquets including adorable mini size ones! Mini size are best for personal place-settings, but also perfect for little hands who loves flowers like their moms!
We took a class on floral arrangements through another one of our homeschool programs, Grace Girls. We are really excited to use the skills we learned to better arrange our bouquets this year.
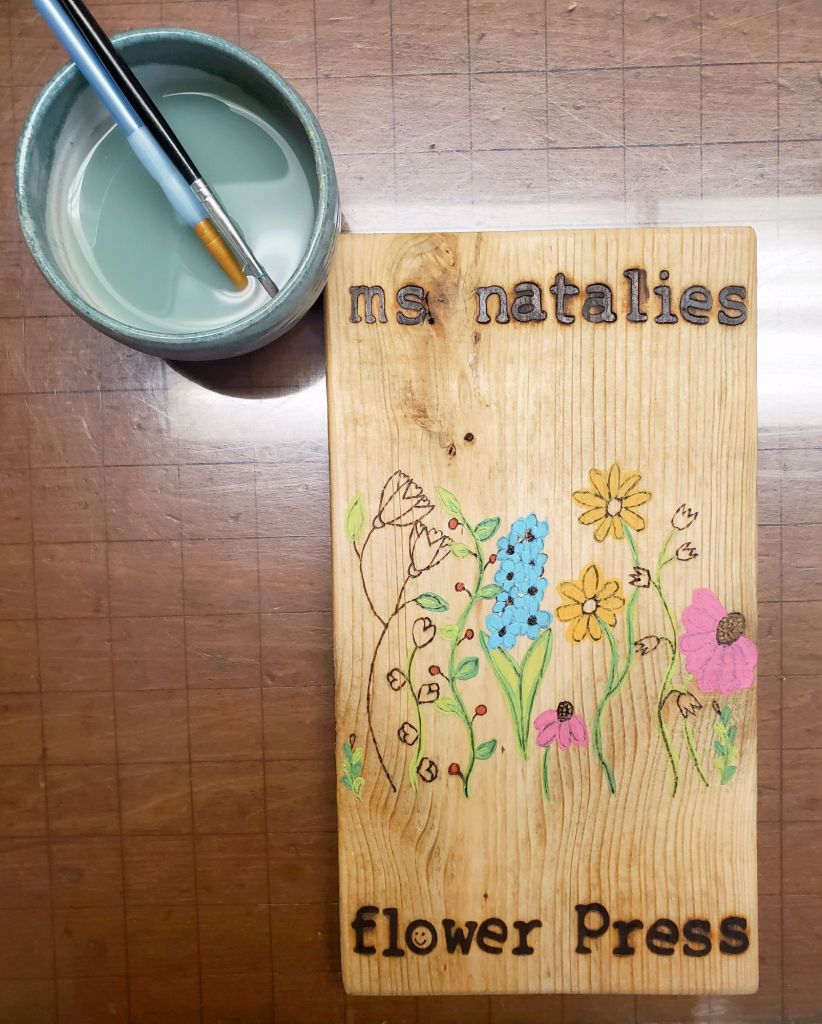
Flower Presses
These flowers presses were designed by me, but are still good examples of what the girls will offer. They will only use the straps for their presses since they are a much more kid-friendly option. They will design and paint each press themselves, but any wood burning will be assisted by their dad for safety purposes.
Sewn items
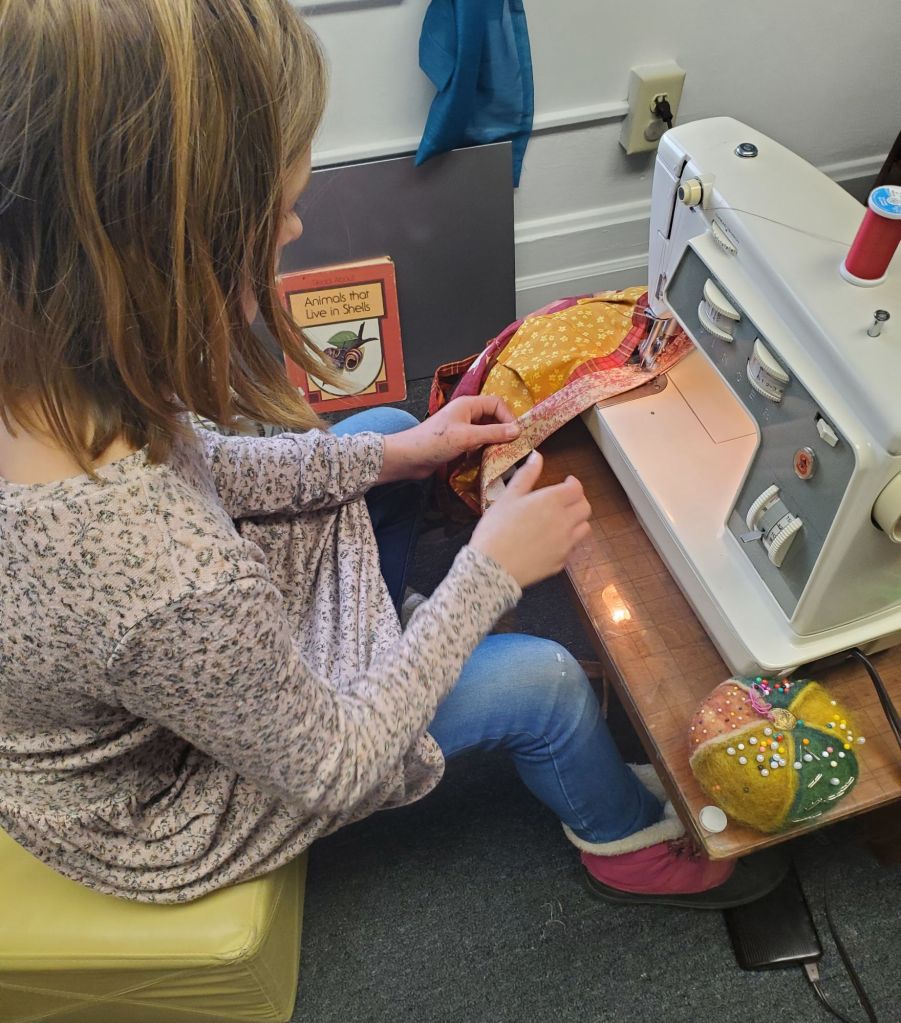
Ella is currently working on sewing our Morozov Mini Market banner for their booths. It is already turning out so cute!
These are a few examples of her past creations. She has specific kids-would-love items in mind that she’ll be making for sale.
For my birthday she made me an apron to collect our chicken’s eggs in. It is reversible, doubling as a kitchen apron as well. She picked all of the fabric herself and I absolutely love it! The plan is for Ella to sew a few child-size ones to sell at their market. With the major influx of both homeschooling families and backyard chickens, I think this will be a “hot” item. We may not have time to achieve this by our June market, but we will definitely have them for our Fall market – which is actually perfect with the timing of laying for the majority of people who began their chicken journey after the 2025 Bird Flu began.
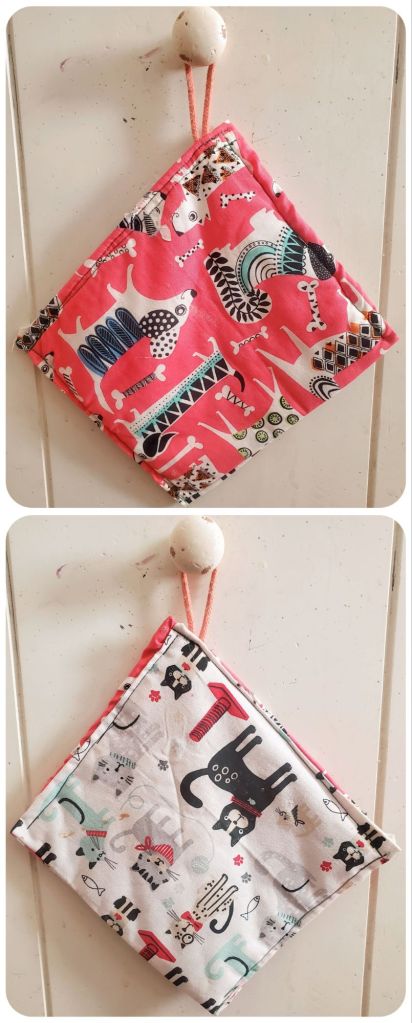
She also made this adorable reversible pot holder. One side has a fun dog fabric while the other side has cute cats.
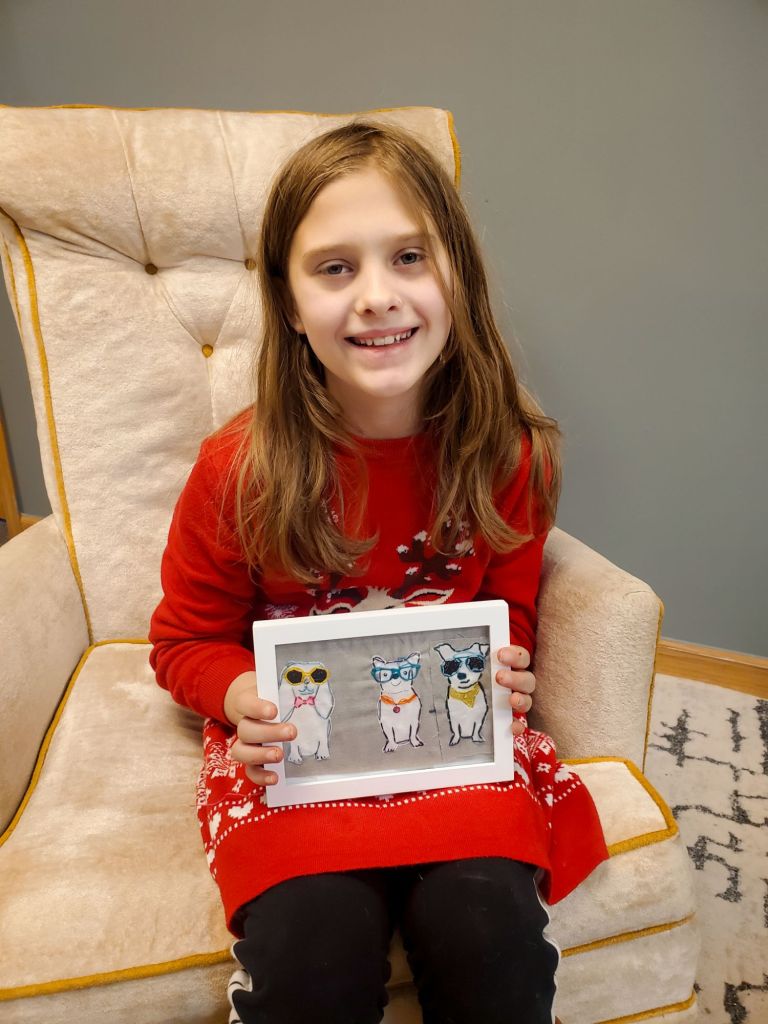
This “Peekable Picture Frame” has always been one of my favorite sewing projects she’s created. When closed, it resembles a quilt square, but when open, it has a beautiful photo that Ella picked out to put in it.
We do take custom orders if our booth dates don’t work for your schedule or you would like something sooner or later! We may be adding more dates this market season🤞🏼.
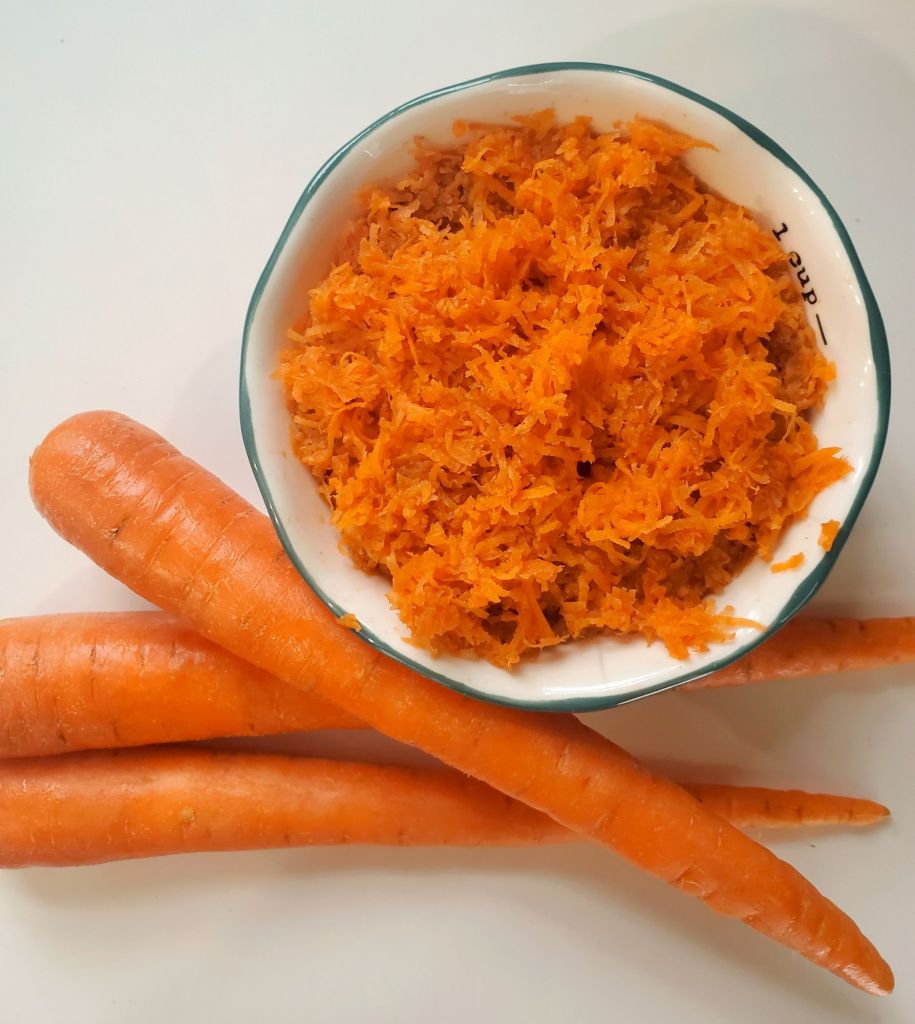
I’m loving this Harvest of the Month campaign! It’s been so fun having a specific produce item to focus on for the month! The month of February was focused around Carrots!
We are a very Holistic Health-oriented family. We believe food and movement are medicine. We also believe you are what you eat (if you eat garbage, you’re going to feel like garbage.) I am hopeful that by sharing these Harvest of the Month unit studies we put together in our homeschool this year will help educate others in the importance of eating healthy & inspire others to intentionally eat healthier too.
Health Benefits
Let’s start out with the health benefits that you will gain by simply eating carrots:
Improves Eyesight, Reduces Macular Degeneration
Anti-aging
Prevents Cancer
Prevents Heart Disease
Strengthens Bones
Promotes Healthier Skin & Hair Growth
Improves Kidney Functions
Prevents Infection
Cleanses Body of Toxins
Improves Liver Functions
Prevents Strokes
Protects Teeth & Gums, Better Breath
Aid Digestion & Weight Loss
Maintain Cholesterol Levels
Minimizes Inflammation
Blood Pressure Regulation
Regulates Blood Sugar Levels
Improves Brain Health & Cognitive Function
Boosts Immunity
Anti-fungal
Antioxidant
Rich in Potassium + Vitamins A & K
High in Fiber, Combats Constipation, Cures Diarrhea
Naturally Boosts Energy
Prevents Diabetes
Increases Sperm Count in Men
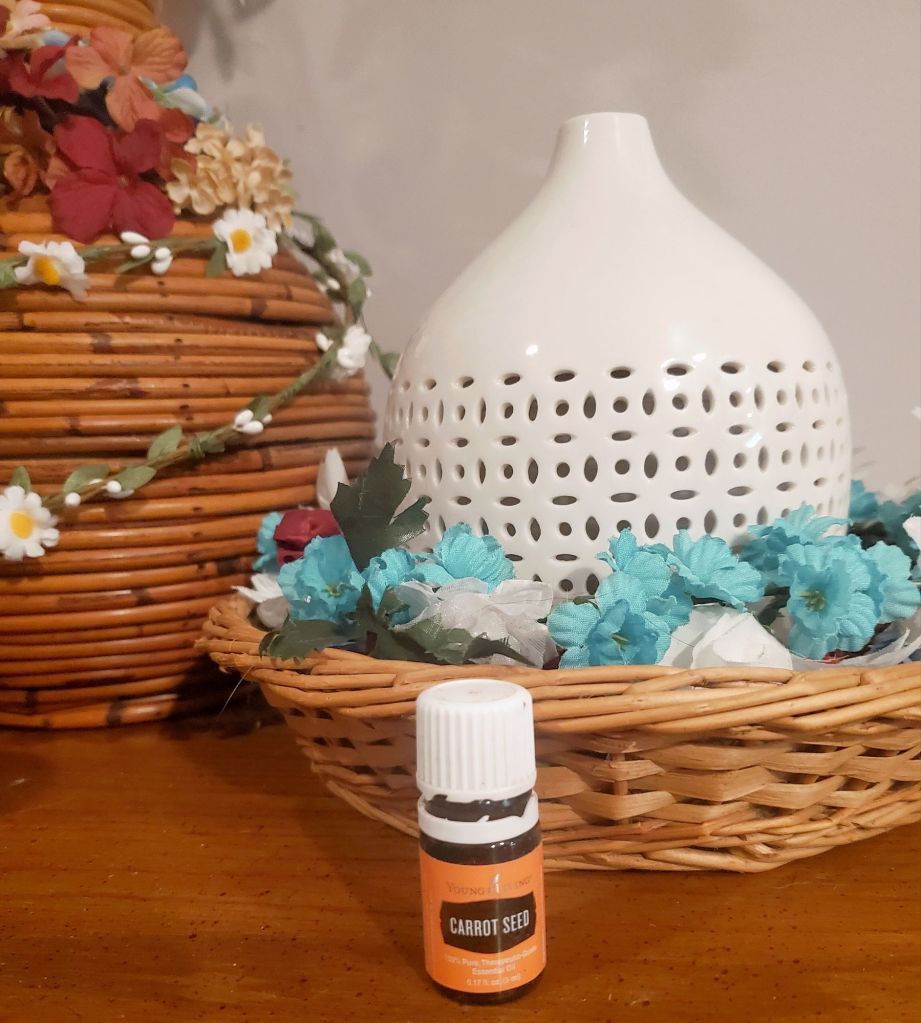
Carrot Seed Essential Oil also has many health benefits, but it is strongly urged to avoid during all stages of pregnancy, as well as by individuals who suffer from epilepsy. As always with Essential oils, make sure you are using a pure & reputable brand (I use Young Living and DoTerra) to get the best results.
Treats Kidney Stones
Treats Jaundice
Aids in digestion, gas, and bloating
Improves breast milk production
Stimulates lymphatic system
Relives menstruation pain
Relieves muscle pain
Stimulates appetite
Healthy Skin and hair
Antioxidant
Heals abscesses, wounds, and other skin disorders
Treats ulcers
Improves liver and gall bladder disorder
Relieves stress & anxiety
Improves respiratory function
Recipes
I made cute little recipe cards of the Carrot recipes we made this month so you could print & put together your own Harvest of the Month Cookbook as I continue to post each month!
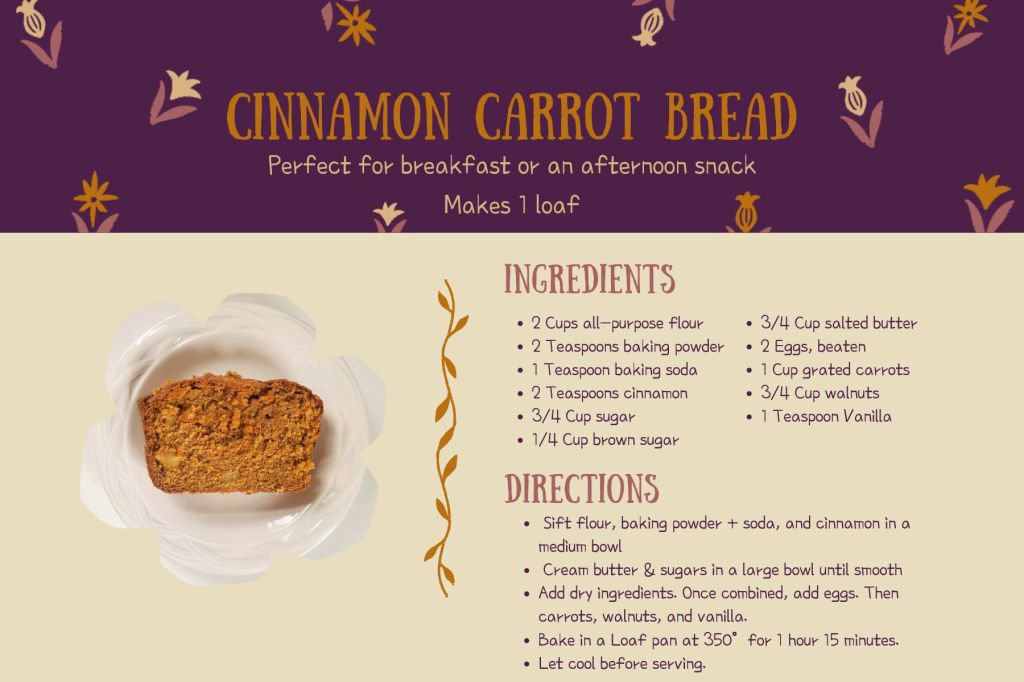
🥕 Cinnamon + Carrot Bread 🥕
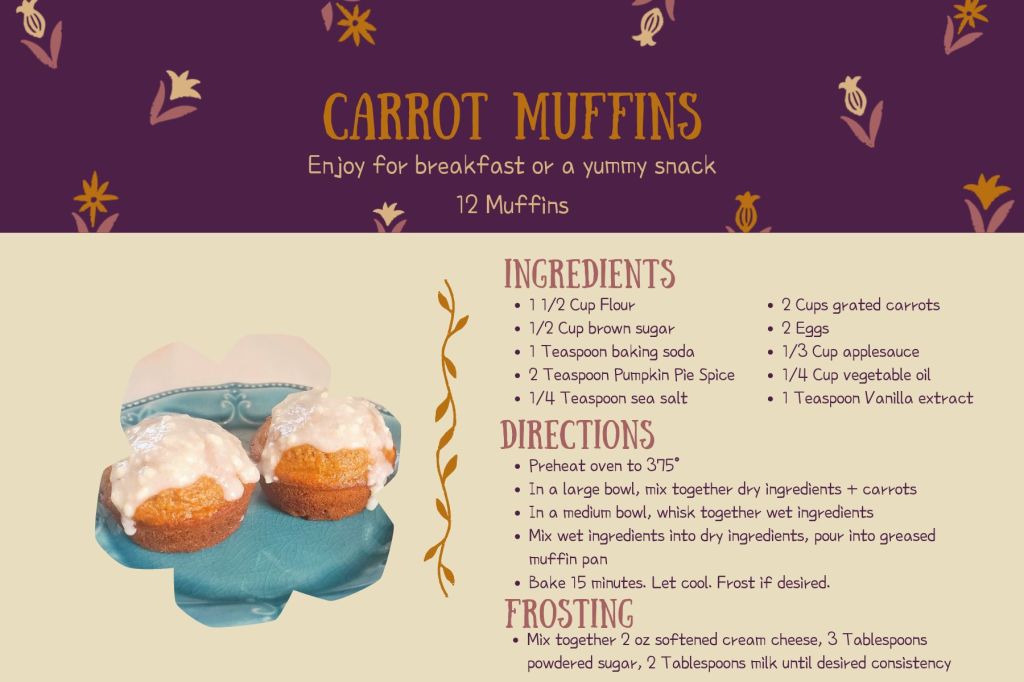
🥕 Carrot Muffins 🥕
🥕 Ukrainian Carrot Sandwiches 🥕
These were hands down my favorite of all the Carrot foods we made. They were SO good! I’ll definitely be making this again soon for Easter and many more meals after that! We really liked these a lot.
🥕 Baked Carrot Fries 🥕
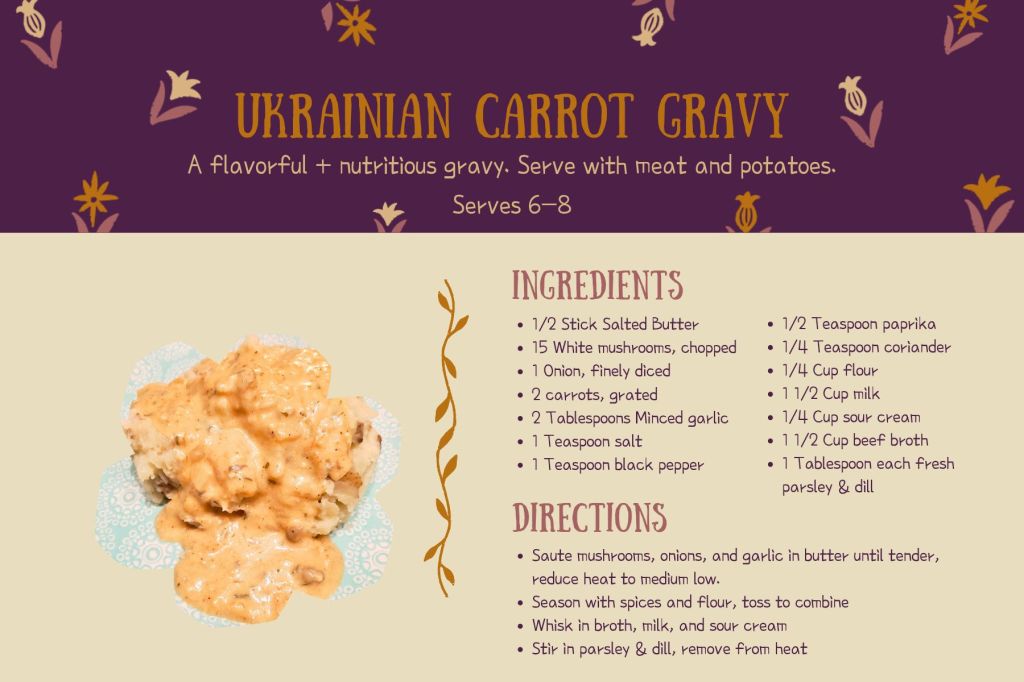
🥕 Ukrainian Carrot Gravy 🥕
We all really loved this gravy and have officially made it our “house gravy.” My husband and I agreed that it was better than any form of gravy we have ever tried before!
🥕 Carrot Pudding 🥕
🥕 Carrot Cake 🥕
I prefer my carrot cake to be packed with thickly shredded carrot pieces, nuts, & Golden raisins, but kids don’t particularly feel the same, especially if they haven’t already been introduced to these textures in cake before so I made a kid-friendly & sensory-friendly carrot cake with no nuts, no raisins, and carrots grated so thinly they resemble more of a carrot “pulp” than a carrot, so that you would never know carrots were included. It’s lovely, but come Easter, I’ll be making it the way we love it – full of texture.
Educational Resources
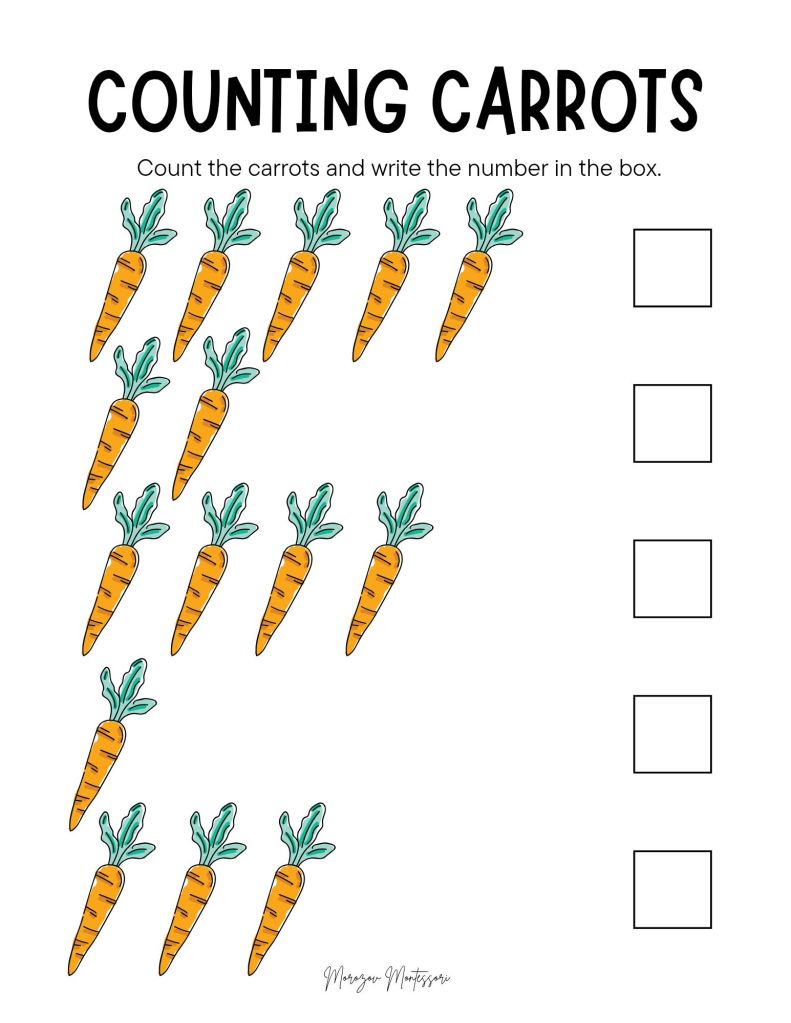
I had a lot of fun creating this Facts About Carrots printable! I feel like we learned a lot about carrots that we didn’t previously know!
These were a few of our books that we used to learn new information about carrots:
Activities
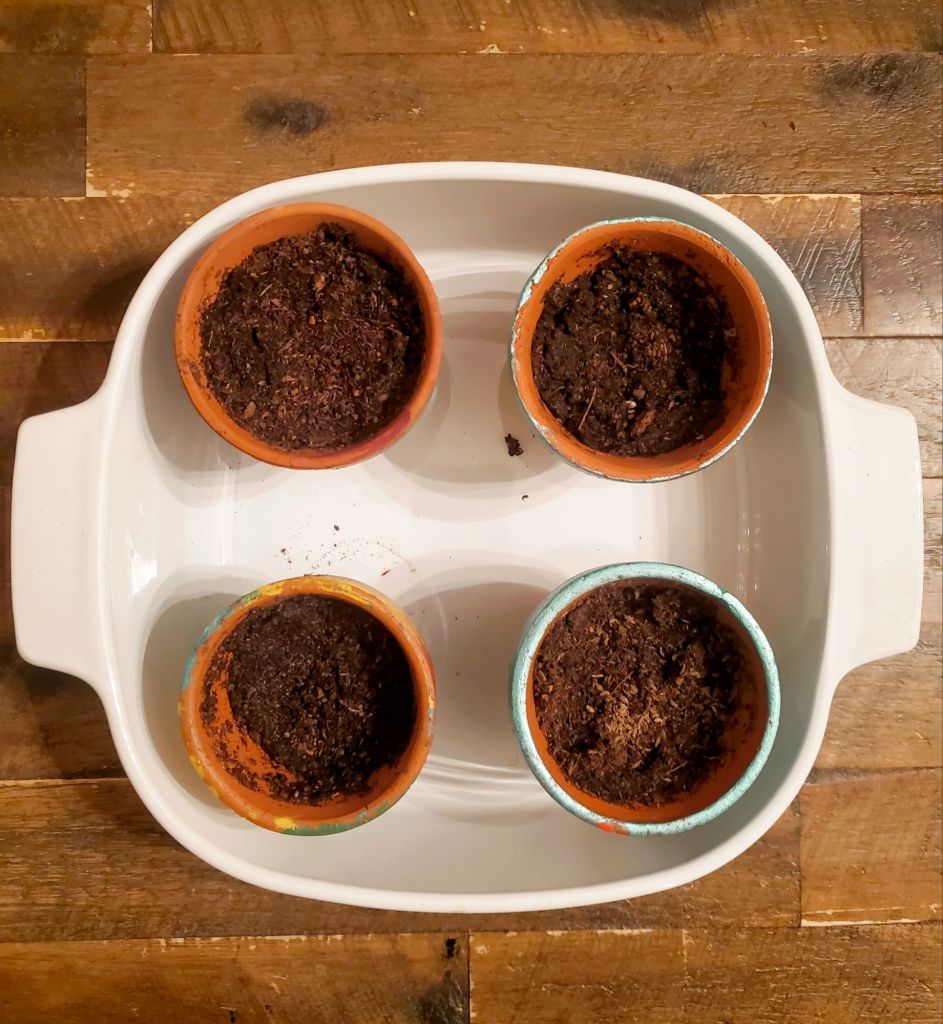
🥕 Planting Carrots For Our Garden.
We painted mini terracotta pots and planted carrot seeds inside.
We learned that carrot plants have roots, stems, leaves, and flowers. We eat the root part of the plant which grows underground. The seeds are planted underground, but can also be started inside 4-6 weeks before spring. Once the carrots are fully grown, flowers form on the carrot plant. The seeds fall down and replant themselves. It takes about 100 days for a carrot to grow.
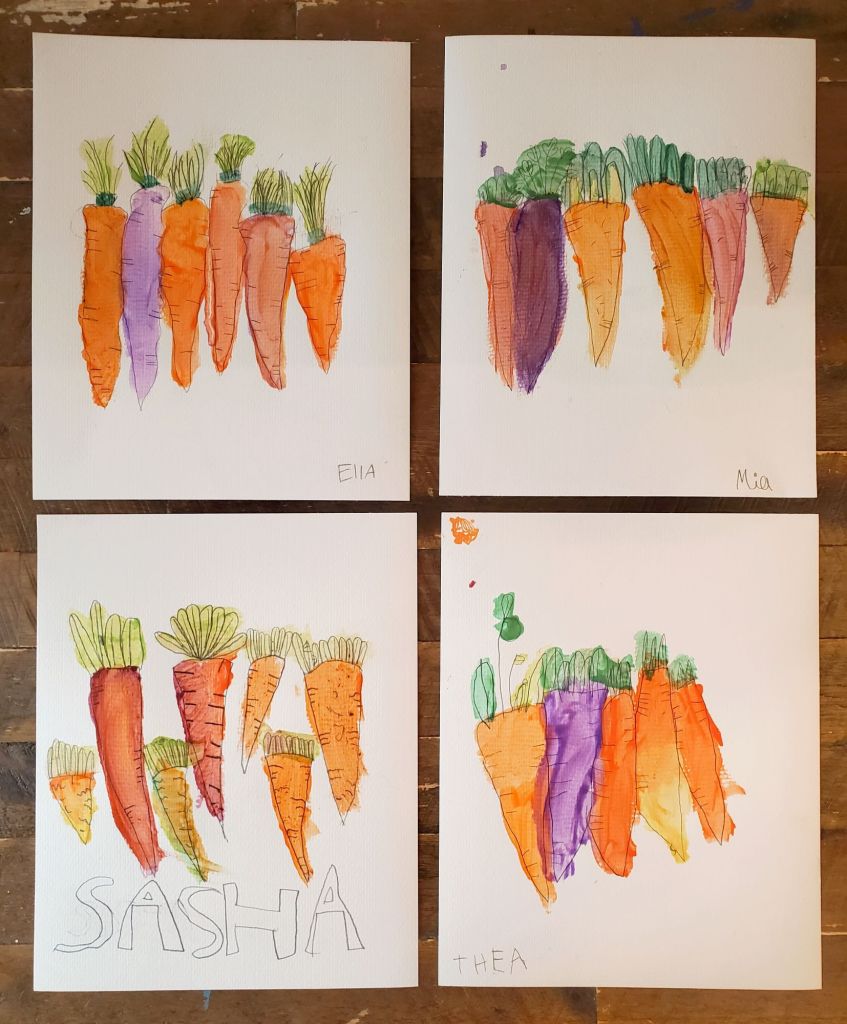
🥕 Watercolor Painting Carrots.
Each of the girls painted carrots using watercolor paints. I asked them to draw their carrots first and then paint them. I think they turned out really good! I asked Moses to participate in this activity, but he chose not to.
🥕 Scrap Fabric Carrots
We used fabric and ribbon scraps to make carrots on canvas banner pieces. Each person got their own banner piece to work on. Moses, again, chose not to participate. I am in love with the way it turned out and it will be hung for at least through Easter.
DaytimeNighttime
I’m honestly really proud of our first Harvest of the Month unit. We learned a lot about carrots that we didn’t previously know and fell in love with recipes we may not have tried. We are excited to work on our March Harvest plans!
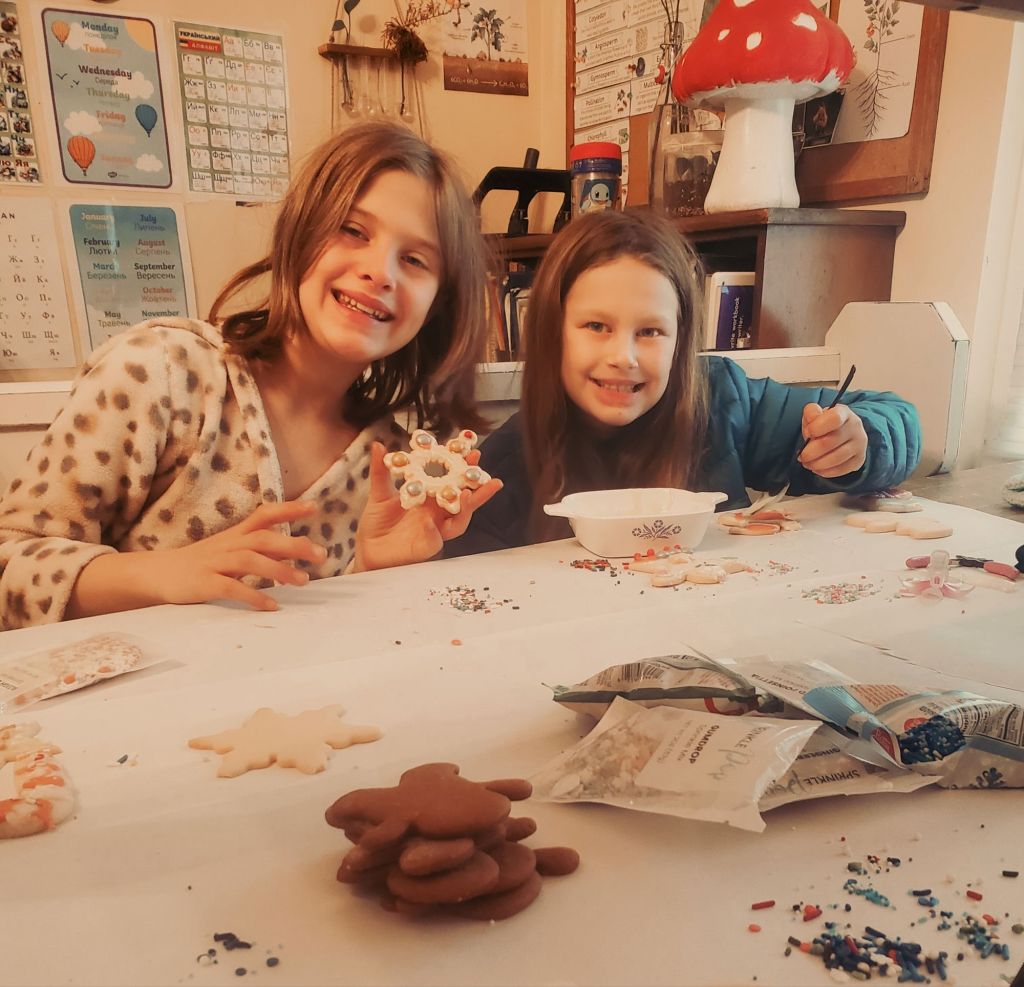
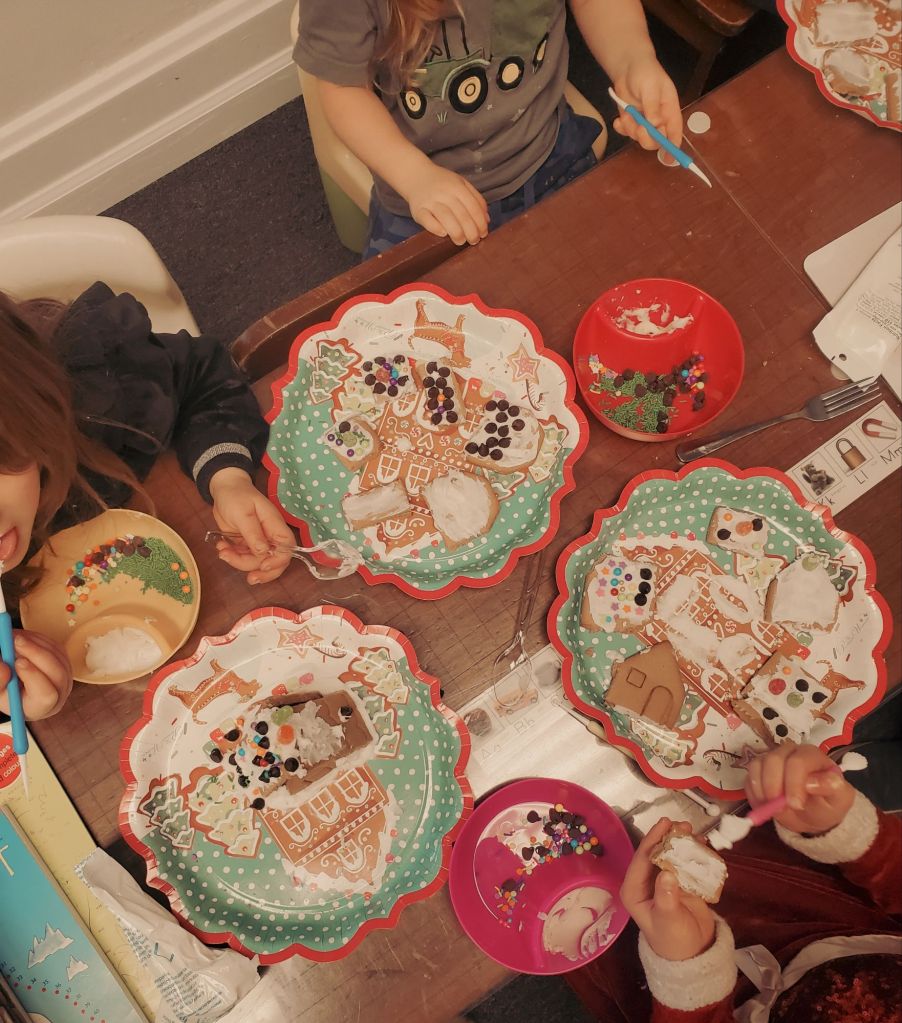
We have been working hard this week baking SO many cookies to put together little Cookie Basket Christmas gifts for our homeschool teacher, Ms. Natalie, and our piano teacher, Ms. Bayleigh. We also made a Cookie Box to bring into my work for my co-workers.
The kids were all big helpers and had lots of fun decorating. I loved how much they were into it and how long it kept them occupied for.
To keep the mess to a minimum, we rolled out our large paper on the table to work on. This is one of my favorite hacks! It makes the situation so much less stressful. Kids can also color on the paper while they are waiting. If you’re working in a group setting you can use it as a way to organize whose cookies are whose, what types of cookies are available to work with (Gingerbread, Sugar, etc.), or ingredients for allergy purposes.
I think that the kids did a really great job decorating. They really put a lot of effort into each cookie.
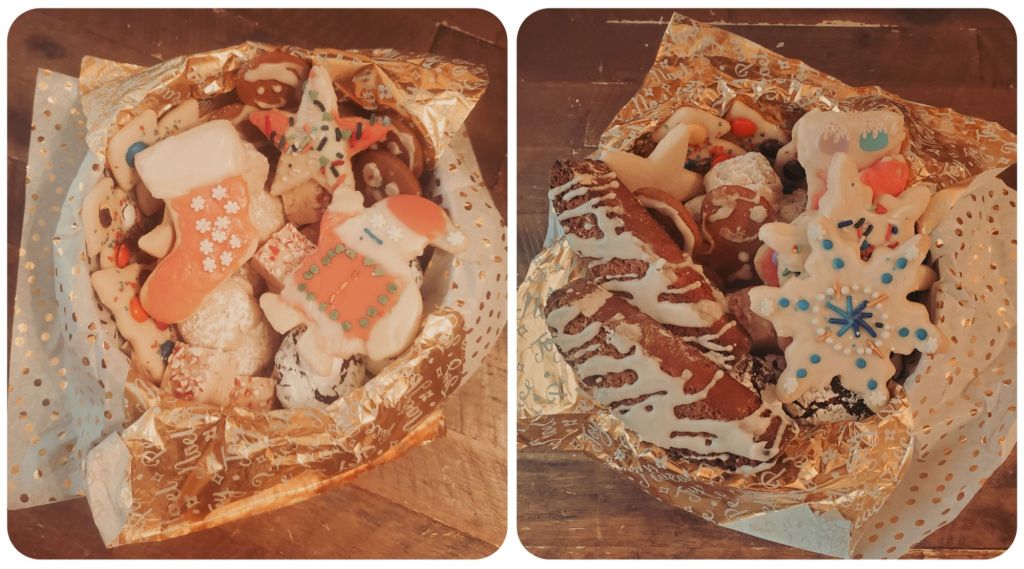
Cookies Boxes
This year we included:
• Snowballs • Gingerbread Men • Sugar Cookies with M&M • Peppermint Fudge • Chocolate Crinkles • Decorated Sugar Cookies & Gingerbread Men • Sourdough Gingerbread Biscotti
We had a lot of fun putting these together! I think they look adorable. I especially like how the box for my co-workers really shows what all is included in the box. I think next year I’d rather do all boxes than baskets for this reason. Mia asked if we can make this a new tradition for our family. We will definitely have to start planning earlier next year to increase our variety. This year, we just worked with what we had available on hand in our pantry. I’d really like to include some fruit ones next year, and a few other treats.
Each kid made their own Gingerbread House with Ms. Natalie for a Christmas activity before winter break began. I did not know this was our activity or I would have made sure Mia came. We did bring home a plateful of treats for her though. It was only Ella & Sasha’s classes today, but I like to bring the Littles so they can free play while the other kids are at their classes.
Some of the cookies broke in the process of trying to separate them. We were able to make the best of the situation and still make them work. I especially liked the little scenes that Ella made. I thought that was really creative.
The important thing is we had a lot of fun! I think they all turned out super cute and they were yummy! These cookies from the kits had a much more mild gingerbread taste to them than the ones we make at home, but I think that’s probably good for kids. Gingerbread can be a bit spicy for kids who aren’t used to a lot of spices. Next year, I’d love to try making our own Gingerbread Homes from scratch! I think that would be an extra special Christmas memory for us.
I found the idea for these adorable Salt Dough Ornaments on Pinterest!
If you have never made Salt Dough Ornaments before, they are SO easy & fun to make! Plus, you get an adorable keepsake from your children or grandchildren!
First, we made our salt dough.
Salt Dough Recipe
2 Cups All-Purpose Flour
1/2 Cup Table Salt
1 Cup Warm Water
Mix together until a dough forms, adding more flour if needed. SO simple!
Once your dough forms, roll out onto floured parchment paper. Get your hand nice & floured to prevent sticking and press down gently, but firmly for a handprint. Cut excess dough away from your handprint & use a chopstick to create a small hole at the top for your ribbon.
Once everyone’s handprints are pressed, bake for 2-3 hours in the oven at 225°F. Once completely hardened, remove from oven and let cool.
Once completely cool, you can begin painting! We went with the Santa theme we found, but you can use your creativity to come up with other Christmas ideas or check Pinterest for more inspiration (there are so many ideas there!). We even made a paw print keepsake for each of our pups!
Once you finish painting and your ornament has dried, it’s time to put a layer of Mod Podge (or other clear sealant) to preserve your ornament! Once the sealant is dry, superglue your pom-pom to Santa’s hat & add your Christmas ribbon to hang!
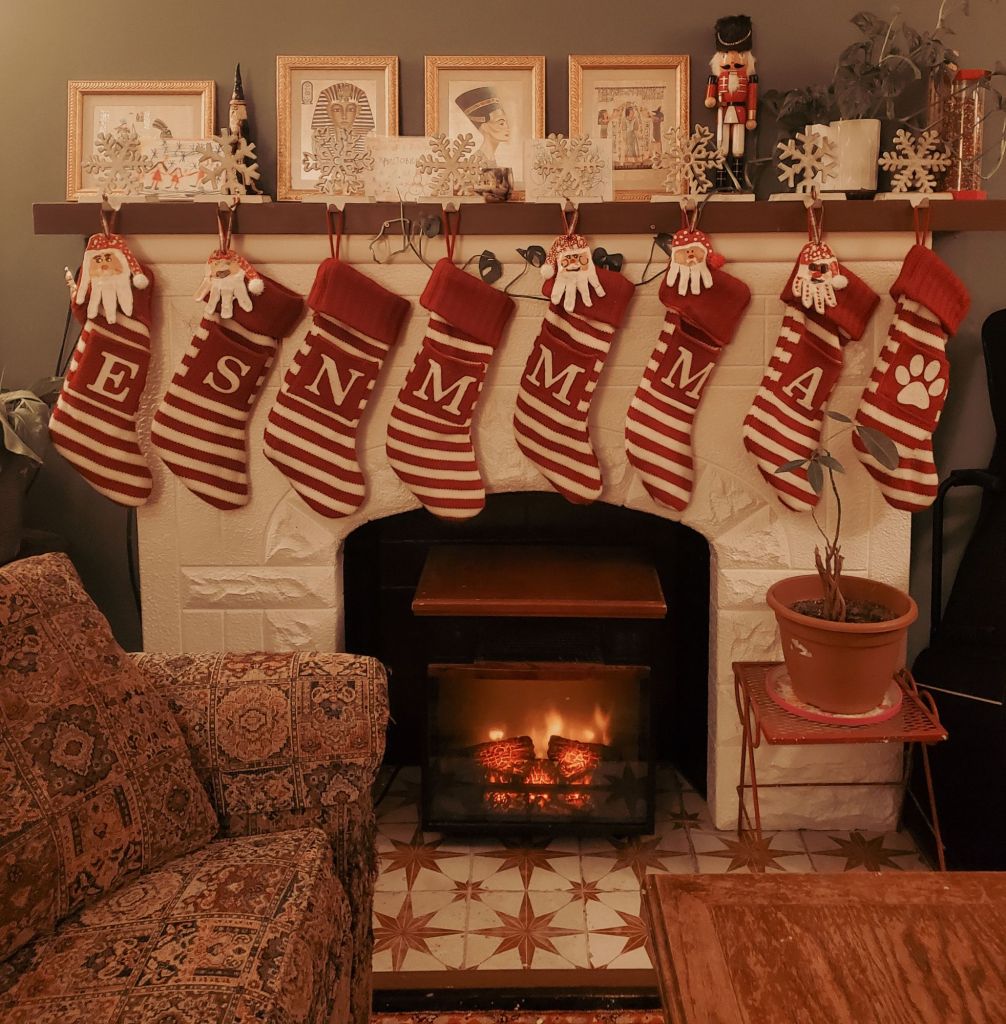
I think that they turned out SO cute & we had a lot of fun making them! We did decide to hang them from their stockings rather than on the tree because of their weight. I think it looks adorable there though!
This is a super simple craft that keeps kids occupied for hours! Even after we finished pressing our handprints, the kids continued to sensory play with leftover dough for a long time while the Ornaments baked in the oven. I definitely recommend adding to your holiday traditions!
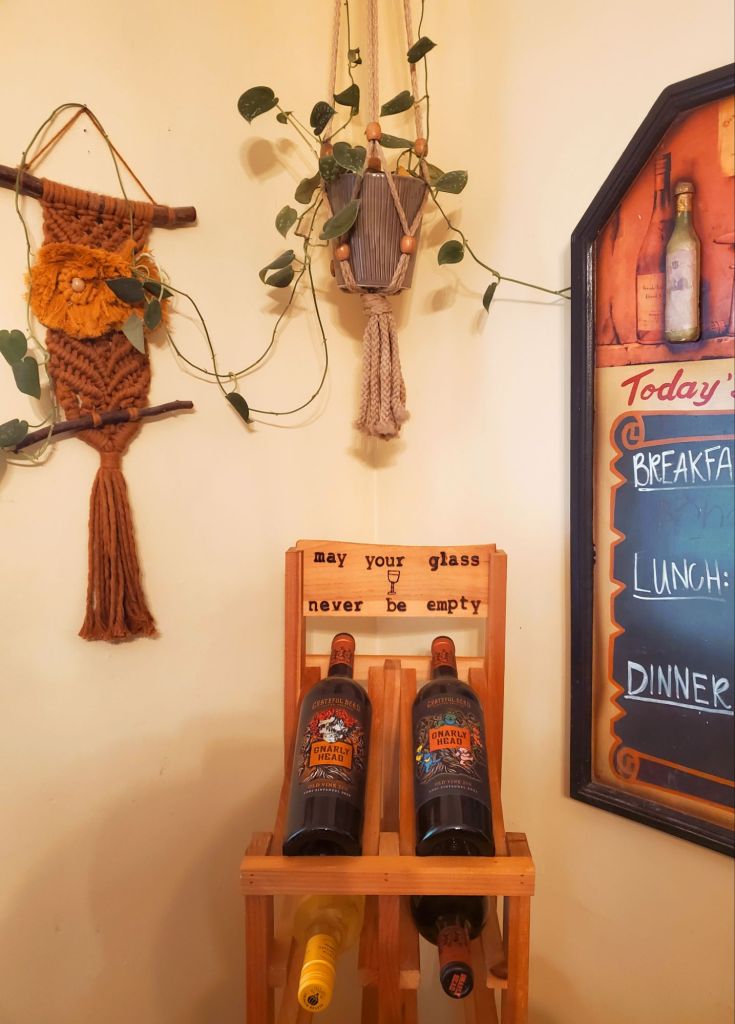
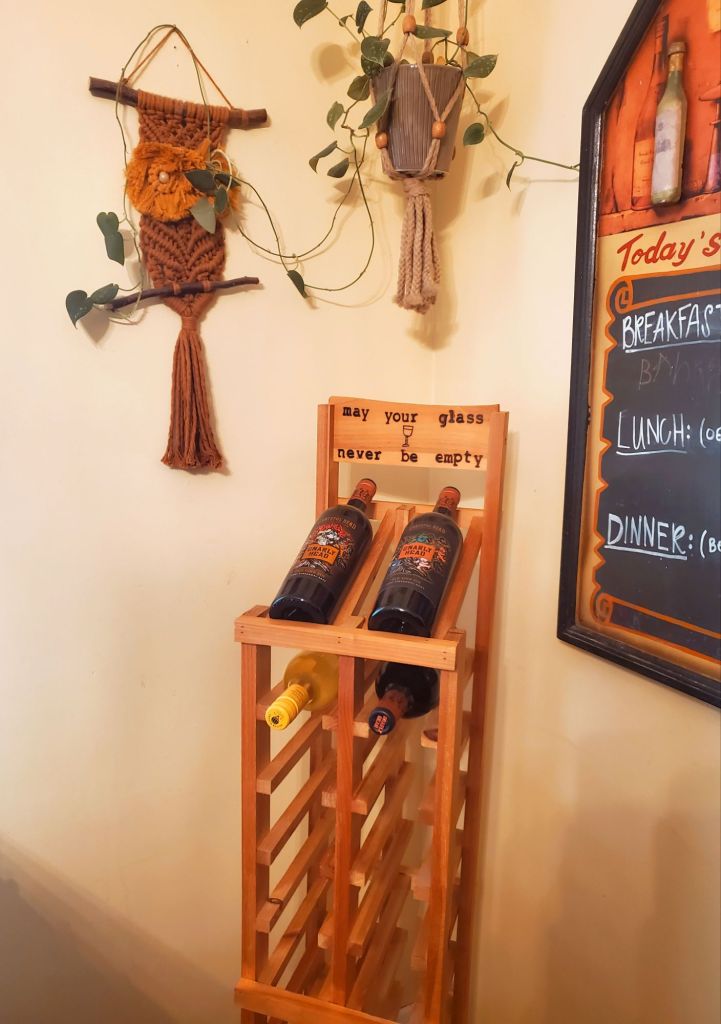
Yesterday was my mom’s birthday & I wanted to share my gift to her!
I was recently tasked with cleaning out the basement of my work – a huge job! It has been used as storage for many decades and became overwhelming, to the point nobody wanted to go down there for years. Luckily for them, hoarder cleans are my absolute favorite – especially when I get to keep treasures I find along the way!
I found a nice, sturdy wine rack that was no longer being used that I thought was perfect for my mom & found part of an Irish blessing to wood-burn onto it to personalize it for her. I cleaned it up really well & added a layer of almond oil. I really love the way it turned out! I hope she loves it too!
This Fall I’ve been working on going through each room of our home, decluttering as much as possible & re-arranging furniture to better fit our space. Earlier this week I focused on a major Hotspot: my desk. I realized that the last time I gave it a declutter this good was when we first began officially homeschooling 3 years ago.
While decluttering I found the step by step instructions from a previous Grace Girls lesson that same year on How to Make Corn Husk Dolls & wanted to store those directions here so they don’t get lost again.
These are not my directions & unfortunately, I do not know who to credit, although I do believe that the moms who taught the class, Mrs. Mary & Mrs. Bekah, probably put it together themselves though!
Corn Husk Dolls
“Simple Corn Husk Dolls have timeless appeal and are just the thing to keep little hands busy at a family gathering taking place during the Fall.”
Materials Needed:
Square-Cut Dried Corn Husks (a Mexican grocery store is the best place to purchase these)
Wool Felt, or Fabric Scraps, in assorted colors
Yarn or Raffia
Paper Towels
Buttons
Scissors
Hot Glue
STEP 1: Start by soaking the husks in water for 10 minutes, then blot excess water with paper towels.
STEP 2: Layer 4 or 6 husks (always has to be an even number) in a stack.
STEP 3: Using thin twine, tie husks together about 1 inch from the top.
STEP 4: Separate husks into equal portions (2 & 2 or 3 & 3) and fold husks down covering the twine. See photo.
STEP 5: Using thin twine, tie husks about 1 inch down to create the head.
STEP 6: Roll a single Husk and tie at the ends to make arms.
STEP 7: Position arms below the knot at the neck, between an equal portions of husks. See photo.
STEP 8: Tie waste. For a FEMALE doll, trim husks to an even length.
STEP 9: For a male doll, separate legs into equal portions. Tie at knees & at ankles. Trim evenly.
Once you have your doll formed, you can begin making clothes out of felt or fabric.
I’m really glad that I found the directions so that we can make these again! They were SO much fun to make when we did! Plus, it’s been a few years since we made these and I’m sure they would be able to make even better ones now, especially since Ella has picked up the hobby of sewing over the last 3 years!
It’s been awhile since I last shared one of Ella’s sewing projects! Today is my birthday & Ella sewed me the BEST present ever! I literally could not love it anymore!!
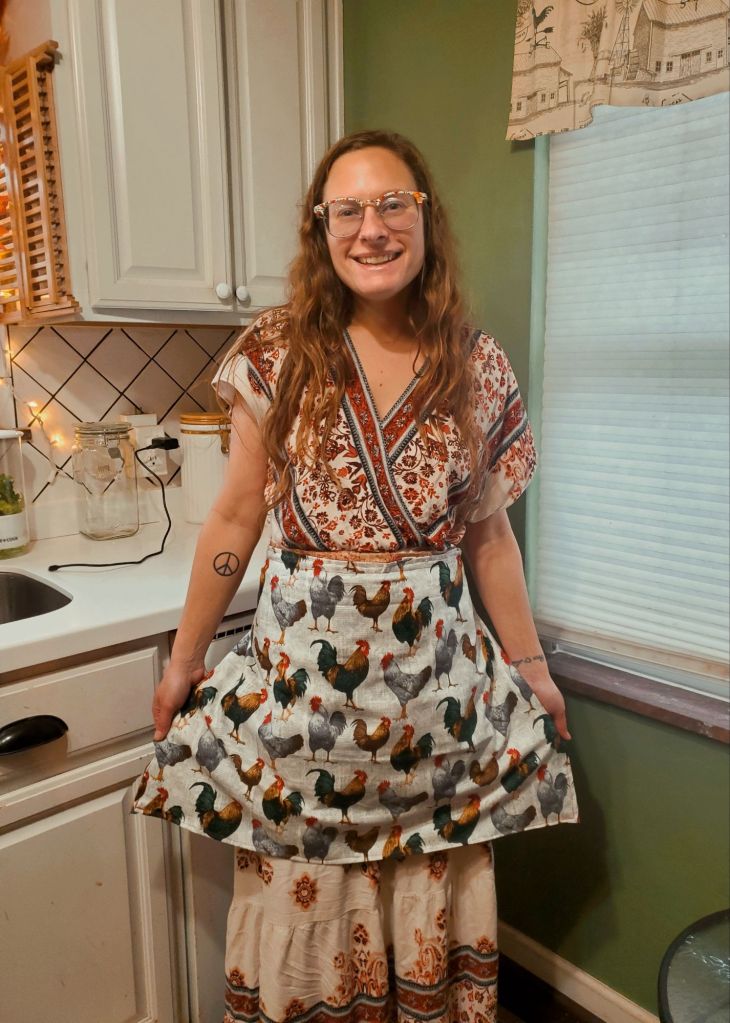
I have been wanting a harvesting apron for the longest time! She sewed me one for collecting eggs for when we get our chickens very soon! I can also use it in the garden to collect fruits & veggies, and it is reversible to double as a kitchen apron too so that I don’t have to switch back and forth!
She picked out all of the fabric herself which I love! It means so much more to me than if someone just went out and bought me an apron. It is made entirely with love and creativity!
I am obsessed with it! We are getting our chicken coop in a couple weeks as an early family Christmas gift! Getting prepared for our new adventure has me SO excited! I cannot wait to fill these adorable little pockets with all the eggs!
She’s planning to make child size ones also for her siblings so they can help collect eggs too. Plus it is just so cute, all the girls immediately begged her to make them one! I love having a girl who sews!
I’m seriously so excited! It feels really great to have something to look forward to. While I wait for these few weeks to pass, I’ll be reading up & learning all the things I need to know! I can’t wait to share our adventure with you here!
Our Grace Girls meeting this week was learning about floral arrangements, how to create one, and when it would be useful.
This was a really great topic for us! In fact, I have felt like all of the classes we have attended lately have been aligning perfectly with our new venture to open our general store – Morozov Mini Market. Flower Presses, Soap Making, Arranging Flowers. The universe is sending very clear messages to me right now, preparing us for our new journey.
When we arrived, the room was set up with a large table in front for the flowers to be visibly arranged on so everyone could see what we were working with.
The first thing we did was soak our “oasis” foams in buckets while we went over our lesson. Our teacher tonight, Ms. Kathy, had grown up creating floral arrangements with her grandmother for their church & has taken 3 professional floral arrangement classes. During the lesson we discussed when people use flowers:
Weddings, funerals, welcome home celebrations, sick/in hospital, new baby, holidays, house warming/thanks for inviting me gift, birthdays, etc.
We also went over tips such as:
💐 Removing the lower flowers so they don’t rot.
💐 The little packets that come packaged in store-bought flower bouquets aren’t meant to be dumped at once, they are meant to be used throughout water changes as well to keep the flowers alive longer.
💐 Always trim the stems, when you get the flowers and when you change the water.
💐 You can check a flowers freshness by pinching the stem gently under the base of the flower. The more tough it is, the more fresh the flower.
💐 Don’t bend the stems
💐 Always use a lot of greenery to fill in the vase or arrangement. The more the better.
Once we finished our lesson, we collected our oasis from the buckets of water and received our flowers that we were to work with.
I love these little reusable “buckets” they come in. The buckets are re-useable, but the standard oasis foam is not, due to bacterial growth. The unused foam rounds should be stored in a dark & dry place so they don’t get damaged from sunlight or dampness. After some research I did find that oasis recently designed a more eco-friendly reuseable option, Terrabrick.
I had no idea that these were able to be used with real flowers. I only ever see then at stores like Michael’s or Hobby Lobby next to the fake flowers. I thought they were only for fake ones, but now that I know they are for real flowers too, it’s a total game changer for me! My options are endless!
We began grouping into small piles of greenery & different types of flowers.
Everyone was given greenery, yellow flowers, and purple flowers. There was light and dark purple to chose from, or you could do a little of both. There were a few different yellows to work with. There was a very small amount of white to work with also.
At the end of the night, each girl got to choose a special flower from the vase arrangement display to bring home. We already have ours set up in the propagation station hoping to get some roots growing and new flower varieties to add to our gardens next Spring for free.
Once we were ready, we began filling in our oasis with greenery. You need to remove about 2 inches of the lowest leaves to be able to stick the stem into the oasis. Make sure to have your compost bin ready!
You’ll want to stick them in all over the sides of the oasis, the outer ring of the top of the oasis, and put some aside for filling in the center. For those center pieces of greenery, try to find the pieces that stick out to you the most: maybe the size, the way the leaves are shaped, maybe they are more fun looking or bend in an interesting way. Just let the greenery work it’s magic.
For real, the more greenery, the more beautiful & full-looking it will be. Even if it looks like it’s going to be too much, it’s not.
After adding greenery, we filled in the center with our flowers.
🌿 Start by placing one flower directly in the center then the rest of the flowers surrounding the center flower, spread out as evenly as possible, working with one color at a time.
🌿 Add smaller flowers or accent pieces.
🌿 Then fill in the remaining spaces with the remaining greenery you set aside.
I love that each girls arrangement looked so different even though we all used the same flowers, with slight variations in color. It showed their creativity.
Athena did not follow directions on this lesson, but that’s kind of who she is in general. She lives outside the box and does not any want limitations in art. She has her own visions, and will see that they are carried out. She is a true artist & free-spirit.
Out of all the girls, Mia holds the most love and appreciation for flowers & nature. At home she loves putting together bouquets for her favorite people & loves pointing out beautiful flowers wherever we go. She loudly exclaims “this one is BEAUTIFUL!!!” anytime she finds out she adores. She’s already asked for her own flower press for all of the flowers she falls in love with.
I was really happy that the moms were also able to participate in creating floral arrangements. A lot of the activities so far have been for only the girls, or mom supervision required (learning knife skills or building/cooking over a fire). I had SO much fun! It was really exciting for me to get to make my own rather than help the girls build theirs. It also gave them much more creative freedom with focusing on my own arrangement instead of how theirs is turning out.
I absolutely adore how it looks & I am SO happy to learn how to perfect my bouquets & now, arrangements.
This was such a great class, I feel like we learned so much. Ms. Kathy did such a great & thoughful job putting this lesson together for us and it was truly a blessing. This is a skill that our family will definitely be using for the rest of our lives & I am so happy that we are learning these skills together as a family – that makes it even more special.
The arrangements look beautiful on our table & I love that they are created with love by us.
I was offered one of the ferns to take home to continue creating more arrangements with. Ms. Kathy said they were at the end of their cycle, but I plan to keep it inside through the winter, hopefully giving it a much longer life span and many more beautiful arrangements.
At our last Grace Girls meeting, we worked with flower presses and I immediately fell in love with them! I asked my husband to make me one using scrap wood we had lying around. I love how it turned out!!! I’m still working on the back side (each of my children will be drawing a flower to be wood burned), but I couldn’t wait to show the front!
We decided that we are going to open a little general store – Morozov Mini Market – and Flower Presses are one of the first products we are going to start taking orders for! If I get enough interest in various items I’m planning to open an Etsy shop.
I’ll be selling them $35 bare wood (includes sanding, wood protector, & optional stain + cardboard inserts), or $45-$55 for custom orders including writing or designs.
One really fun & useful way to use pressed flowers is by making soap! Today at школа, Ms. Vika taught the children how to do this.
She brought different molds, a huge variety of pressed flowers & dried petals, and Essential oils for the children to all make their own soap using their creativity.
The kids really enjoyed this activity. They really want to get into soap making now, and with our brand new flower press & my collection of Young Living & DoTerra Essential Oils & molds, we’re already almost ready to get started on our natural soap making journey.
The younger children went last to make soap & they made one large one that needed time to set to be cut to share for all the children which we will get to bring home next class, but we were able to bring the ones my older girls made and I absolutely love how cute they are!
I already have them on display in our bathroom & it smells sooo good in there from them!


