Our friend, Mrs. Mary, invited us out to her beautiful property in Indiana today to go on a Homeschool Nature Hike. They are also into the Charlotte Mason lifestyle.
Her property is that of my actual dreams. She has a beautiful farmhouse filled with all vintage and handmade items. It is so cozy, especially this time of year with her fire burning in their fireplace in the living room. It has the sweetest laundry/mud room with beautiful natural sunlight and vintage & natural decor that would make doing laundry feel so peaceful and joyous.
Out back is a huge nature trail through the woods, a barn, a pond with a beautifully crafted gazebo, large garden spaces, so much room for kids to run around and play endlessly outside. Best of all, her son’s family lives next door. That’s exactly what we dream of!!!!
Before our hike, she fed us all lunch and shared her personal Nature Journal with us, then gifted us each our own new nature journal to get started with! That was so sweet & thoughtful of her to do for us. We peaked through the book that she uses as inspiration for how to create a Nature Journal.
She has been doing this for many years and has fond memories recorded from trips she’s taken where she was able to experience the wonders that the Creator has freely given us. I love the idea of looking back years from now with special memories brought flooding back by pages recorded in our Nature Journal. She’ll jot down notes or places she made an entry. She adds poems & words of wisdom in her journal. I love that.
Afterwards, we took a lovely hike through the woods, then came back and let the kids play outside for awhile. They have a great fairy garden that the kids loved. I’ll have to put a lot more work into ours. They have such cool Nature in their own backyard! That is exactly what I long for in our forever home. We left in time to miss the dreaded Friday late afternoon traffic, came home and the girls took time working on their first Nature Journal pages.
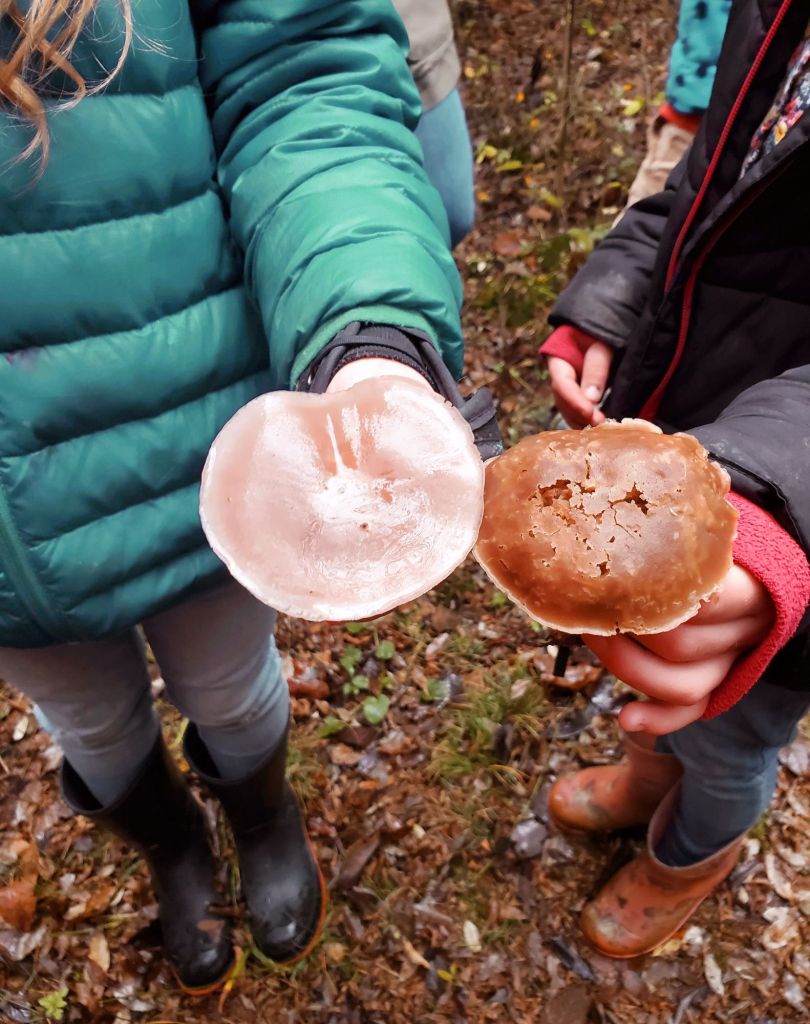
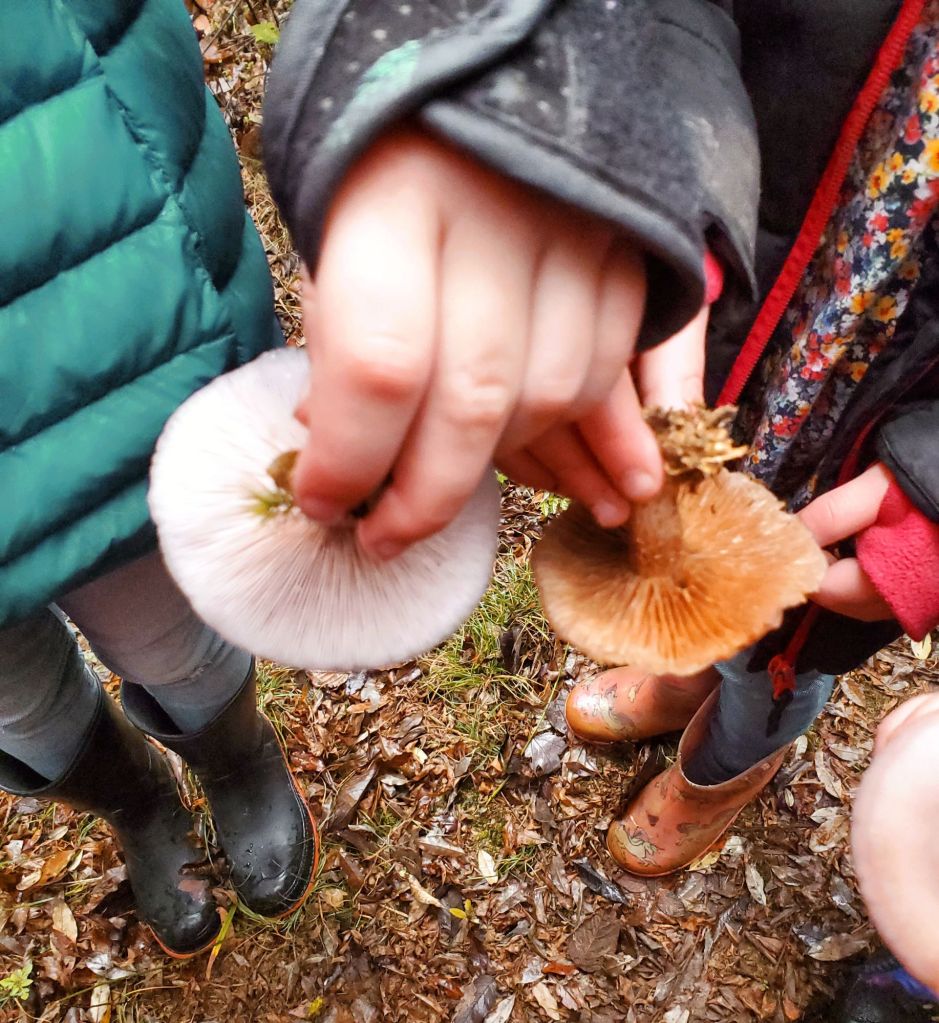
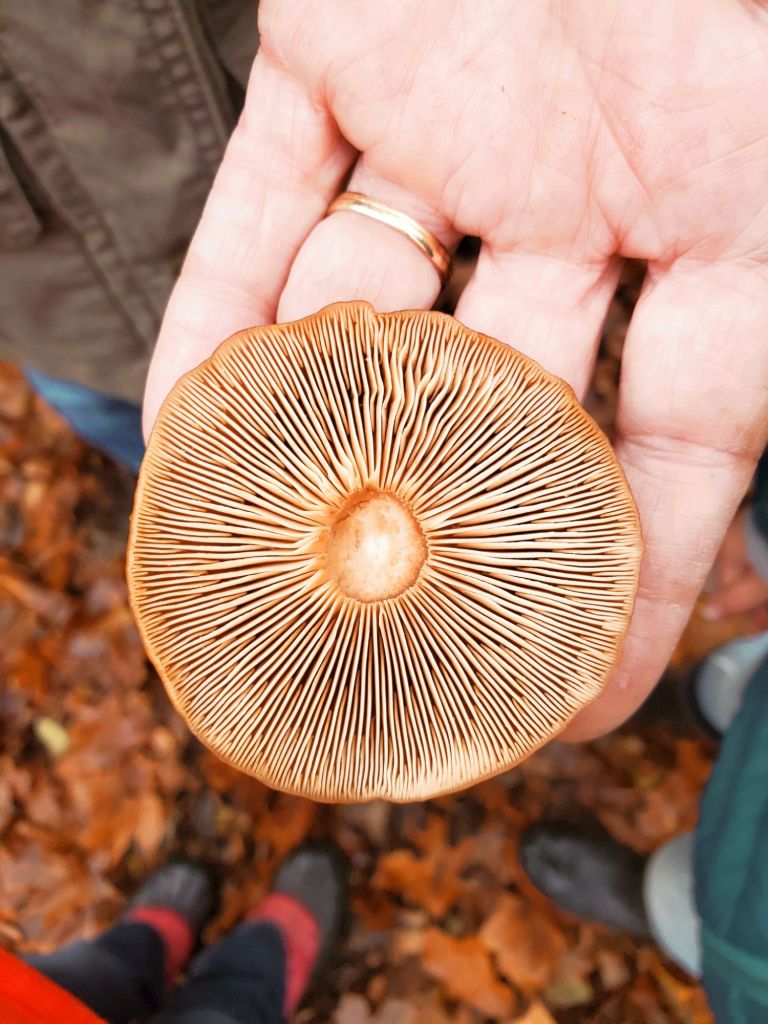
All of us really enjoyed finding mushrooms. We spotted several different types while we were out on the trail. I love them so much! There were really big ones & really small ones and the ones we see the most often: Turkey Tails. It’s fascinating how many different varieties there are in just her forest alone!
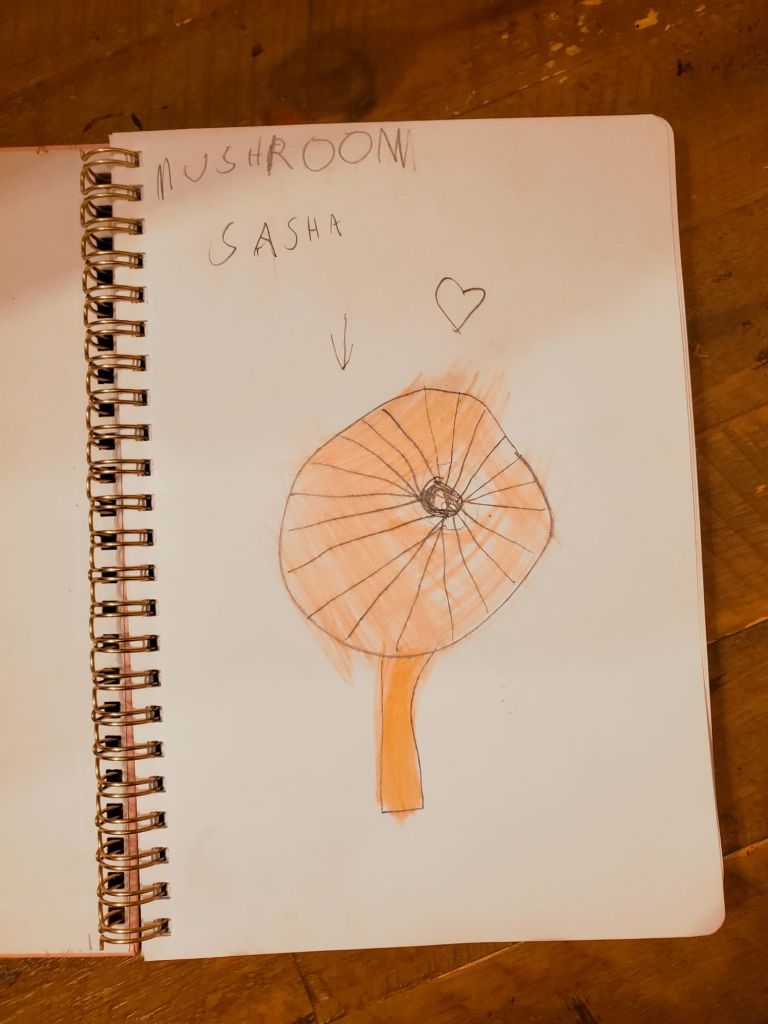
The mushrooms definitely made it into the Nature Journals. Mrs. Mary told me that she keeps another book of Spore Prints that she makes. I’m really excited to check that out next time we are invited. She also has a Nature Wall like us too!
We tasted Rosehip. It’s very sweet! I liked the way they looked. We learned that Rosehip is often used in tea. I had heard of it before, but had no idea what it looked like or what it was a berry.
Rosehip has a lot of medicinal purposes, which is why it is popular in teas. Rosehip can help with joint pain & inflammation, lower blood pressure & cholesterol, and aid in digestion. They help improve eyesight & skin. They are also used to treat bronchitis, coughs, & colds and have a ton of Vitamin A and E so they help strengthen your immune system. They also protect your vascular system. I’m definitely going to have to start incorporating this into our diets more.
Besides tea, they are also used to make jams & jellies, syrup, soup, or a sauce. I’m interested to try those!
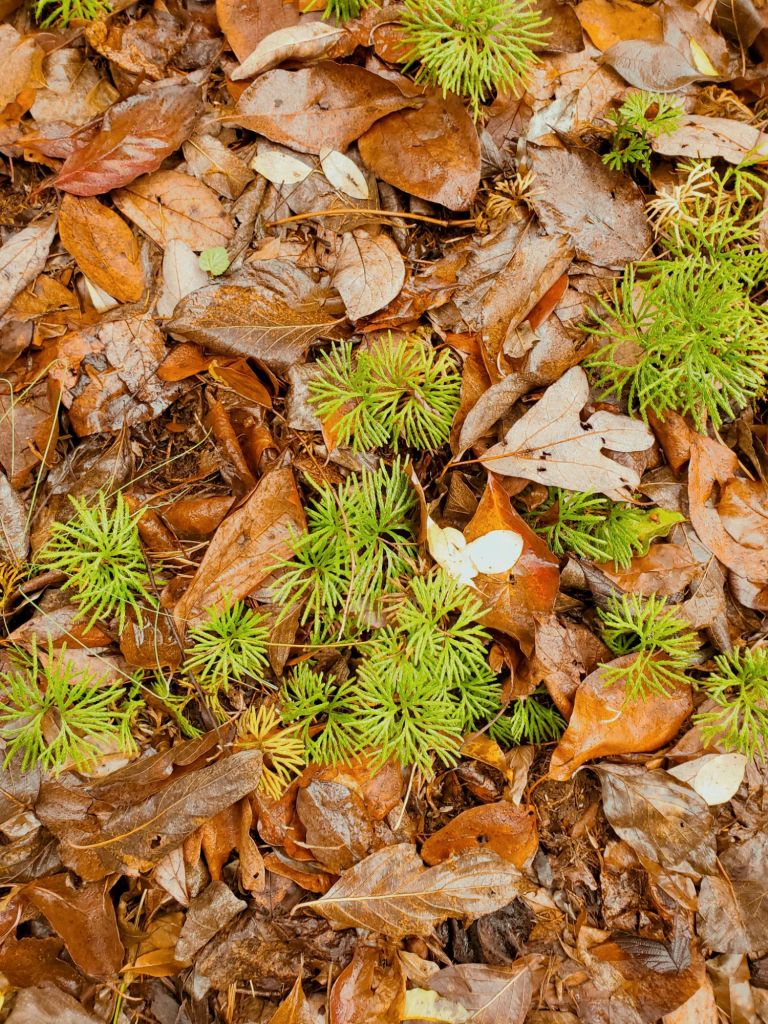
There was also so much moss on the trail! I really, really love moss. I loved the way this shaggy type looked growing off of the trees.
Athena also liked the tress with moss & the whispy, twirly branches hanging from some of them.
This cool stuff is called Fan Clubmoss. It was popping up all over the trail! I had never heard of it before, but when I got home I looked it up and found they also have so many medicinal purposes! They treat rashes & wounds, skin infections & chafing, urinary Tract infections, kidney infections, and bladder infections. It can also be used to naturally dye cloths & fabrics. It is so amazing what all Nature is capable of & I absolutely love the way it looks!
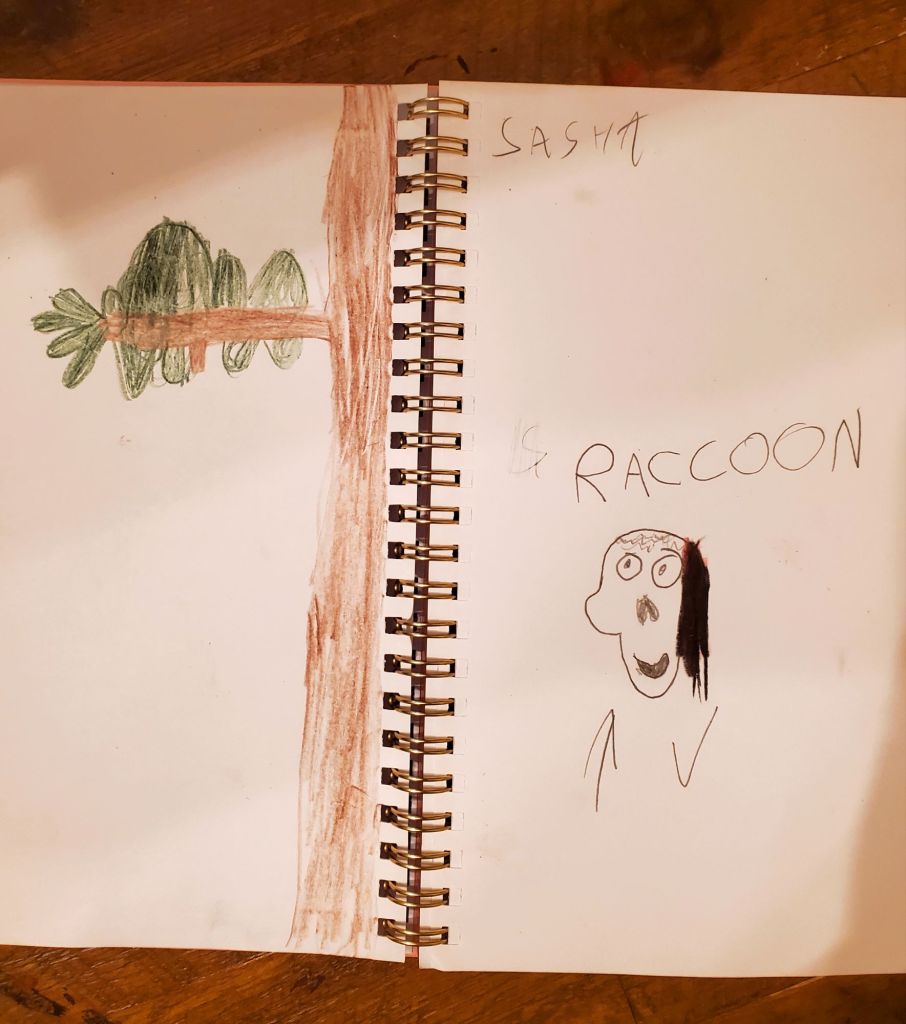
Another fascination was the animal skulls along the trail. This was a raccoon. There was a second decomposing raccoon later down the trail that still had some of its furry meat-suit attached (Athena thought it was a monkey) and a teeny tiny bird skull that was so cute!
It will be really neat to watch as their journals become more detailed the more they get into it. I am so excited to begin working in mine. This is something that we will definitely be doing for the rest of our homeschool journey & I’m sure even longer as we will then pass it on to their children when that season of life comes around.
I really love Nature so much & am so happy to be raising children who also love and appreciate Nature as much as I do. Ella really gets so into it each time we go on a Nature Hike. She loves using the PictureThis App to find out the names of different plants she wants to learn more about. I’m happy they would rather be outside exploring Nature & the world around them than choosing to plop down in front of a screen wasting their lives away. There is such a big, beautiful world out there and now we have a new way to document the wonders we come across. So grateful for Mrs. Mary sharing this with us.
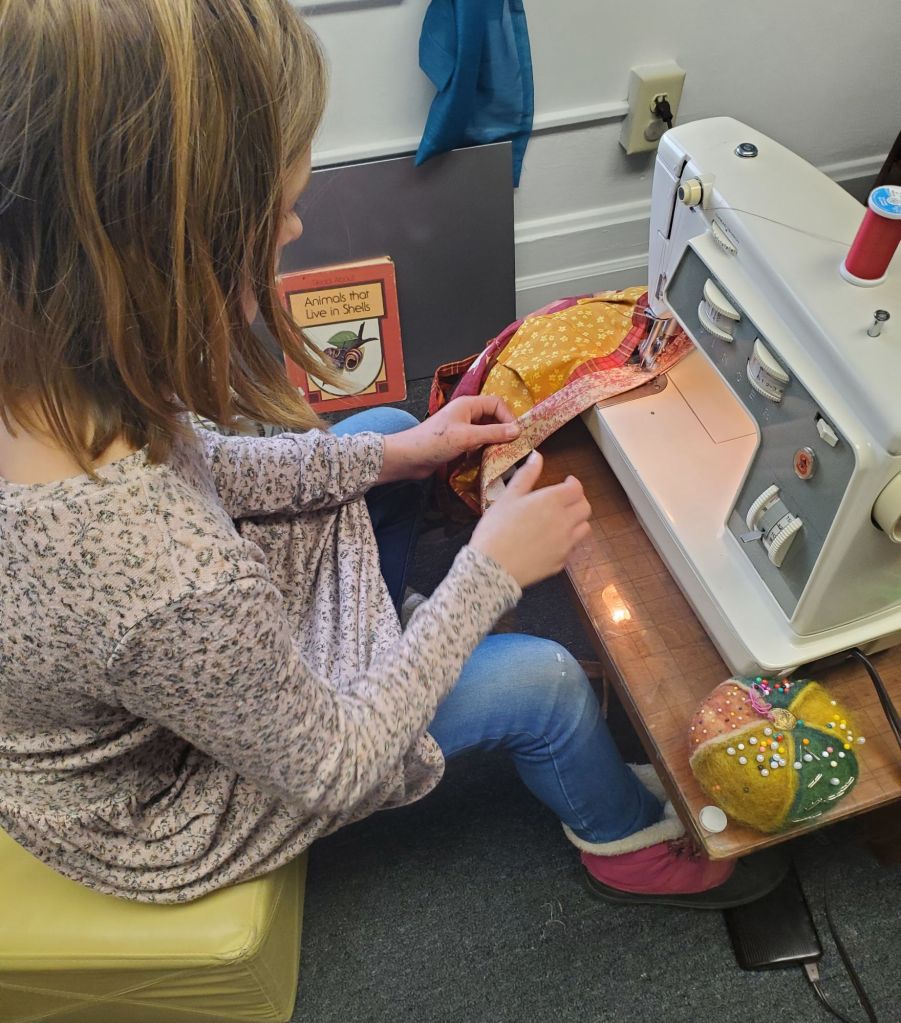
It’s been awhile since I last shared one of Ella’s sewing projects! Today is my birthday & Ella sewed me the BEST present ever! I literally could not love it anymore!!
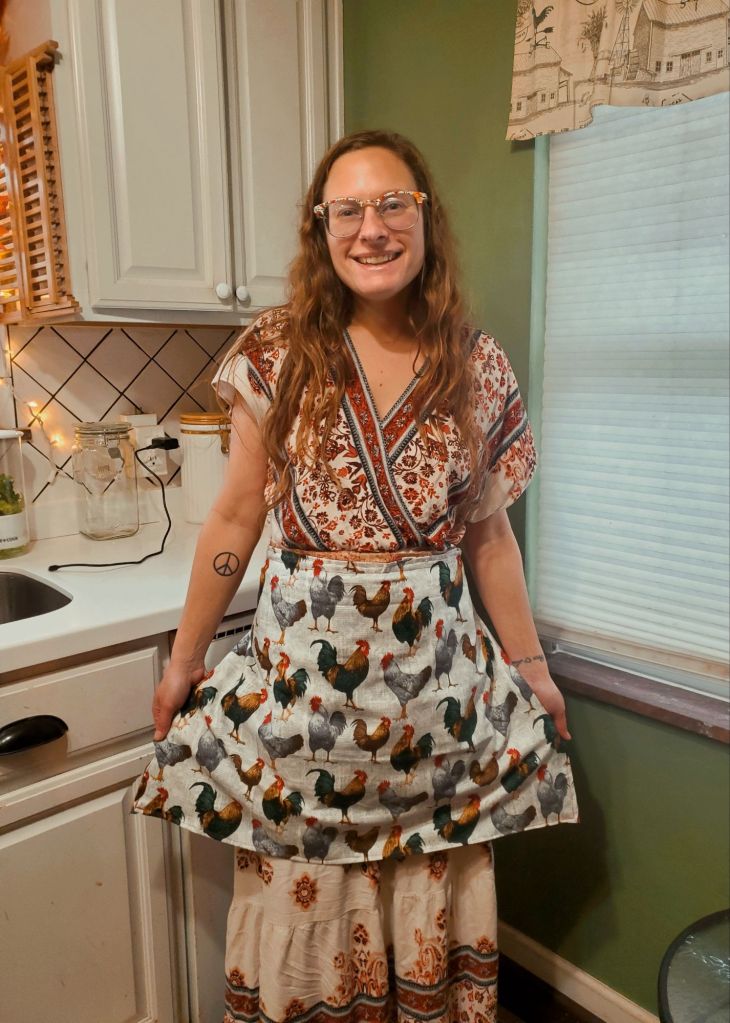
I have been wanting a harvesting apron for the longest time! She sewed me one for collecting eggs for when we get our chickens very soon! I can also use it in the garden to collect fruits & veggies, and it is reversible to double as a kitchen apron too so that I don’t have to switch back and forth!
She picked out all of the fabric herself which I love! It means so much more to me than if someone just went out and bought me an apron. It is made entirely with love and creativity!
I am obsessed with it! We are getting our chicken coop in a couple weeks as an early family Christmas gift! Getting prepared for our new adventure has me SO excited! I cannot wait to fill these adorable little pockets with all the eggs!
She’s planning to make child size ones also for her siblings so they can help collect eggs too. Plus it is just so cute, all the girls immediately begged her to make them one! I love having a girl who sews!
I’m seriously so excited! It feels really great to have something to look forward to. While I wait for these few weeks to pass, I’ll be reading up & learning all the things I need to know! I can’t wait to share our adventure with you here!
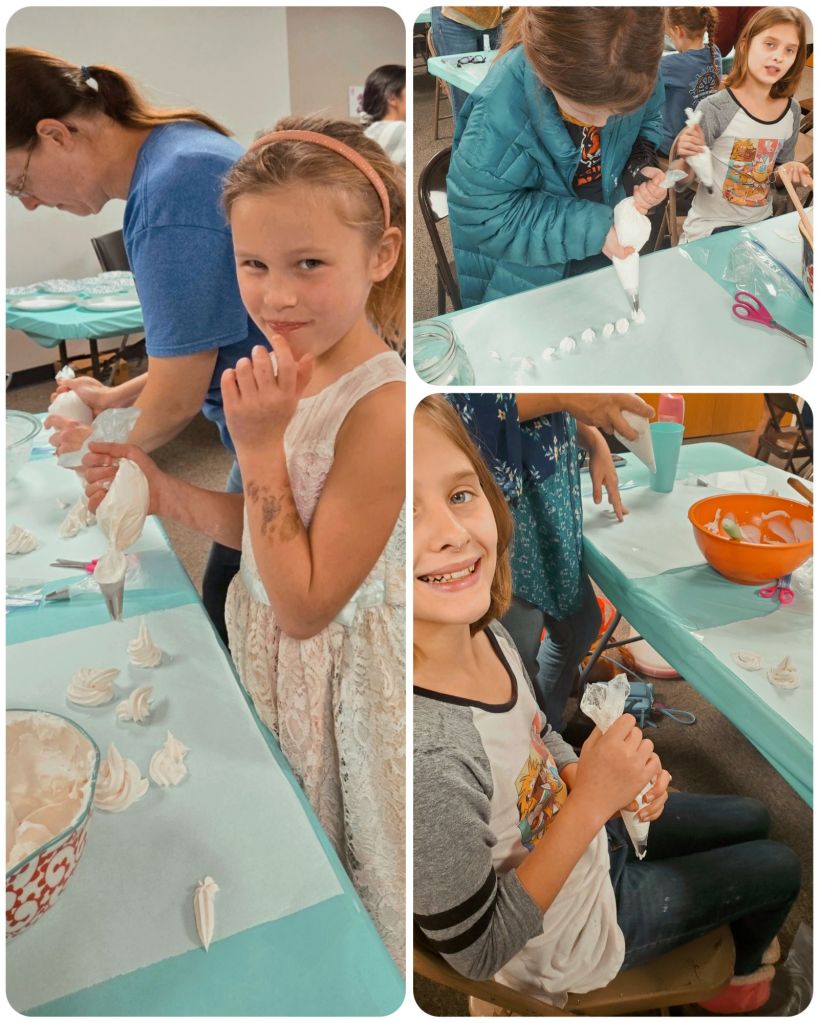
This week’s Grace Girls class was on the basics of cupcake decorating. We learned about frosting, how to make & fill piping bags, and how to use the piping bags to frost cupcakes or other desserts.
Our class was led by Mrs. Mandee. She did such a great job teaching the girls (and some of us moms) how to properly frost cupcakes. She prepared a little cupcake tray ahead of time showing different designs you can make using your piping bags.
Everyone was told to bring: a small mixing bowl, a rubber spatula, and a large Mason jar. My wide-mouths are currently being used, so we brought standard size. In the future, I will be using wide-mouth for this.
Mrs. Mandee taught us how to make our piping bags. We take one bag and one tip and place it inside as far as it will go without disrupting the bag. Make a mark using your scissors halfway up your piping tip to indicate where you will be cutting. Push your tip back a little bit, cut at the mark you made, then push tip back down to the end so it is snug in the bag.
The piping bags should look like this when they are ready to be used:
Once they are made, place your piping bag inside the Mason Jar with the ends open around the jar to prepare for filling your piping bag.
This tip to me was a game-changer! I have typically avoided using piping bags in the past because of the mess I would make filling the bag. This prevents a mess! It makes it seriously SO easy!!!
Next, Mrs. Mandee scooped out her Buttercream icing into her mixing bowl and explained that you must whip the frosting really well before placing into your piping bags to make sure you do not get any air bubbles into it.
She shared that at home this is her favorite recipe to make homemade frosting, but because there was a large number of participants, she purchased bulk frosting from Sam’s Club. We went through 80% of the bucket in the class!
To fill our bags we:
1. Stir, stir, stir until as smooth as possible. Add a color, if using.
2. Using a rubber spatula, scoop smooth frosting into the prepared piping bag in your jar.
3. Shake your frosting to the bottom.
4. Twist your bag from the top of the frosting to the end to close it.
When making designs, we want to twist not squeeze the piping bag. We will continue to twist like this all the way down the bag until it is finished.
Finally, Mrs. Mandee demonstrated how to make various designs before it was time to work independently. Then continued to show us new ones throughout our practice time.
We stirred our frosting, filled our piping bags, and practiced getting used to working with our piping bags and making designs on parchment paper.
When we were finished practicing with both size piping tips, we scooped our frosting back into the bowl with our rubber spatula and started the process over. We stirred & refilled our piping bags to get ready to frost our own cupcakes.
I loved seeing the different designs being practiced. Over at Sasha’s table, a mom made an adorable butterfly! She shared that she had previous employment experience at a bakery years ago.
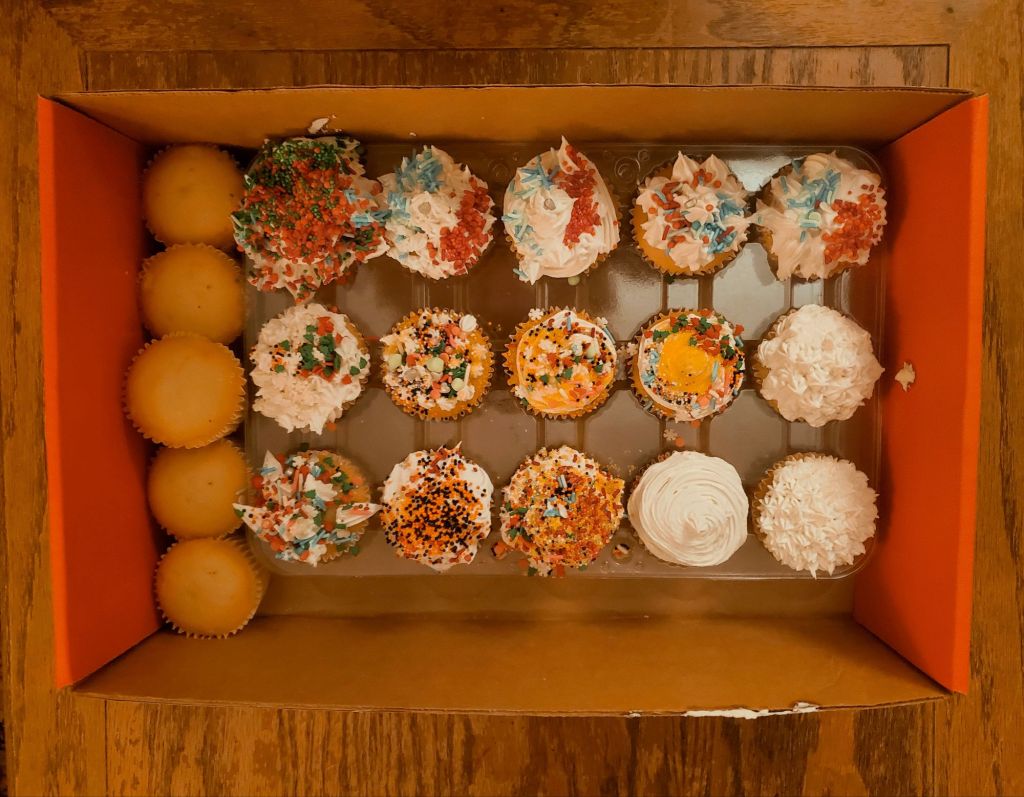
After a lot of practice, it was finally time to frost our own cupcakes! Everyone was given 4 to decorate.
Ella made American flag cupcakes to celebrate America, Veterans, and her birthday (Veteran’s Day).
It was the perfect time for this lesson with her birthday next week. I will definitely be using my new frosting skills on her birthday cake this year! So thankful to learn this lifelong skill!!
I chose to leave mine un-sprinkled, but one of my girls (Mia) decided to practice her sprinkling once we got home. I gotta say, she did a really great job! She used tweezers to line them perfectly around. I think she may have found her new life passion.
Athena had to miss out on this night unfortunately, but we brought her home a piping kit & un-frosted cupcakes so she didn’t have to completely miss out on the activity. I also gave Moses one of mine to decorate too.
We will be doing a second part to this class though, which will be “advanced” cupcake decorating beyond simple frosting. That is a class that we are all really looking forward to!
Our next meeting is our annual potluck Thanksgiving Feast! This is one of our favorite traditions now. We will be spending the next 2 weeks planning & then preparing our dishes. Ella, of course, signed up to bring the turkey again for the second year in a row! It was the biggest hit last year and she was SO proud of herself! That girl will be a pro at cooking up a turkey feast before she even has a family to fix it for!
Any suggestions for what we should bring to our potluck Thanksgiving Feast?! I’d love to hear them!
If you are an America reading this, there is an extremely high chance you’ve never even heard about Holodomor, as they don’t teach this part of history in American schools. So I am hoping to spread awareness to my small corner of the world wide web.
– First, I need to say, absolutely none of these photos below are mine. I have given credit where credit is due under each photo, and I greatly appreciate these historical archives being available online to the public. –
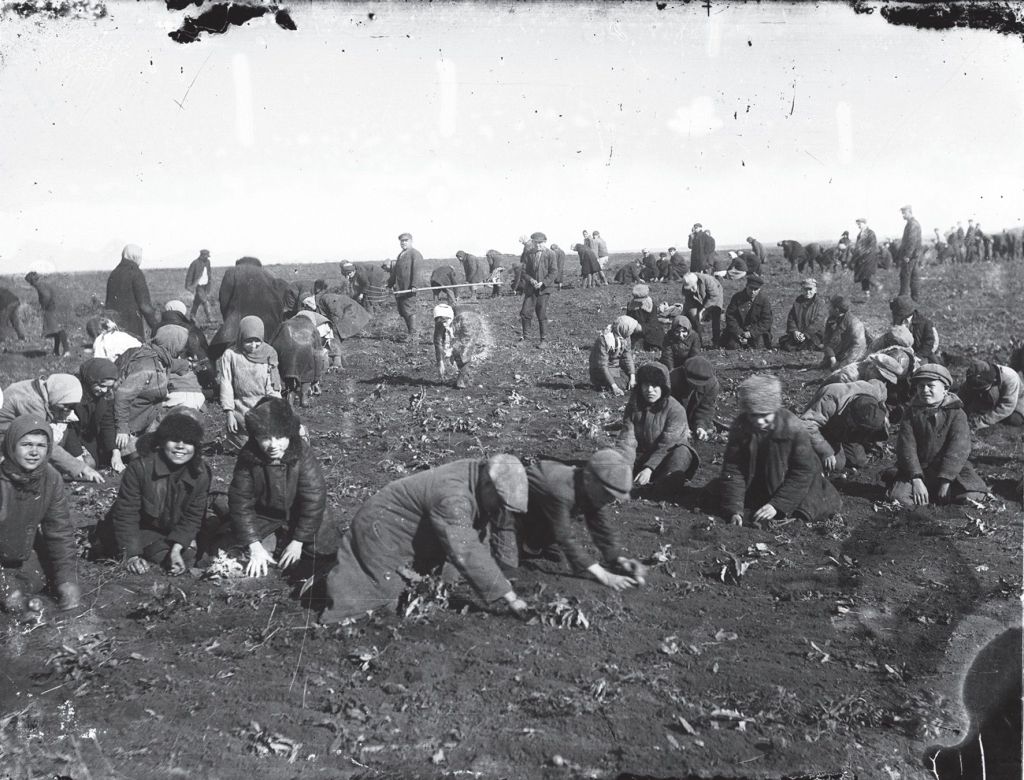
Holodomor (which in Ukrainian language means “death inflicted by starvation”) was the man-made famine from 1932-1933 led by Josef Stalin, killing millions of Ukrainians by starvation in order to keep Ukraine from gaining independence as a nation. Ukraine had built a reputation of resistance to Soviet Rule and Stalin saw that as a threat to the Soviet Regime, fearing a Ukrainian Counter-Revolution. Since the easiest way to control a person/people is by their controlling their food, Stalin began depriving the Ukrainian people – especially the farmers which consisted of 80% of Ukraine’s population – of food. Controlling their food supply gave the government complete control of every aspect of their lives. Starving people don’t have the energy they need to fight back.
First: he decreed the collectivisation of agriculture, which gave the Soviet State direct control over all of Ukraine’s rich resources for agricultural (it is know as the Bread Basket of the world), as well as the complete control over the supply of grain. With the intention of wiping out the Ukrainian nation, Stalin put unrealistic quotas on grain procurement, and decreed that anyone, even a child, would be shot or imprisoned for at least 10 years if being caught stealing any “socialist property,” aka food, even a crumb. In 1933, nearly 55,000 Ukrainians had been tried & sentenced for this act, and at least 2,000 were executed for it.
The majority of poor Ukrainian farmers resisted collectivisation & taxation. Many Ukrainians participated in resistance protests. Tens of thousands of farmers were arrested, shot, or sent to labor camps for protesting. They were forced to surrender their farms, livestock, and tools to the Soviet Authorities then forced to work on collective farms instead.
The farmers who happened to be rich or successful (labeled as Kulaks) where declared lazy enemies of the state and were to be eliminated by deportation or execution. This was meant to serve as a warning to anyone who opposed, a way to transfer confiscated land to the collective farms, and to eliminate both private ownership & independent leadership of villages.
In 1933, Ukraine’s borders were shut down, preventing anyone from leaving to find food. Even though the borders were sealed, some Ukrainians did manage to flee to Poland. Next, the Soviet State began a system of internal passports. All farmers were denied this passport, therefore unable to travel or obtain tickets for the train. The same restrictions were put in place for the region of Kuban in Russia (which is on the Ukrainian border) and had the highest percentage of Ukrainian population outside of Ukraine.
If farmers didn’t meet their unrealistic quotas, their village became blacklisted. Blacklisted villages were baracaded and denied from receiving supplies. It was a mass death sentence punishment on the entire village.
The government authorities raided villages, homes, & barns; breaking their walls, digging into their grounds, and destroying everything in their path in order to destroy or confiscate every last handful of food anyone was attempting to hide. In order to survive, they were forced in situations where they had to eat anything they could to survive, including turning to cannibalism.
In 1932, the Soviet State extracted enough grain to feed at least 12 million people for an entire year, while starving every Ukrainian in the process. In 1933, there was still enough reserves to feed at least 10 million people, while roughly 28,000 Ukrainians died daily from starvation.
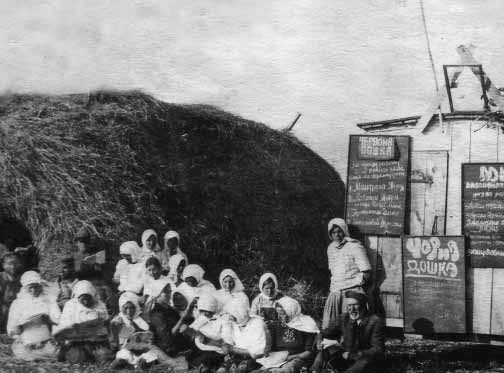
In order to conceal this event, fake villages (called Potemkin Villages) were set up for foreign visitors, specifically Westerners. Travel by foreigners was already restricted to certain areas with Government Official escorts only prior to Holodomor, so creating the facade of these Potemkin Villages was simple & unquestioned. These villages were set up with fake food & items to make the village look prosperous. Any destitute villagers were replaced with plump Party members & professional actors, playing their roles to make sure any Westerners don’t have any suspensions, and it worked. The Americans easily fell for it. The true citizens were hidden & forbidden from appearing in public during these visits. The Westerners would come back & report this false reality to the rest of the world, thus further covering up the facade without even knowing it. The Interview with Seth Rogan & James Franco potrays this exactly, except set in modern times in North Korea.
Until 1991, when Ukraine gained its independence, there was strict Soviet Law that use of the word “famine” was banned in all documents, records, and accounts. Up until this point, all records including recorded eyewitness accounts had been inaccessible. They banned Ukrainians from speaking about this event, both during & after it happened. The Soviet authorities did everything they could to cover up this genocide. They hid & denied it. When “rumors” began spreading of famine by Ukrainians who had successfully fled, the authorities refused aid, insisting there was no famine, just “food difficulties” and “partical crop failures,” and no one needed any help. Any discussion of this event or who/what caused it was forbidden by any press. The media would vigorously attack anyone who attempted to speak out about the event, silencing their voice & turning everyone in the media against them. The Government cancelled the Visas of any journalist they felt wasn’t loyal enough to the Soviet Regime, but if they wrote positively about it, they were given special privileges & “rewards.” Famous writers were influenced by the Soviet Authorities to spread disinformation, especially to the West. The Soviet Embassies around the world were ordered to deny the event as well, claiming the “rumors” of famine were mere attempts to “slander the USSR.” Everyone complied, out of fear, until 1986 when Ukrainian poet & activist, Ivan Drach, spoke publicly about it for the first time. He wanted everyone to know how dangerous Official Silence is. It wasn’t until 1991 when surviving victims began sharing their truths & grieving.
George Orwell also wrote about Holodomor in his novel, Animal Farm. 5000 copied were originally printed, but at least 3000 of those copies were confiscated & destroyed by both American and Soviet Authorities because they were considered “propaganda.” In 1947, Animal Farm was translated into Ukrainian language by Ihor Shevchenko, called Kolhosp Tvaryn which translates to “A Collective Farm of Animals,” putting Stalin’s Collective Farms on the cover of the book. The Ukrainian version included a letter from George Orwell to the Ukrainian refugees. Copies of this version were passed around between Ukrainian Revolutionaries.
Photo credit: Holodomor Museum, Kyiv
Like all Ukrainians, I hold this event dear in my heart. Since I was a very little girl I was always very sympathetic for people facing food insecurity. I wanted to help them – however that may be to a child. I have fond memories of volunteering at a food bank with my school. I remember preparing, packaging, and serving those in need out of a little window downtown. As a child from well-to-do parents, that experience greatly shaped my view of food-insecurity. I saw a very real world outside of my own safe bubble. Maybe it is why when the Ukrainian Refugees began arriving in Cincinnati, I made it my personal mission to help them find food. My Ukrainian heart has generational memories ingrained from my ancestors struggles through this major food-driven genocide. Maybe it is why food is my love language. Maybe it is why I have felt such a strong need to stockpile & preserve food for my family, especially over the last few years as food insecurity in America is at an all time high (and the basic survival skills of the average American is at an all time low thanks to the convenience lifestyle), preparing us with knowledge & skills to survive off the land. Maybe it is why I was born with a strong spirit & veins that run deep with resistance to our own government, censorship, & injustices, especially how destitute people are treated here in America today. Our passions & callings in life are by design, they aren’t random. I wasn’t stamped at birth, I was stamped before I even existed.
In the month of November, while you are giving Thanks & enjoying your feasts, please keep the victims of Holodomor in your hearts. Honor them at your tables. Keep their memory alive. Remember how truly blessed you are to have a meal in front of you.
In this month, I am hoping to plan a day trip to visit the Holodomor Memorial with my children in Cleveland – Ohio’s largest Ukrainian population. Maybe my Ukrainian family there will join us. I would love that, although I’m not 100% sure yet if I can make this trip happen.
If you feel called, please reach out to a local Food Bank or Homeless Shelter to volunteer & help others that are currently facing food insecurity. If your schedule doesn’t allow for that, consider donating food items instead. Food Banks are especially busy during the holiday months, and already haven’t been able to keep up with the rapidly growing amounts of families currently struggling with food. They need your help now more than ever.
Go ever further and share a meal with the homeless. Sit down and eat with them. Listen to their stories. If you are in the Cincinnati area, you can do this at City Gospel Mission. It’s a great volunteer opportunity as an entire family.
Photo Credit: Cleveland Historical
I hope you learned something new about History today and feel inspired to help others currently facing food insecurity and/or begin learning skills surrounding food security & self-sufficiency for yourself and family. Learn skills for preventing food waste. Challenge yourself to a no-waste November.
I hope you are also inspired to stand up for the current injustices in the world revolving around food and continue sharing about the genocides & injustices in the past so they do not go forgotten. The past is doomed to repeat if the people don’t learn the REAL truth. The truth that isn’t taught in American schools. The truth they don’t want the citizens to know. Fight against all government censorship, do not support it in any way. Nothing good comes from censorship. Please understand that the governments are completely willing to starve us into submission for their own gains. Fight against all government that puts & keeps their own people in poverty. It’s unconscionable. And it’s not a far-fetched conspiracy, it’s currently happening in America.
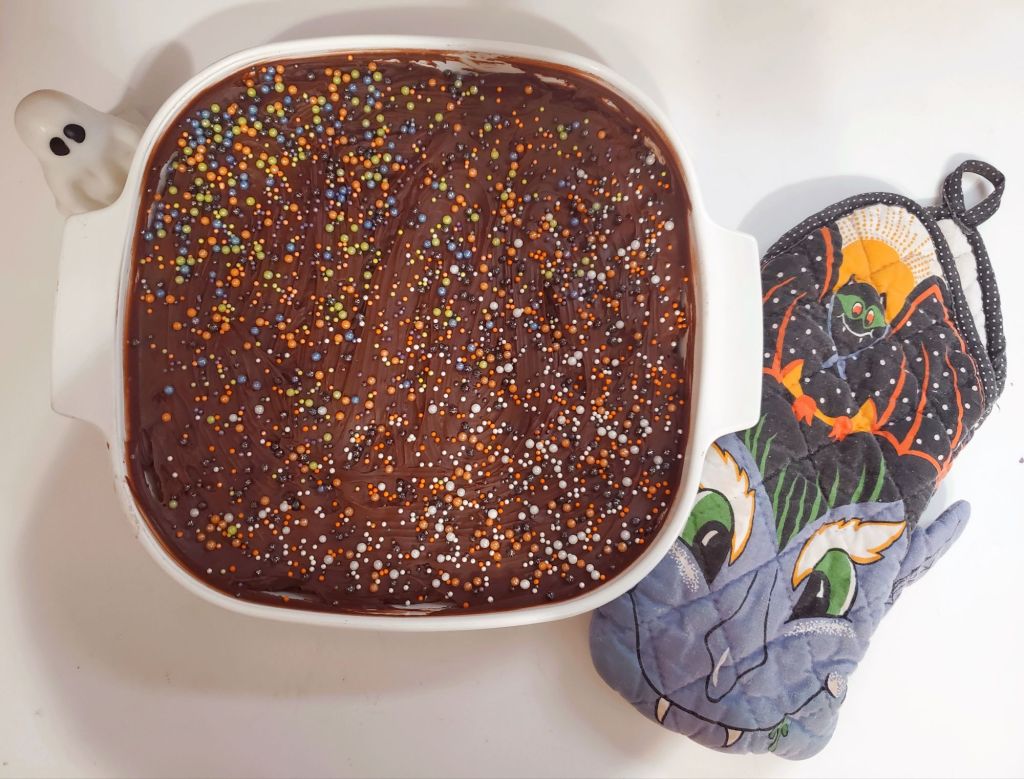
HAPPY HALLOWEEN 🎃!!! I can’t believe that tomorrow is already November! This year has absolutely blown by abnormally fast. I’m not gonna lie though, this has been a rough (but also rewarding) year & I’m totally ready for a fresh new one.
Anywho – These Sourdough Discard Brownies have easily become my favorite brownie ever! Usually I prefer to leave out the Mini M&Ms in this recipe and they are absolutely delicious, but for Halloween we decided to add the Mini M&M candy surprise then topped them with Halloween Sprinkles we had.
Ingredients
1 Stick Salted Butter
1 10oz Bag Semi-Sweet Chocolate Chips
1/2 Cup Cocoa Powder
2 Teaspoons Pure Vanilla Extract
2 Large Eggs, + 1 Egg Yolk
1 Cup Sugar
1/2 Cup Brown Sugar
1 Cup All-Purpose Flour
1 Teaspoon Salt
1/2 Cup Mini M&Ms (or other candy of choice)
Directions
Preheat oven to 350° and grease a 10×10 square baking dish.
On low heat, melt the butter. Once melted stir in chocolate chips, cocoa powder, and vanilla extract. Once everything is smooth, remove from heat and set aside.
In the bowl of your electric mixer, beat together the eggs & sugars for 5 minutes. Add the sourdough discard and chocolate mixture and beat again for another 5 minutes. Add flour and salt, and mix together until fully combined on a low setting.
Remove bowl from stand mixer and fold in Mini M&Ms.
Pour into prepared baking dish and bake for 35 minutes at 350°
Cool for at least 30 minutes before adding frosting & Halloween Sprinkles or other decorations.
Serve & Enjoy!
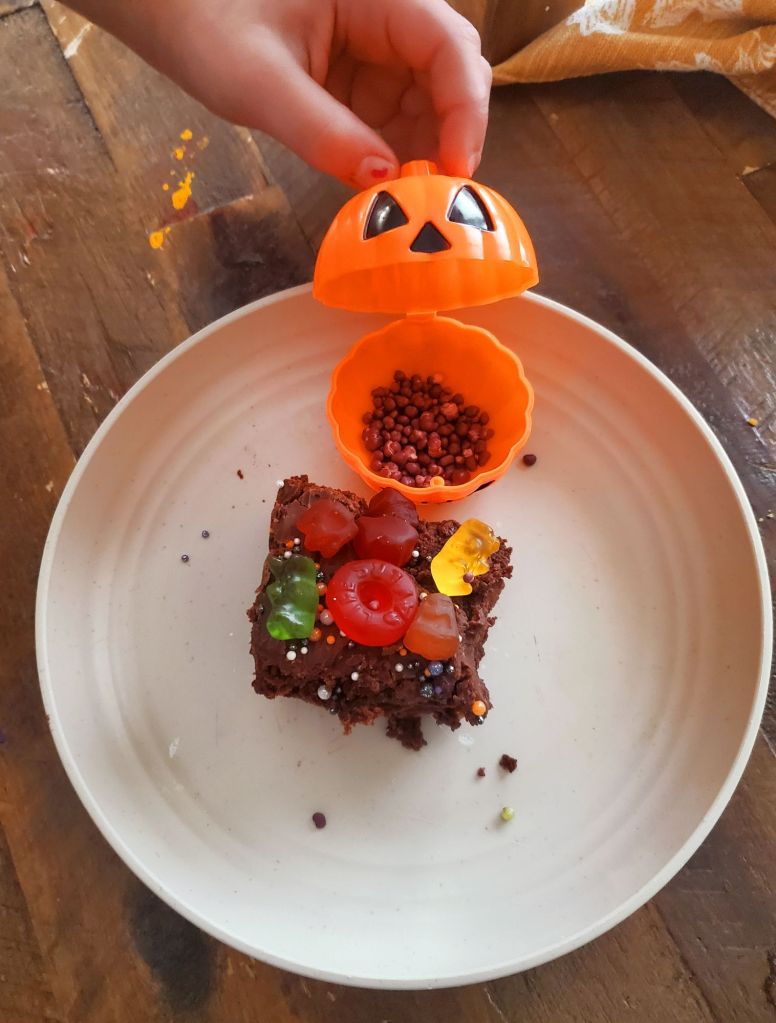
The kids decided to decorate theirs with some of the Halloween candy they received too. They were definitely a hit for Halloween!
‘Tis the season for Pumpkin Spiced everything! Although, it’s hard to accept that we are already 2/3 of the way through the Fall season. These little Pumpkin Spiced Whoopie Pies are so good and easy to make! They would make a great addition to a Halloween celebration or a non-pie dessert option for Thanksgiving.
Ingredients | Cookies
2 Cups All Purpose Flour
1 Teaspoon Baking Soda
1 Teaspoom Baking Powder
2 Teaspoons Pumpkin Pie Spice
1 Teaspoon Cinnamon
1/2 Teaspoon Sea Salt
1 Stick Salted Butter, Softened
1 Cup Brown Sugar
2 Large Eggs, Room Temperature
1 Cup Pumpkin Puree
2 Teaspoons Pure Vanilla Extract
Ingredients | Filling
8 oz Cream Cheese, Softened
1 Stick Salted Butter, Softened
2 Cups Powdered Sugar
1 Teaspoon Pure Vanilla Extract
Directions
Line 2 large baking sheets with parchment paper & preheat oven to 350°
In a large mixing bowl, whisk together flour, baking soda, baking powder, pumpkin pie spice, cinnamon, and salt. Set aside.
In the bowl of your stand mixer, use the paddle attachment to cream together the butter & brown sugar for 2 minutes. Scrape down sides.
Add eggs, one at a time, until fully incorporated. Scrape down sides, Add pumpkin puree. Scrape down sides. Then add vanilla extract. Scrape down sides.
Slowly, mix in the dry ingredients so they don’t fly all over the counter.
Scoop 1 Tablespoon of cookie dough at a time onto the prepared baking sheets lined with parchment paper spaced at least 2 inches apart.
Bake one baking sheet at a time for 13 minutes at 350°
Allow cookies to cool for 10-15 minutes while you make the cream cheese filling.
Clean the bowl of your stand mixer & paddle attachment, then beat the cream cheese until smooth. Scrape down the sides and add the butter, mixing until combined & smooth. Scrape down the sides, add the powdered sugar, and mix until smooth. Repeat with the vanilla extract.
Pipe the frosting filling onto all of the flat sides of the cookies, then squish together. Save any extra frosting filling.
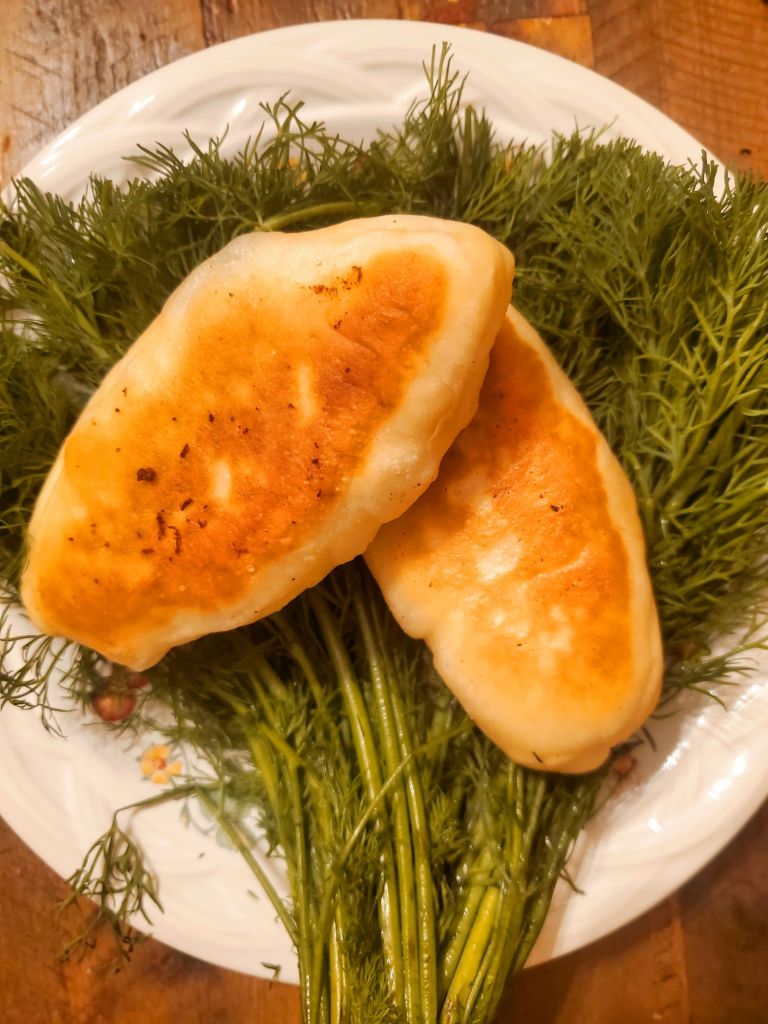
I love cooking traditional Ukrainian food for my family, and replicating the dishes into Vegetarian counterparts for myself.
This time I was trying to mash both Ukrainian & American foods together (I was going for the Ukrainian version of Arby’s Beef N Cheddar in my head) for something a little different. The flavor was AMAZING, but the cheese wasn’t saucy enough for what I was aiming for. I think next time I’ll make a cheese sauce instead of mixing the cheese together in the filling.
However my family will tell you that these piroshki are absolutely perfect the way they are. They begged me to write this down so I could remake them again, and told me that serving it alongside my Green Ajika sauce would take it to the next level.
Ingredients | Dough
1 1/2 Cup Warmed Whole Milk
1 Tablespoon Sugar
1 Tablespoon Active Dry Yeast
1 Teaspoon Sea Salt
1/4 Cup Melted Butter
1 Large Egg
4 Cups All-Purpose Flour
Ingredients | Filling
1 Tablespoon Butter
1 Pound Vegetarian Ground “Beef” Crumbles
1 Onion
3 Cups Cheddar Cheese
1 Tablespoon Fresh Dill
2 Teaspoons Sea Salt
1 Teaspoon Black Pepper
1 Teaspoon Garlic Powder
Directions | Dough
Whisk the warmed milk & sugar together in the bowl of your stand mixer until the sugar has dissolved. Sprinkle the yeast on top of mixture, set aside, and let proof for 5 minutes.
Add in melted butter, egg, and salt, and allow your stand mixer to whisk for 2 minutes.
Switch from your whisk attachment to your dough hook attachment & begin adding flour 1/2 cup at a time until a dough ball has formed.
Knead dough on a floured surface for 5 minutes, then transfer to a large greased bowl for 1 – 1/2 hours.
Directions | Filling
Cook ground “beef” crumbles according to package or preference, set aside.
Grate onion into a large mixing bowl.
Add cooked, but cooled ground “beef” crumbles, Cheddar cheese, dill, salt, pepper, & garlic powder to the bowl with onion. Mix together. Set aside.
Directions | Assemble
On a floured surface, cut your dough into 16 equal pieces.
Roll each piece into small circles and fill with 1/4 cup of filling. Fold dough from the middle down to close tightly and place seam side down. Repeat until all are assembled.
Fry in small batches in a large Dutch Oven cast iron pot over medium heat for a total of 5 minutes each, flipping after every minute for even heating.
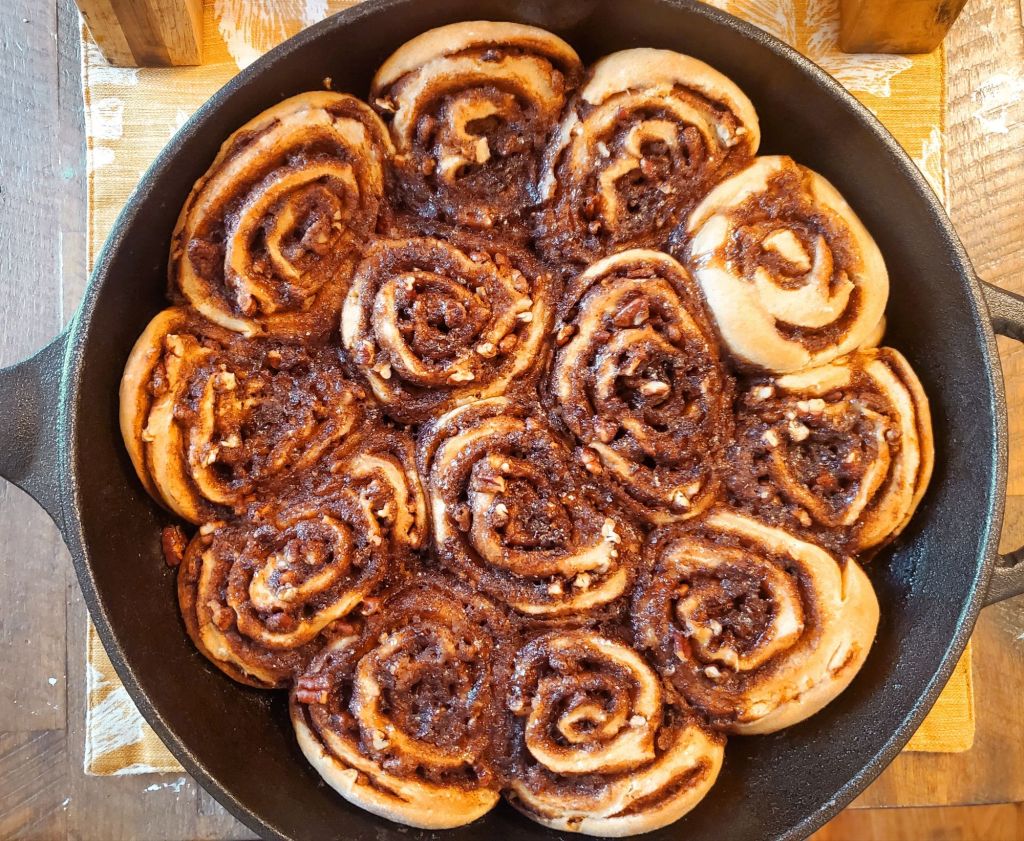
Our Fall baking is still in full swing! The days are both shorter & busier, but we are squeezing in new treats every chance we get.
These Maple Orange Pecan Cinnamon Rolls made using sourdough discard are the perfect, flavorful start to a crisp fall morning.
Unlike most cinnamon rolls, these don’t require any rise time, so you can still throw these together pretty quickly even on busy morning days. If you want to save even more time in the morning, you can prepare your filling & icing the evening before.
Ingredients | Dough
4 Cups All Purpose Flour
1 Teaspoon Baking Soda
2 Teaspoons Baking Powder
1 Teaspoon Salt
1 Cup Sourdough Discard
1 Cup Water
1 Stick Melted Butter
1 Tablespoon Fresh Squeezed Orange Juice
1/4 Cup Maple Syrup
Directions | Dough
In the bowl of your stand mixer, add & whisk together all dry ingredients.
Once whisked, add all wet ingredients to the same bowl.
Use dough hook to mix until a ball forms and easily attches from the bowl, about 5-8 minutes.
On a well-floured surface, roll the ball out to as best of a rectangle as you can. It helps to shape the dough into the shape before you begin rolling.
Once rolled out, you can begin filling:
Ingredients | Filling
1 Stick Salted Butter
1 Cup Brown Sugar
Zest of 1 orange
2 Teaspoons Cinnamon
*Plus 1 Cup Pecan Pieces, set aside.*
Directions | Filling
In a small mixing bowl, mix all ingredients together, except the pecans.
Place globs of the Filling mixture on top of the rolled out dough & spread evenly, leaving about 1/2 inch border.
Sprinkle the Pecan pieces on top of the Filling spread.
Fold top down 1 inch, fold borders on both sides, and gently roll down towards your body, forming an even log.
Once log is finished & seam side down, grab a ruler and cut 1 Inch rounds, placing each roll in your cast iron skillet.
Bake 30 minutes at 375°
Let cool at least 10 minutes while you make the icing:
Ingredients | Icing
1 (8oz) Package Cream Cheese
1/2 Cup Heavy Whipping Cream
1/2 Cup Maple Syrup
2 Teaspoons Vanilla Extract
Zest of 1 Orange (Optional)
Directions | Icing
Mix ingredients over medium-low heat until all combined, let cool slightly and pour on top of cooled rolls.
Serve & Enjoy!!
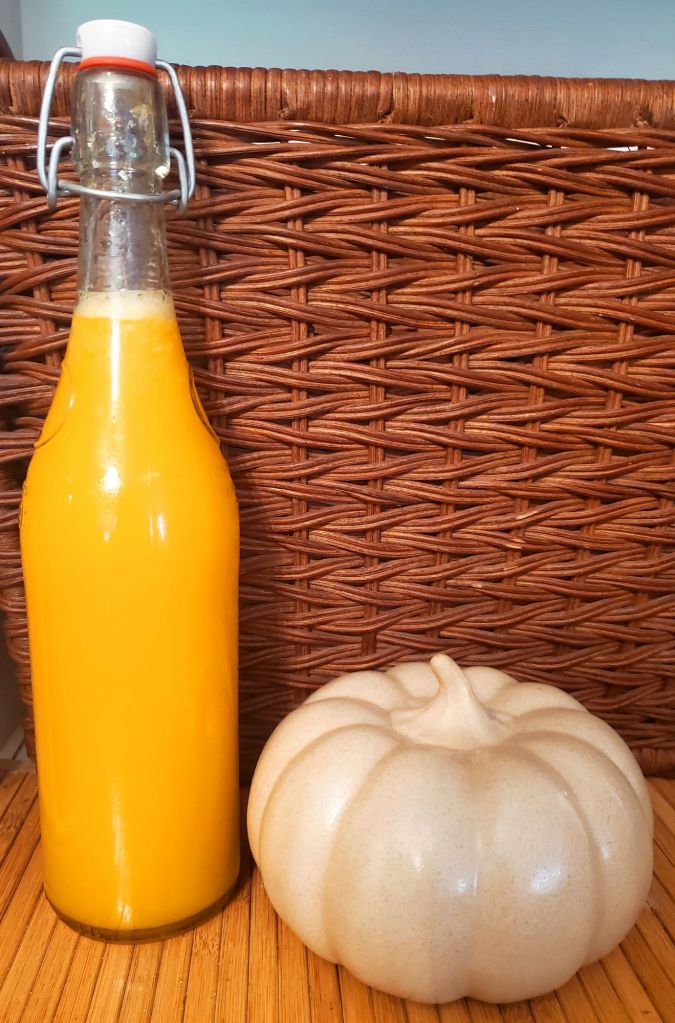
We served these Maple Orange Pecan Cinnamon Rolls with fresh-squeezed orange juice. It is so much better than store-bought & no extra ingredients so it isn’t all fake tasting.
This was such a simple, yet flavorful & delicious way to begin our Fall morning. They make your entire home smell like a Fall candle during & after baking. I hope that you enjoy them as much as our family does!
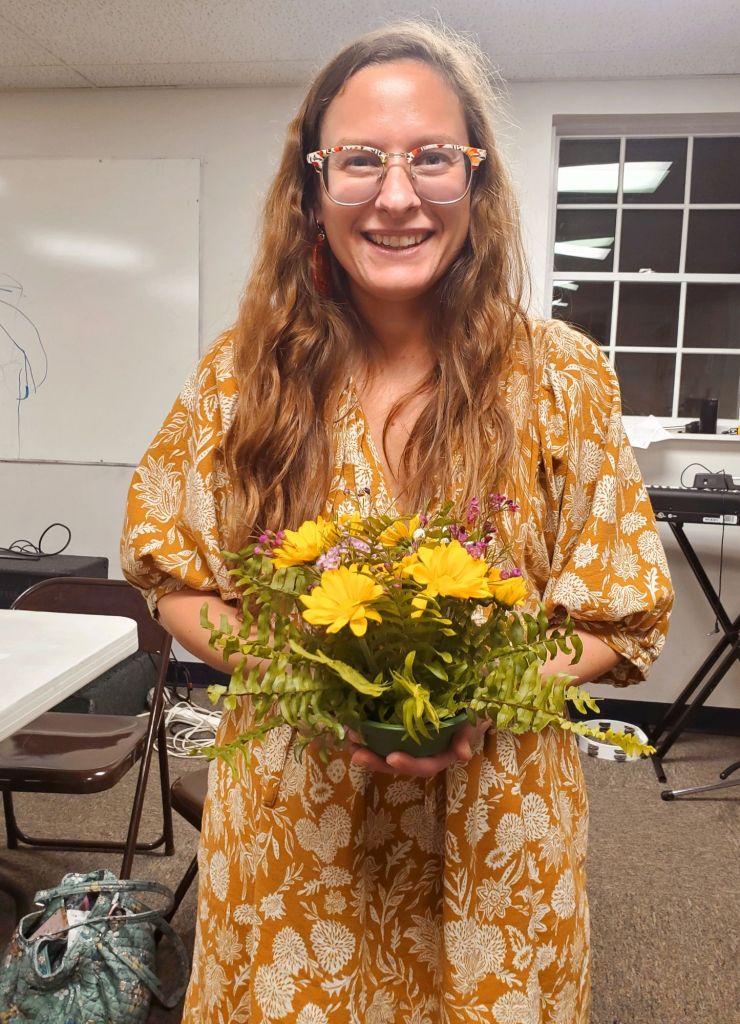
Our Grace Girls meeting this week was learning about floral arrangements, how to create one, and when it would be useful.
This was a really great topic for us! In fact, I have felt like all of the classes we have attended lately have been aligning perfectly with our new venture to open our general store – Morozov Mini Market. Flower Presses, Soap Making, Arranging Flowers. The universe is sending very clear messages to me right now, preparing us for our new journey.
When we arrived, the room was set up with a large table in front for the flowers to be visibly arranged on so everyone could see what we were working with.
The first thing we did was soak our “oasis” foams in buckets while we went over our lesson. Our teacher tonight, Ms. Kathy, had grown up creating floral arrangements with her grandmother for their church & has taken 3 professional floral arrangement classes. During the lesson we discussed when people use flowers:
Weddings, funerals, welcome home celebrations, sick/in hospital, new baby, holidays, house warming/thanks for inviting me gift, birthdays, etc.
We also went over tips such as:
💐 Removing the lower flowers so they don’t rot.
💐 The little packets that come packaged in store-bought flower bouquets aren’t meant to be dumped at once, they are meant to be used throughout water changes as well to keep the flowers alive longer.
💐 Always trim the stems, when you get the flowers and when you change the water.
💐 You can check a flowers freshness by pinching the stem gently under the base of the flower. The more tough it is, the more fresh the flower.
💐 Don’t bend the stems
💐 Always use a lot of greenery to fill in the vase or arrangement. The more the better.
Once we finished our lesson, we collected our oasis from the buckets of water and received our flowers that we were to work with.
I love these little reusable “buckets” they come in. The buckets are re-useable, but the standard oasis foam is not, due to bacterial growth. The unused foam rounds should be stored in a dark & dry place so they don’t get damaged from sunlight or dampness. After some research I did find that oasis recently designed a more eco-friendly reuseable option, Terrabrick.
I had no idea that these were able to be used with real flowers. I only ever see then at stores like Michael’s or Hobby Lobby next to the fake flowers. I thought they were only for fake ones, but now that I know they are for real flowers too, it’s a total game changer for me! My options are endless!
We began grouping into small piles of greenery & different types of flowers.
Everyone was given greenery, yellow flowers, and purple flowers. There was light and dark purple to chose from, or you could do a little of both. There were a few different yellows to work with. There was a very small amount of white to work with also.
At the end of the night, each girl got to choose a special flower from the vase arrangement display to bring home. We already have ours set up in the propagation station hoping to get some roots growing and new flower varieties to add to our gardens next Spring for free.
Once we were ready, we began filling in our oasis with greenery. You need to remove about 2 inches of the lowest leaves to be able to stick the stem into the oasis. Make sure to have your compost bin ready!
You’ll want to stick them in all over the sides of the oasis, the outer ring of the top of the oasis, and put some aside for filling in the center. For those center pieces of greenery, try to find the pieces that stick out to you the most: maybe the size, the way the leaves are shaped, maybe they are more fun looking or bend in an interesting way. Just let the greenery work it’s magic.
For real, the more greenery, the more beautiful & full-looking it will be. Even if it looks like it’s going to be too much, it’s not.
After adding greenery, we filled in the center with our flowers.
🌿 Start by placing one flower directly in the center then the rest of the flowers surrounding the center flower, spread out as evenly as possible, working with one color at a time.
🌿 Add smaller flowers or accent pieces.
🌿 Then fill in the remaining spaces with the remaining greenery you set aside.
I love that each girls arrangement looked so different even though we all used the same flowers, with slight variations in color. It showed their creativity.
Athena did not follow directions on this lesson, but that’s kind of who she is in general. She lives outside the box and does not any want limitations in art. She has her own visions, and will see that they are carried out. She is a true artist & free-spirit.
Out of all the girls, Mia holds the most love and appreciation for flowers & nature. At home she loves putting together bouquets for her favorite people & loves pointing out beautiful flowers wherever we go. She loudly exclaims “this one is BEAUTIFUL!!!” anytime she finds out she adores. She’s already asked for her own flower press for all of the flowers she falls in love with.
I was really happy that the moms were also able to participate in creating floral arrangements. A lot of the activities so far have been for only the girls, or mom supervision required (learning knife skills or building/cooking over a fire). I had SO much fun! It was really exciting for me to get to make my own rather than help the girls build theirs. It also gave them much more creative freedom with focusing on my own arrangement instead of how theirs is turning out.
I absolutely adore how it looks & I am SO happy to learn how to perfect my bouquets & now, arrangements.
This was such a great class, I feel like we learned so much. Ms. Kathy did such a great & thoughful job putting this lesson together for us and it was truly a blessing. This is a skill that our family will definitely be using for the rest of our lives & I am so happy that we are learning these skills together as a family – that makes it even more special.
The arrangements look beautiful on our table & I love that they are created with love by us.
I was offered one of the ferns to take home to continue creating more arrangements with. Ms. Kathy said they were at the end of their cycle, but I plan to keep it inside through the winter, hopefully giving it a much longer life span and many more beautiful arrangements.
At our last Grace Girls meeting, we worked with flower presses and I immediately fell in love with them! I asked my husband to make me one using scrap wood we had lying around. I love how it turned out!!! I’m still working on the back side (each of my children will be drawing a flower to be wood burned), but I couldn’t wait to show the front!
We decided that we are going to open a little general store – Morozov Mini Market – and Flower Presses are one of the first products we are going to start taking orders for! If I get enough interest in various items I’m planning to open an Etsy shop.
I’ll be selling them $35 bare wood (includes sanding, wood protector, & optional stain + cardboard inserts), or $45-$55 for custom orders including writing or designs.
One really fun & useful way to use pressed flowers is by making soap! Today at школа, Ms. Vika taught the children how to do this.
She brought different molds, a huge variety of pressed flowers & dried petals, and Essential oils for the children to all make their own soap using their creativity.
The kids really enjoyed this activity. They really want to get into soap making now, and with our brand new flower press & my collection of Young Living & DoTerra Essential Oils & molds, we’re already almost ready to get started on our natural soap making journey.
The younger children went last to make soap & they made one large one that needed time to set to be cut to share for all the children which we will get to bring home next class, but we were able to bring the ones my older girls made and I absolutely love how cute they are!
I already have them on display in our bathroom & it smells sooo good in there from them!